

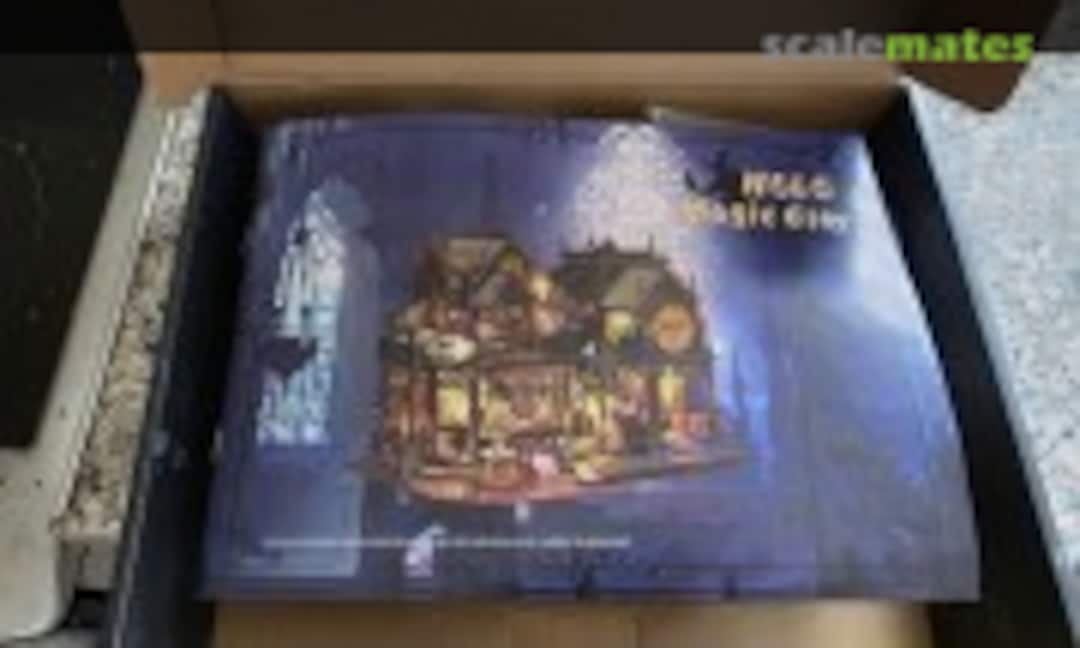
Holo Magic City Fantasy Magic Shop
- Scale:
- 1:24
- Status:
- Completed
- Started:
- June 23, 2025
- Completed:
- August 14, 2025
This is a mixed media kit of a fantasy magic shop. Mostly laser cut wood, paper, card, stickers and various detail items. Also comes with a set of LED lights. Real scale is unknown. But, on reflection, it may be close to 1:24 or 1:25 scale.
Project inventory
Scratchbuilt No kits or aftermaket sets are attached.
Photoalbums


Comments
1 5 August, 16:56
Update 01, 05.08.25 Hi folks. I bought this wooden kit for my wife for our anniversary. But she was not confident in building it. So, I am having a go at doing it myself. I actually started this a few days after our anniversary on 11th June. But only just got round to adding it on here. I am slowly working my way through the instructions. Sometimes vague instructions because of translation from Chinese. I have been building up various bits an pieces, step by step. Mostly I have been using the supplied wood glue, but also some parts have been fixed with super glue. Its taken me around 20 hours of work to get to where I am. There are a few more bits and pieces to be done, before I get to the building stage of the building itself. That's all for now. Enjoy.
5 August, 17:09
Update 02. 10.08.25. Lots of stuff done now. The spiral staircase has been made up. That was very awkward to do. Made up of wooden steps, card pieces for each step. A central pole. Bannister posts and rail made out of card. Various signs, clocks, and cats have been done. Some LED light bulbs have been put into lamp shades, wall post shades and a sign. Various floor pieces have been made up. This comprised of cut out pieces of paper that were glued onto wooden floor pieces. Some walls have also been done. 2 walls have a clear acetate piece in them. Although, I couldn't avoid getting glue marks on the glass faces. An outside shed has been made up too. This would have housed a sound box that it states is available separately. But I don't have that, so its just a shed. A large outside wall clock has also been made up. I can now start the main build phase of installing the walls and filling the areas with all the bits and pieces. Oh, and I ran out of the supplied wood glue. There is not enough in that small bottle to do it all. Good job that I have some more of my own glue. That's it for now. Enjoy.
10 August, 07:46
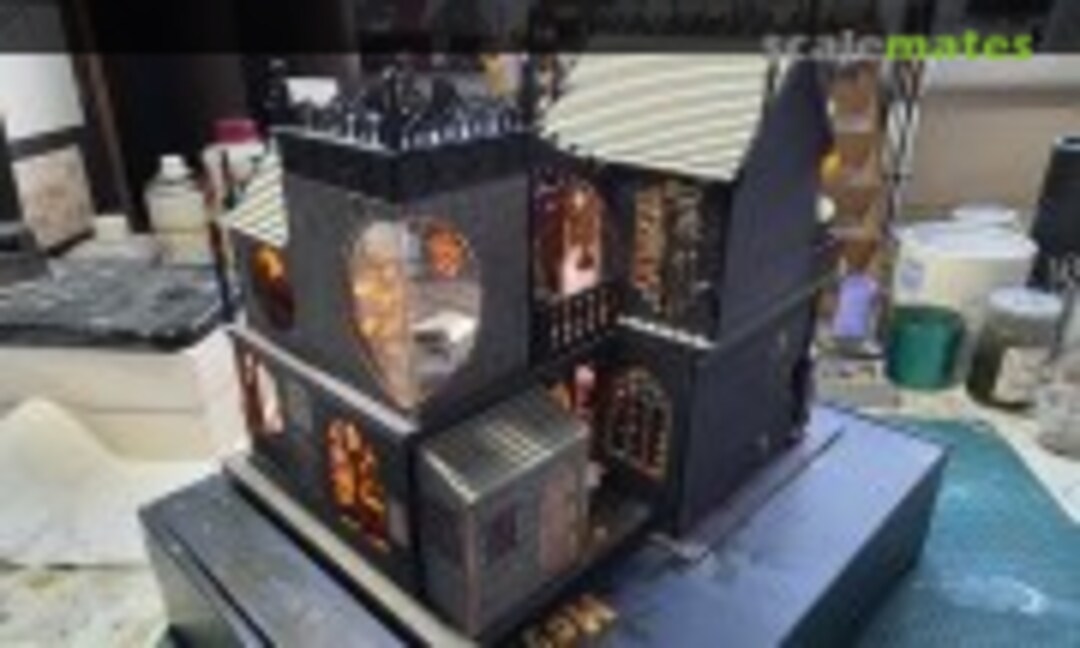
Update 03. 10.08.25. Second update today. I have started building the building now. I have completed all of the first part, a shop part, with counter, and window shelf. Various posters have been put up. The alcove window installed. Clocks on the wall and a circular book stand. Its coming along nicely now.
10 August, 11:38
Update 04. 12.08.25. The first upper floor area (a bedroom) has been completed. I have now started on the second section of the upper floors. More lights have been installed in this section. With all the cables routed down to where the battery box will sit. I just hope all these lights still work, when they are finally wired in lol. Not long to go now. My pile of made up bits, is very small now. Another couple of days should finish it.
12 August, 07:50
Update 05.12.08.25. Another massive update. Well, the main build phase is complete. All the lights have been wired into the battery box, and they all work. had a problem with the two flying buttresses that go in between the two upper floor sections. They were too short. Don't know if I put a wall in the wrong place. But it was easily solved by gluing on an extra section of wood, to make sure they fitted. All the balconies have been fitted in place. The rest of the made up items glued into place. I do have some boxes and posters etc left over. So, I will build them up and place them on it too. What I am going to do next is, get some matt black paint out, and paint as much of the wood ends where the wood is black. That should make it blend in better. That's it for now. Enjoy.
12 August, 11:47
Update 06. 14.08.25. Well, folks. Its done. Finished it at last. To finish it off, I have painted a lot of the exposed wood ends in matt black paint. There are some that I couldn't reach. But at least it looks a lot better now. Finally, I had a couple of paper posters and boxes left over. So, I made them up and added them to the build. You will see a couple of envelopes that were not there before lol. Overall, I enjoyed doing this build. It was something different. But, oh boy, was it a bit tedious in the early stages when you build up all the internal bits and bobs. I might look to doing another one similar to this. Or I might do one of those Book Nook model kits. Anyway, that's it for this one. Enjoy.
14 August, 09:26
