

Bell UH-1D
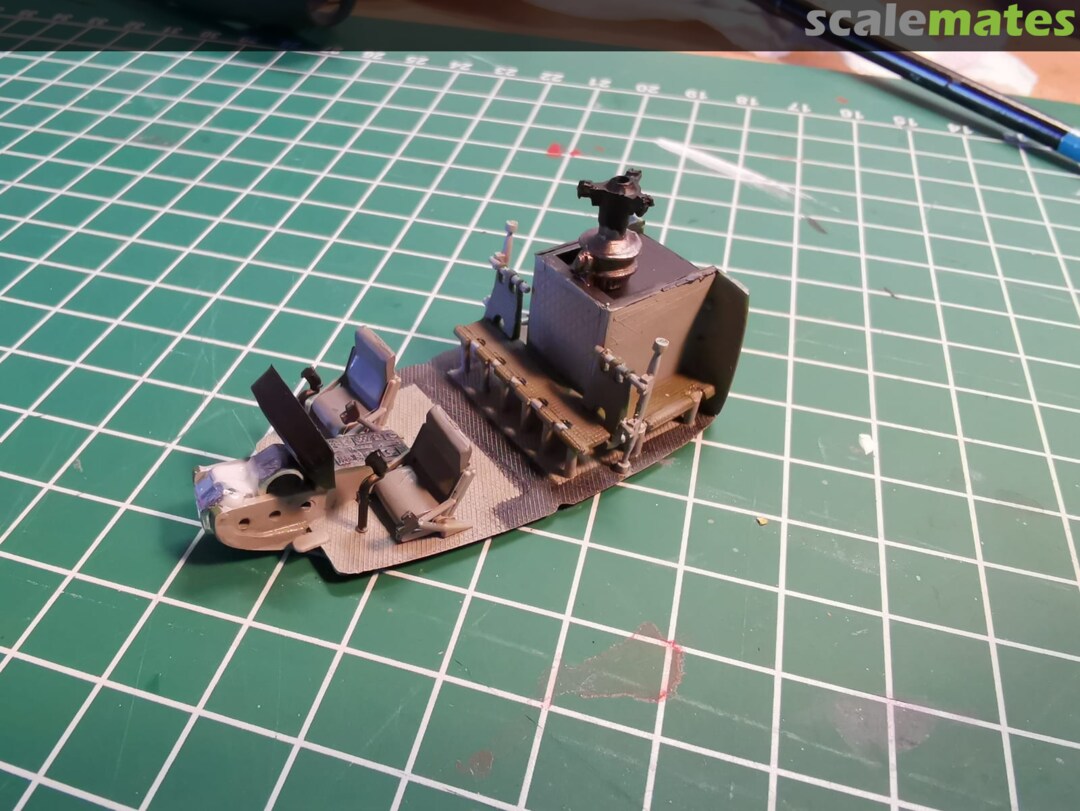
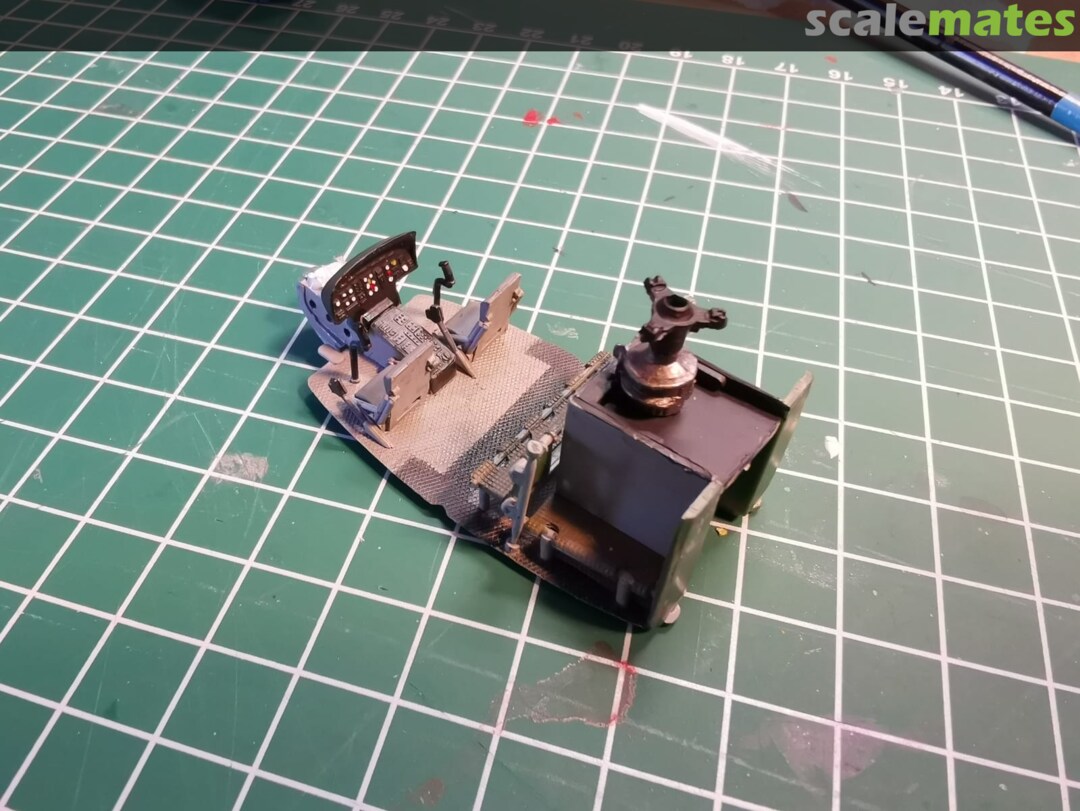
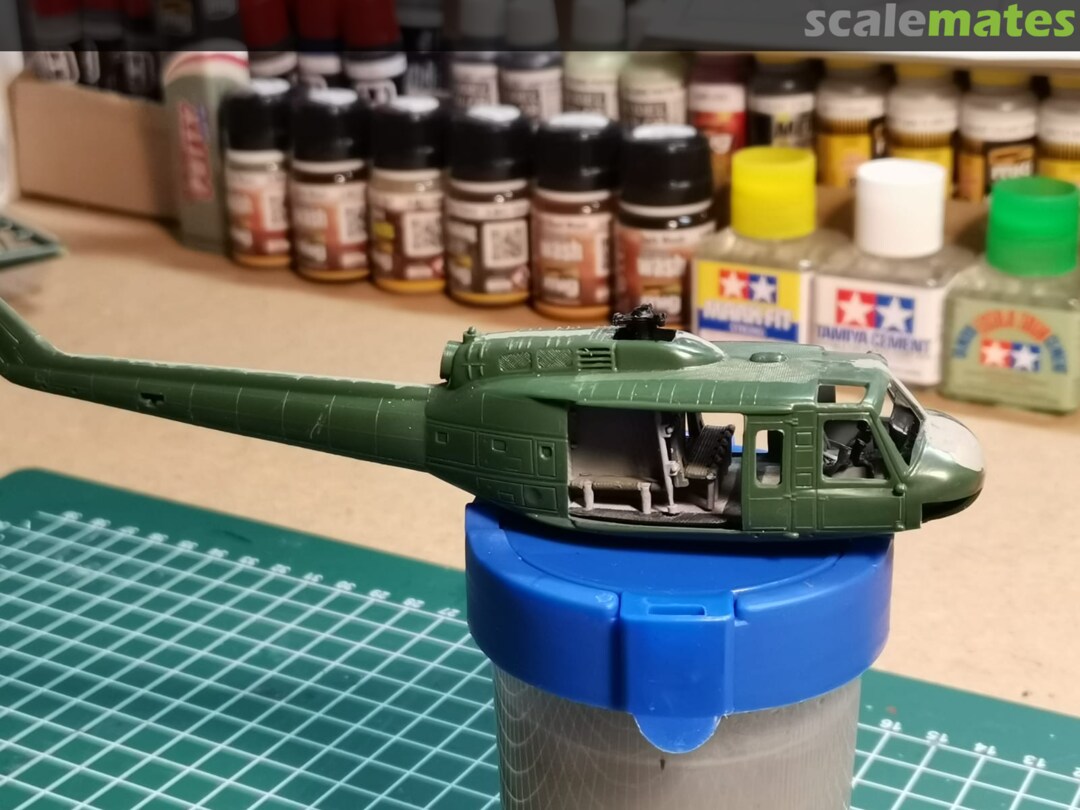
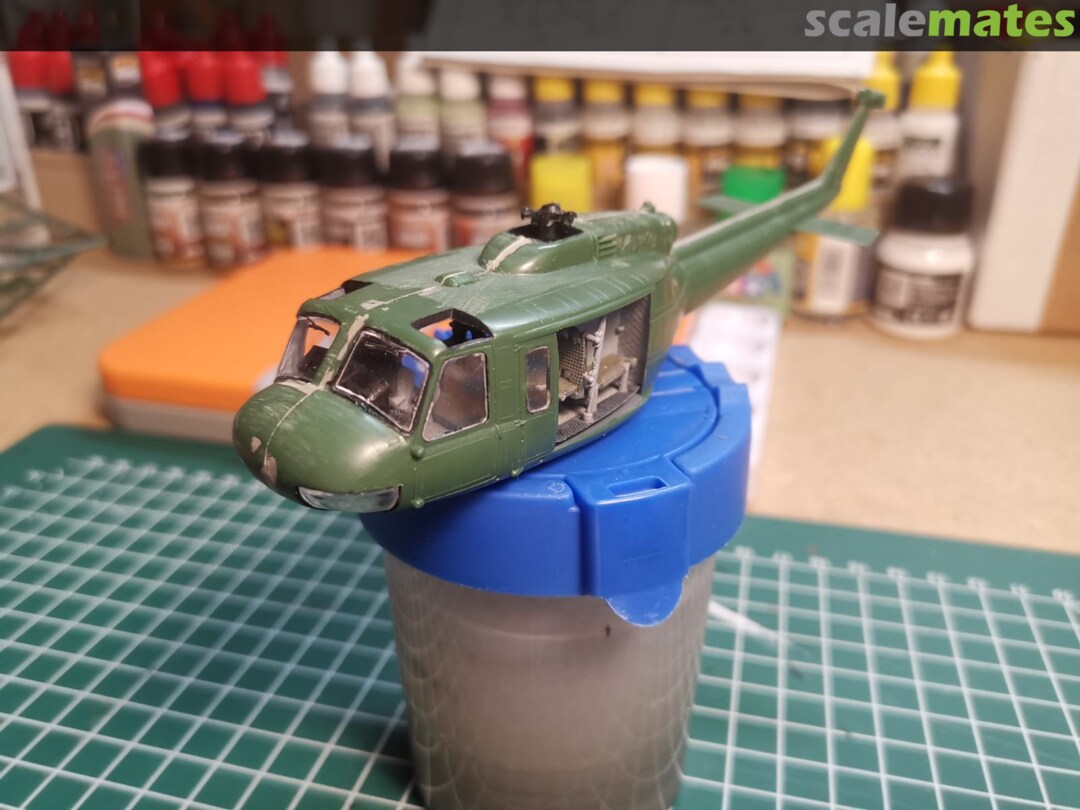
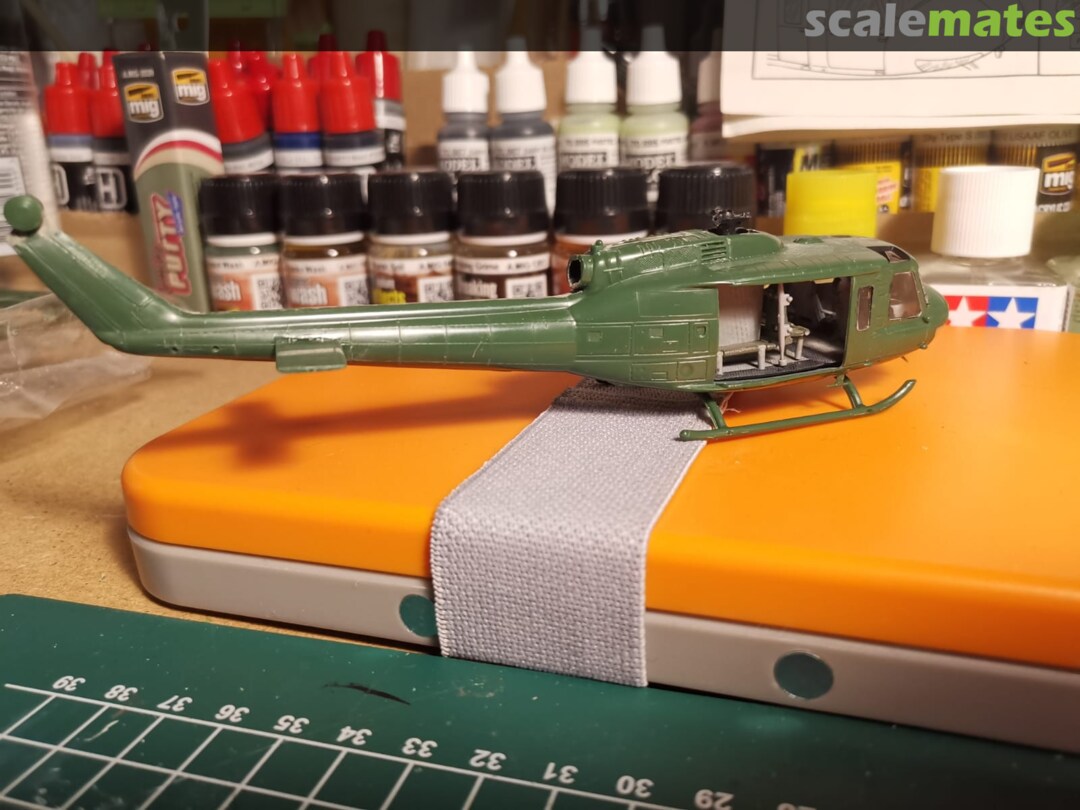
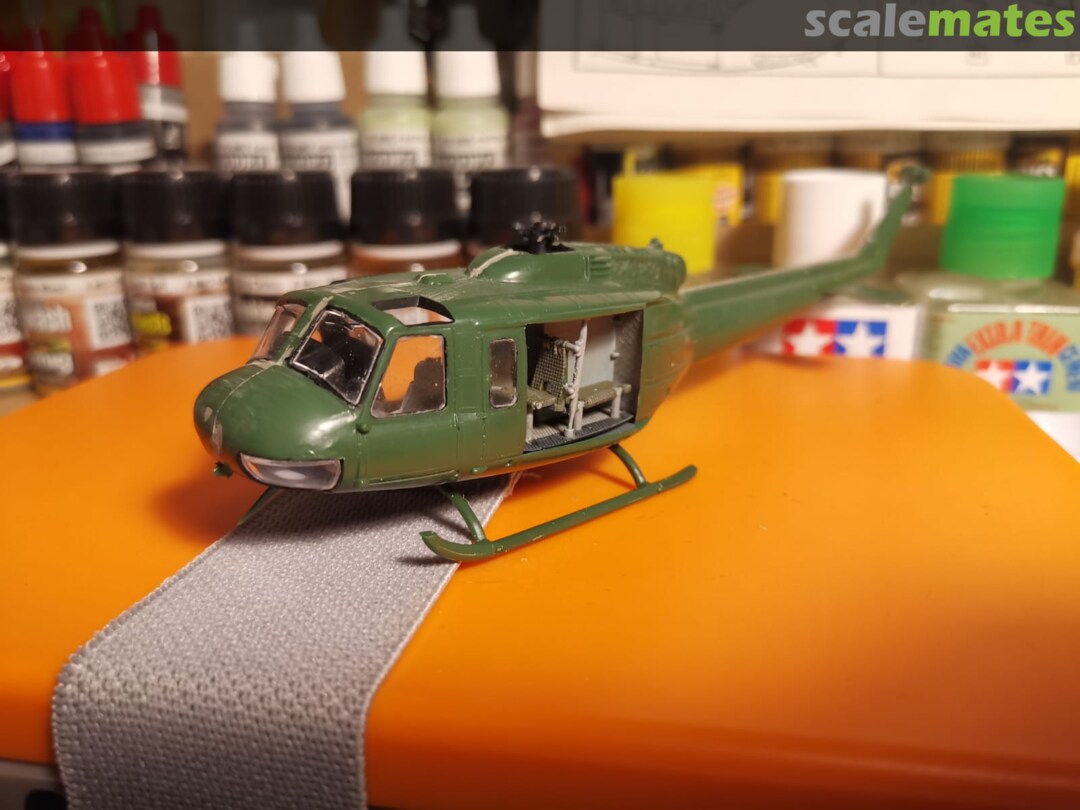
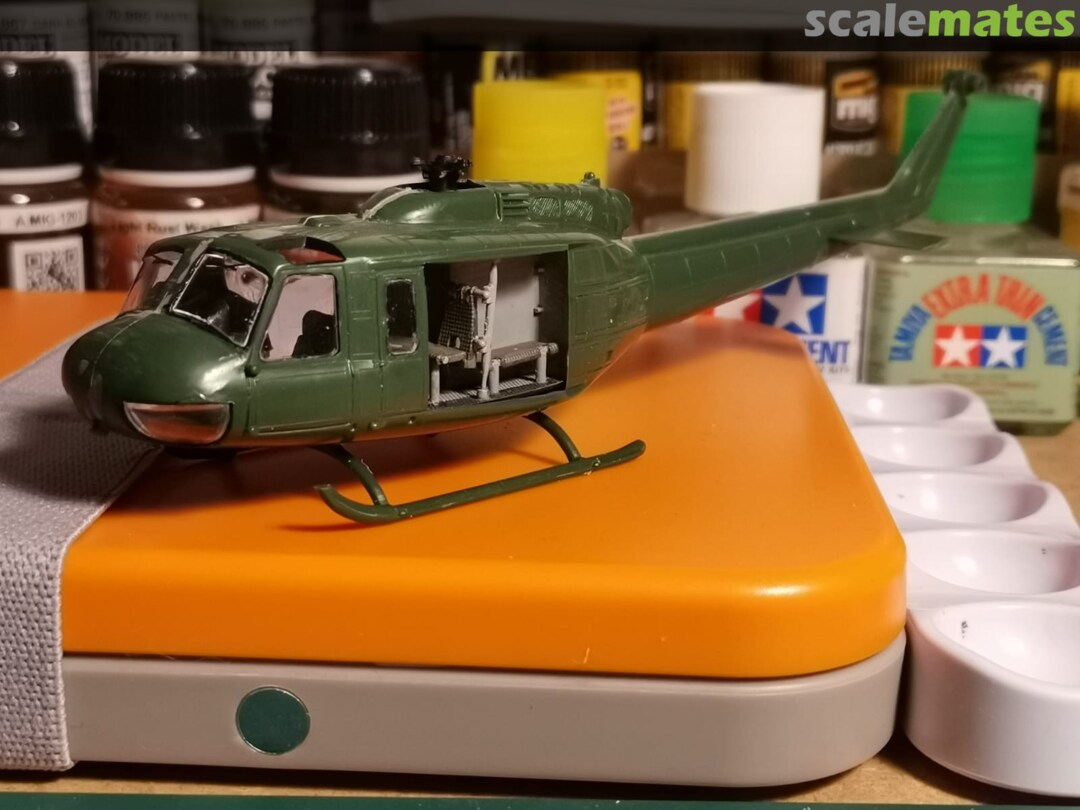
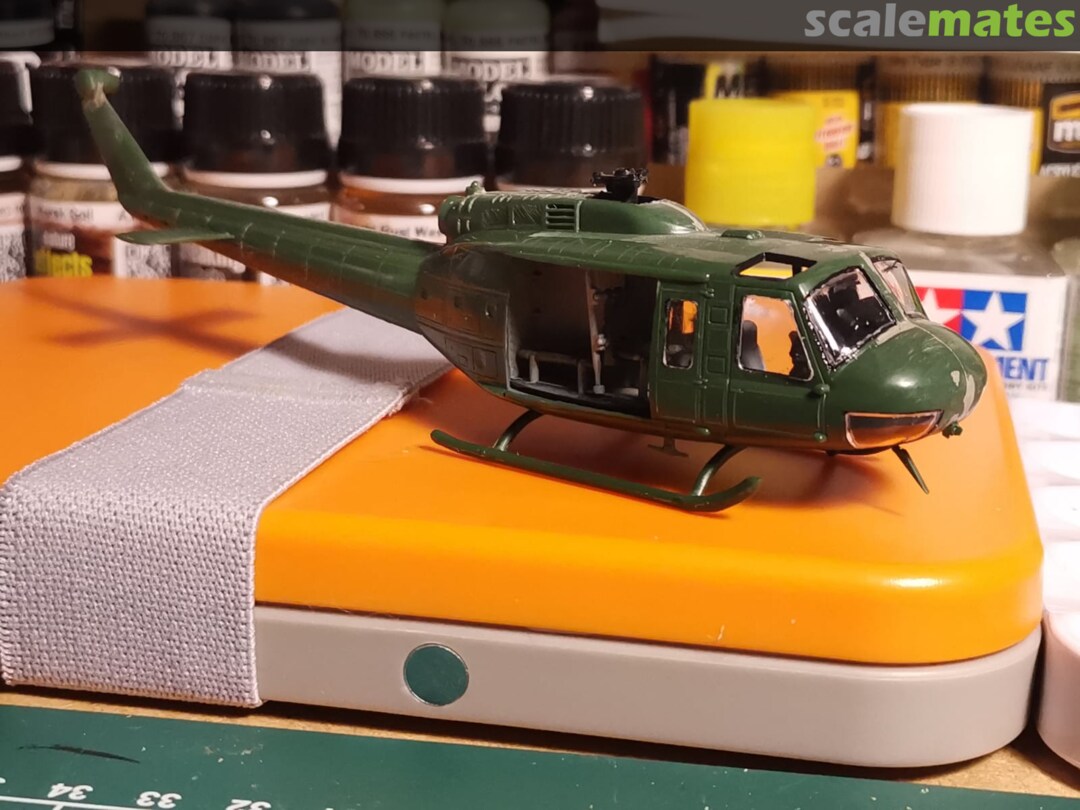
 1February 10, 2021
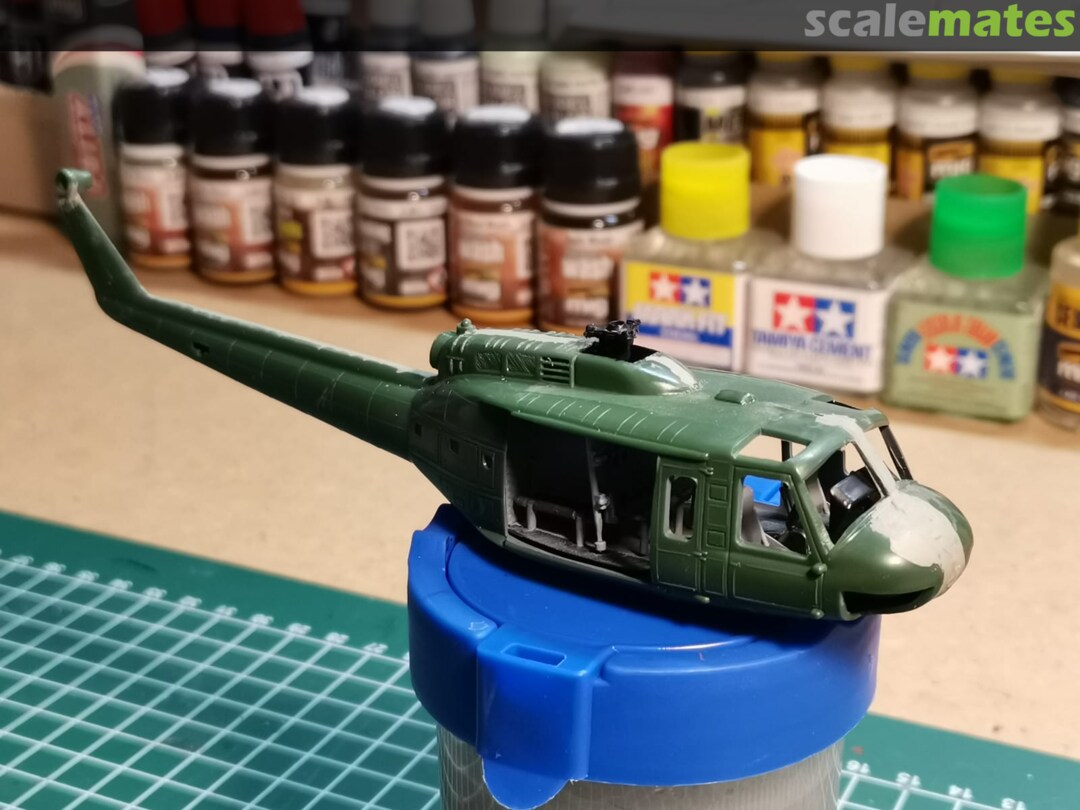
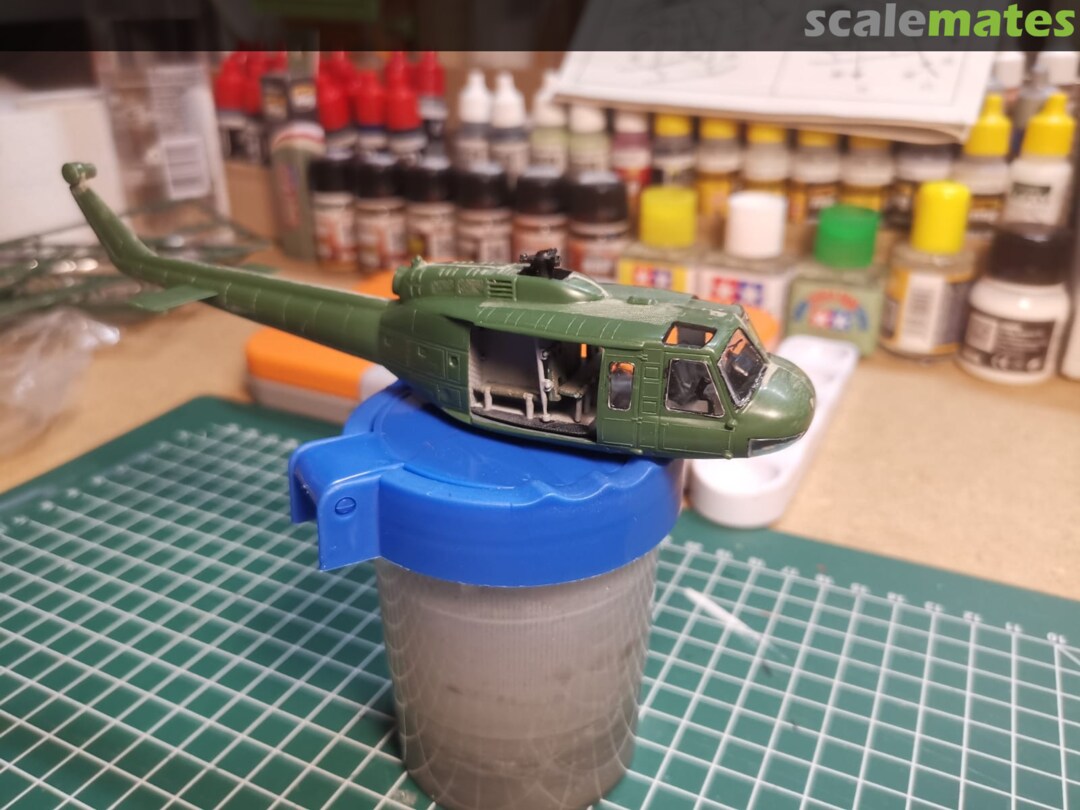
 2February 10, 2021
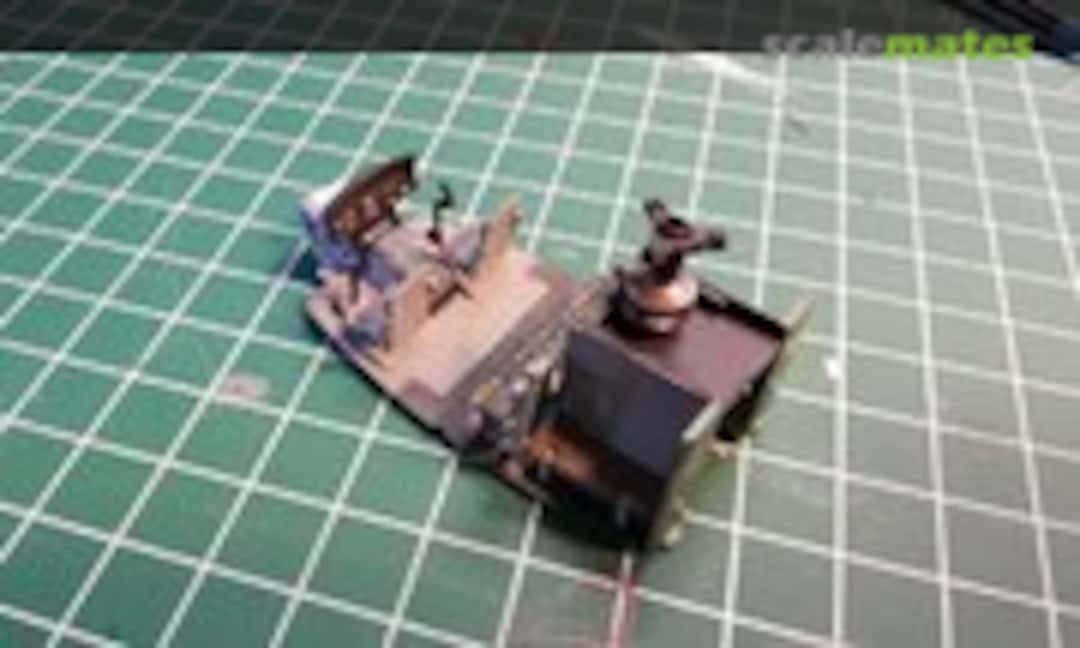 3February 10, 2021
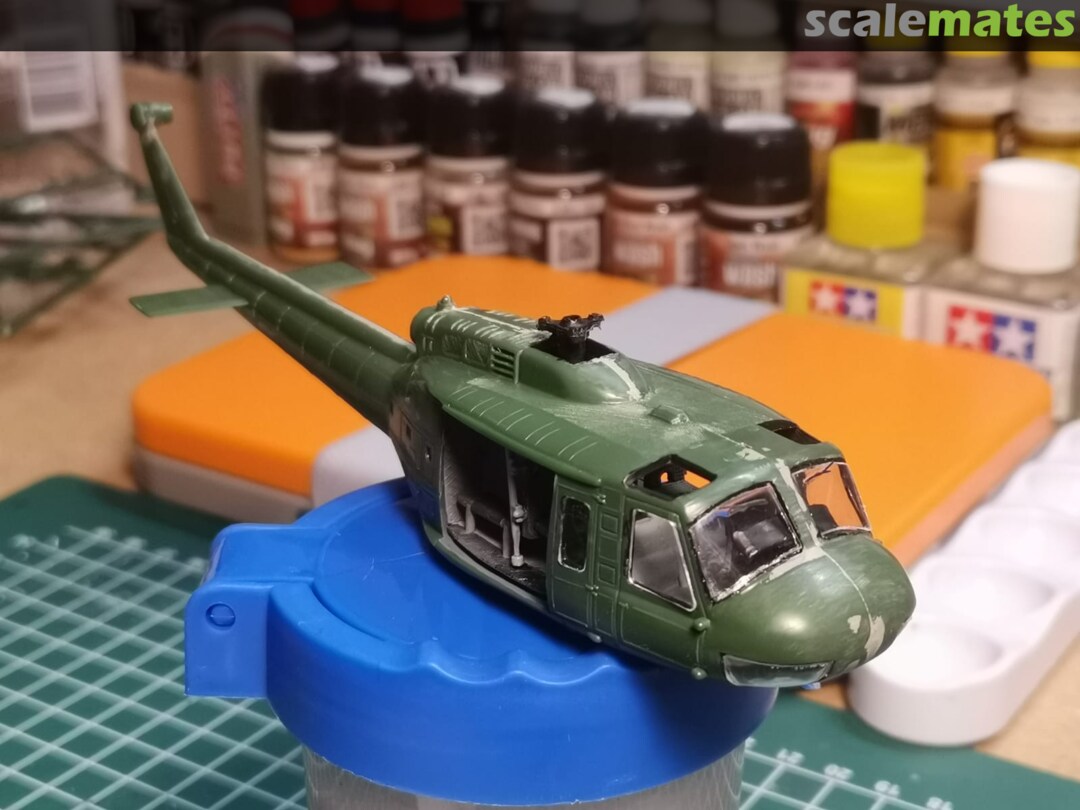
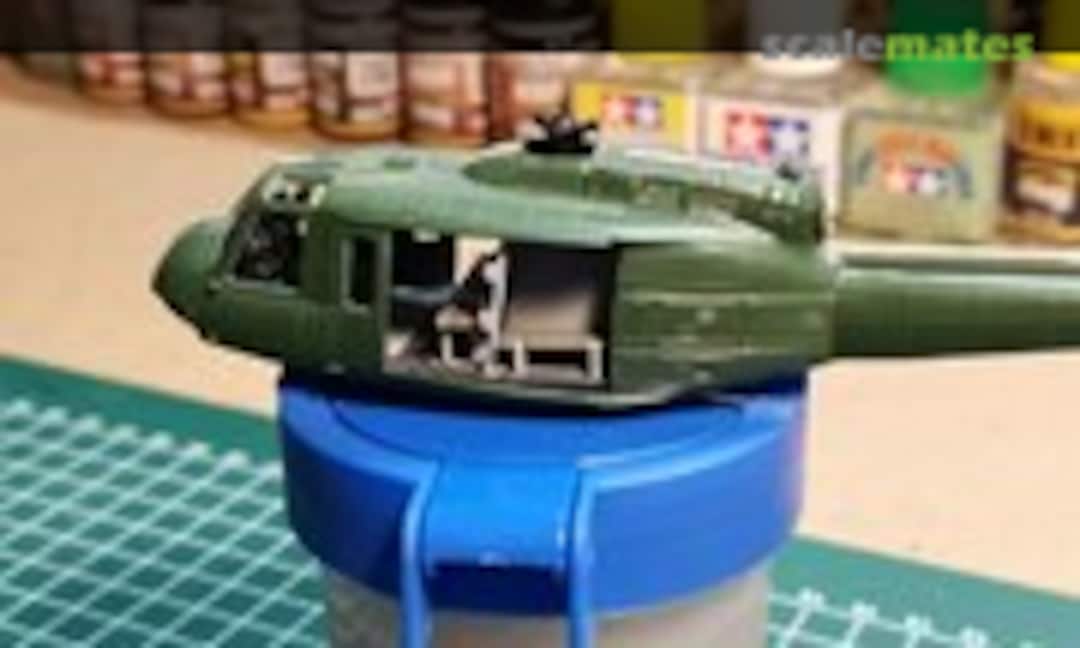 4February 10, 2021
 5February 10, 2021
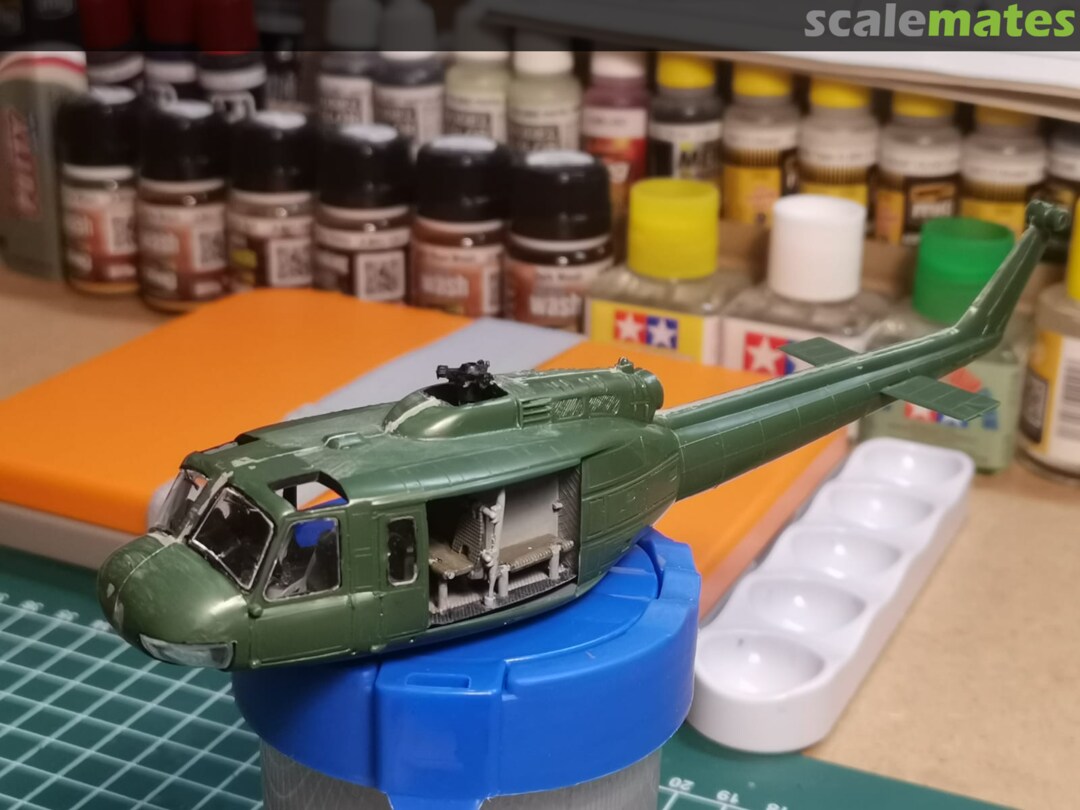
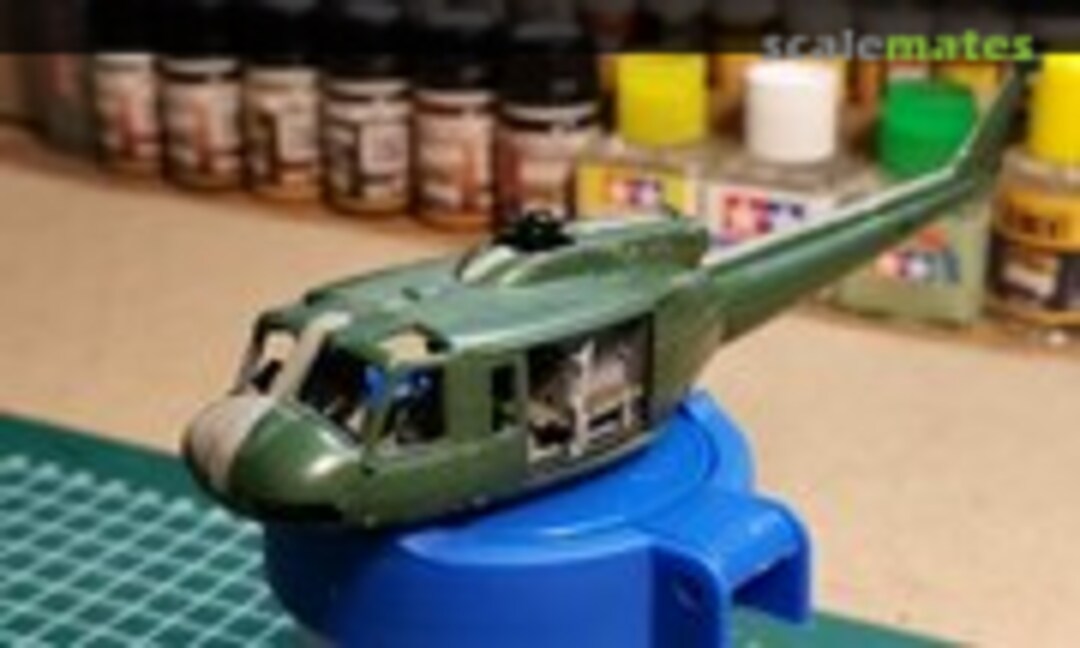 6February 10, 2021
 7February 10, 2021
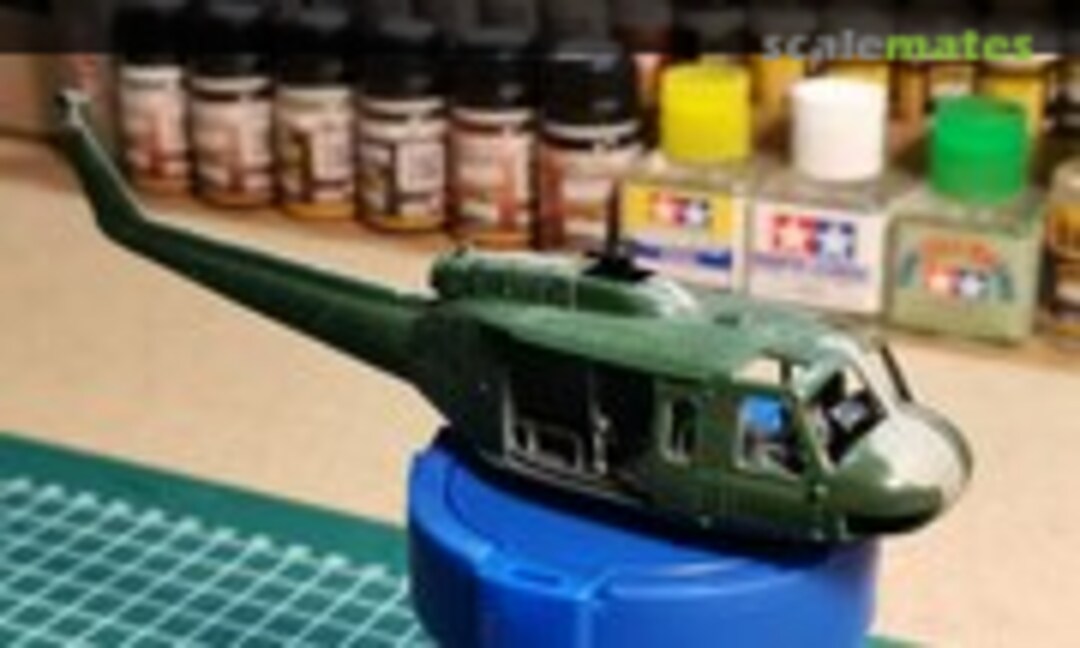 8February 10, 2021
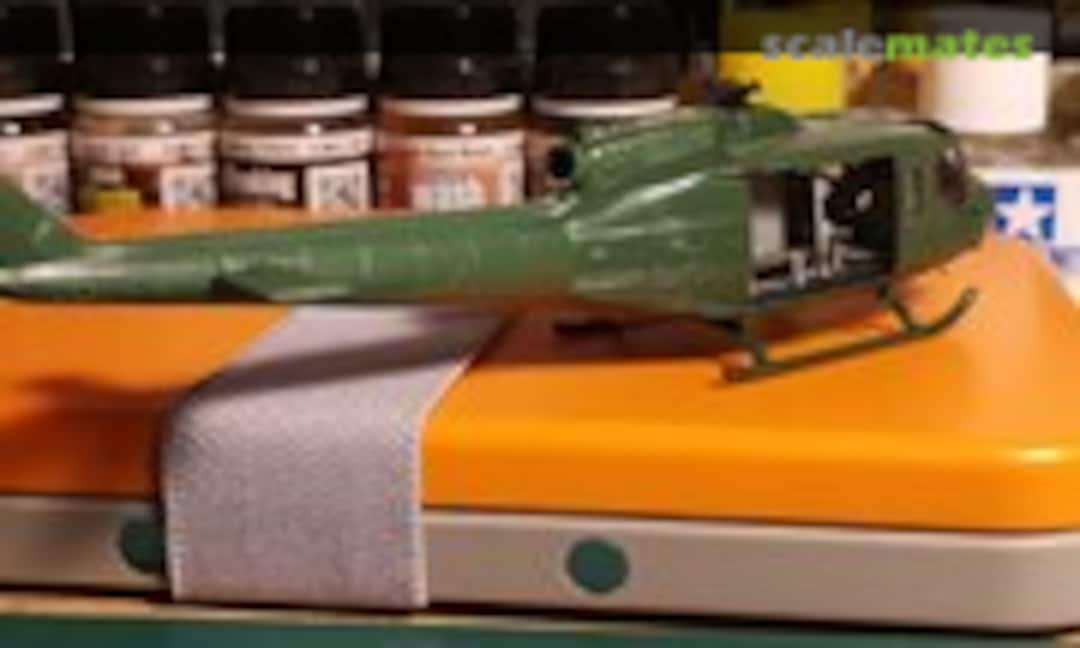 9February 10, 2021
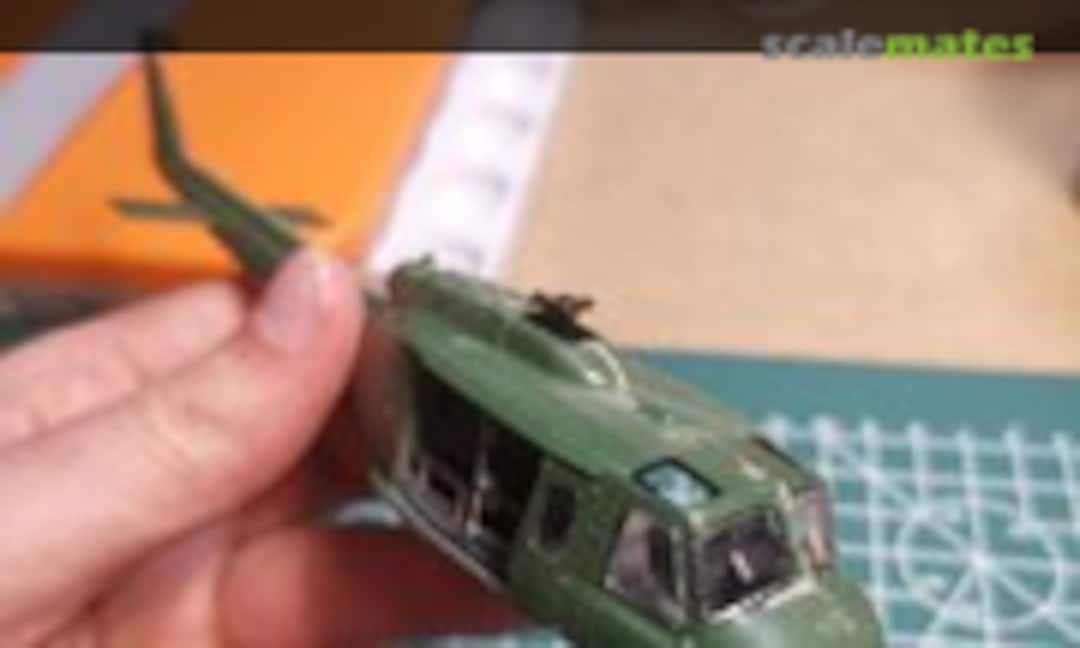 10February 10, 2021
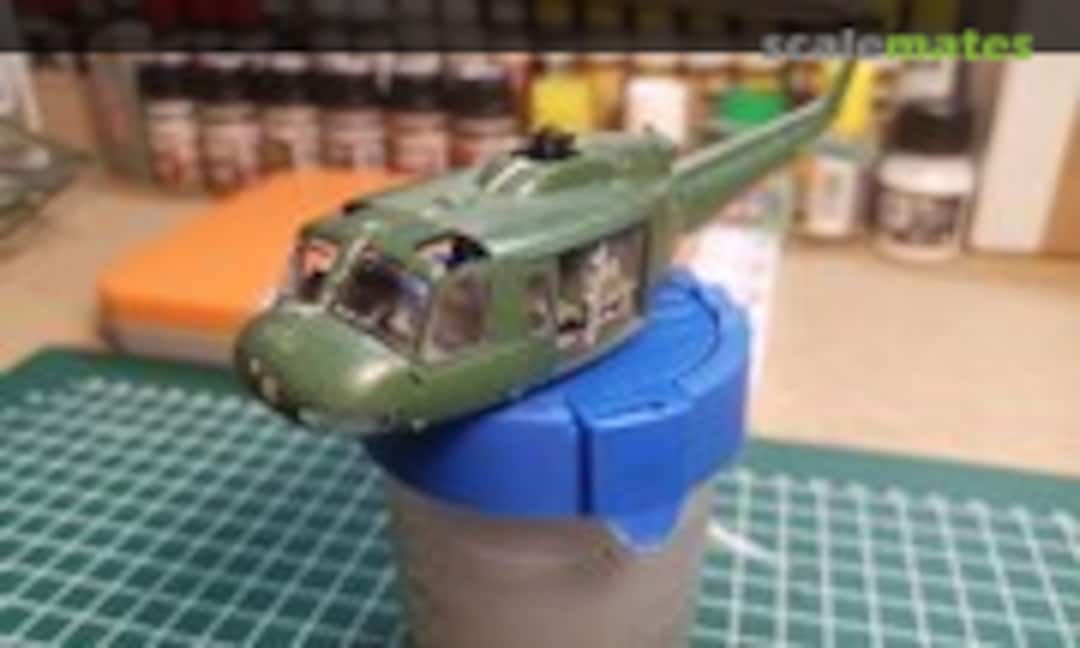 11February 10, 2021
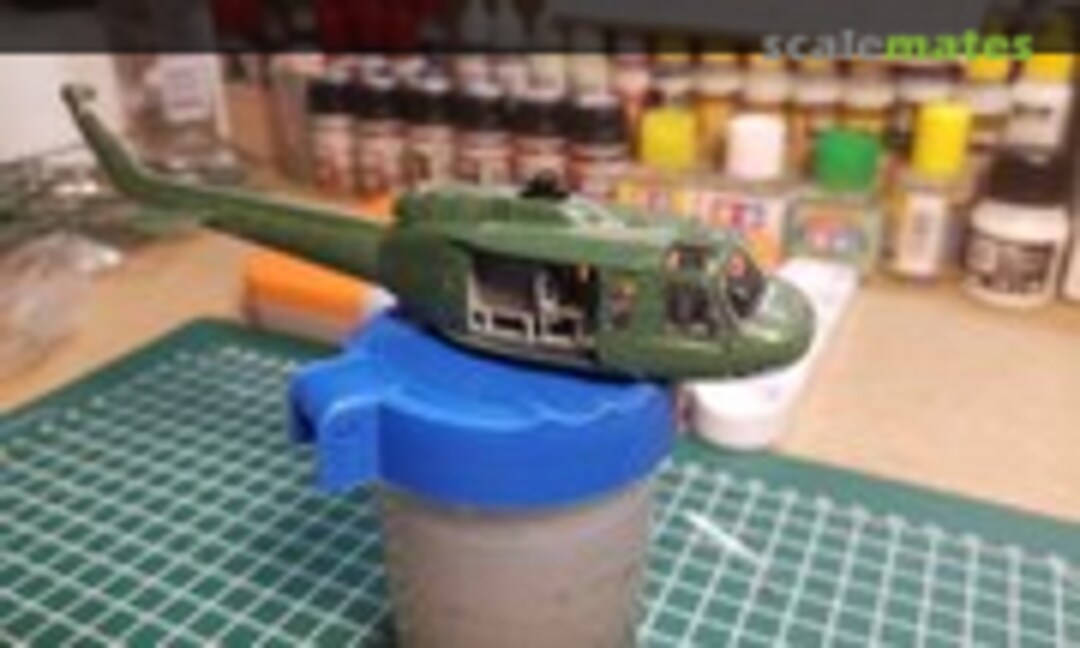 12February 10, 2021
 13February 10, 2021
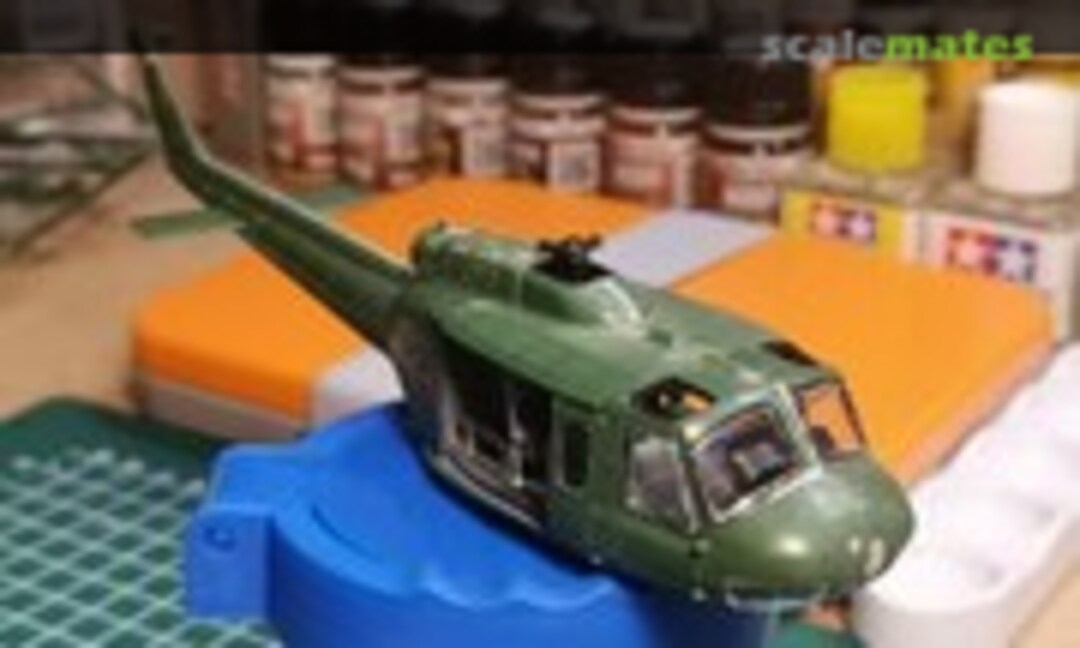 14February 10, 2021
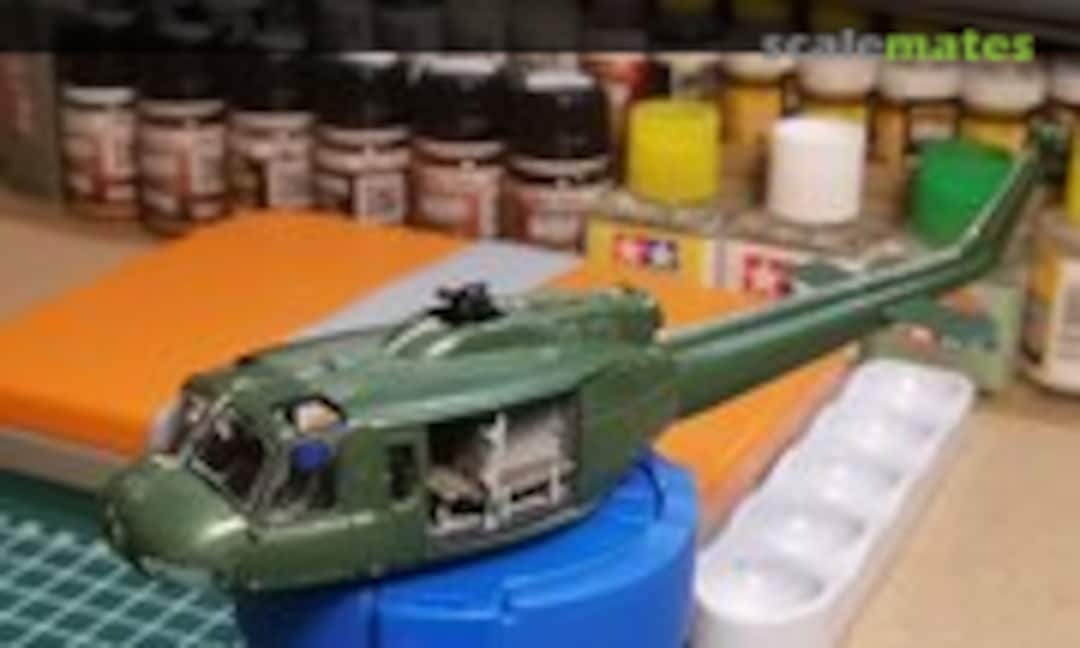 15February 10, 2021
 16February 10, 2021
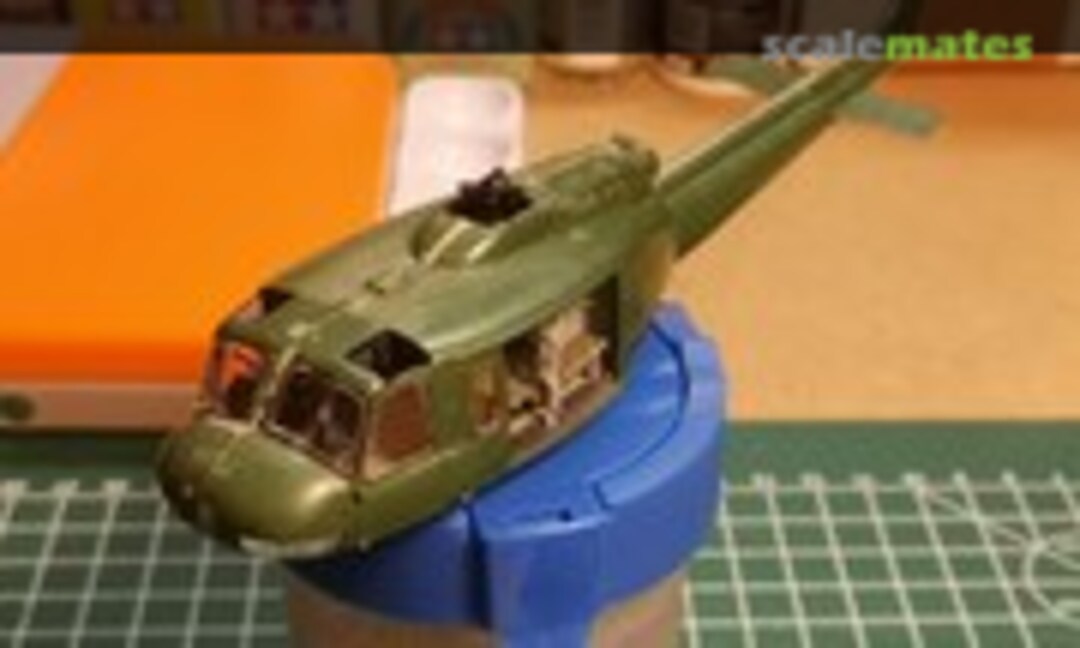 17February 10, 2021
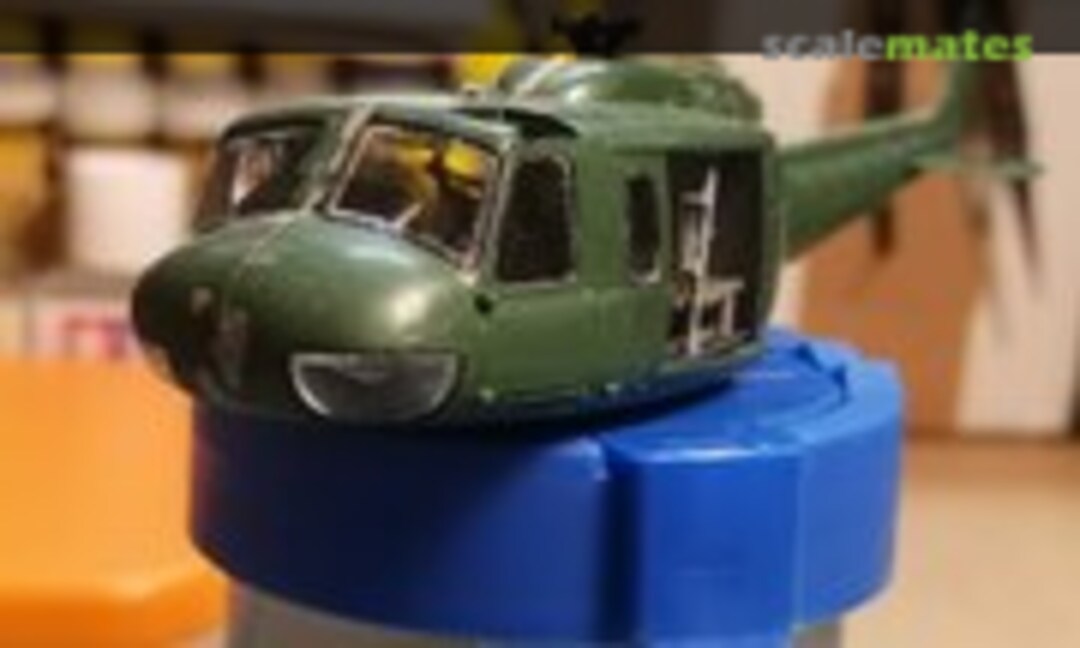 18February 10, 2021
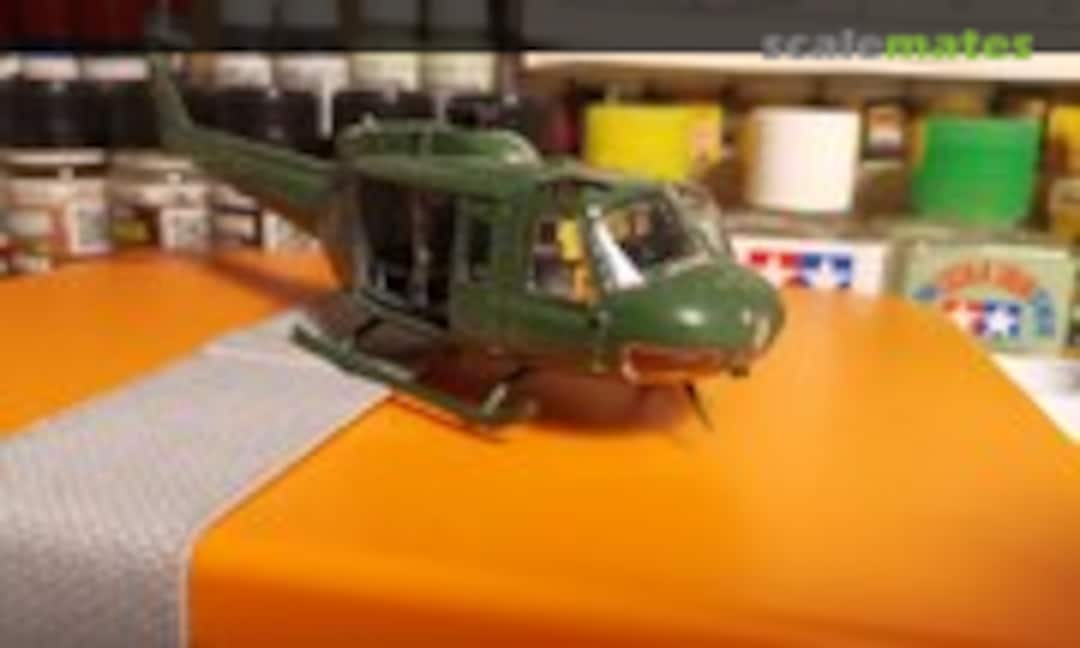 19February 10, 2021
 20February 10, 2021
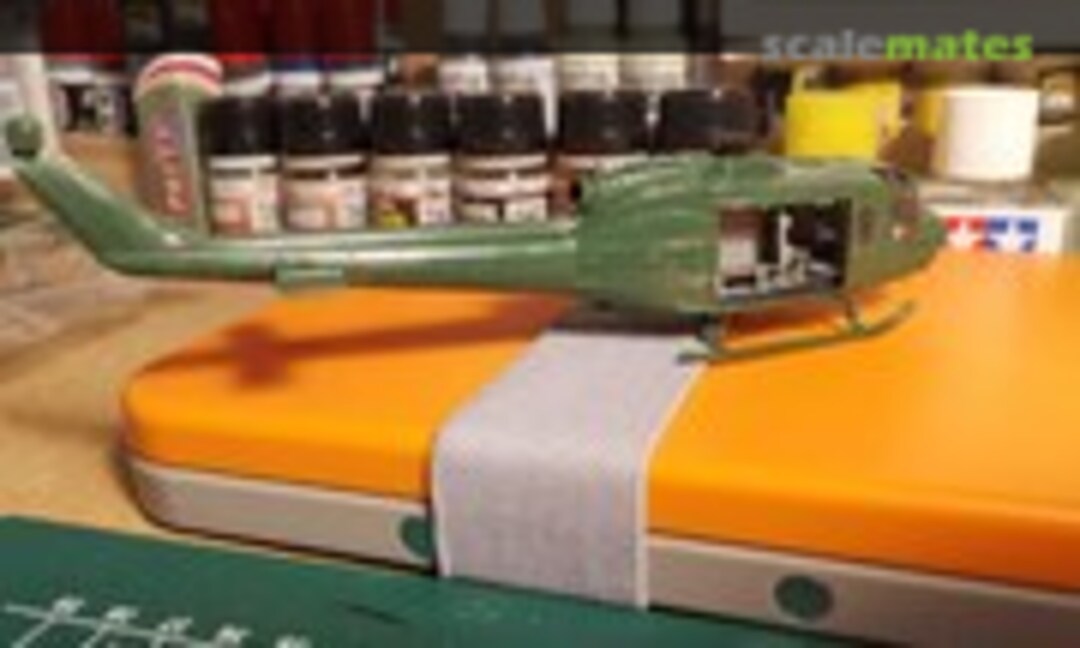 21February 10, 2021
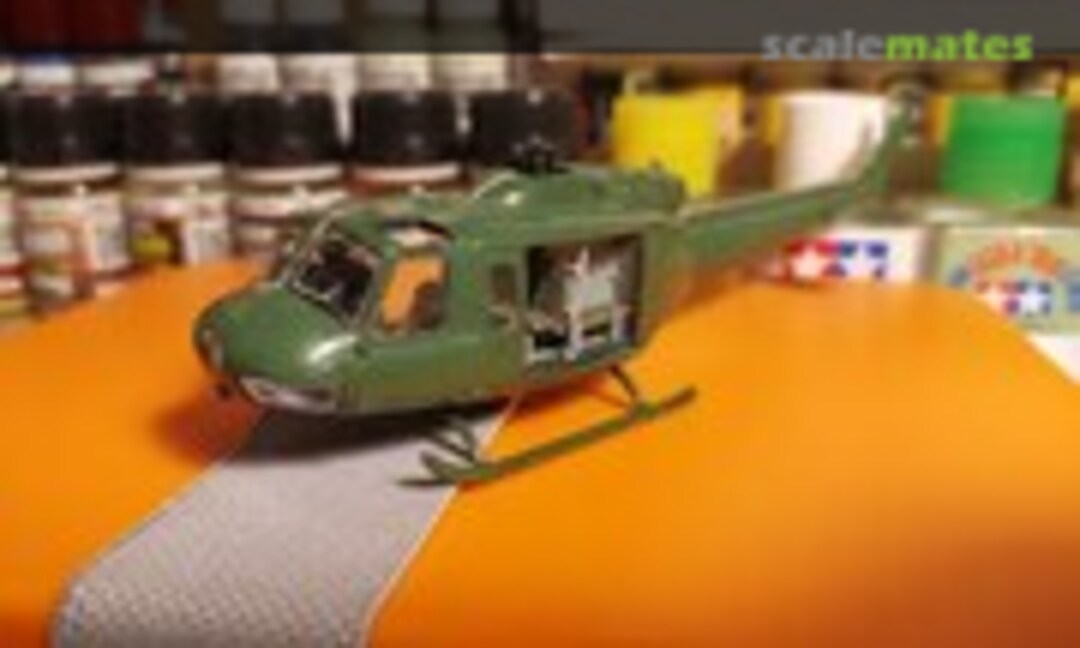 22February 10, 2021
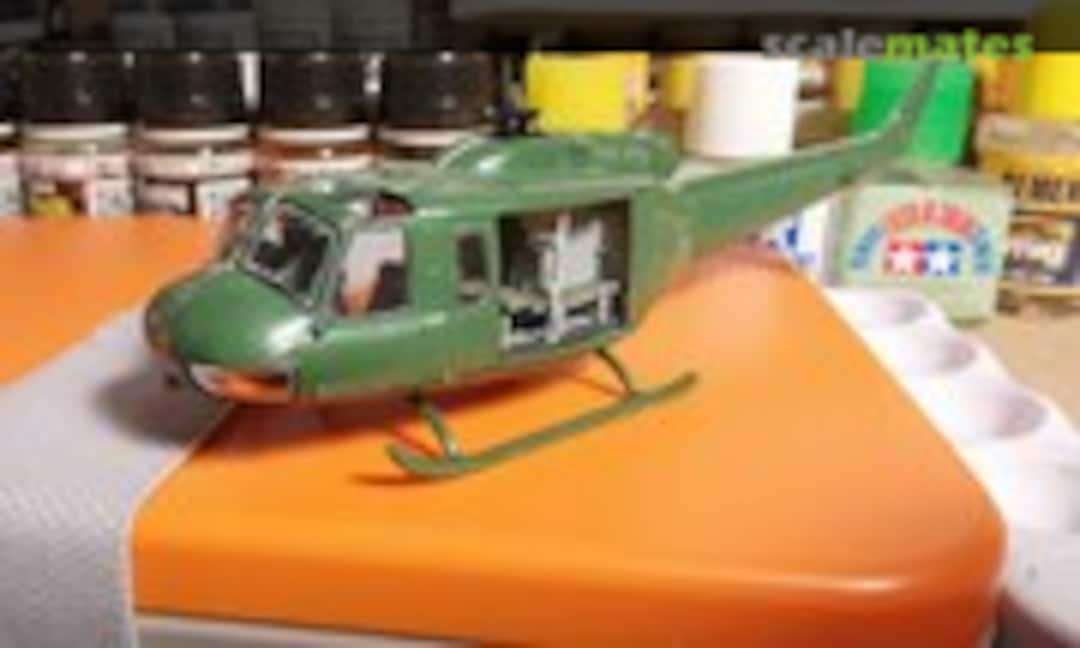 23February 10, 2021
 24February 10, 2021
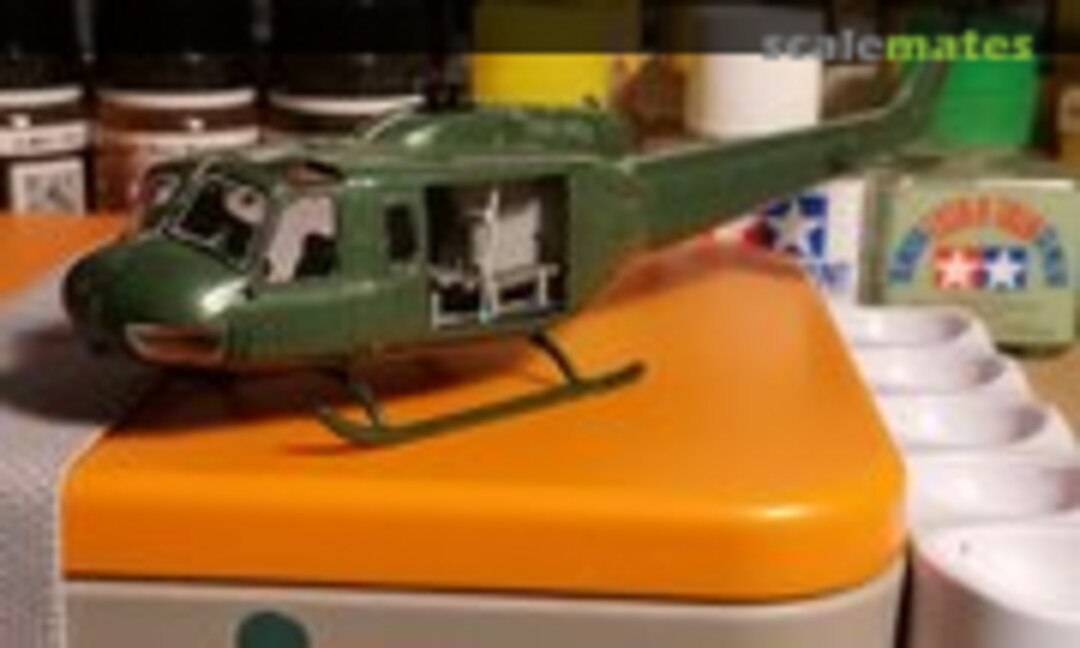 25February 10, 2021
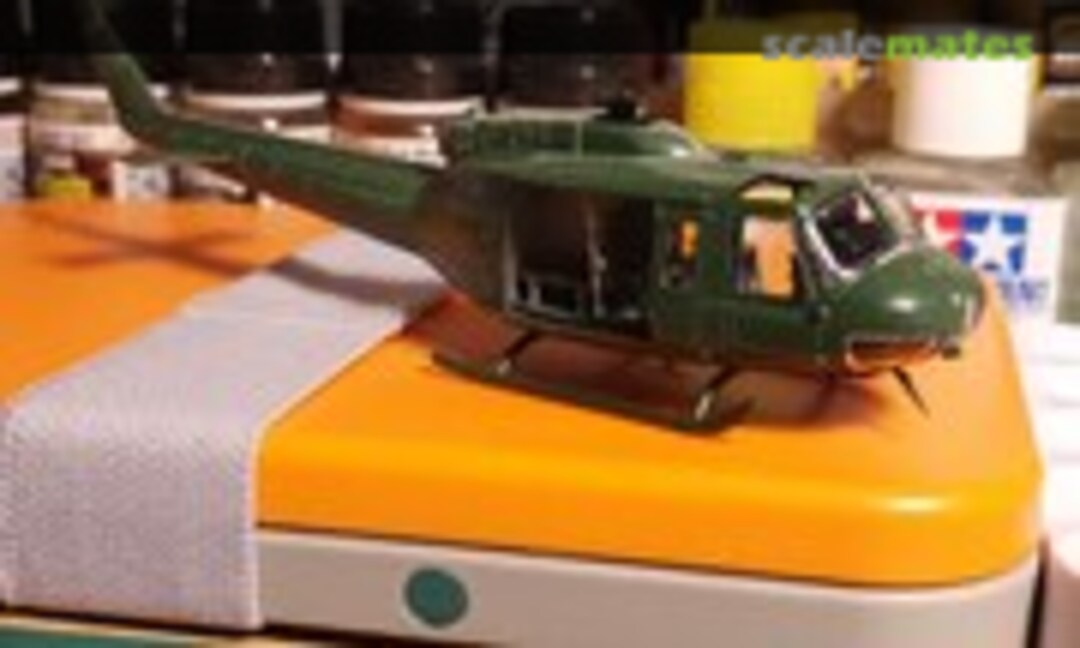 26February 10, 2021
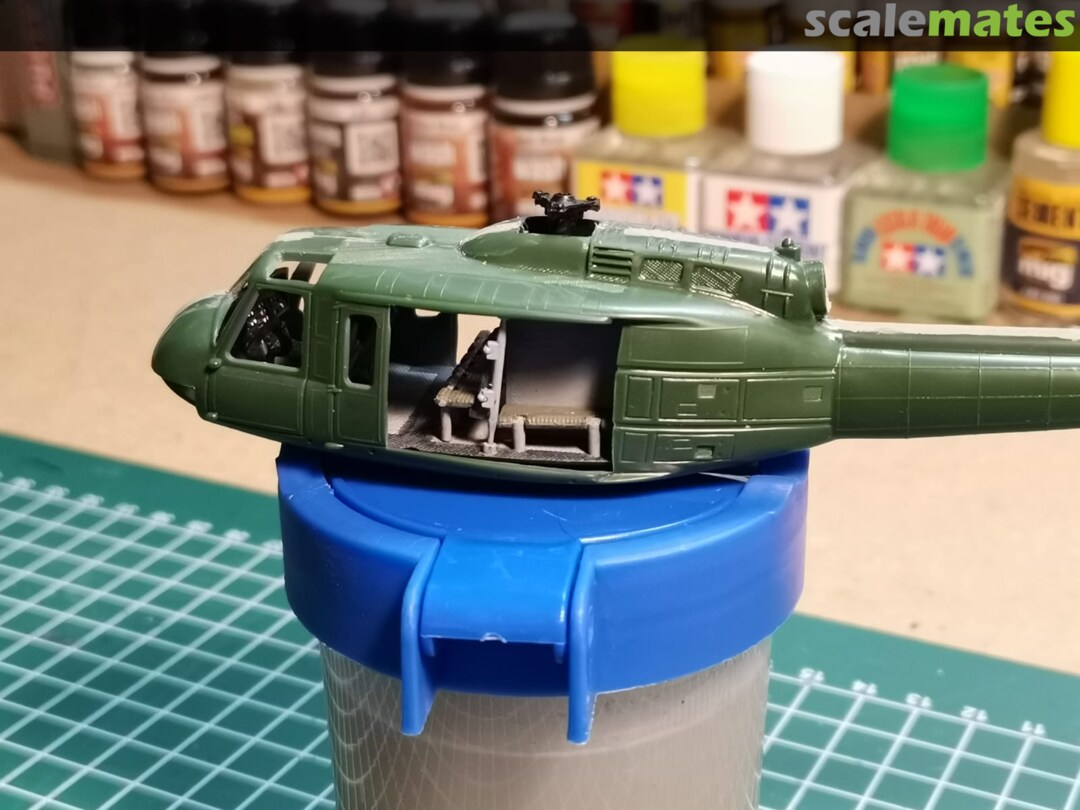
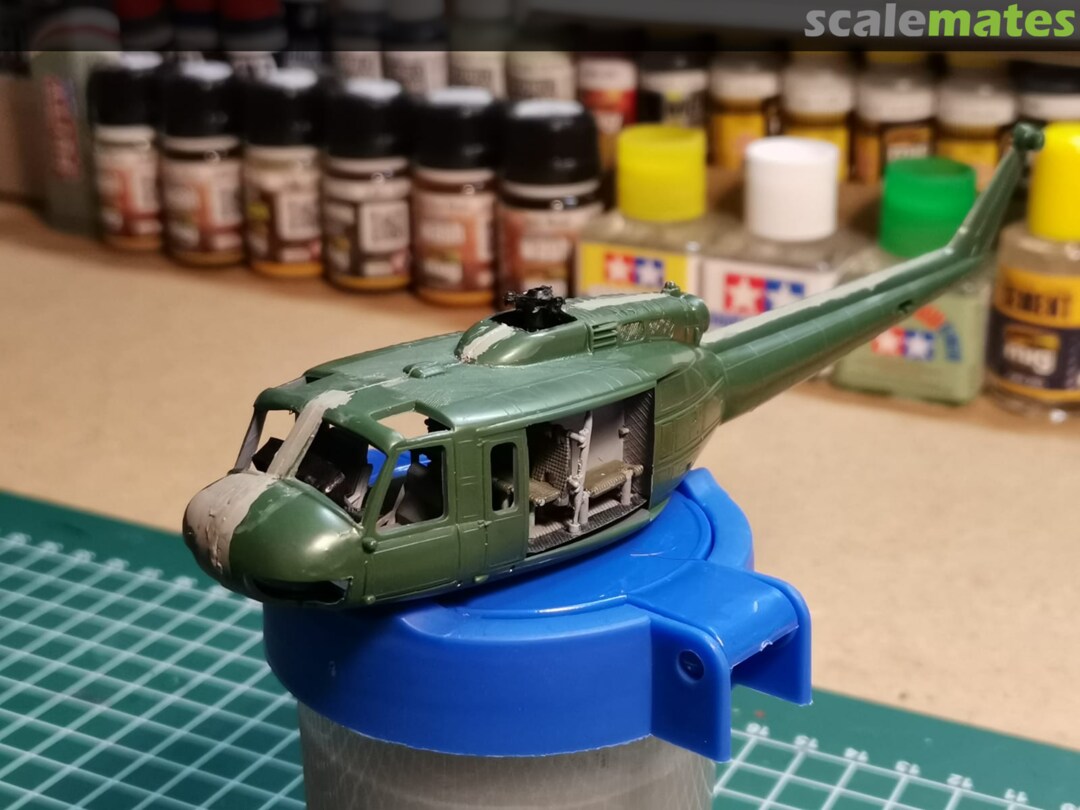
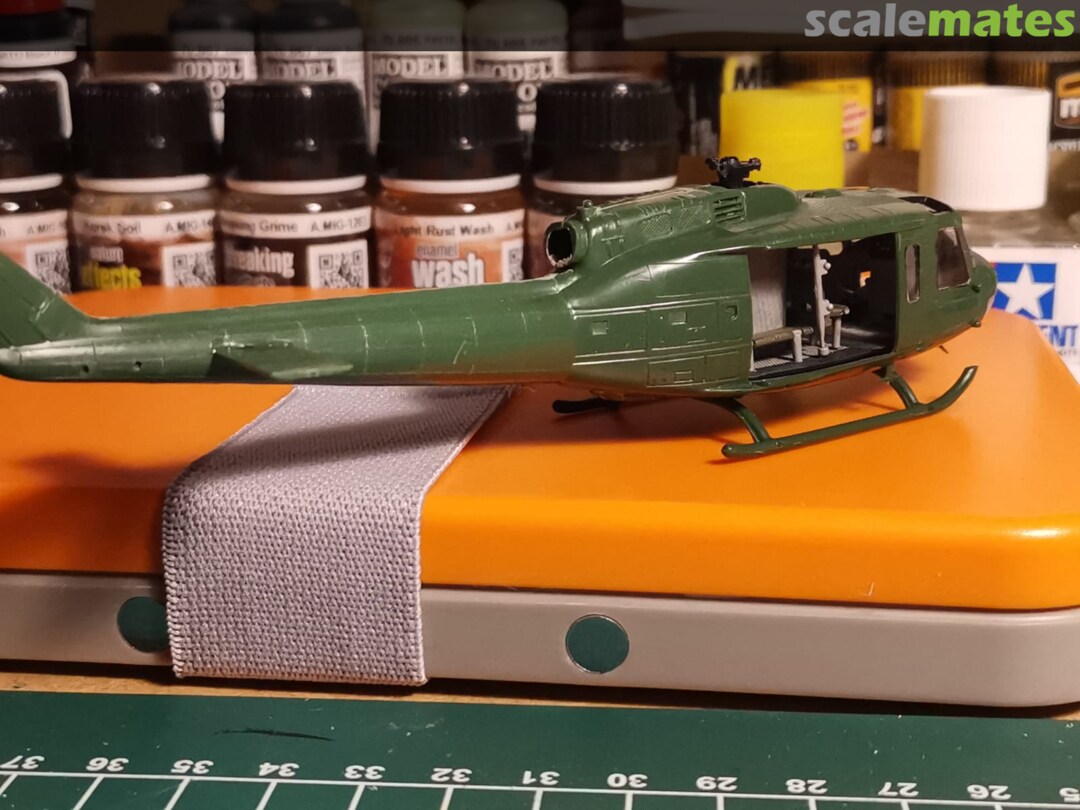
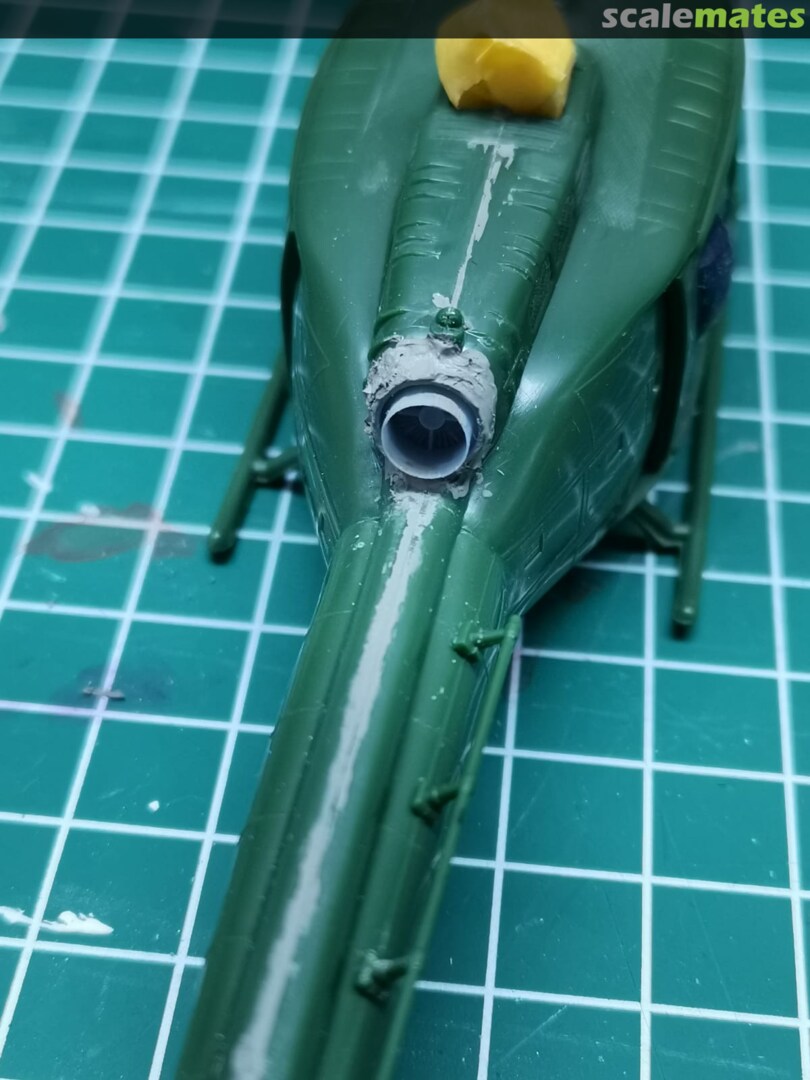
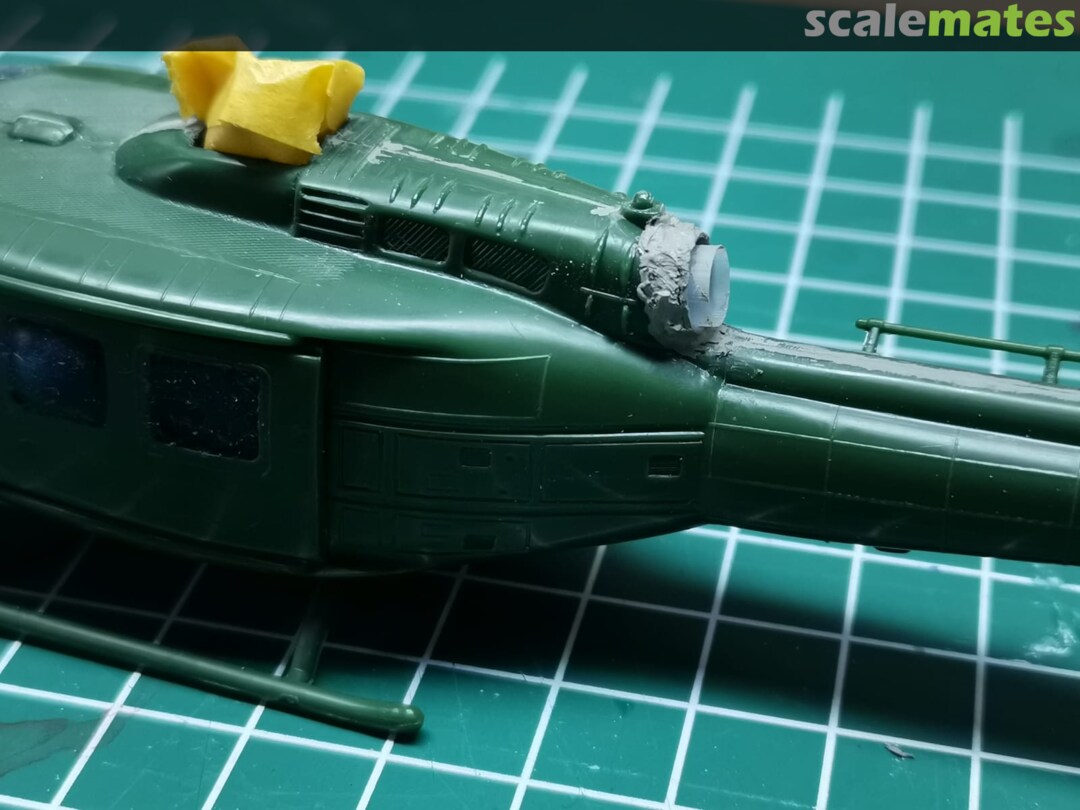
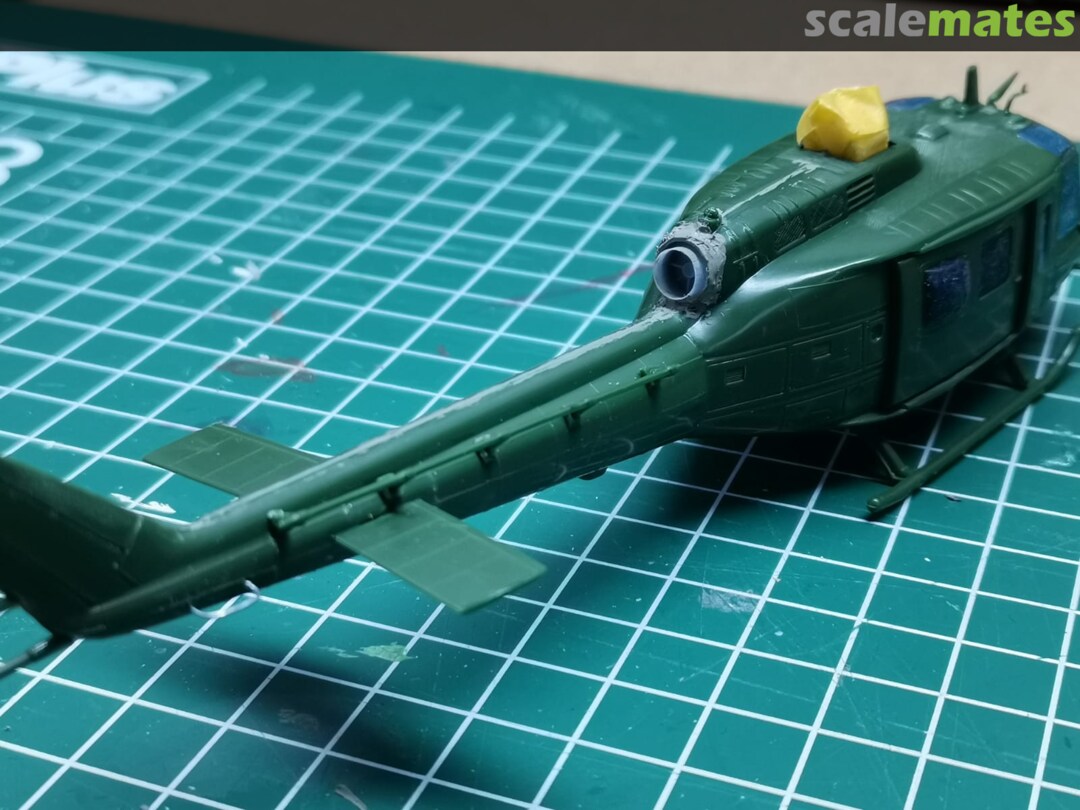
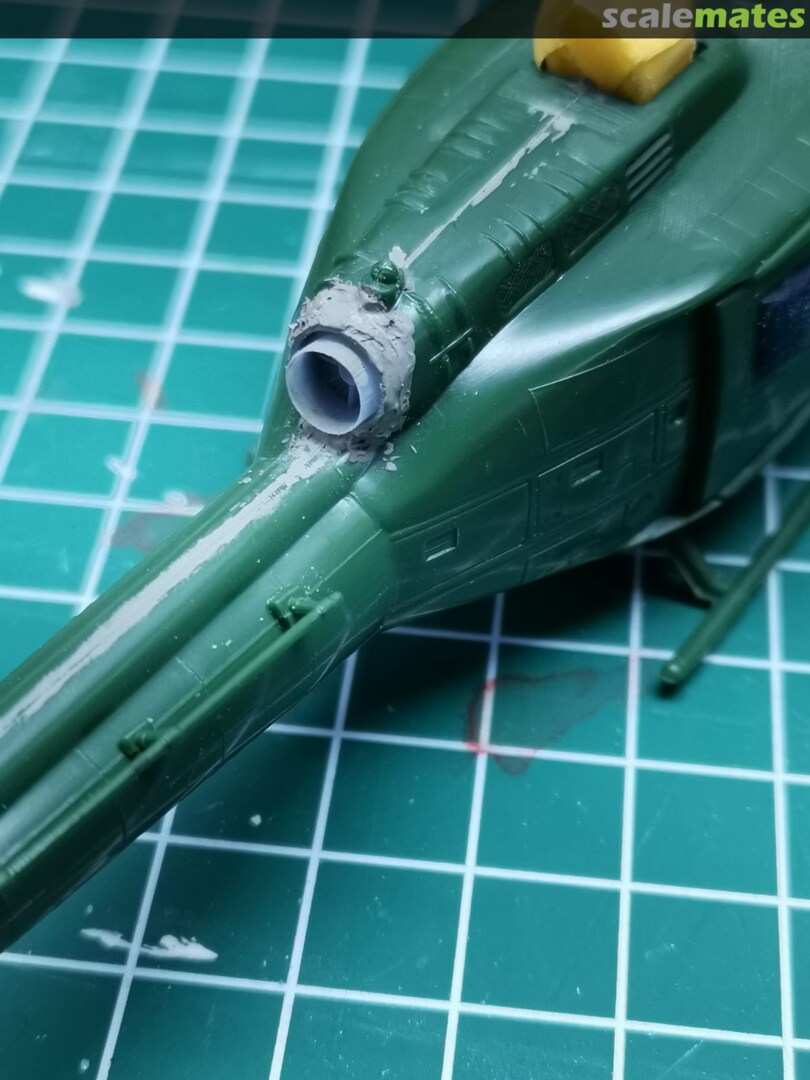
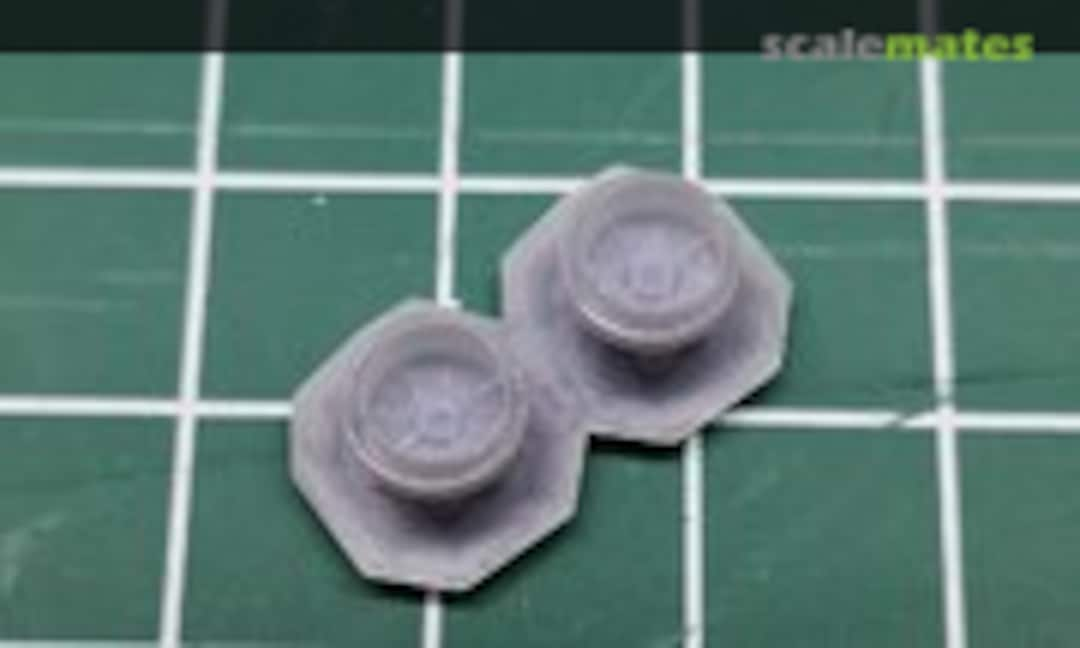 27February 19, 2021My first 3d printed part. Drawn in Fusion 360 as a replacement for the stock "exhaust" (or actually hole in the model...) I had glued the fuselage halves together before I had the printer. If i were to do it a next time i would remove the exhaust from the fuselage halves, make the new one fit in there, and then glue the halves together. It will most likely not look 100% correct, but alot better than how it comes out of the box.
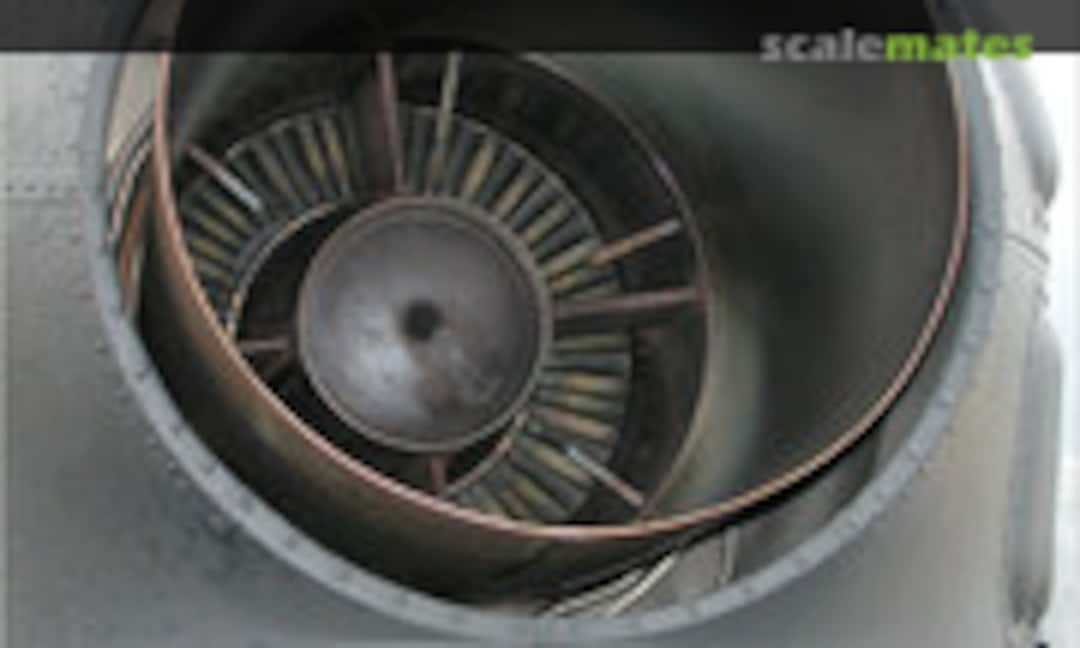 28February 19, 2021The reference picture i used from: b-domke.de/AviationImages/Huey/6493.html
 29February 19, 2021The reference picture i used from: b-domke.de/AviationImages/Huey/8959.html
 30February 19, 2021Waiting for CA glue to arrive to glue it to the model and then use putty to blend it in. It will most likely not look 100% accurate but alot better than the stock kit form.
 31February 19, 2021Waiting for CA glue to arrive to glue it to the model and then use putty to blend it in. It will most likely not look 100% accurate but alot better than the stock kit form.
 32February 19, 2021Waiting for CA glue to arrive to glue it to the model and then use putty to blend it in. It will most likely not look 100% accurate but alot better than the stock kit form.
 33February 19, 2021Waiting for CA glue to arrive to glue it to the model and then use putty to blend it in. It will most likely not look 100% accurate but alot better than the stock kit form.
 34February 19, 2021Waiting for CA glue to arrive to glue it to the model and then use putty to blend it in. It will most likely not look 100% accurate but alot better than the stock kit form.
 35February 19, 2021Waiting for CA glue to arrive to glue it to the model and then use putty to blend it in. It will most likely not look 100% accurate but alot better than the stock kit form.
 36March 16, 2021Glued it in with CA glue and then used some acrylic filler putty from Ammo by Mig to blend it in. This is before sanding.
 37March 16, 2021Glued it in with CA glue and then used some acrylic filler putty from Ammo by Mig to blend it in. This is before sanding.
 38March 16, 2021Glued it in with CA glue and then used some acrylic filler putty from Ammo by Mig to blend it in. This is before sanding.
 39March 16, 2021Glued it in with CA glue and then used some acrylic filler putty from Ammo by Mig to blend it in. This is before sanding.
 40March 16, 2021Glued it in with CA glue and then used some acrylic filler putty from Ammo by Mig to blend it in. This is before sanding.
 41March 16, 2021Glued it in with CA glue and then used some acrylic filler putty from Ammo by Mig to blend it in. This is before sanding.
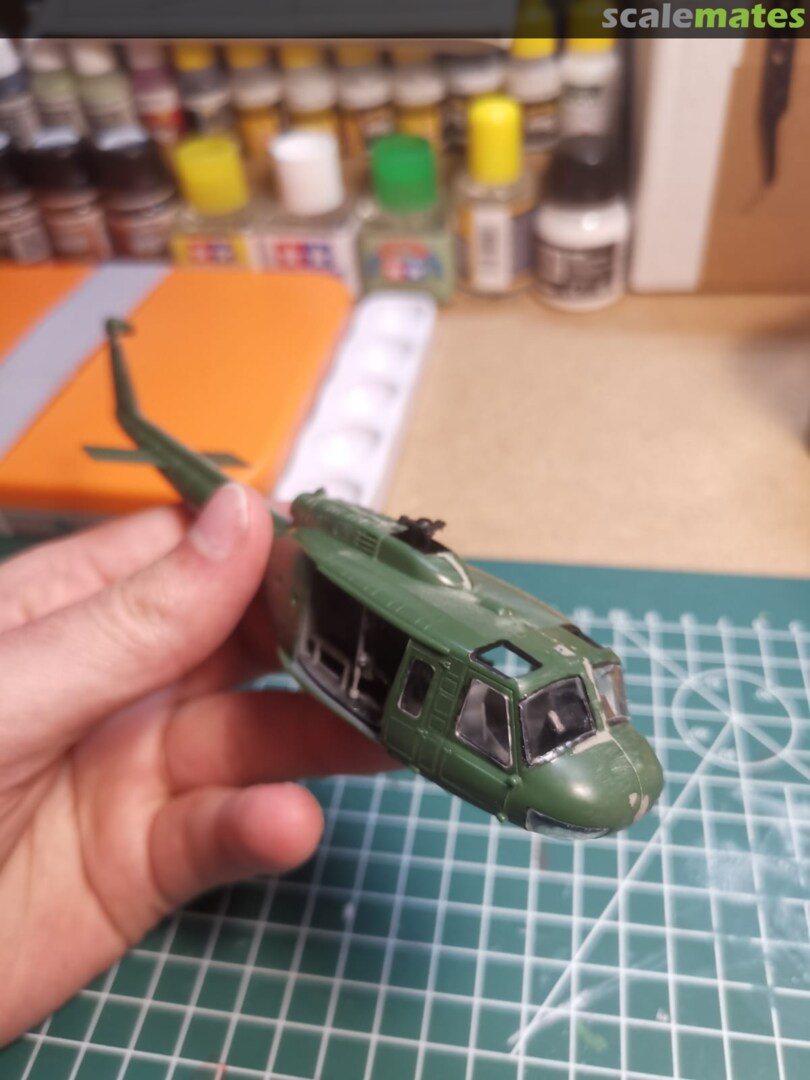
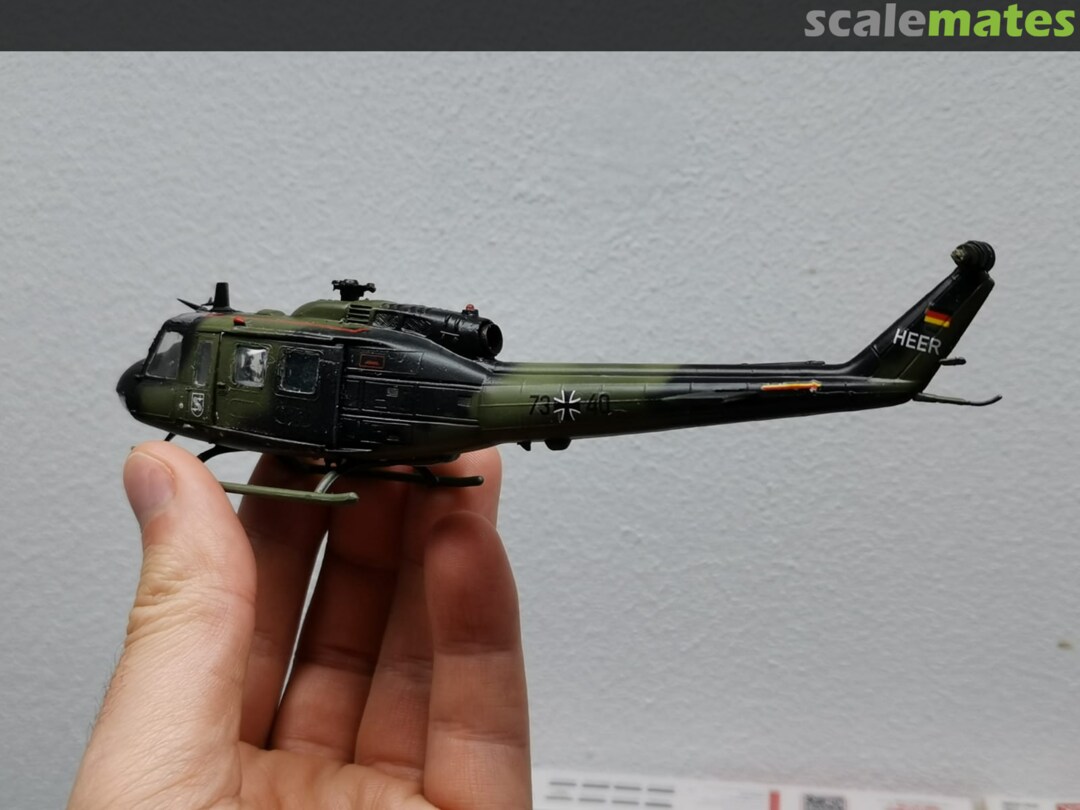
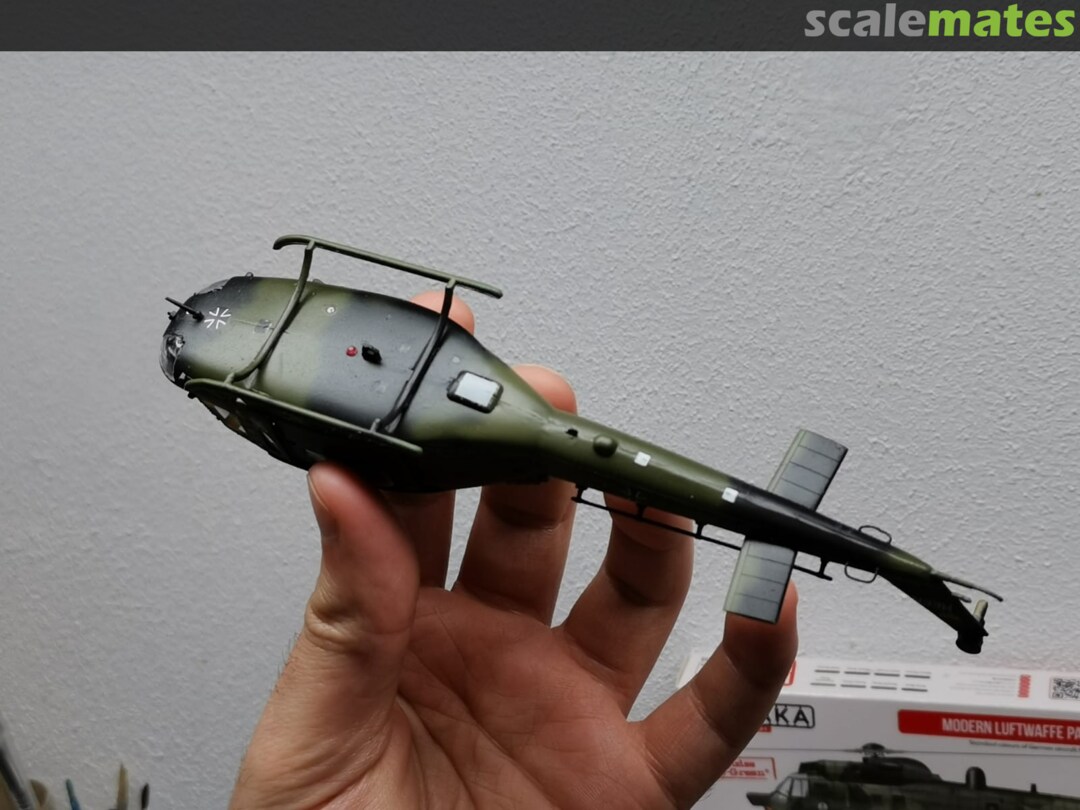
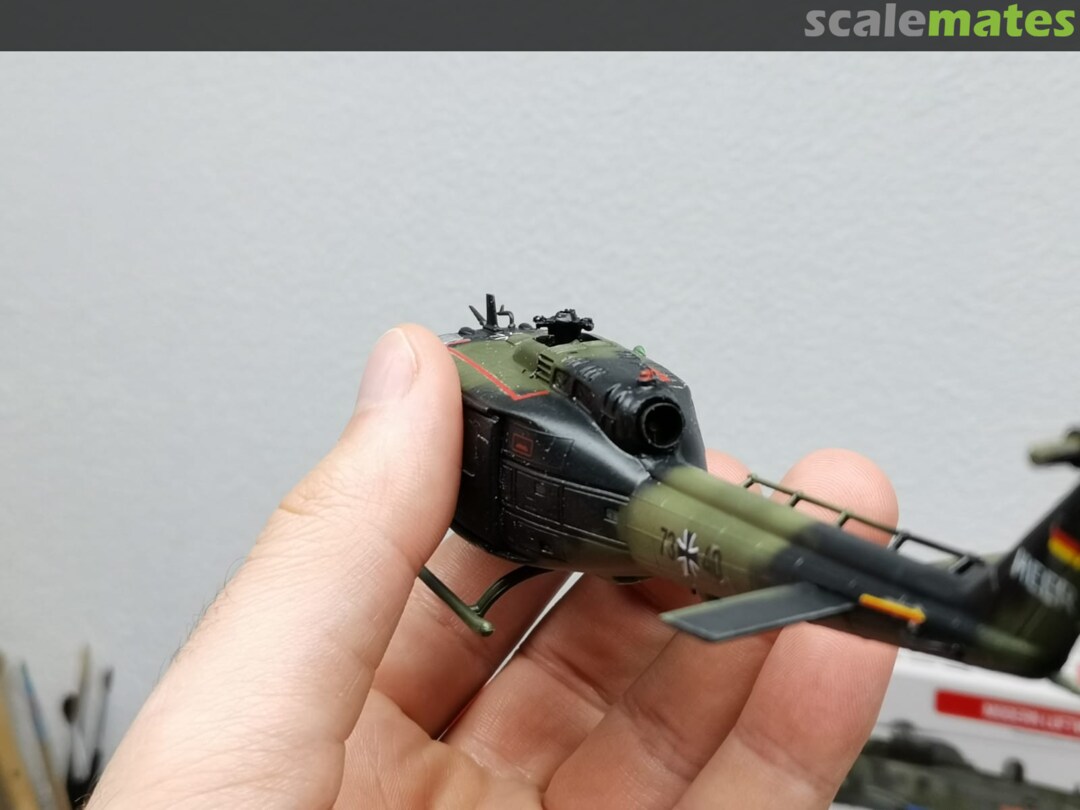
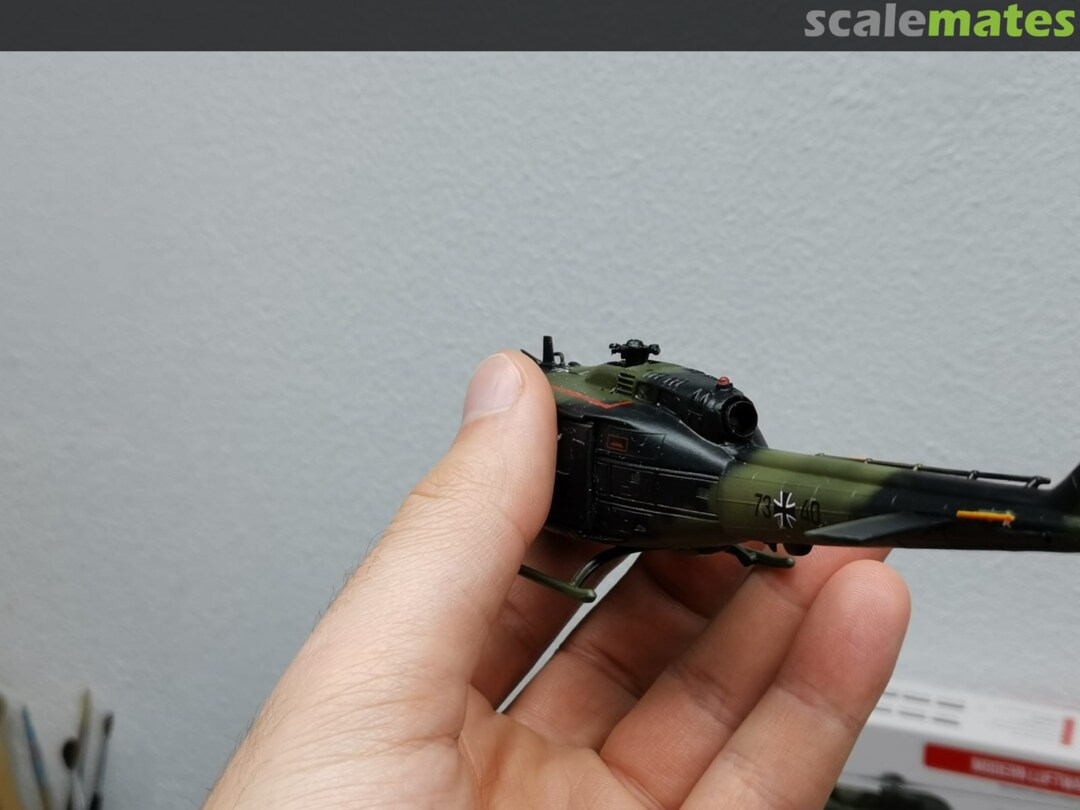
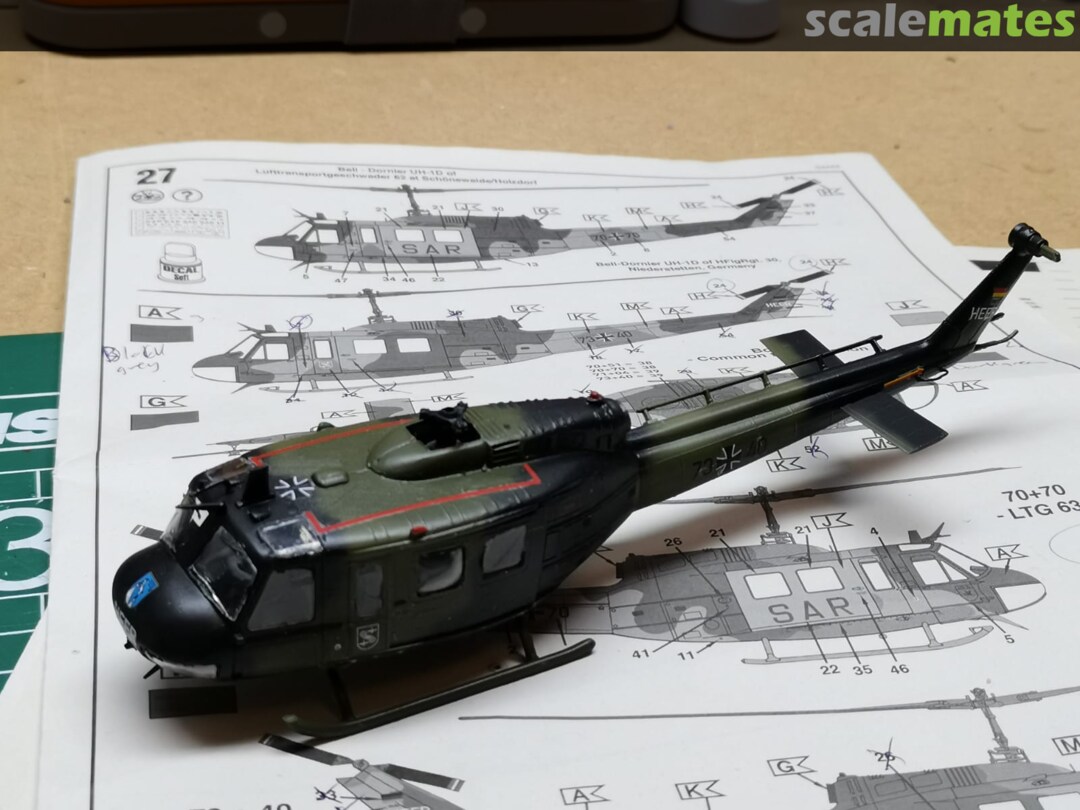
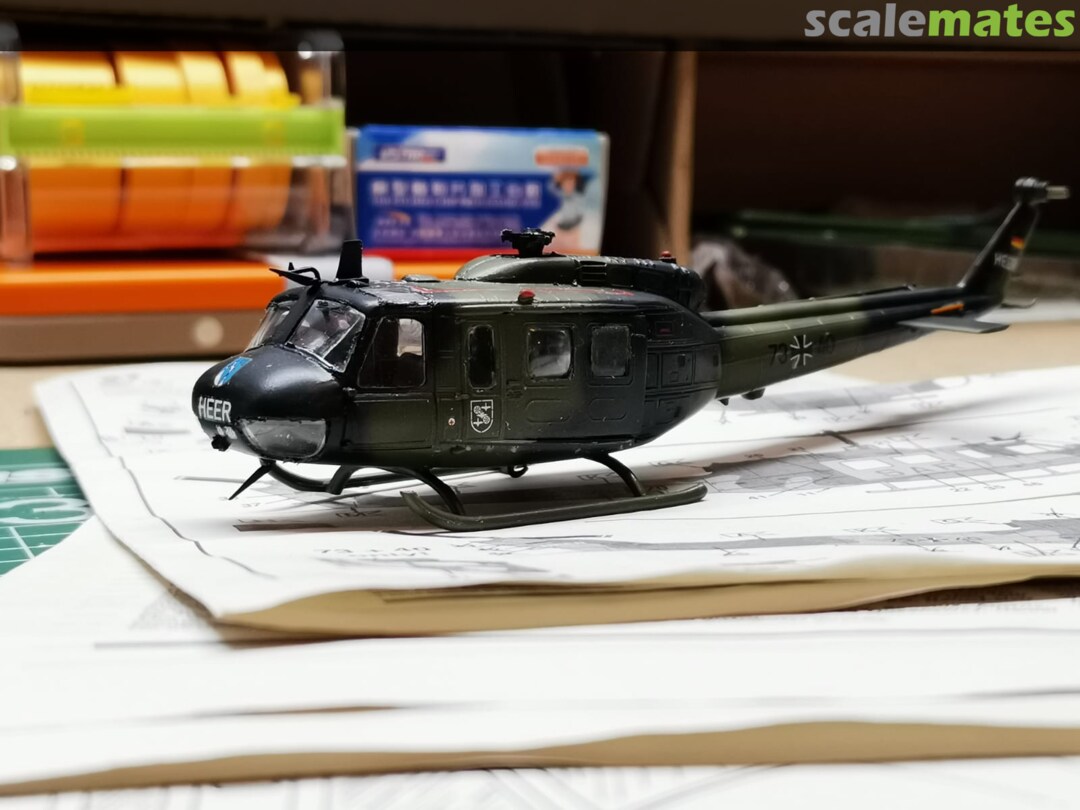
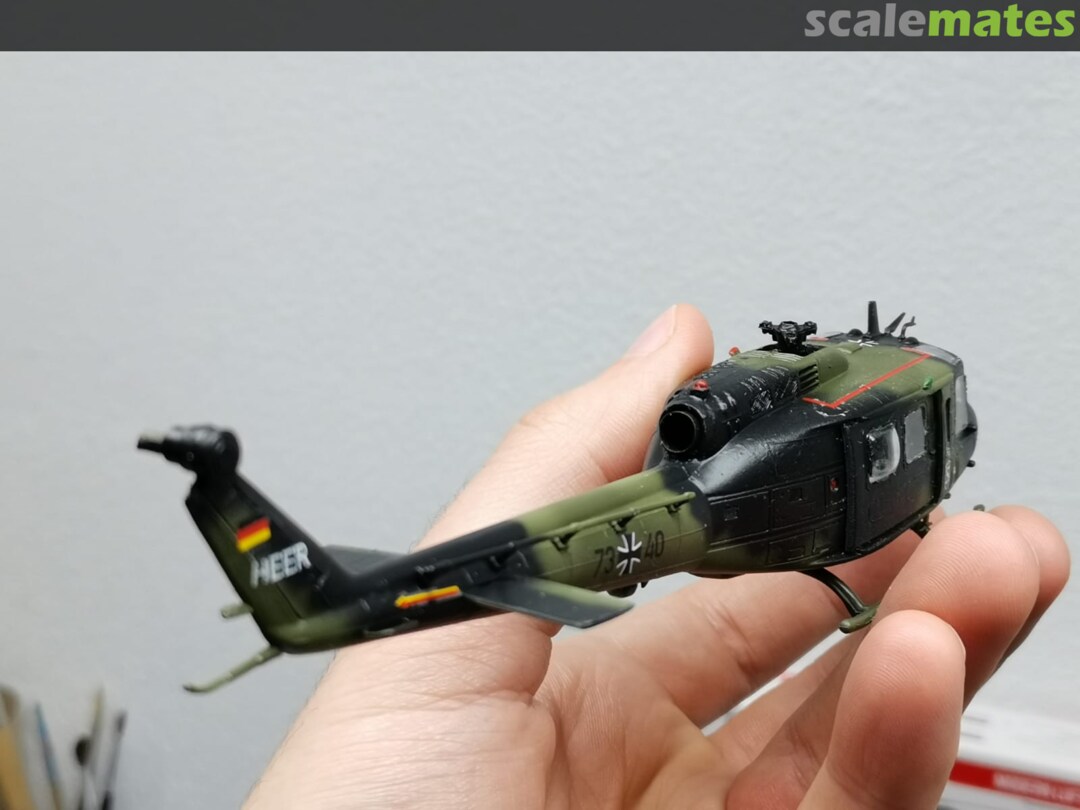
 42March 16, 2021I then sanded, primed (ammo by mig grey one shot) and painted the first base coats (Hataka Red line Field green). When i got to the second color, Hataka Red line Dark greenthings went south. The color sprayed fine on my test piece but when i took it to the model it started gunking up and and sputtering. Being the noob i am i didnt catch it soon enough and it started to ruin the paintjob. I decided to swap to some Ammo by mig nato green, but that tint isnt alot darker than the base green. Then i used ammo by mig black instead of the Hataka redline dark grey for the last color. I finished it off with 3 layers of ammo by mig gloss varnish. This was also the first time i did decals. I used Tamiya mark soft strong. Either i did something wrong or all the youtube tuts i watched are just weird. I used a tiny bit of marksoft and it burns away all the clear layers. Also, the decals did not really want to form to the details nomather what i tried (mark soft before i place the decal, after i place the decal, etc). softly rubbing with a qtip just wrinkels the clear and wipes it off, using a soft brush kind of helped but it still silvered alot. I finished it off with another 2 gloss clear coats followed by 3 satin clear coats. Now I just have to do the rotors.
 43March 16, 2021I then sanded, primed (ammo by mig grey one shot) and painted the first base coats (Hataka Red line Field green). When i got to the second color, Hataka Red line Dark greenthings went south. The color sprayed fine on my test piece but when i took it to the model it started gunking up and and sputtering. Being the noob i am i didnt catch it soon enough and it started to ruin the paintjob. I decided to swap to some Ammo by mig nato green, but that tint isnt alot darker than the base green. Then i used ammo by mig black instead of the Hataka redline dark grey for the last color. I finished it off with 3 layers of ammo by mig gloss varnish. This was also the first time i did decals. I used Tamiya mark soft strong. Either i did something wrong or all the youtube tuts i watched are just weird. I used a tiny bit of marksoft and it burns away all the clear layers. Also, the decals did not really want to form to the details nomather what i tried (mark soft before i place the decal, after i place the decal, etc). softly rubbing with a qtip just wrinkels the clear and wipes it off, using a soft brush kind of helped but it still silvered alot. I finished it off with another 2 gloss clear coats followed by 3 satin clear coats. Now I just have to do the rotors.
 44March 16, 2021I then sanded, primed (ammo by mig grey one shot) and painted the first base coats (Hataka Red line Field green). When i got to the second color, Hataka Red line Dark greenthings went south. The color sprayed fine on my test piece but when i took it to the model it started gunking up and and sputtering. Being the noob i am i didnt catch it soon enough and it started to ruin the paintjob. I decided to swap to some Ammo by mig nato green, but that tint isnt alot darker than the base green. Then i used ammo by mig black instead of the Hataka redline dark grey for the last color. I finished it off with 3 layers of ammo by mig gloss varnish. This was also the first time i did decals. I used Tamiya mark soft strong. Either i did something wrong or all the youtube tuts i watched are just weird. I used a tiny bit of marksoft and it burns away all the clear layers. Also, the decals did not really want to form to the details nomather what i tried (mark soft before i place the decal, after i place the decal, etc). softly rubbing with a qtip just wrinkels the clear and wipes it off, using a soft brush kind of helped but it still silvered alot. I finished it off with another 2 gloss clear coats followed by 3 satin clear coats. Now I just have to do the rotors.
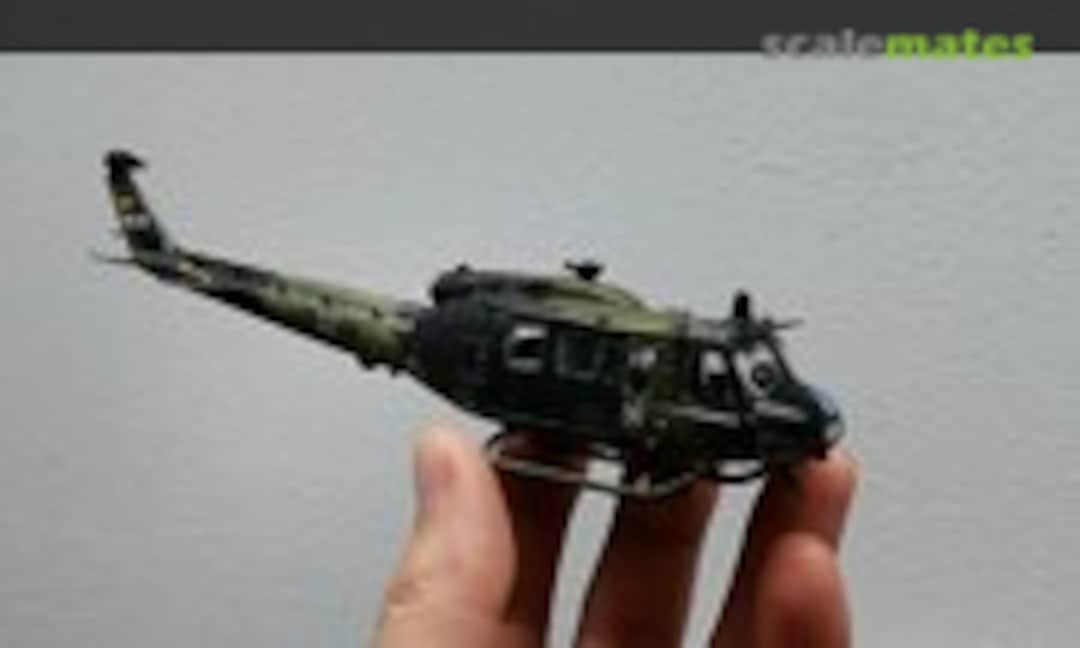 45March 16, 2021I then sanded, primed (ammo by mig grey one shot) and painted the first base coats (Hataka Red line Field green). When i got to the second color, Hataka Red line Dark greenthings went south. The color sprayed fine on my test piece but when i took it to the model it started gunking up and and sputtering. Being the noob i am i didnt catch it soon enough and it started to ruin the paintjob. I decided to swap to some Ammo by mig nato green, but that tint isnt alot darker than the base green. Then i used ammo by mig black instead of the Hataka redline dark grey for the last color. I finished it off with 3 layers of ammo by mig gloss varnish. This was also the first time i did decals. I used Tamiya mark soft strong. Either i did something wrong or all the youtube tuts i watched are just weird. I used a tiny bit of marksoft and it burns away all the clear layers. Also, the decals did not really want to form to the details nomather what i tried (mark soft before i place the decal, after i place the decal, etc). softly rubbing with a qtip just wrinkels the clear and wipes it off, using a soft brush kind of helped but it still silvered alot. I finished it off with another 2 gloss clear coats followed by 3 satin clear coats. Now I just have to do the rotors.
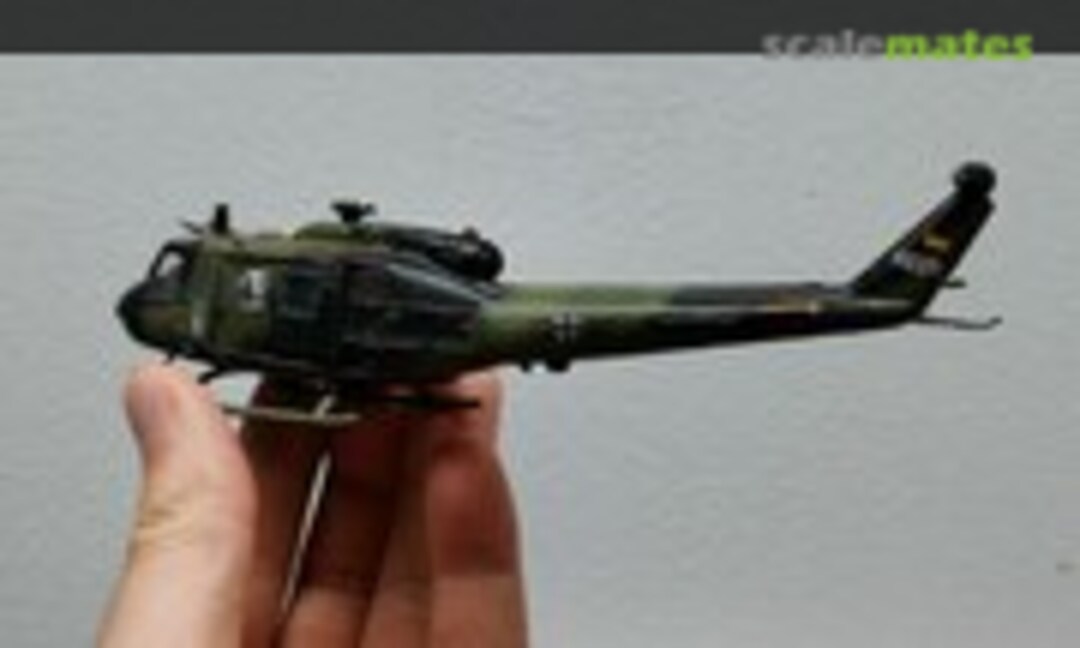 46March 16, 2021I then sanded, primed (ammo by mig grey one shot) and painted the first base coats (Hataka Red line Field green). When i got to the second color, Hataka Red line Dark greenthings went south. The color sprayed fine on my test piece but when i took it to the model it started gunking up and and sputtering. Being the noob i am i didnt catch it soon enough and it started to ruin the paintjob. I decided to swap to some Ammo by mig nato green, but that tint isnt alot darker than the base green. Then i used ammo by mig black instead of the Hataka redline dark grey for the last color. I finished it off with 3 layers of ammo by mig gloss varnish. This was also the first time i did decals. I used Tamiya mark soft strong. Either i did something wrong or all the youtube tuts i watched are just weird. I used a tiny bit of marksoft and it burns away all the clear layers. Also, the decals did not really want to form to the details nomather what i tried (mark soft before i place the decal, after i place the decal, etc). softly rubbing with a qtip just wrinkels the clear and wipes it off, using a soft brush kind of helped but it still silvered alot. I finished it off with another 2 gloss clear coats followed by 3 satin clear coats. Now I just have to do the rotors.
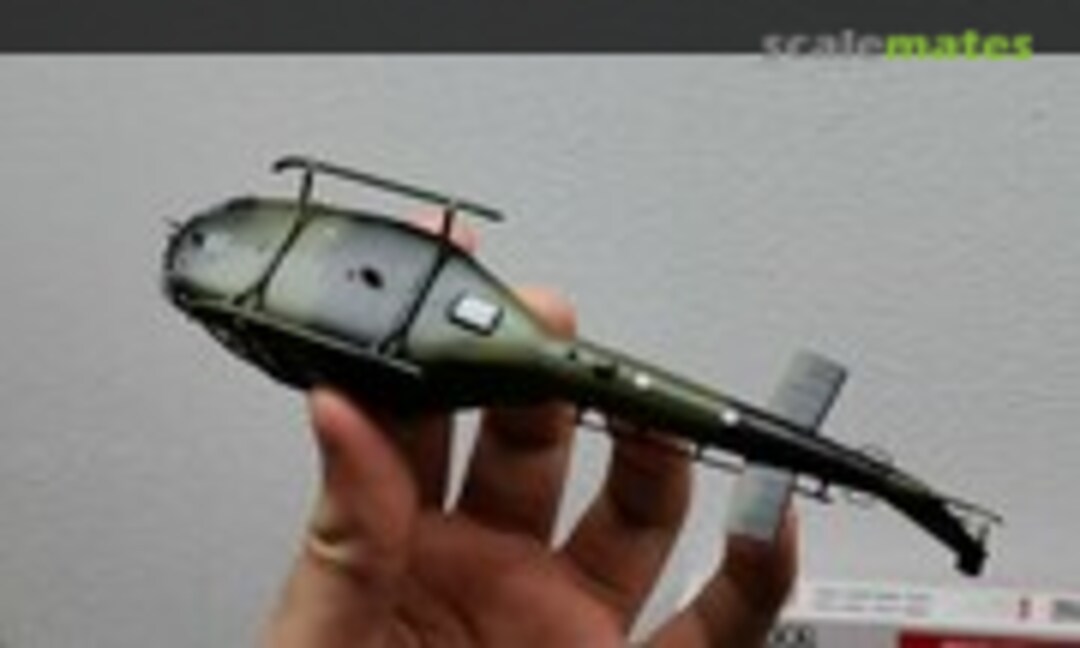 47March 16, 2021I then sanded, primed (ammo by mig grey one shot) and painted the first base coats (Hataka Red line Field green). When i got to the second color, Hataka Red line Dark greenthings went south. The color sprayed fine on my test piece but when i took it to the model it started gunking up and and sputtering. Being the noob i am i didnt catch it soon enough and it started to ruin the paintjob. I decided to swap to some Ammo by mig nato green, but that tint isnt alot darker than the base green. Then i used ammo by mig black instead of the Hataka redline dark grey for the last color. I finished it off with 3 layers of ammo by mig gloss varnish. This was also the first time i did decals. I used Tamiya mark soft strong. Either i did something wrong or all the youtube tuts i watched are just weird. I used a tiny bit of marksoft and it burns away all the clear layers. Also, the decals did not really want to form to the details nomather what i tried (mark soft before i place the decal, after i place the decal, etc). softly rubbing with a qtip just wrinkels the clear and wipes it off, using a soft brush kind of helped but it still silvered alot. I finished it off with another 2 gloss clear coats followed by 3 satin clear coats. Now I just have to do the rotors.
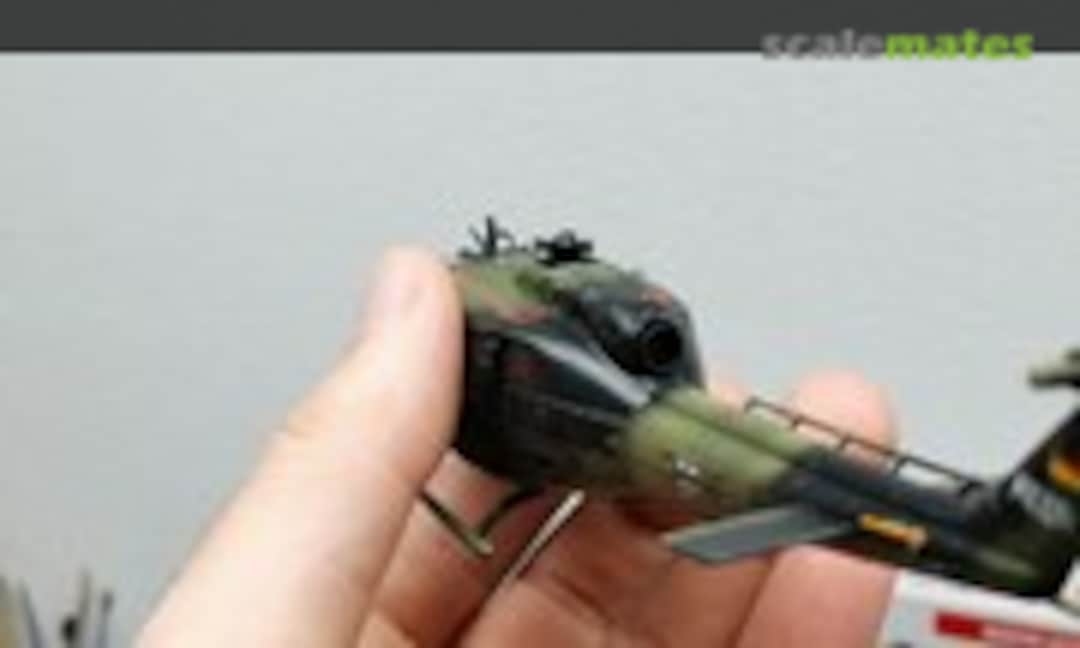 48March 16, 2021I then sanded, primed (ammo by mig grey one shot) and painted the first base coats (Hataka Red line Field green). When i got to the second color, Hataka Red line Dark greenthings went south. The color sprayed fine on my test piece but when i took it to the model it started gunking up and and sputtering. Being the noob i am i didnt catch it soon enough and it started to ruin the paintjob. I decided to swap to some Ammo by mig nato green, but that tint isnt alot darker than the base green. Then i used ammo by mig black instead of the Hataka redline dark grey for the last color. I finished it off with 3 layers of ammo by mig gloss varnish. This was also the first time i did decals. I used Tamiya mark soft strong. Either i did something wrong or all the youtube tuts i watched are just weird. I used a tiny bit of marksoft and it burns away all the clear layers. Also, the decals did not really want to form to the details nomather what i tried (mark soft before i place the decal, after i place the decal, etc). softly rubbing with a qtip just wrinkels the clear and wipes it off, using a soft brush kind of helped but it still silvered alot. I finished it off with another 2 gloss clear coats followed by 3 satin clear coats. Now I just have to do the rotors.
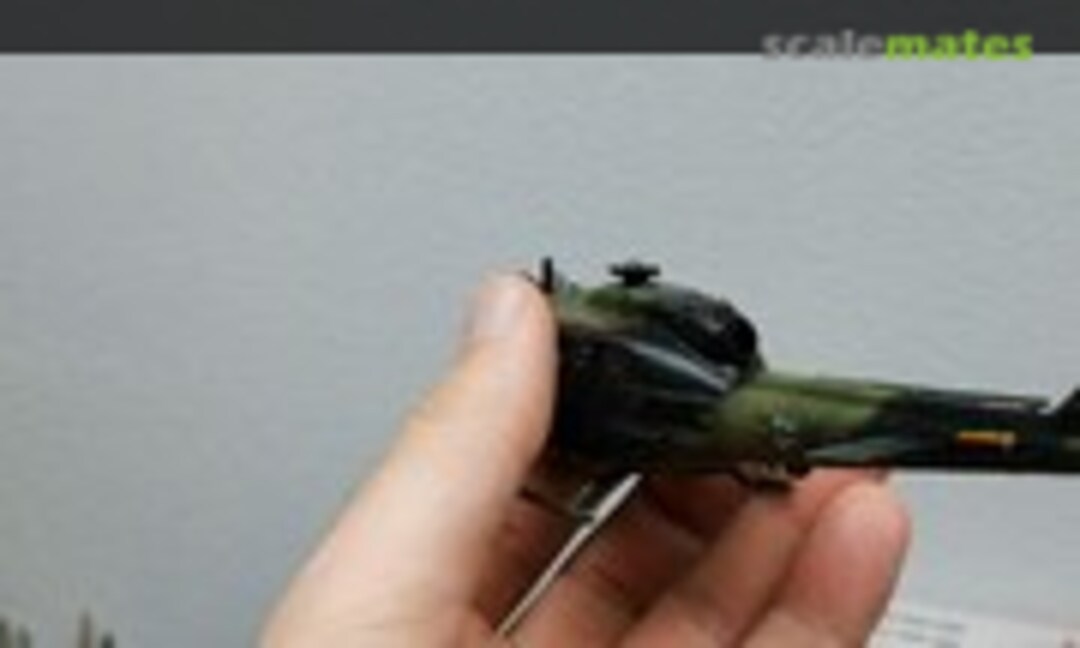 49March 16, 2021I then sanded, primed (ammo by mig grey one shot) and painted the first base coats (Hataka Red line Field green). When i got to the second color, Hataka Red line Dark greenthings went south. The color sprayed fine on my test piece but when i took it to the model it started gunking up and and sputtering. Being the noob i am i didnt catch it soon enough and it started to ruin the paintjob. I decided to swap to some Ammo by mig nato green, but that tint isnt alot darker than the base green. Then i used ammo by mig black instead of the Hataka redline dark grey for the last color. I finished it off with 3 layers of ammo by mig gloss varnish. This was also the first time i did decals. I used Tamiya mark soft strong. Either i did something wrong or all the youtube tuts i watched are just weird. I used a tiny bit of marksoft and it burns away all the clear layers. Also, the decals did not really want to form to the details nomather what i tried (mark soft before i place the decal, after i place the decal, etc). softly rubbing with a qtip just wrinkels the clear and wipes it off, using a soft brush kind of helped but it still silvered alot. I finished it off with another 2 gloss clear coats followed by 3 satin clear coats. Now I just have to do the rotors.
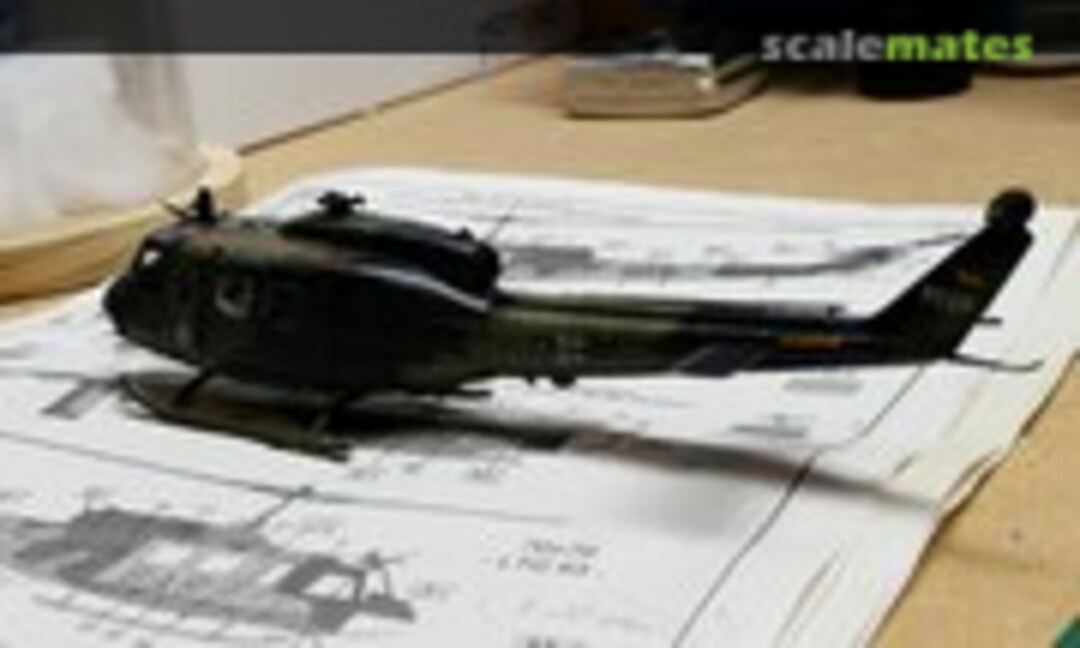 50March 16, 2021I then sanded, primed (ammo by mig grey one shot) and painted the first base coats (Hataka Red line Field green). When i got to the second color, Hataka Red line Dark greenthings went south. The color sprayed fine on my test piece but when i took it to the model it started gunking up and and sputtering. Being the noob i am i didnt catch it soon enough and it started to ruin the paintjob. I decided to swap to some Ammo by mig nato green, but that tint isnt alot darker than the base green. Then i used ammo by mig black instead of the Hataka redline dark grey for the last color. I finished it off with 3 layers of ammo by mig gloss varnish. This was also the first time i did decals. I used Tamiya mark soft strong. Either i did something wrong or all the youtube tuts i watched are just weird. I used a tiny bit of marksoft and it burns away all the clear layers. Also, the decals did not really want to form to the details nomather what i tried (mark soft before i place the decal, after i place the decal, etc). softly rubbing with a qtip just wrinkels the clear and wipes it off, using a soft brush kind of helped but it still silvered alot. I finished it off with another 2 gloss clear coats followed by 3 satin clear coats. Now I just have to do the rotors.
 51March 16, 2021I then sanded, primed (ammo by mig grey one shot) and painted the first base coats (Hataka Red line Field green). When i got to the second color, Hataka Red line Dark greenthings went south. The color sprayed fine on my test piece but when i took it to the model it started gunking up and and sputtering. Being the noob i am i didnt catch it soon enough and it started to ruin the paintjob. I decided to swap to some Ammo by mig nato green, but that tint isnt alot darker than the base green. Then i used ammo by mig black instead of the Hataka redline dark grey for the last color. I finished it off with 3 layers of ammo by mig gloss varnish. This was also the first time i did decals. I used Tamiya mark soft strong. Either i did something wrong or all the youtube tuts i watched are just weird. I used a tiny bit of marksoft and it burns away all the clear layers. Also, the decals did not really want to form to the details nomather what i tried (mark soft before i place the decal, after i place the decal, etc). softly rubbing with a qtip just wrinkels the clear and wipes it off, using a soft brush kind of helped but it still silvered alot. I finished it off with another 2 gloss clear coats followed by 3 satin clear coats. Now I just have to do the rotors.
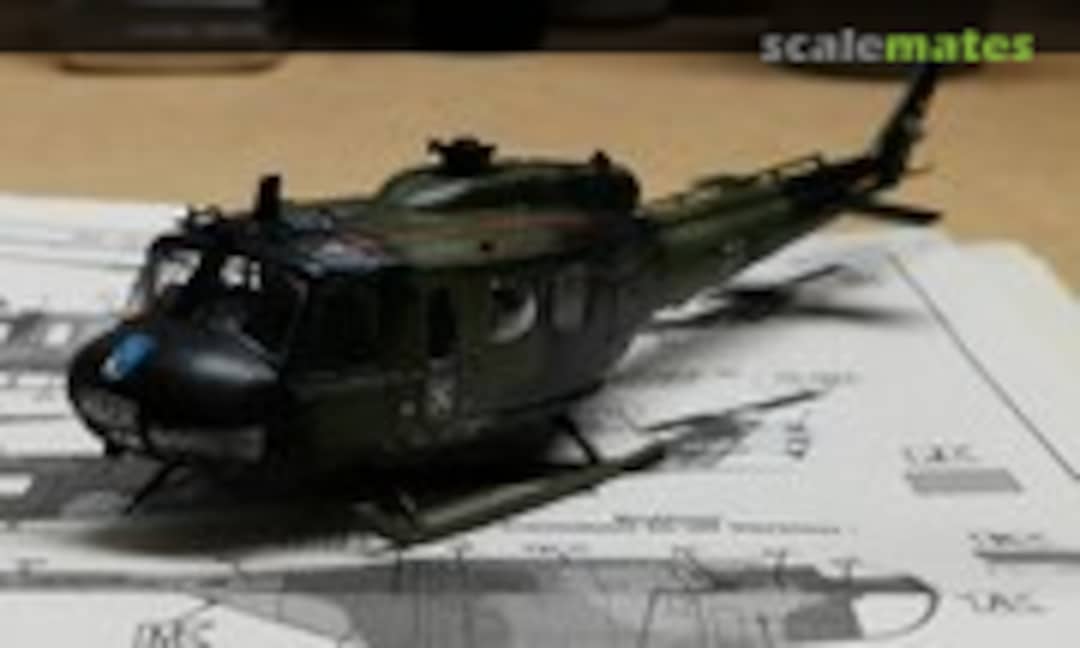 52March 16, 2021I then sanded, primed (ammo by mig grey one shot) and painted the first base coats (Hataka Red line Field green). When i got to the second color, Hataka Red line Dark greenthings went south. The color sprayed fine on my test piece but when i took it to the model it started gunking up and and sputtering. Being the noob i am i didnt catch it soon enough and it started to ruin the paintjob. I decided to swap to some Ammo by mig nato green, but that tint isnt alot darker than the base green. Then i used ammo by mig black instead of the Hataka redline dark grey for the last color. I finished it off with 3 layers of ammo by mig gloss varnish. This was also the first time i did decals. I used Tamiya mark soft strong. Either i did something wrong or all the youtube tuts i watched are just weird. I used a tiny bit of marksoft and it burns away all the clear layers. Also, the decals did not really want to form to the details nomather what i tried (mark soft before i place the decal, after i place the decal, etc). softly rubbing with a qtip just wrinkels the clear and wipes it off, using a soft brush kind of helped but it still silvered alot. I finished it off with another 2 gloss clear coats followed by 3 satin clear coats. Now I just have to do the rotors.
 53March 16, 2021I then sanded, primed (ammo by mig grey one shot) and painted the first base coats (Hataka Red line Field green). When i got to the second color, Hataka Red line Dark greenthings went south. The color sprayed fine on my test piece but when i took it to the model it started gunking up and and sputtering. Being the noob i am i didnt catch it soon enough and it started to ruin the paintjob. I decided to swap to some Ammo by mig nato green, but that tint isnt alot darker than the base green. Then i used ammo by mig black instead of the Hataka redline dark grey for the last color. I finished it off with 3 layers of ammo by mig gloss varnish. This was also the first time i did decals. I used Tamiya mark soft strong. Either i did something wrong or all the youtube tuts i watched are just weird. I used a tiny bit of marksoft and it burns away all the clear layers. Also, the decals did not really want to form to the details nomather what i tried (mark soft before i place the decal, after i place the decal, etc). softly rubbing with a qtip just wrinkels the clear and wipes it off, using a soft brush kind of helped but it still silvered alot. I finished it off with another 2 gloss clear coats followed by 3 satin clear coats. Now I just have to do the rotors.
 54March 16, 2021I then sanded, primed (ammo by mig grey one shot) and painted the first base coats (Hataka Red line Field green). When i got to the second color, Hataka Red line Dark greenthings went south. The color sprayed fine on my test piece but when i took it to the model it started gunking up and and sputtering. Being the noob i am i didnt catch it soon enough and it started to ruin the paintjob. I decided to swap to some Ammo by mig nato green, but that tint isnt alot darker than the base green. Then i used ammo by mig black instead of the Hataka redline dark grey for the last color. I finished it off with 3 layers of ammo by mig gloss varnish. This was also the first time i did decals. I used Tamiya mark soft strong. Either i did something wrong or all the youtube tuts i watched are just weird. I used a tiny bit of marksoft and it burns away all the clear layers. Also, the decals did not really want to form to the details nomather what i tried (mark soft before i place the decal, after i place the decal, etc). softly rubbing with a qtip just wrinkels the clear and wipes it off, using a soft brush kind of helped but it still silvered alot. I finished it off with another 2 gloss clear coats followed by 3 satin clear coats. Now I just have to do the rotors.
 55March 16, 2021I then sanded, primed (ammo by mig grey one shot) and painted the first base coats (Hataka Red line Field green). When i got to the second color, Hataka Red line Dark greenthings went south. The color sprayed fine on my test piece but when i took it to the model it started gunking up and and sputtering. Being the noob i am i didnt catch it soon enough and it started to ruin the paintjob. I decided to swap to some Ammo by mig nato green, but that tint isnt alot darker than the base green. Then i used ammo by mig black instead of the Hataka redline dark grey for the last color. I finished it off with 3 layers of ammo by mig gloss varnish. This was also the first time i did decals. I used Tamiya mark soft strong. Either i did something wrong or all the youtube tuts i watched are just weird. I used a tiny bit of marksoft and it burns away all the clear layers. Also, the decals did not really want to form to the details nomather what i tried (mark soft before i place the decal, after i place the decal, etc). softly rubbing with a qtip just wrinkels the clear and wipes it off, using a soft brush kind of helped but it still silvered alot. I finished it off with another 2 gloss clear coats followed by 3 satin clear coats. Now I just have to do the rotors.
 56March 16, 2021I then sanded, primed (ammo by mig grey one shot) and painted the first base coats (Hataka Red line Field green). When i got to the second color, Hataka Red line Dark greenthings went south. The color sprayed fine on my test piece but when i took it to the model it started gunking up and and sputtering. Being the noob i am i didnt catch it soon enough and it started to ruin the paintjob. I decided to swap to some Ammo by mig nato green, but that tint isnt alot darker than the base green. Then i used ammo by mig black instead of the Hataka redline dark grey for the last color. I finished it off with 3 layers of ammo by mig gloss varnish. This was also the first time i did decals. I used Tamiya mark soft strong. Either i did something wrong or all the youtube tuts i watched are just weird. I used a tiny bit of marksoft and it burns away all the clear layers. Also, the decals did not really want to form to the details nomather what i tried (mark soft before i place the decal, after i place the decal, etc). softly rubbing with a qtip just wrinkels the clear and wipes it off, using a soft brush kind of helped but it still silvered alot. I finished it off with another 2 gloss clear coats followed by 3 satin clear coats. Now I just have to do the rotors.
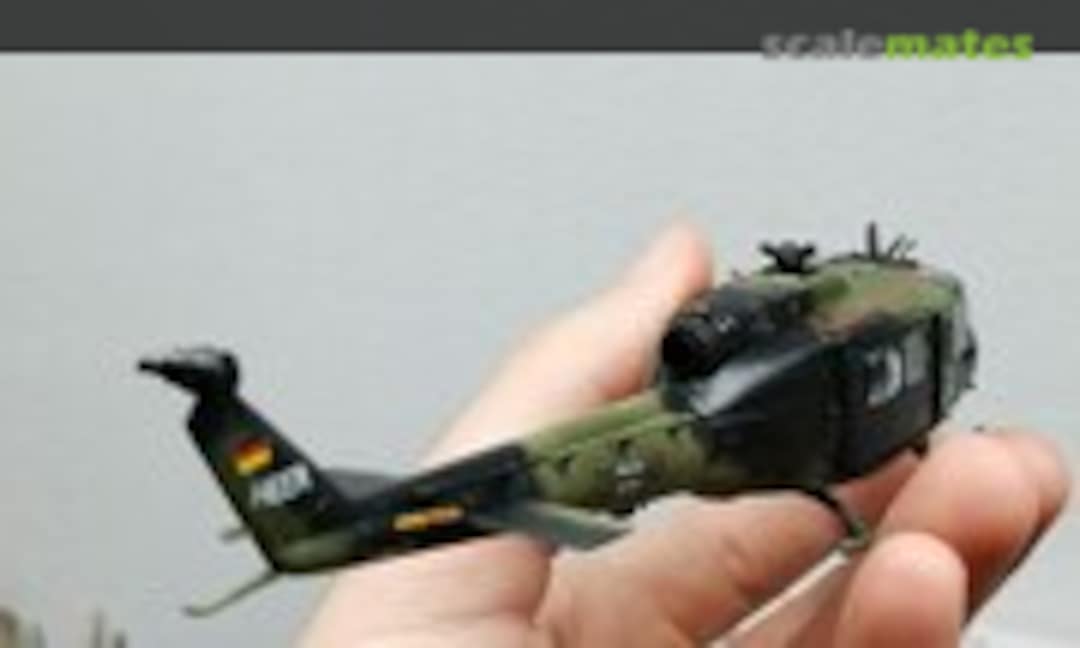 57March 16, 2021I then sanded, primed (ammo by mig grey one shot) and painted the first base coats (Hataka Red line Field green). When i got to the second color, Hataka Red line Dark greenthings went south. The color sprayed fine on my test piece but when i took it to the model it started gunking up and and sputtering. Being the noob i am i didnt catch it soon enough and it started to ruin the paintjob. I decided to swap to some Ammo by mig nato green, but that tint isnt alot darker than the base green. Then i used ammo by mig black instead of the Hataka redline dark grey for the last color. I finished it off with 3 layers of ammo by mig gloss varnish. This was also the first time i did decals. I used Tamiya mark soft strong. Either i did something wrong or all the youtube tuts i watched are just weird. I used a tiny bit of marksoft and it burns away all the clear layers. Also, the decals did not really want to form to the details nomather what i tried (mark soft before i place the decal, after i place the decal, etc). softly rubbing with a qtip just wrinkels the clear and wipes it off, using a soft brush kind of helped but it still silvered alot. I finished it off with another 2 gloss clear coats followed by 3 satin clear coats. Now I just have to do the rotors.
 58March 16, 2021I then sanded, primed (ammo by mig grey one shot) and painted the first base coats (Hataka Red line Field green). When i got to the second color, Hataka Red line Dark greenthings went south. The color sprayed fine on my test piece but when i took it to the model it started gunking up and and sputtering. Being the noob i am i didnt catch it soon enough and it started to ruin the paintjob. I decided to swap to some Ammo by mig nato green, but that tint isnt alot darker than the base green. Then i used ammo by mig black instead of the Hataka redline dark grey for the last color. I finished it off with 3 layers of ammo by mig gloss varnish. This was also the first time i did decals. I used Tamiya mark soft strong. Either i did something wrong or all the youtube tuts i watched are just weird. I used a tiny bit of marksoft and it burns away all the clear layers. Also, the decals did not really want to form to the details nomather what i tried (mark soft before i place the decal, after i place the decal, etc). softly rubbing with a qtip just wrinkels the clear and wipes it off, using a soft brush kind of helped but it still silvered alot. I finished it off with another 2 gloss clear coats followed by 3 satin clear coats. Now I just have to do the rotors.


Comments
3 10 February 2021, 15:19
Very interesting, I again feel like needing to learn how to design 3D prints😉
19 February 2021, 08:51
Album info
My first helicopter build ever
58 images
1:72
In progress

Bell UH-1D Huey
HFlgRgt 30 73+40
Niederstetten
anthrazit, dark green, bronze green