

Vought F-8D Crusader, VF-32 "Swordsmen"


Comments
57 24 June, 18:21
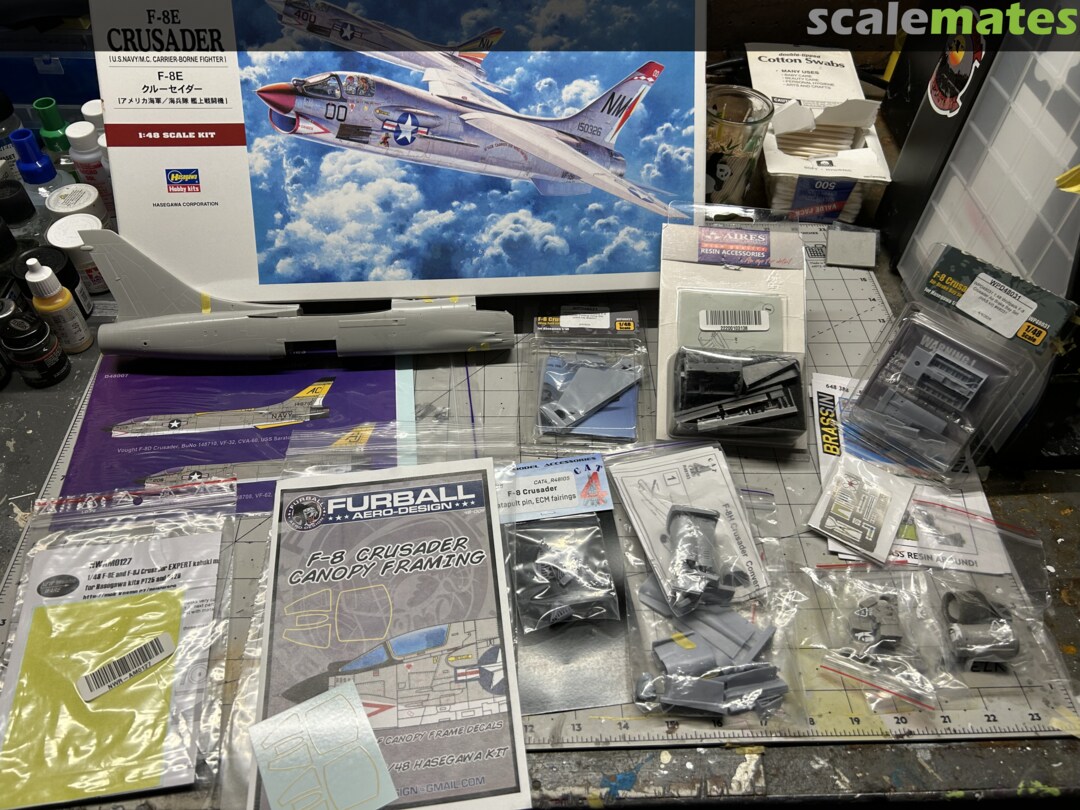
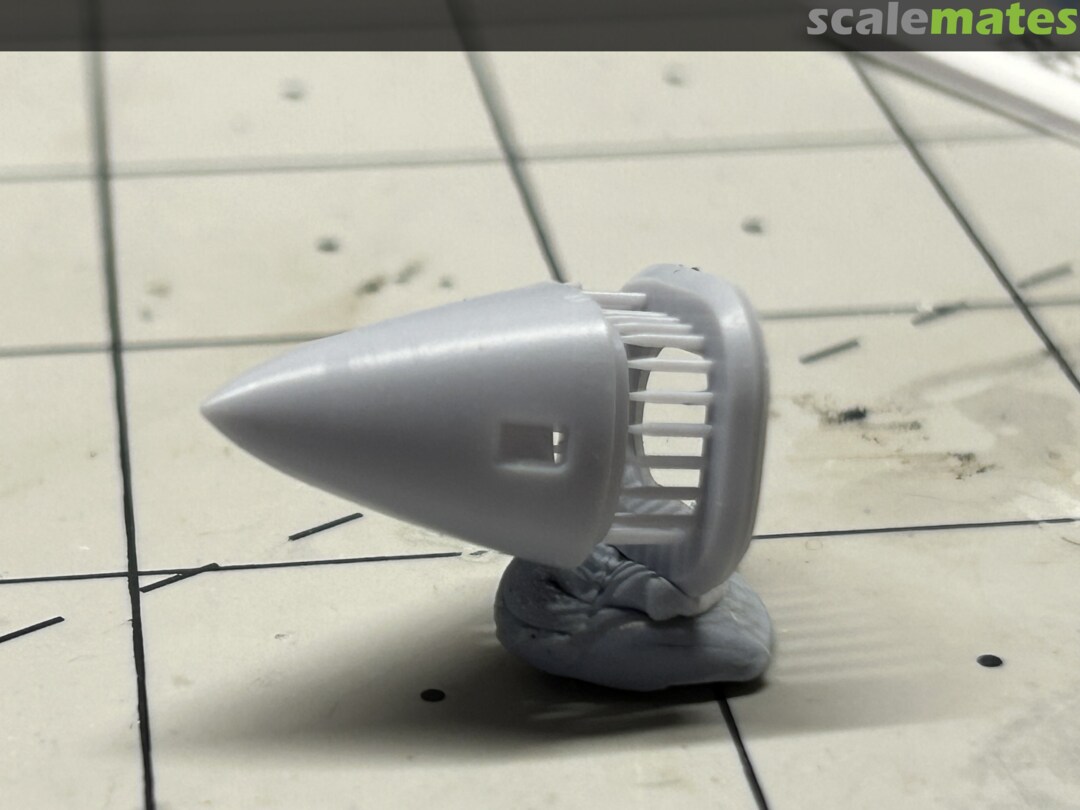
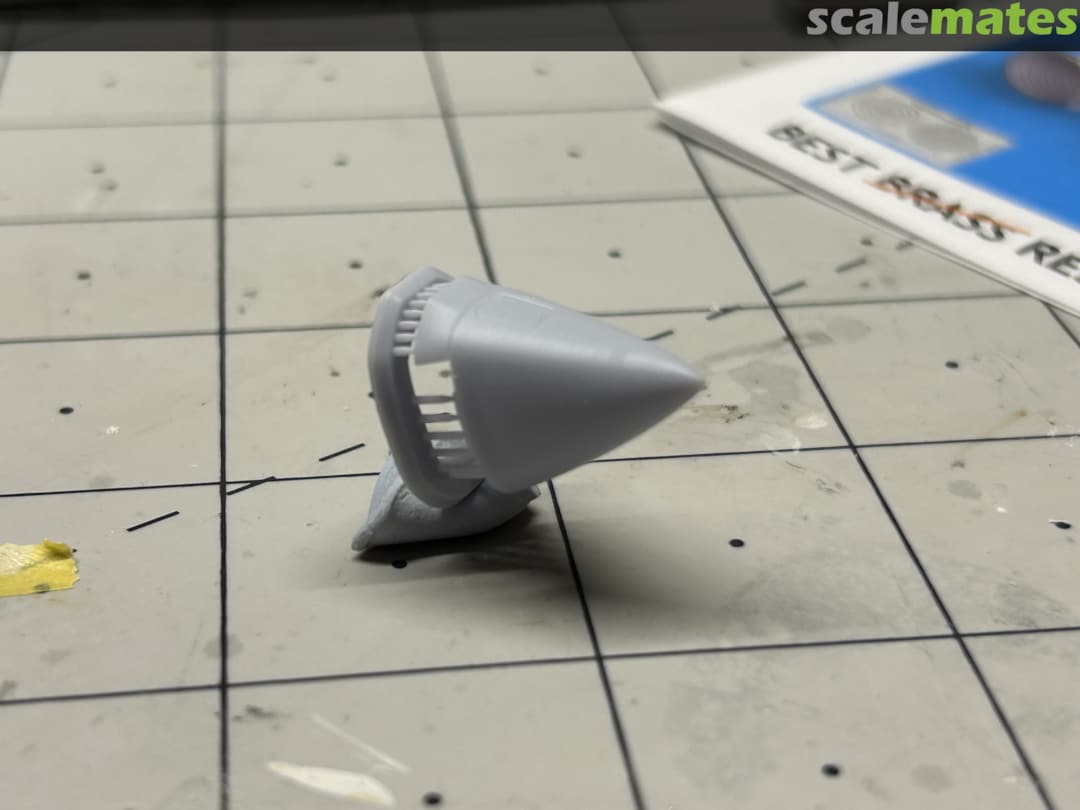
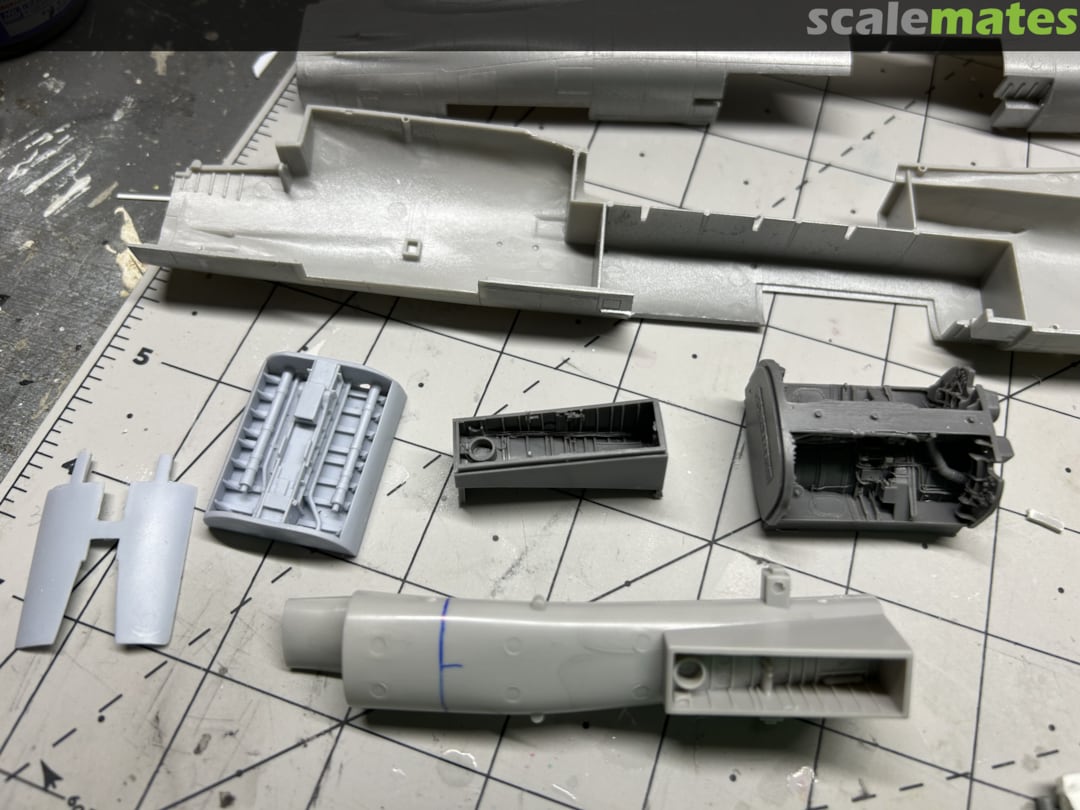
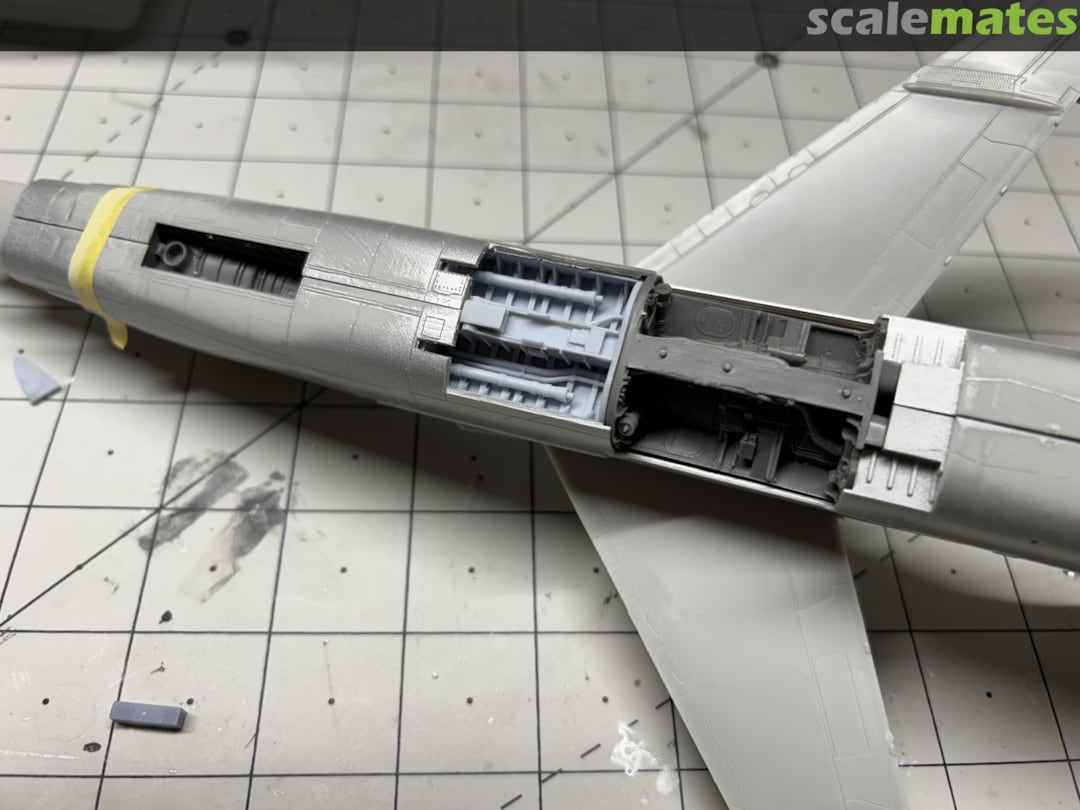
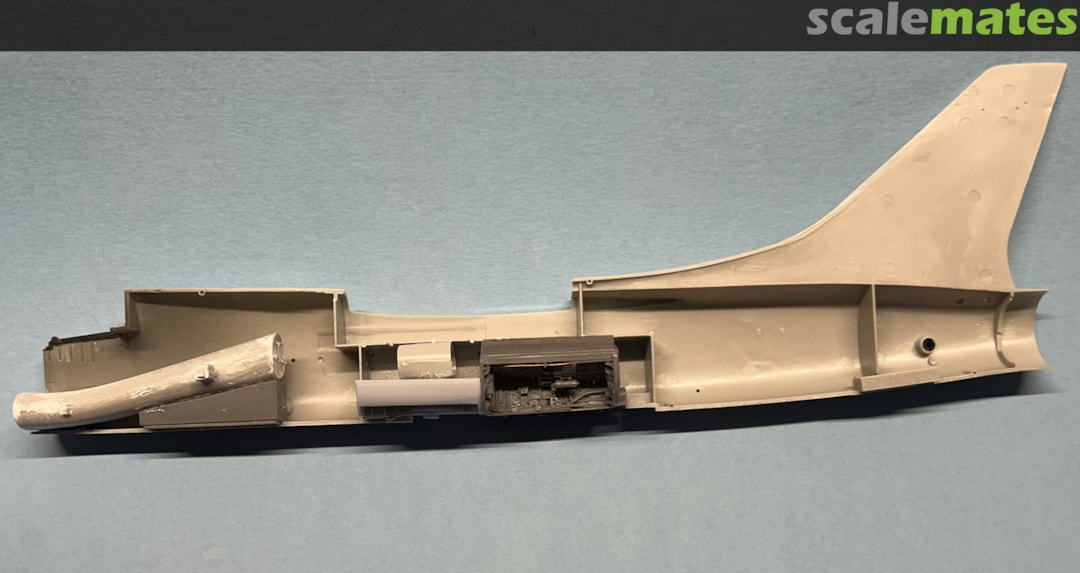
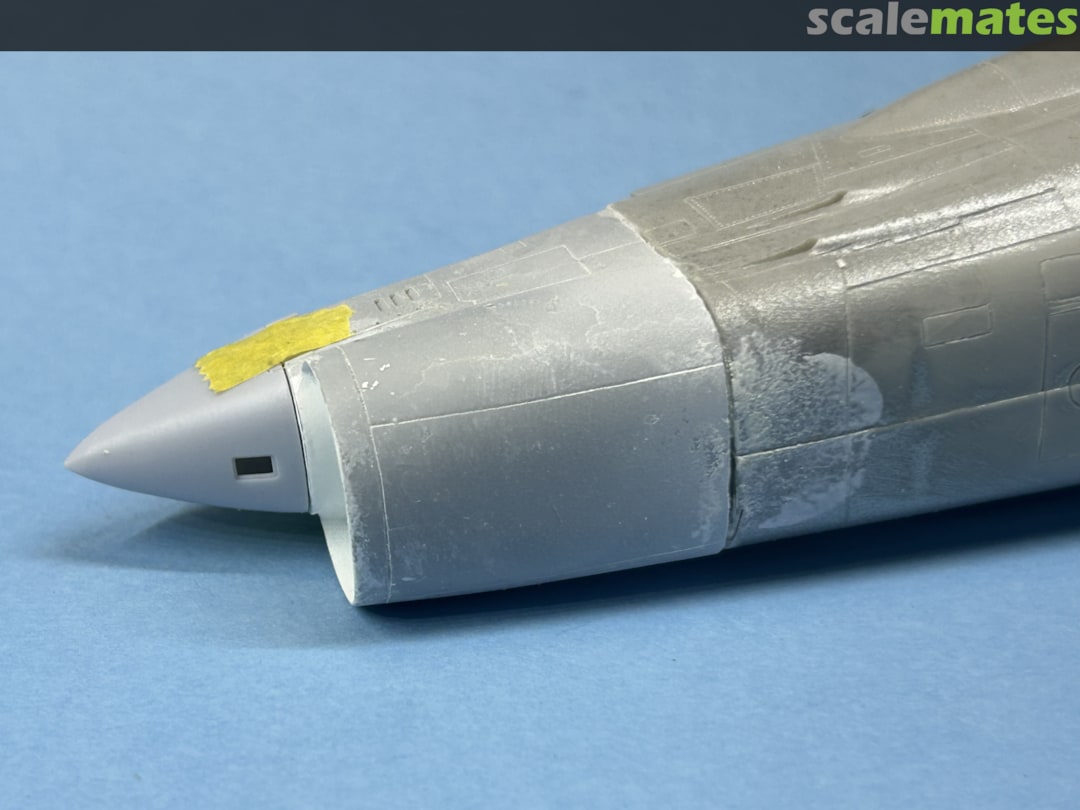
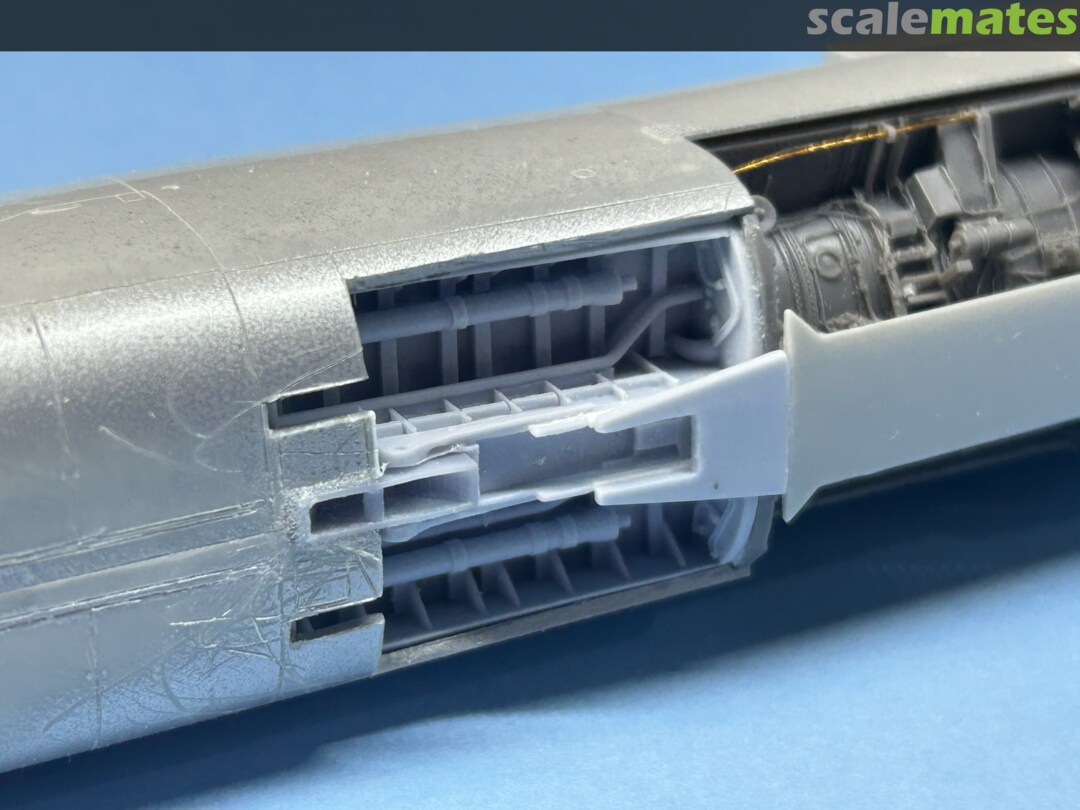
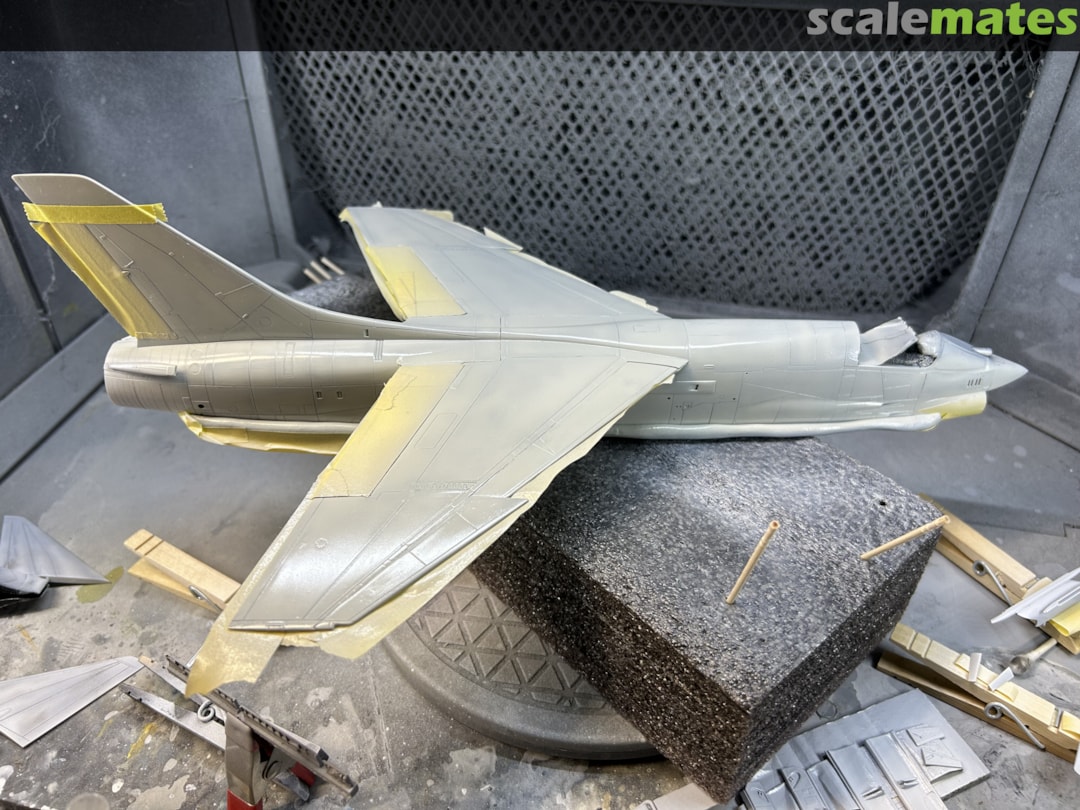
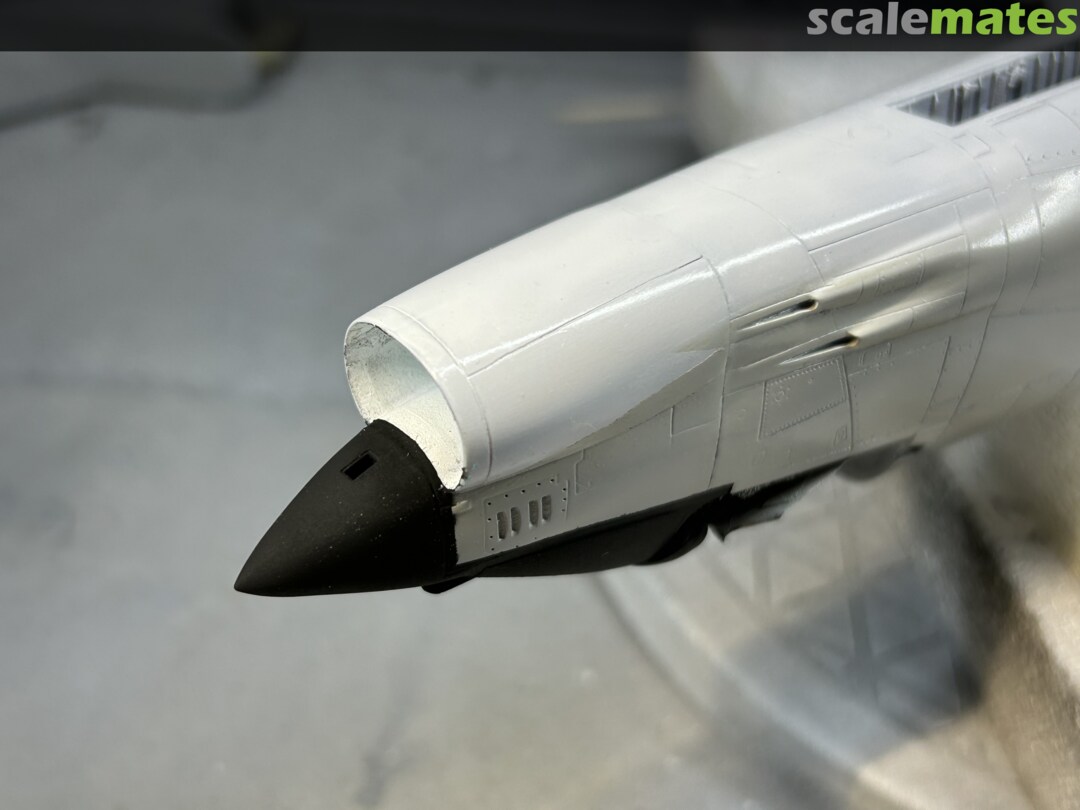
So after the botched "nose job" I put this project on hold, and also decided to change the plane I'm building. The VF-111 jet is "special" and I want to save that one for later. Since I really wanted an accurate early F-8 nose, I worked with someone who had access to CAD and 3D printing, and we came up with a more accurately shaped nose cone that fits the CAT4 forward fuselage piece. It fits excellent and much better matches the shape. For the scheme, I'm going to give CAT4's F-8D decal sheet a try. The VF-32 decals have a problem with the "AC" tail code lettering, they're too bold looking. So I'm going to solve this with some tricky masking and painting instead. I've been prepping the kit for the conversion parts. Also been prepping some detail parts, mainly some Aires gear bays and Wolfpack airbrake.
1 24 June, 18:46
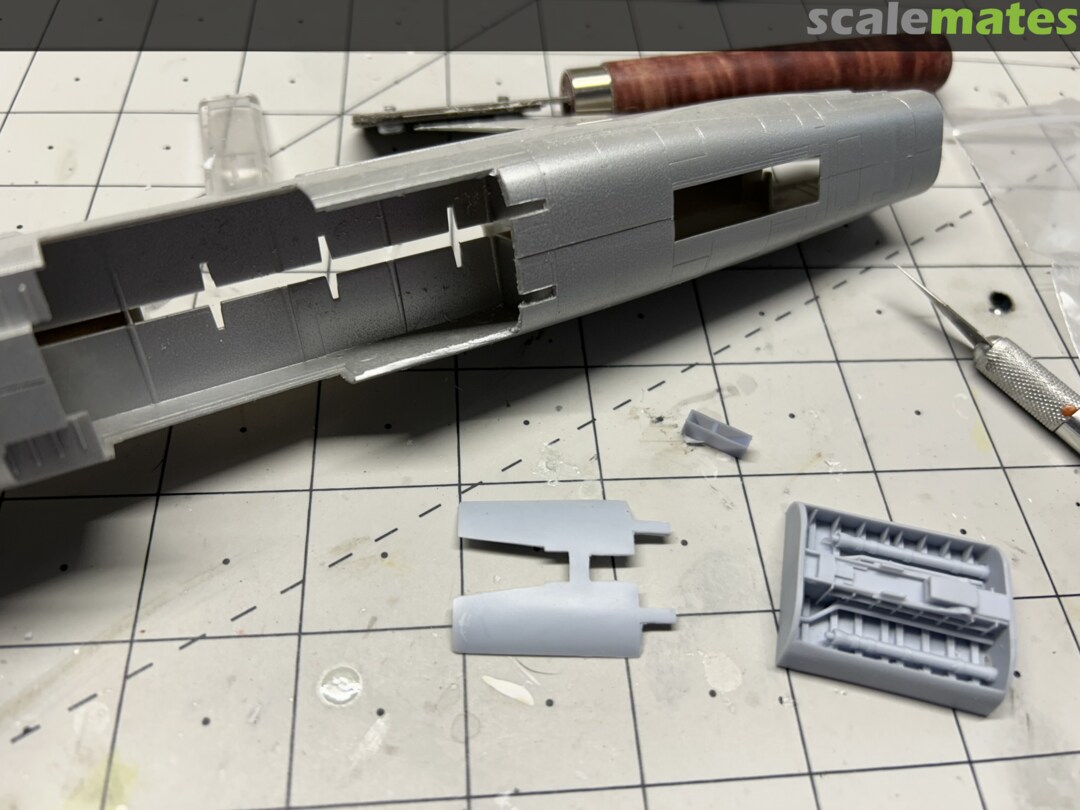
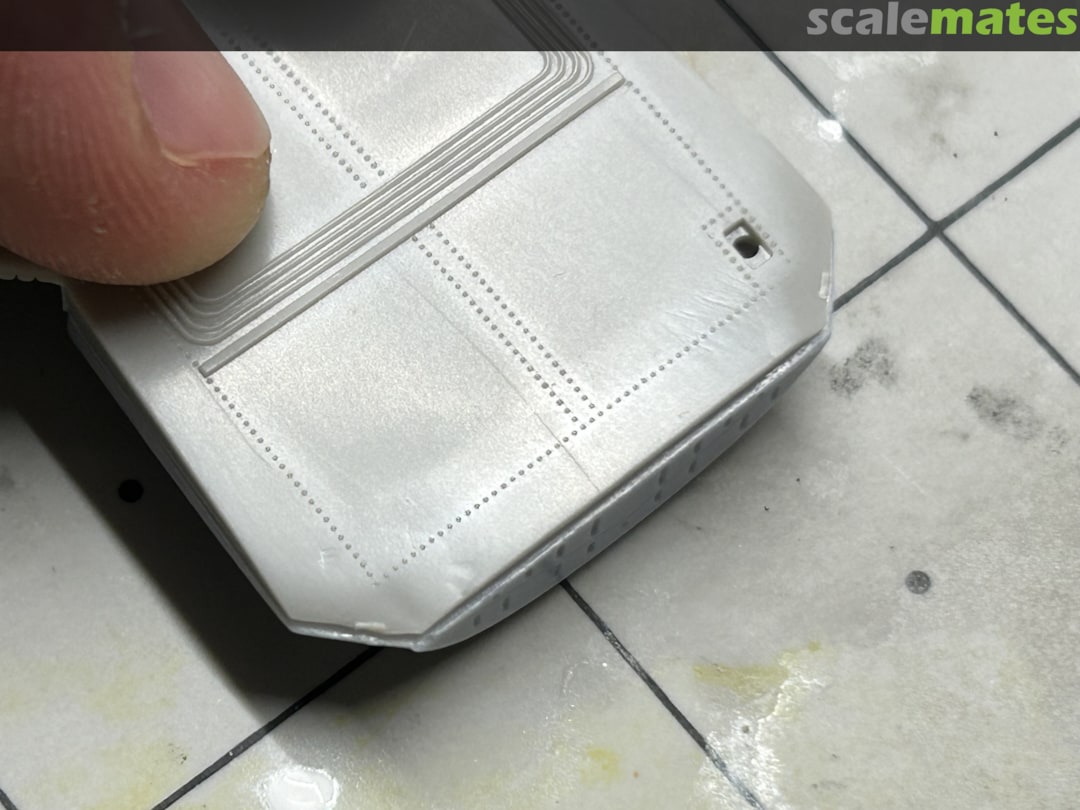
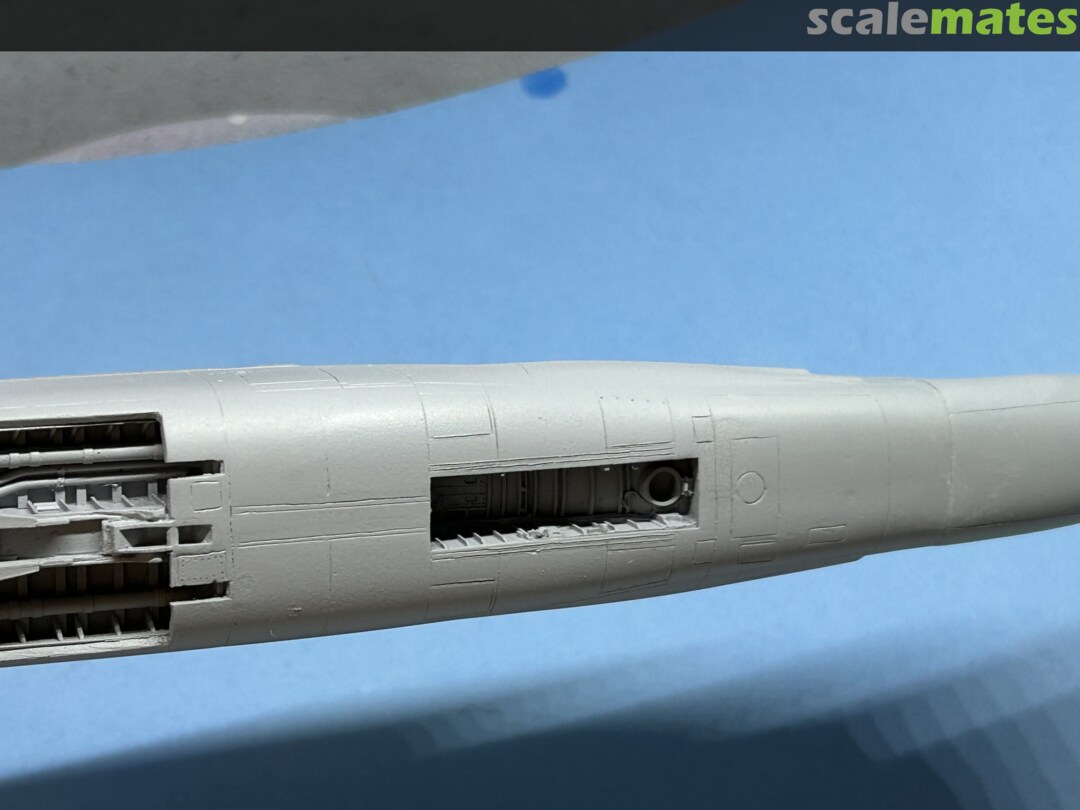
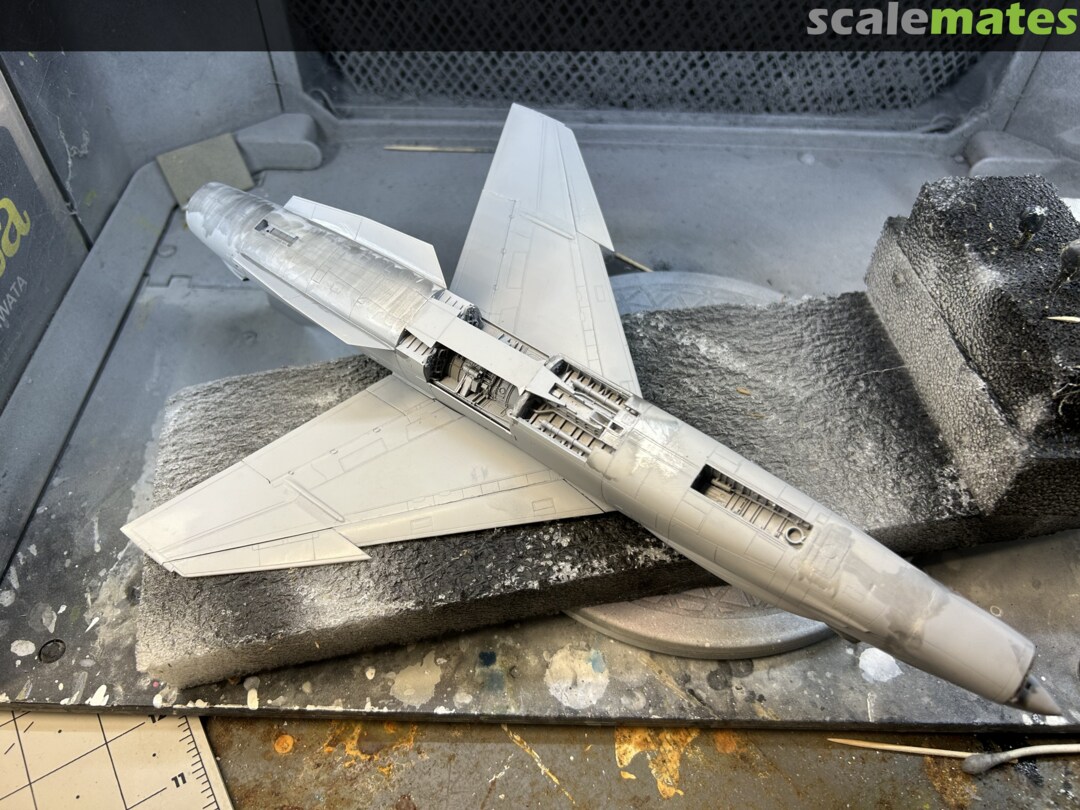
I added some photos of work I did on the Aires gear bays and other parts of the conversion. Were the gear bays worth it? I dunno, for the nose gear bay, it was a lot of grinding off the gear bay from the kit intake and resin part to get anything to fit. Think I'd rather spend my time scratchbuilding some details. But at least with the resin bays, there's no ejector pin marks to fill in.
1 25 June, 13:09
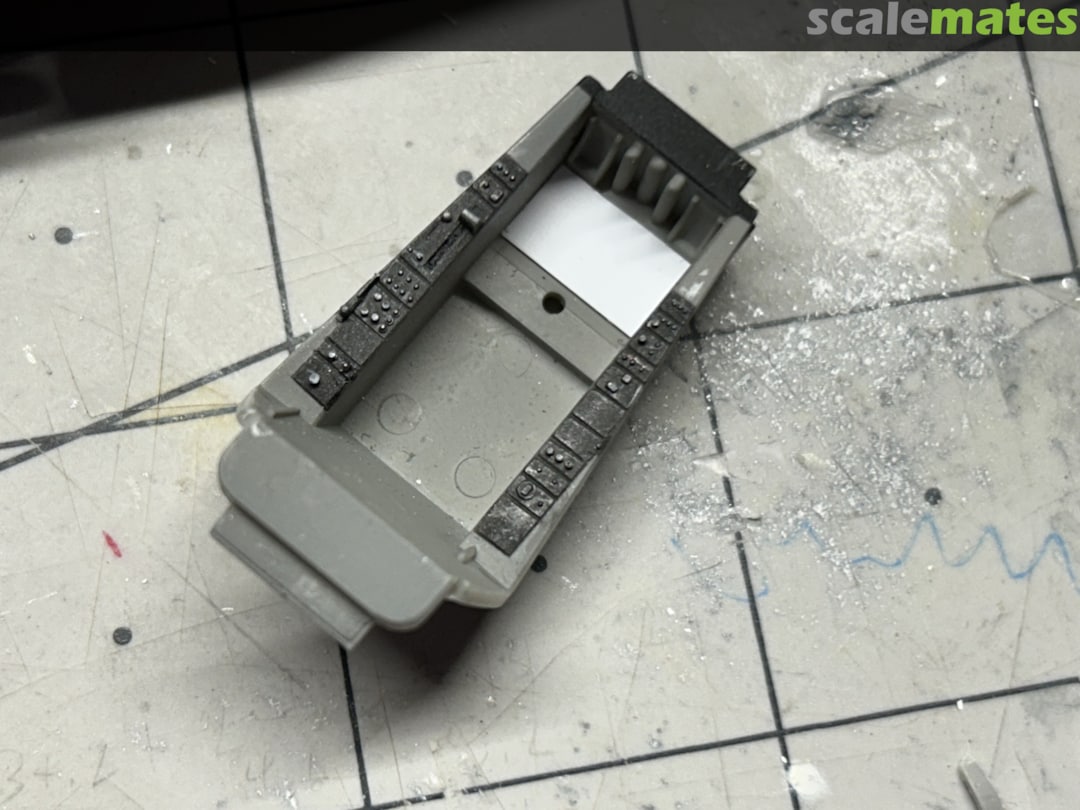
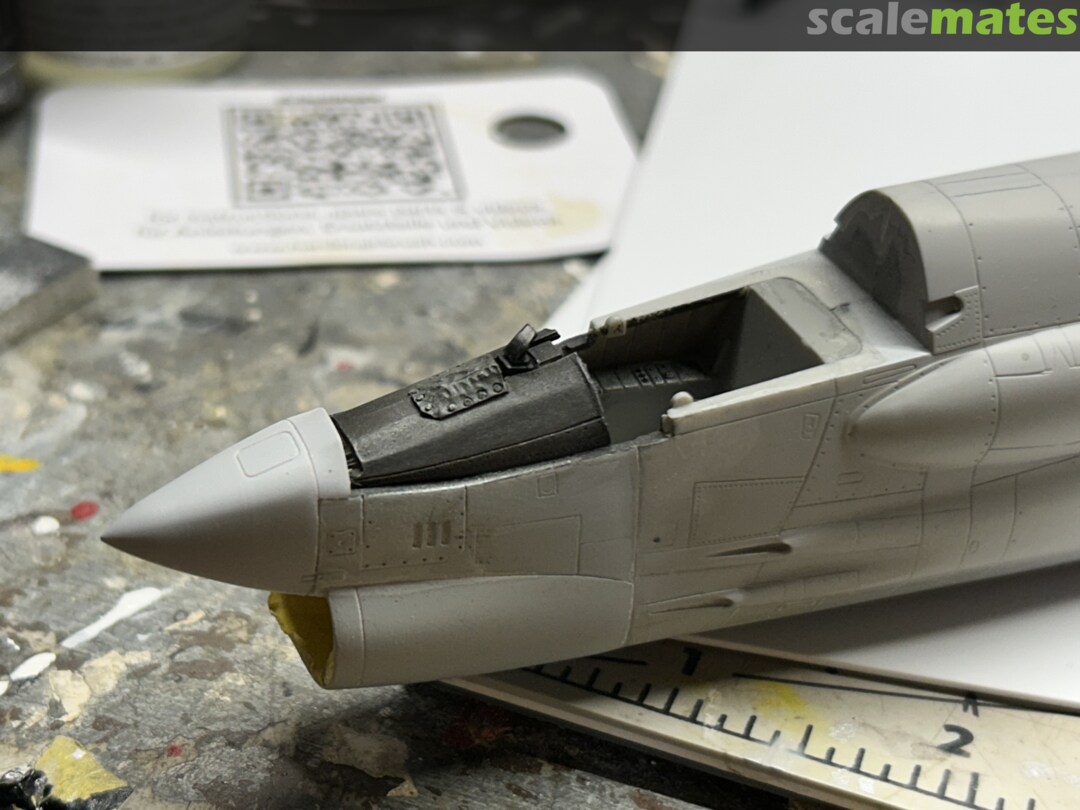
Hi gents thanks for being here. Tough to get time to build in the summer but I've been getting a few things done. Mainly making sure everything fits before fuselage assembly and getting the cockpit painted.
1 22 July, 04:20
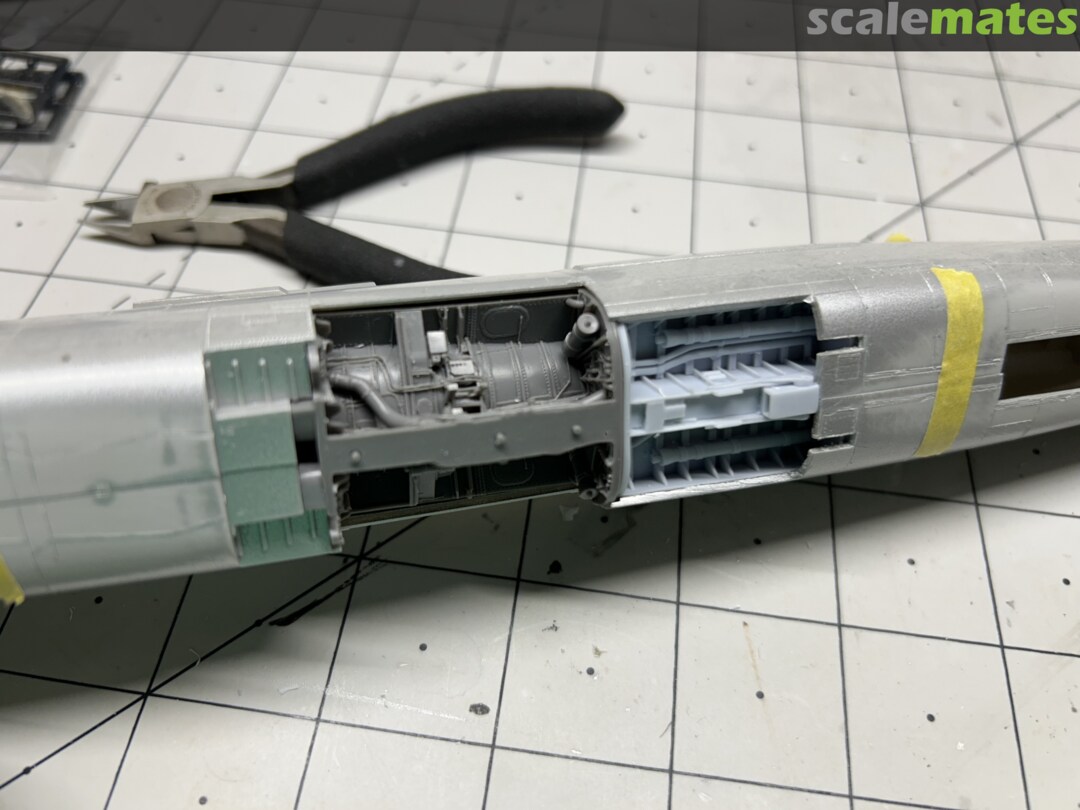
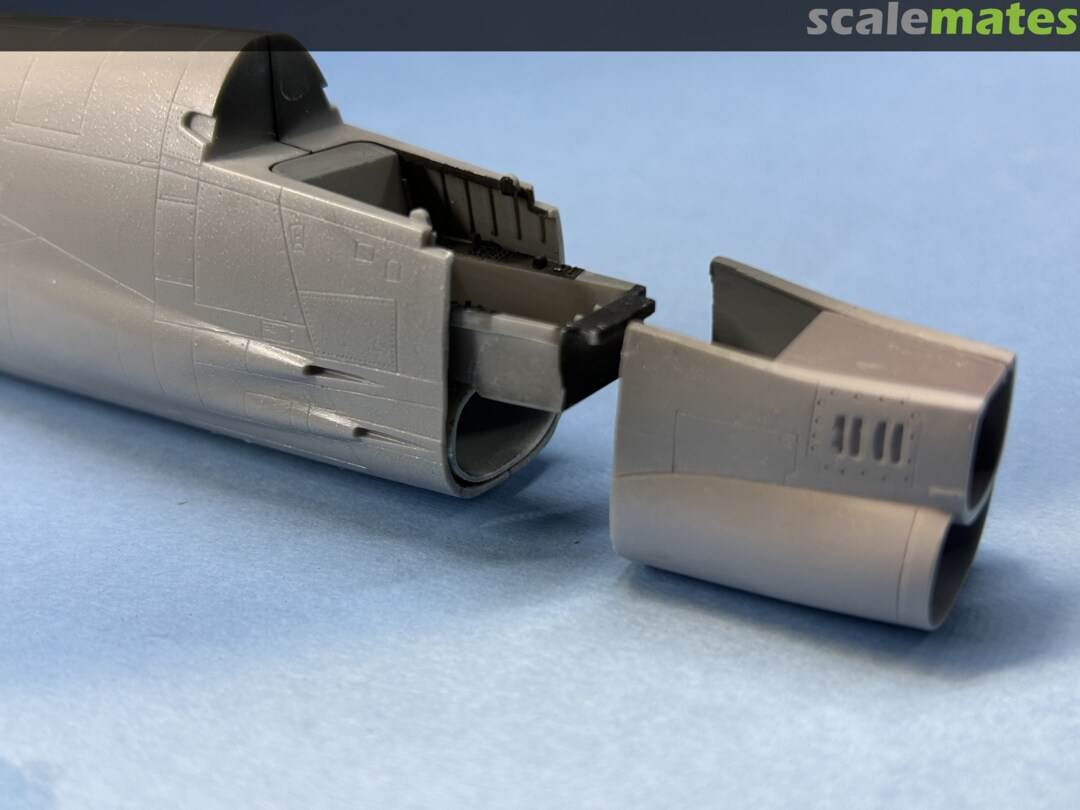
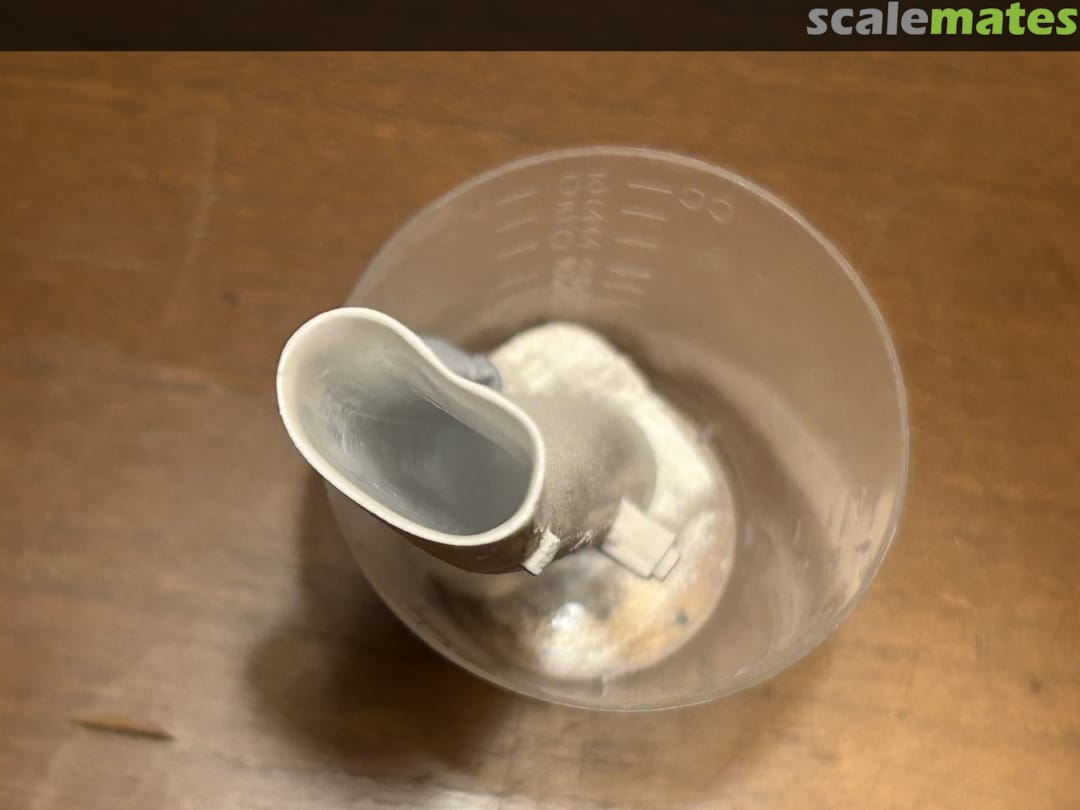
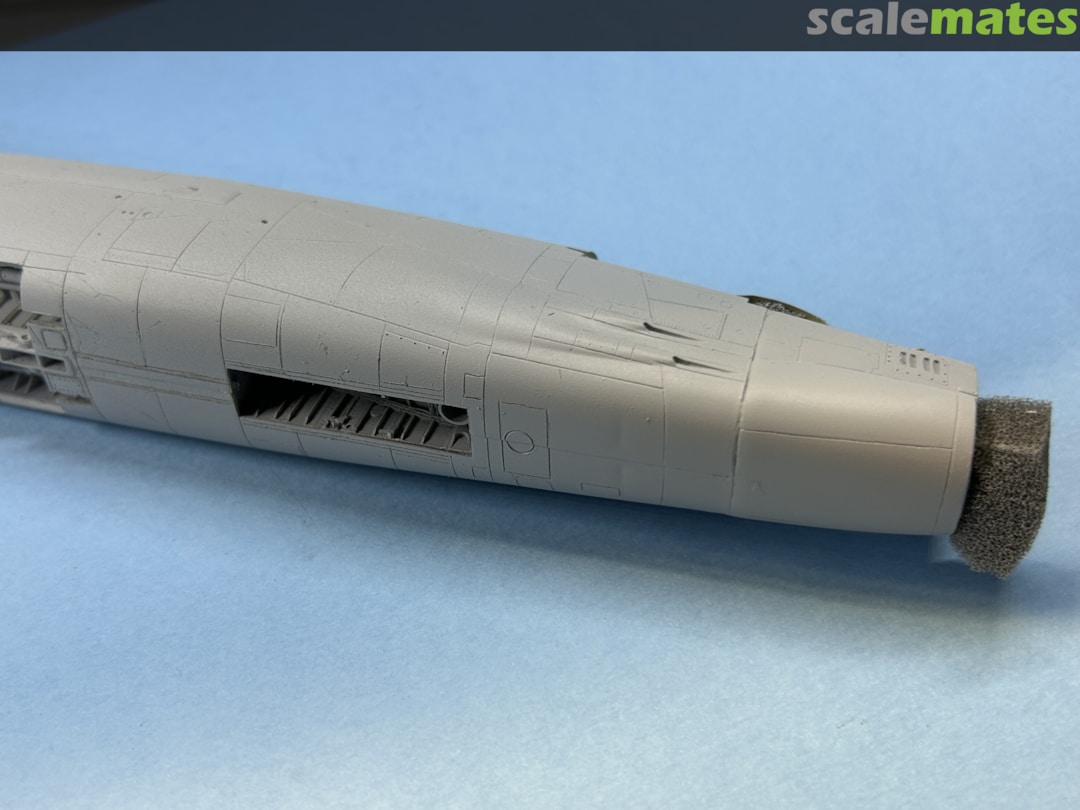
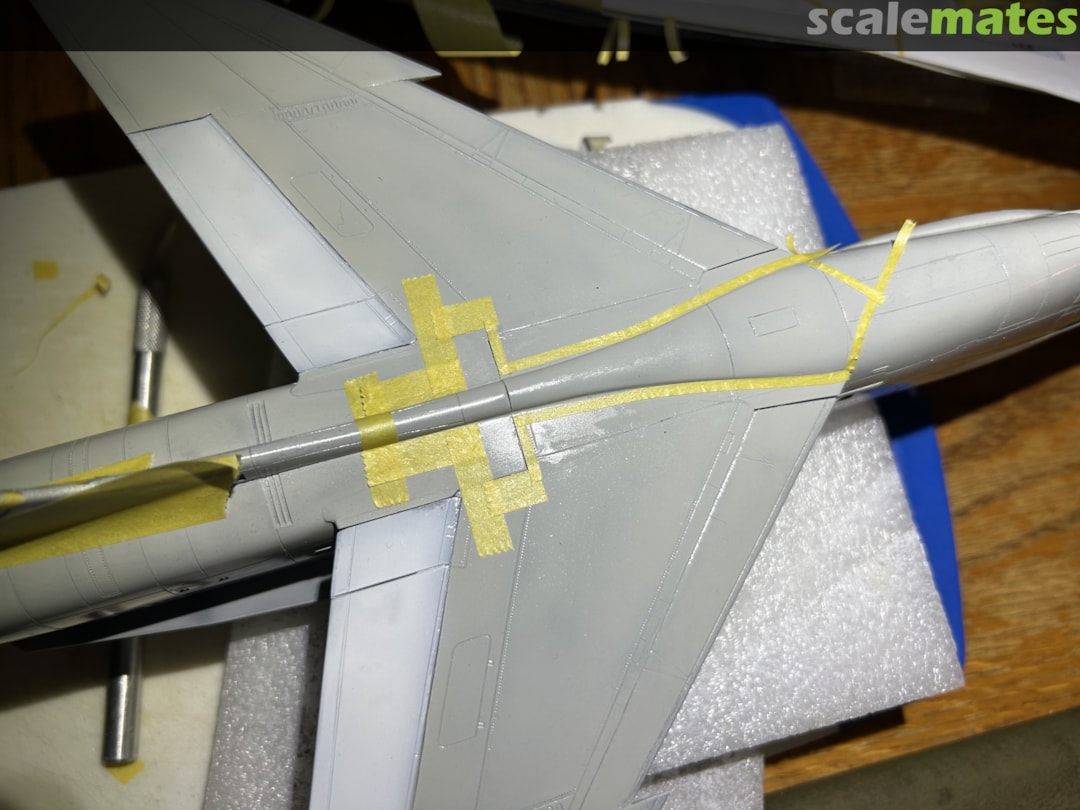
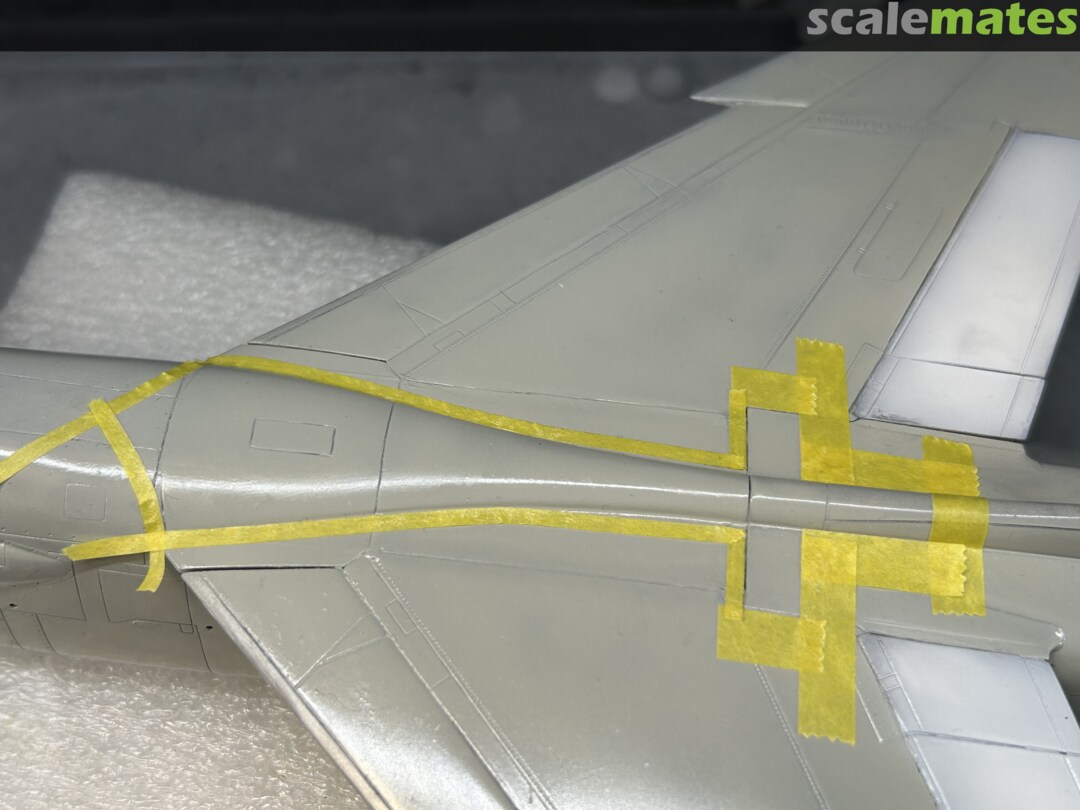
Tricky part to get right is the intake trunking, which should align with the forward fuselage part intake. I thinned the lip of the trunking so it would be easier to align with the intake, and I'm happy with how it lines up.
1 25 July, 04:21
Thanks Sergej! Doing that "pour method" to get the intake trunking looking good.
1 29 July, 13:26
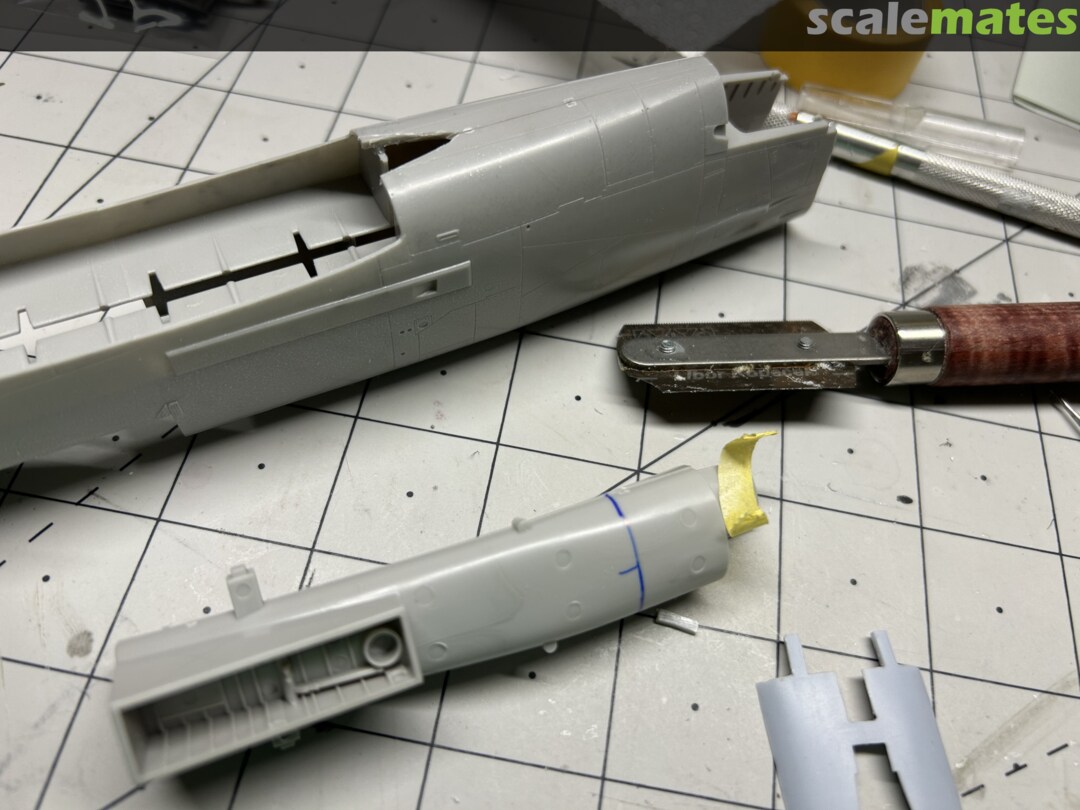
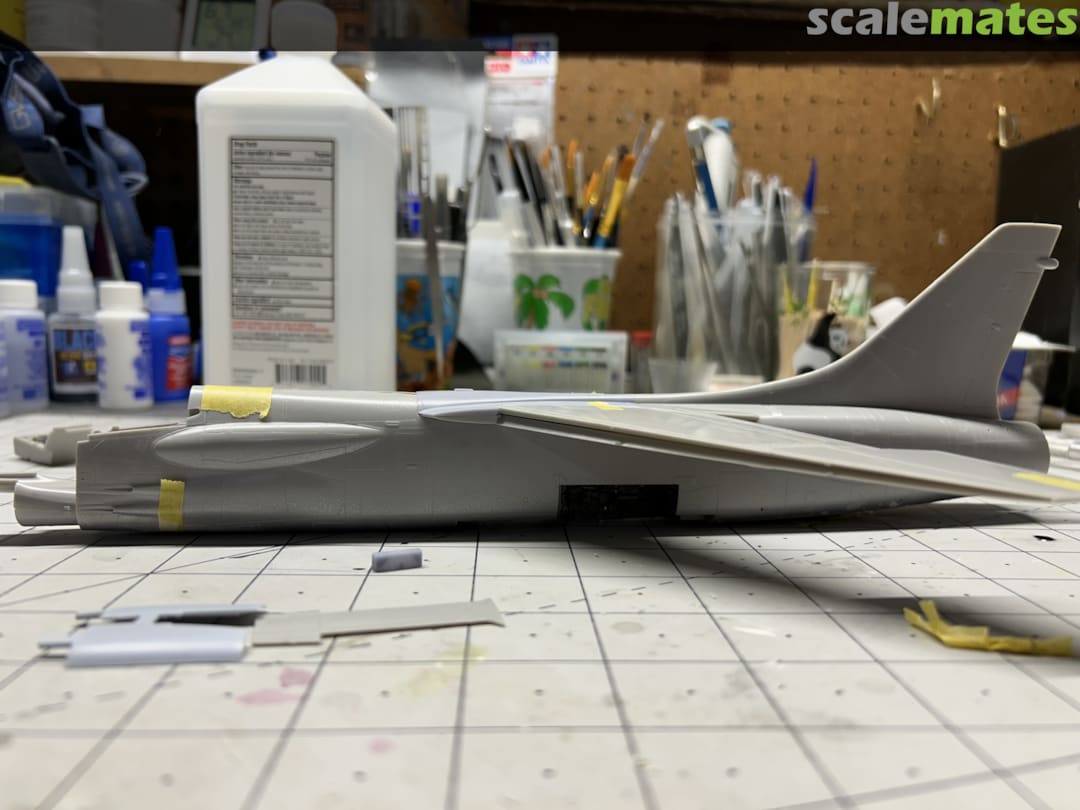
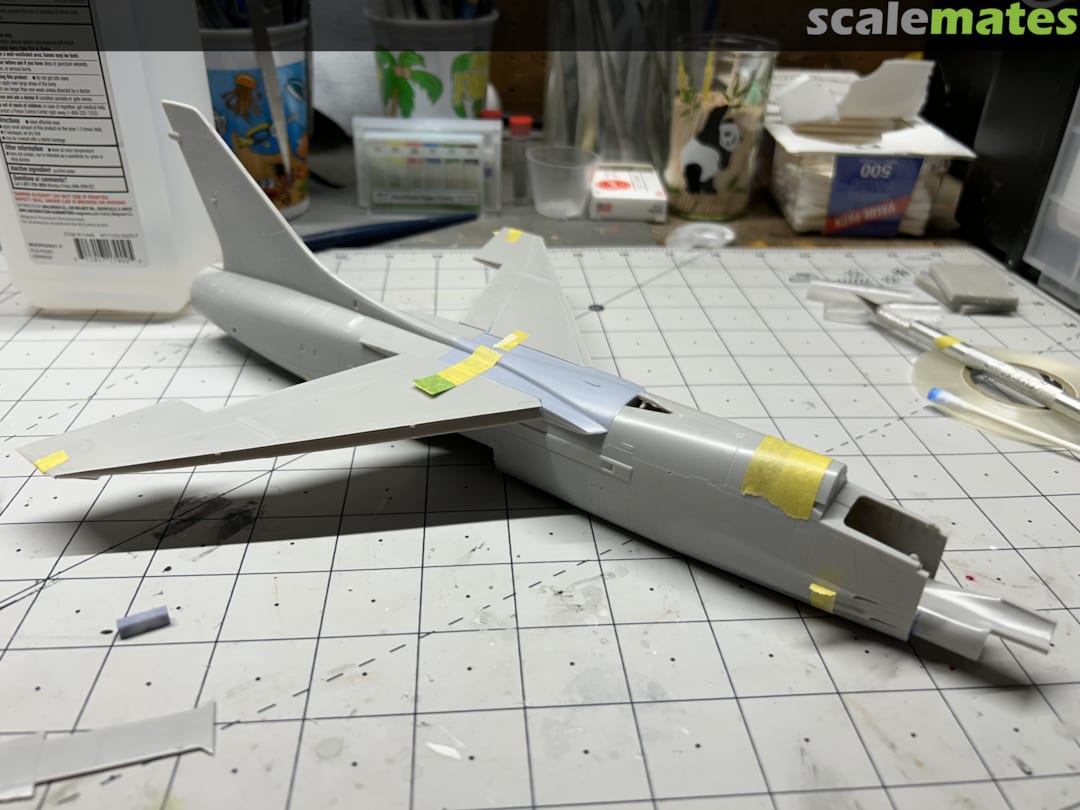
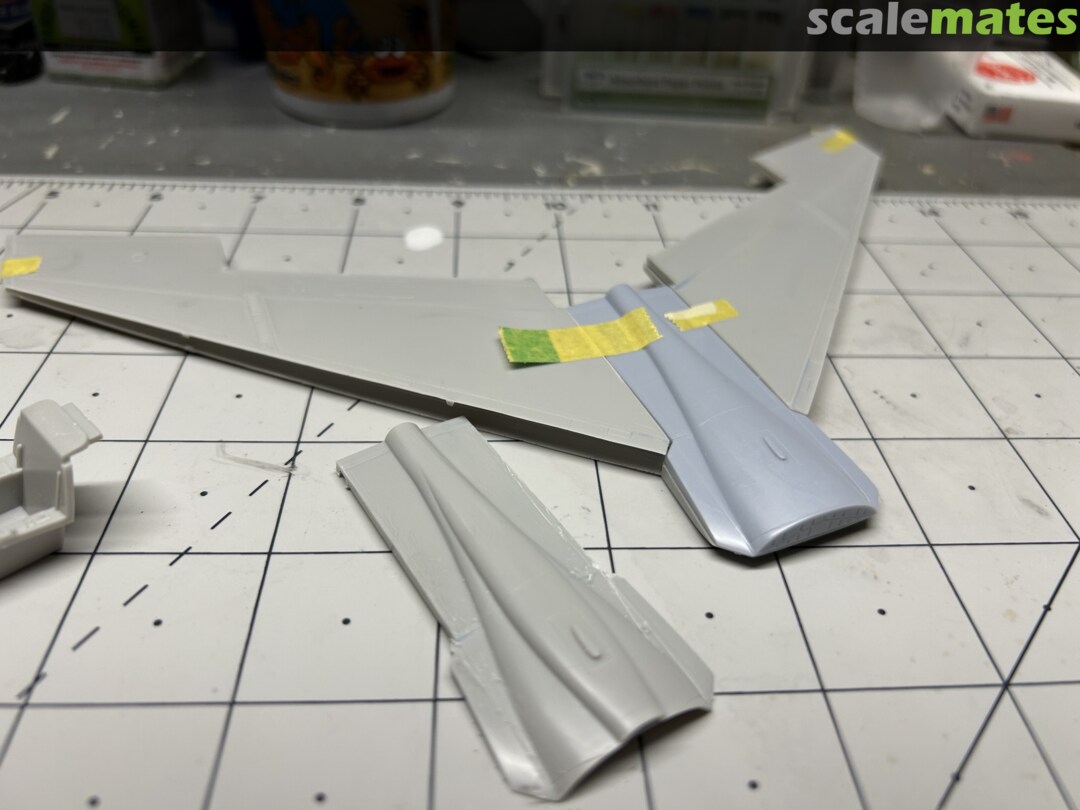
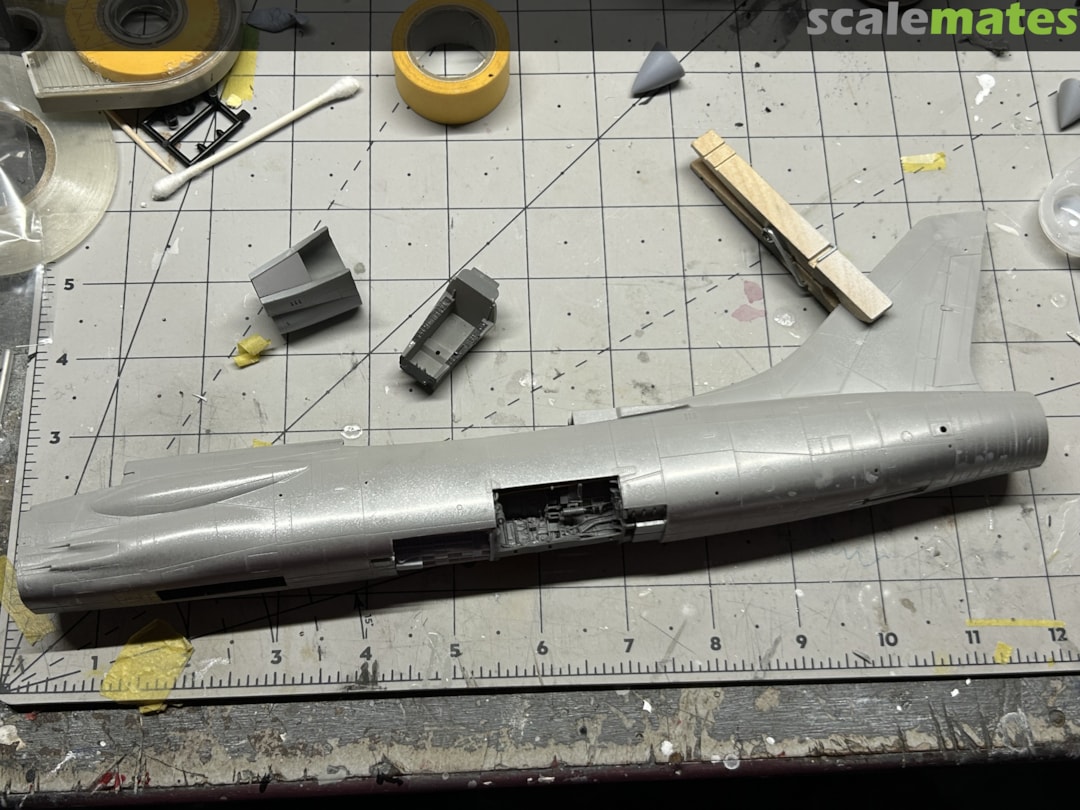
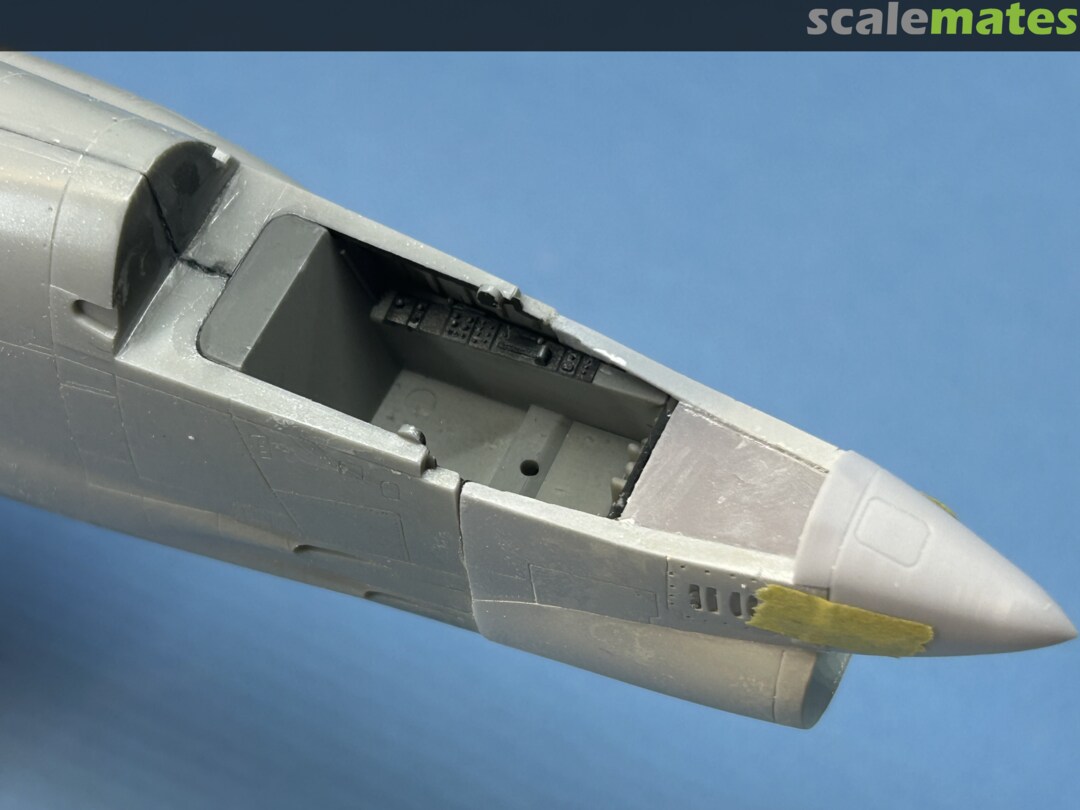
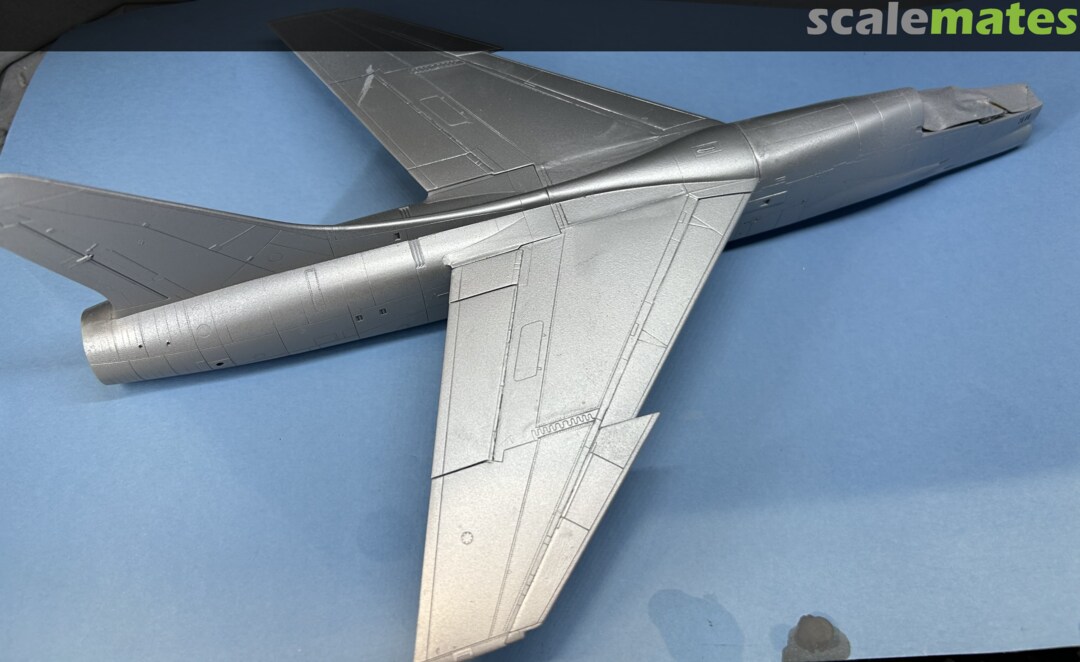
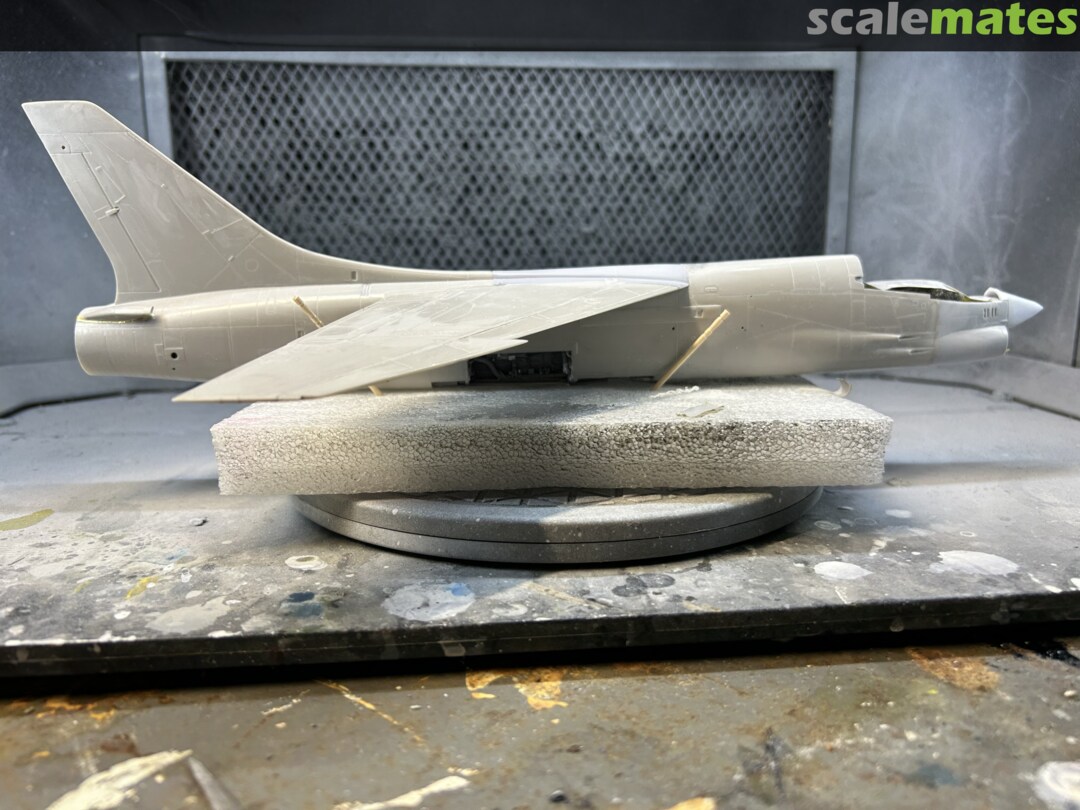
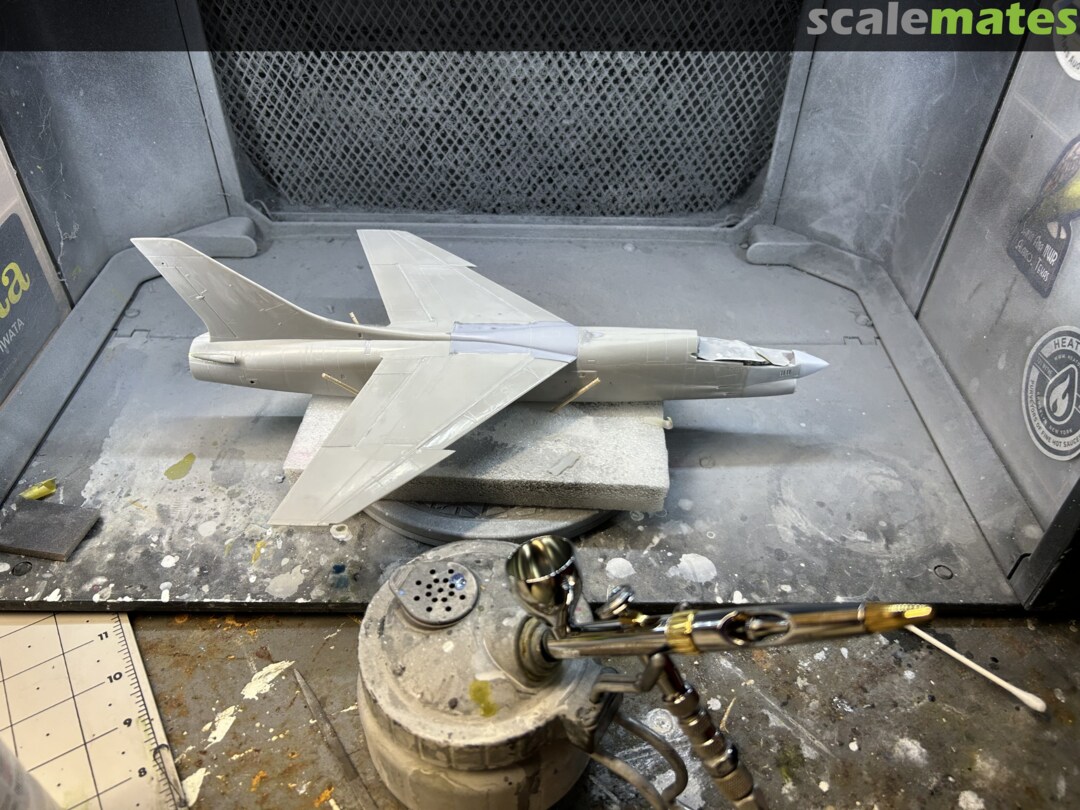
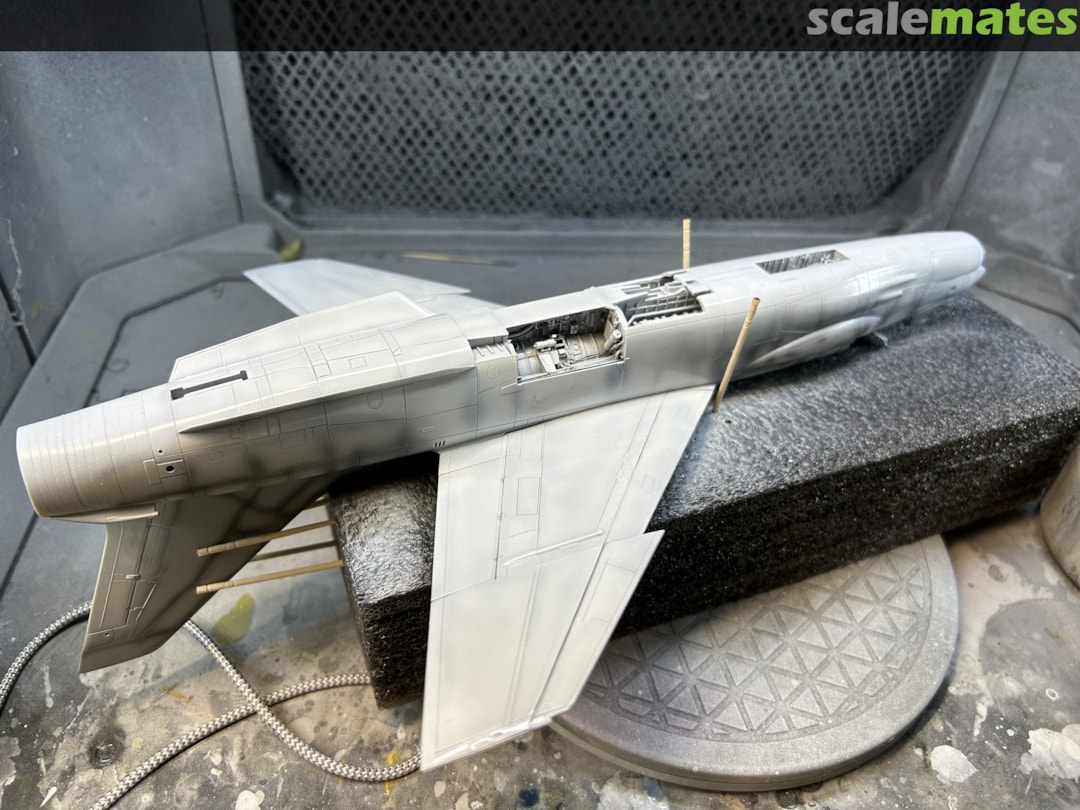
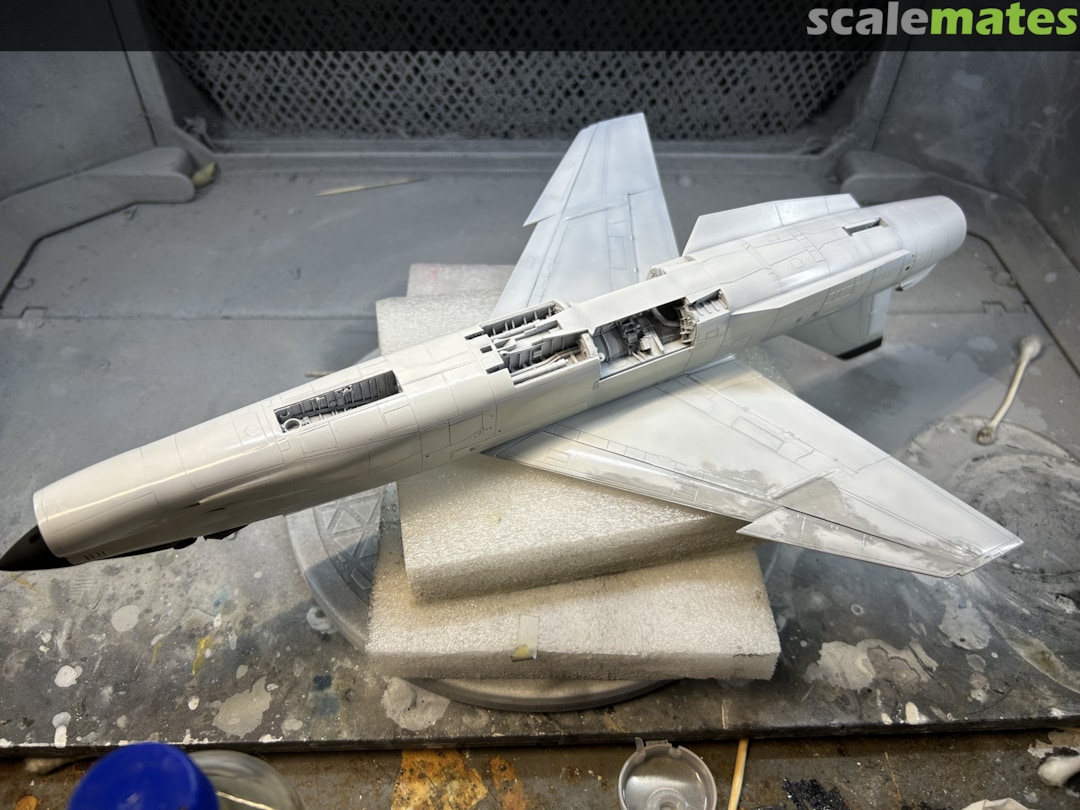
Fuselage finally together! Took quite awhile to make sure the interior components fit just right. The halves went together very well as a result. Next step is adding the CAT4 forward fuselage, filling in the gap of the removed avionics hump, and getting the fuselage and wings ready to paint!
6 August, 12:47
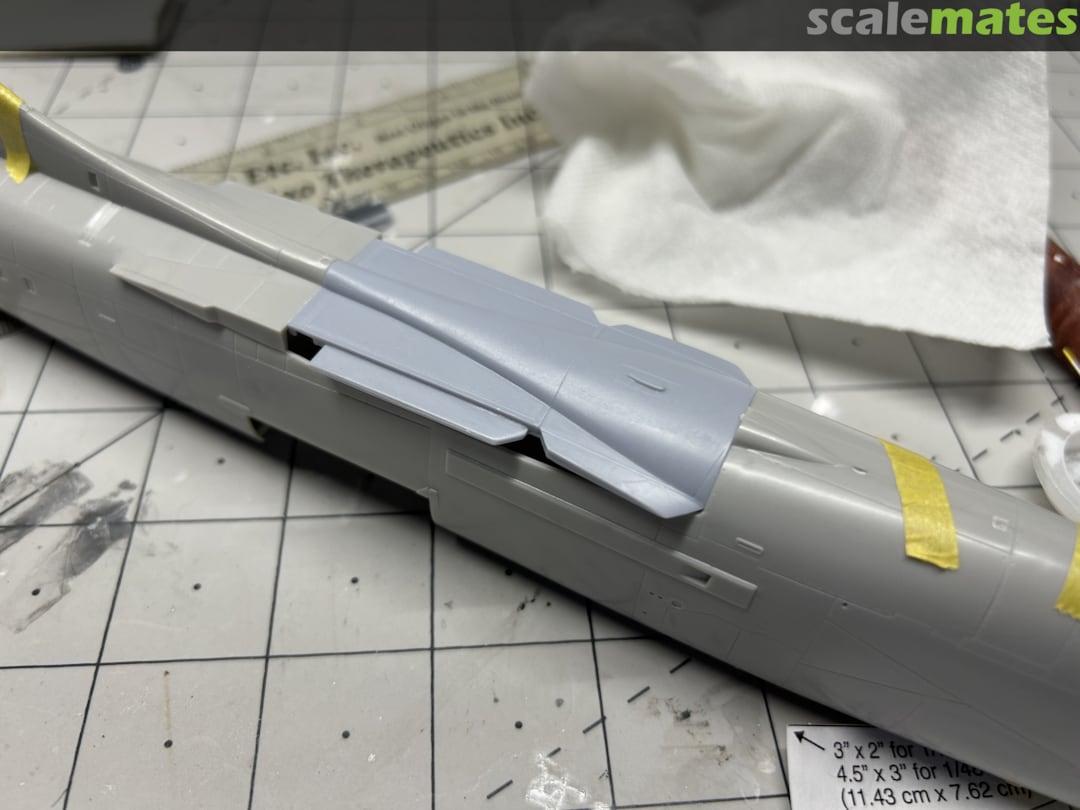
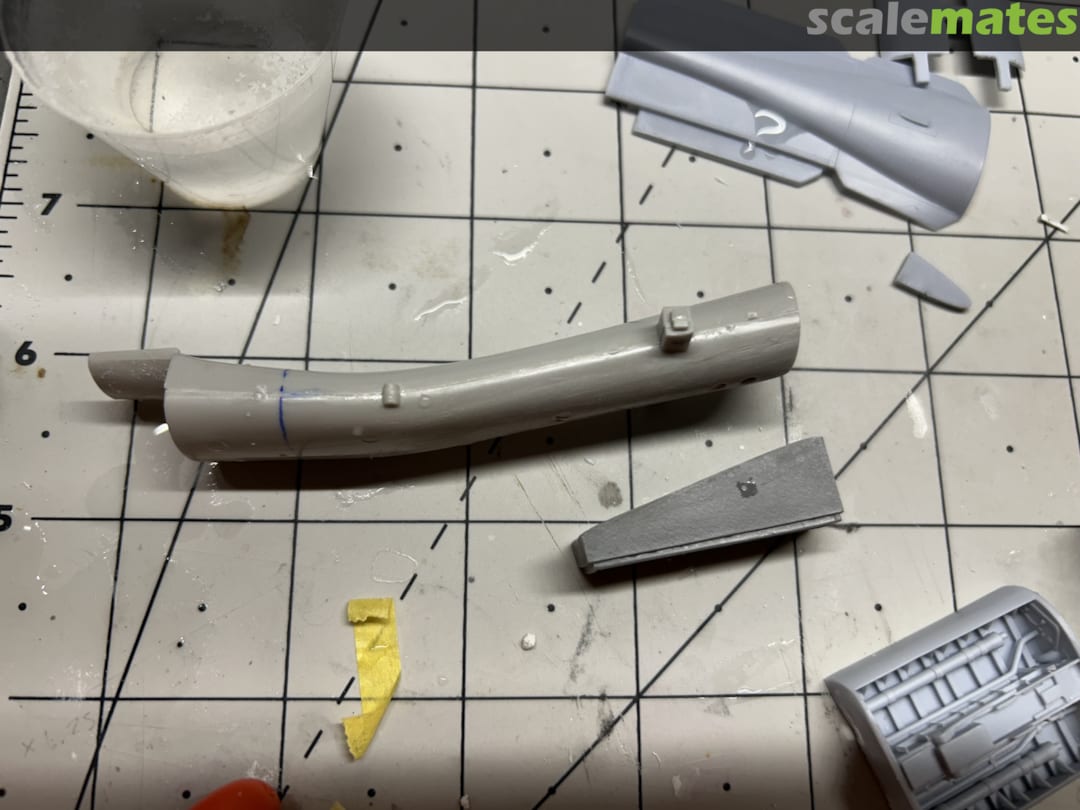
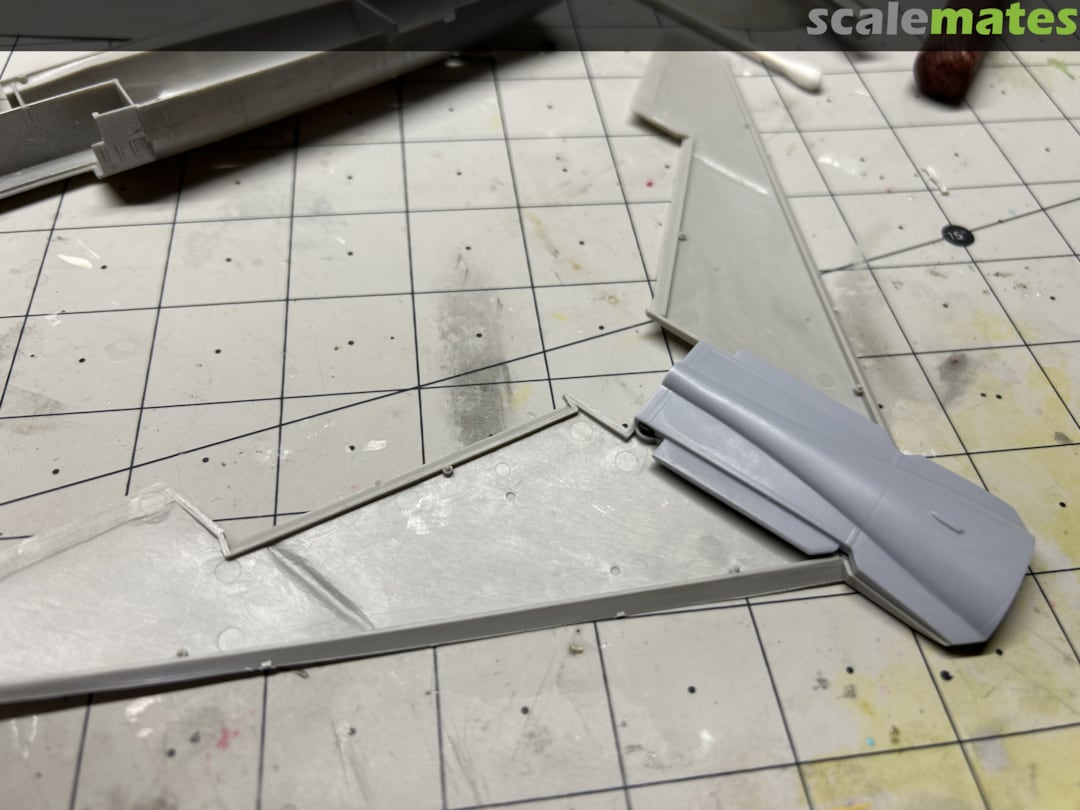
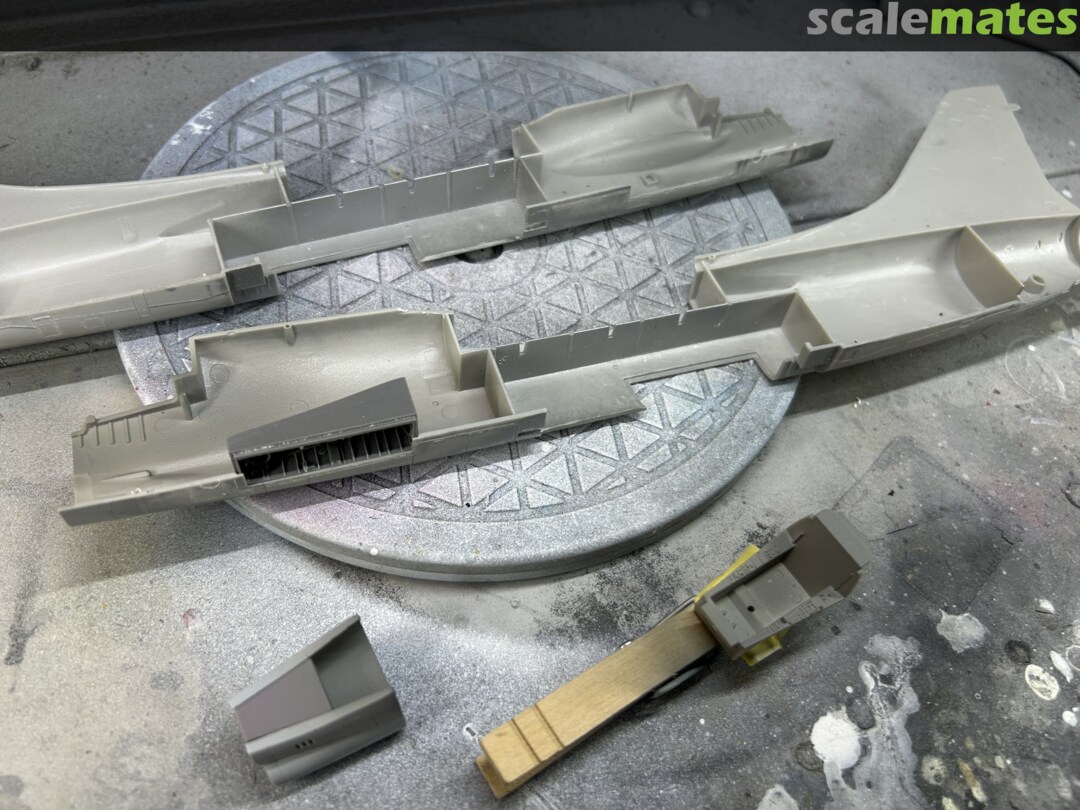
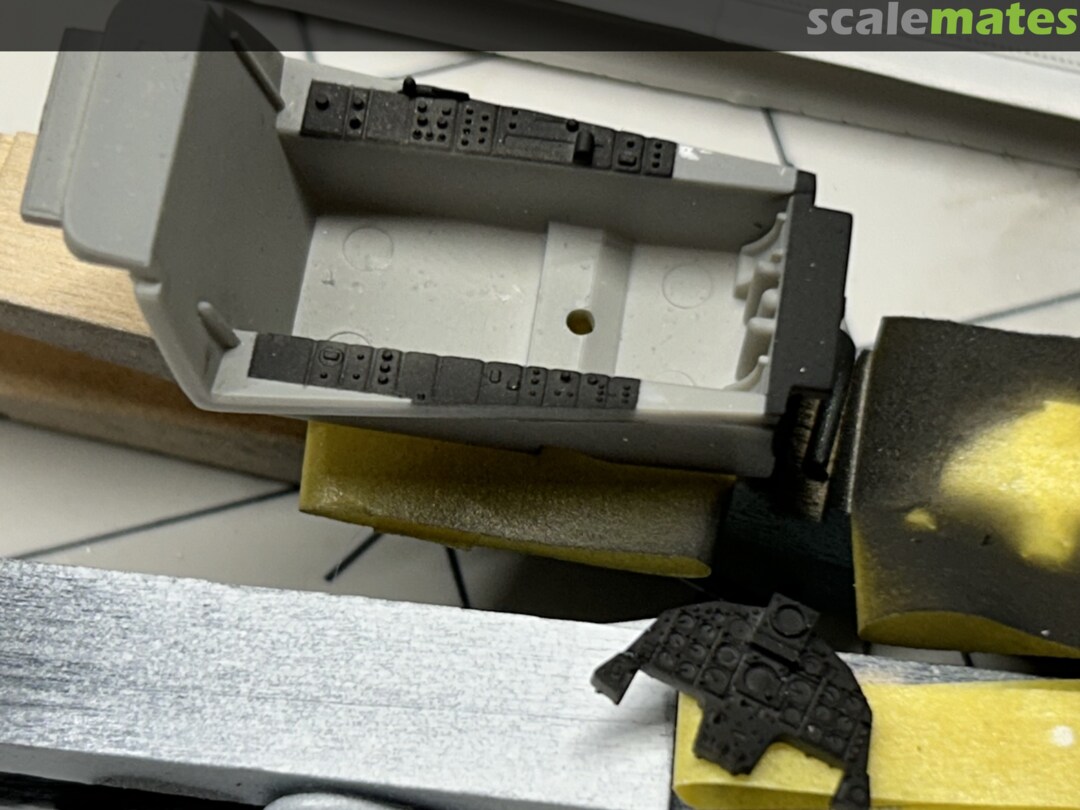
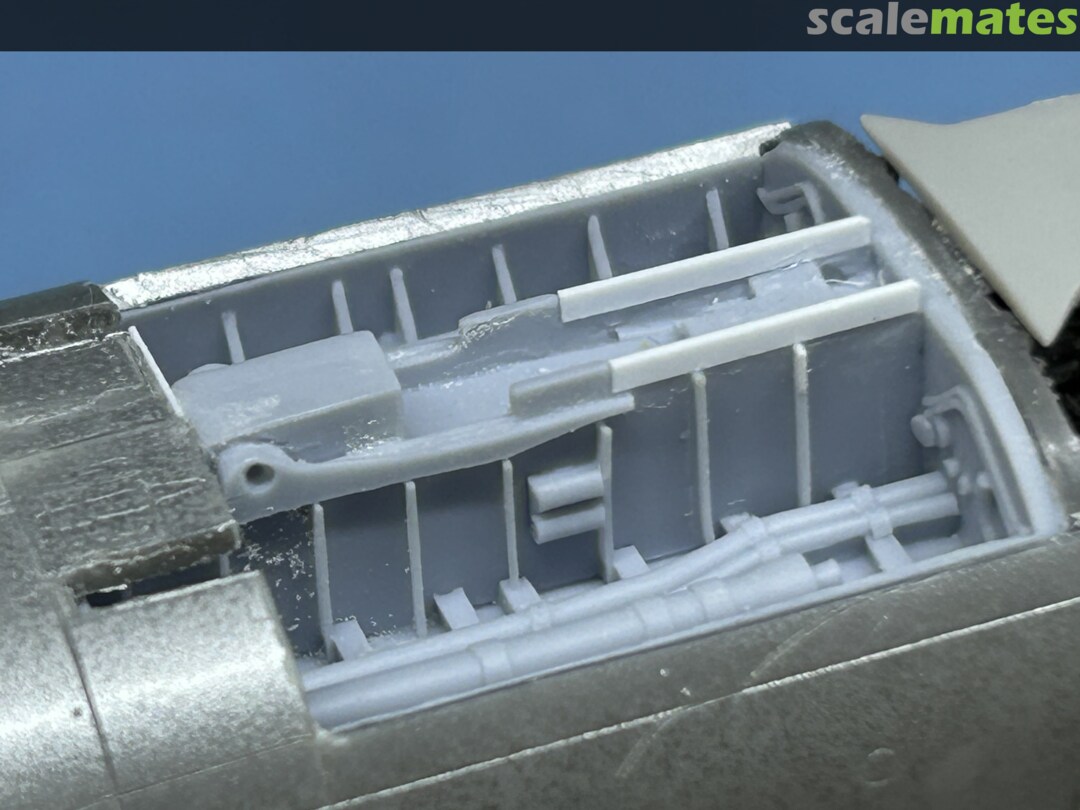
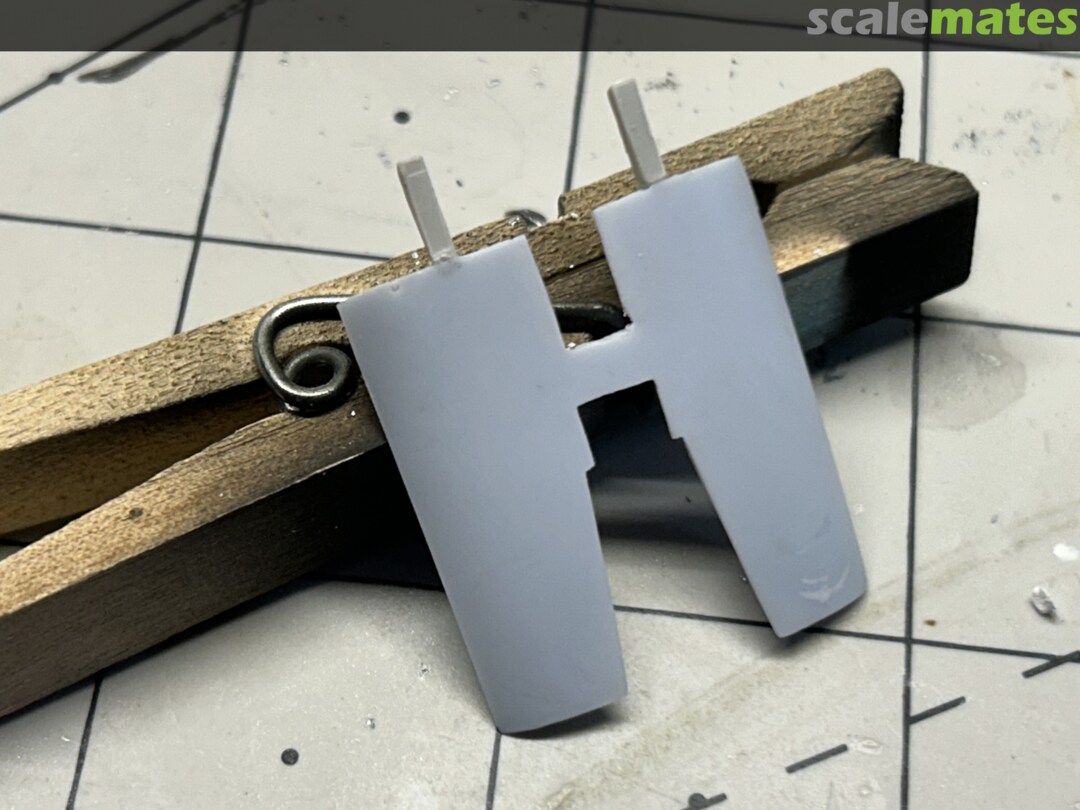
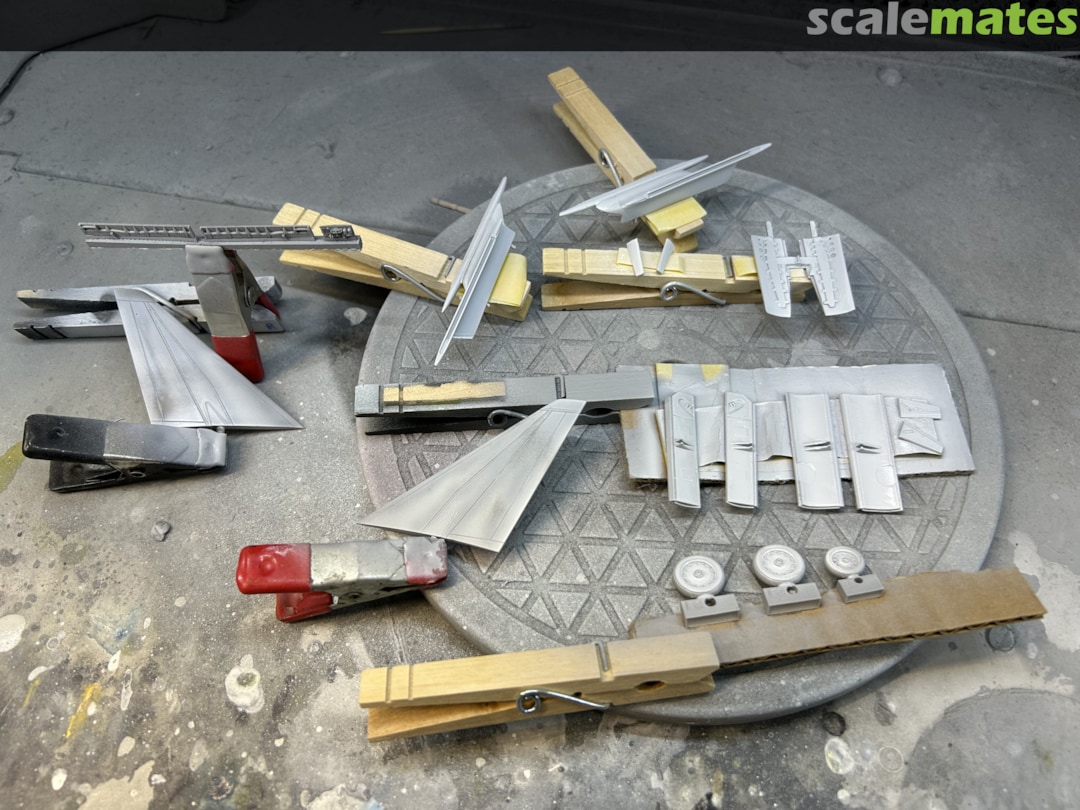
The Wolfpack airbrake bay needs some plastic strips to support the resin plate that's part of the fuselage. Also some of the interior "ribs" were fragile and had to be rebuilt with strips.
15 August, 13:39
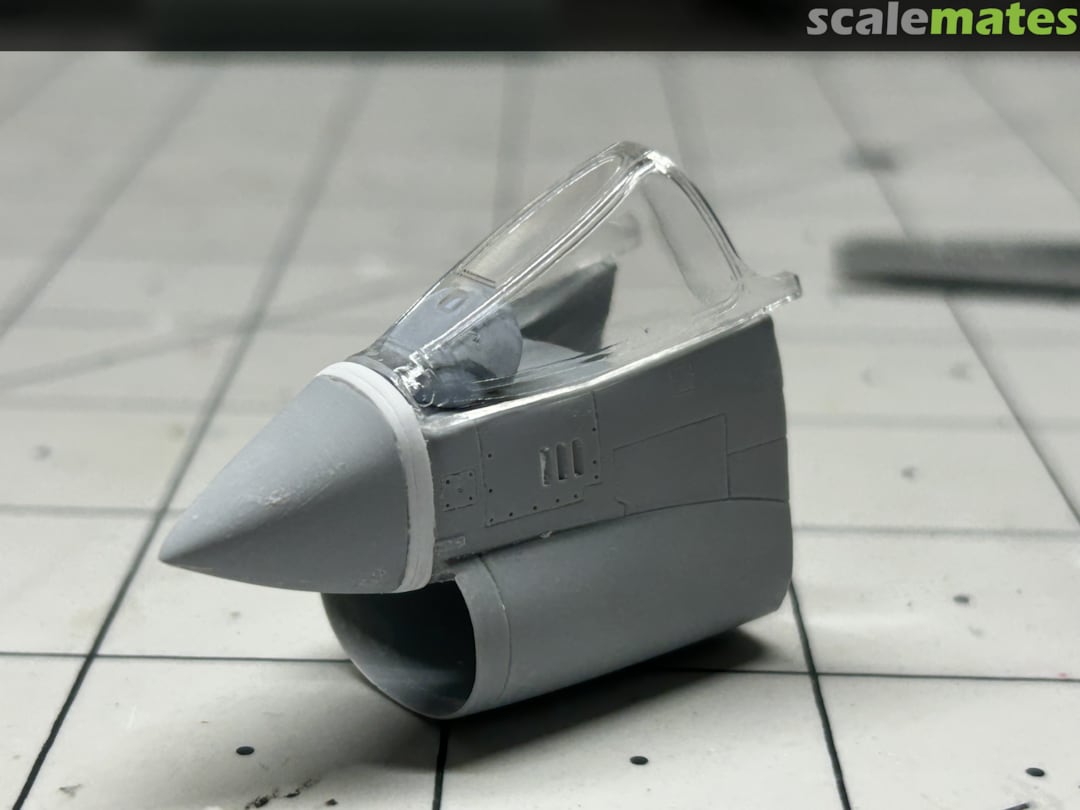
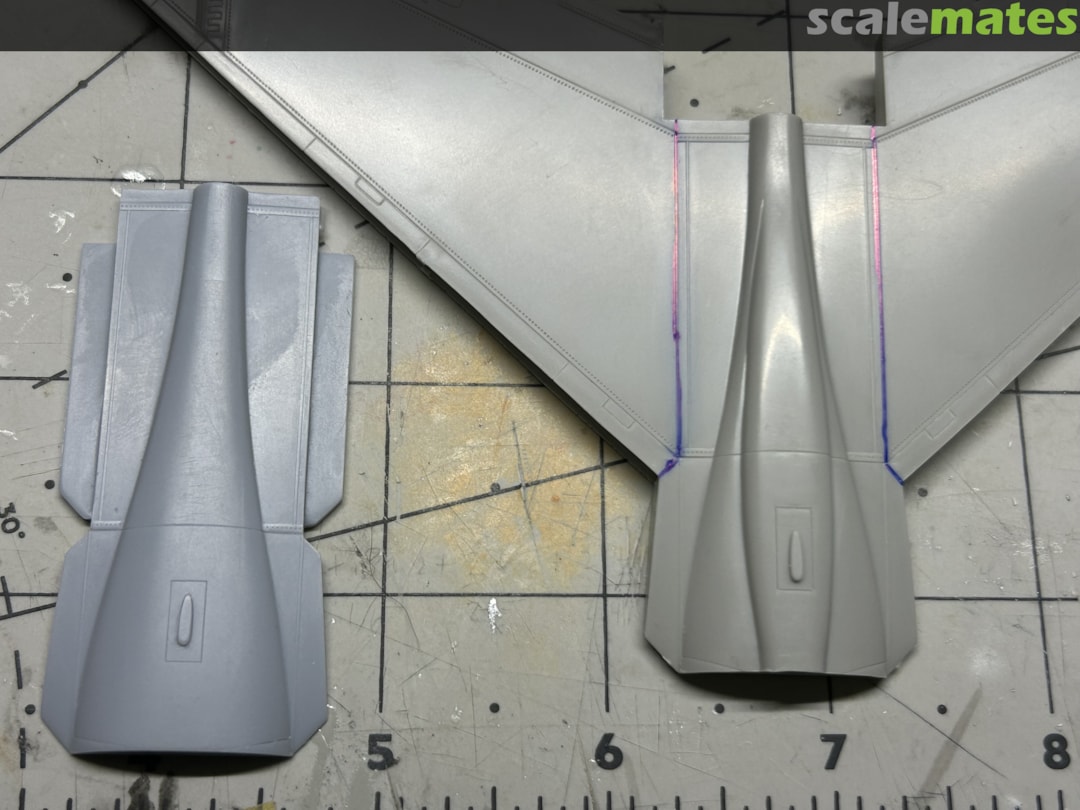
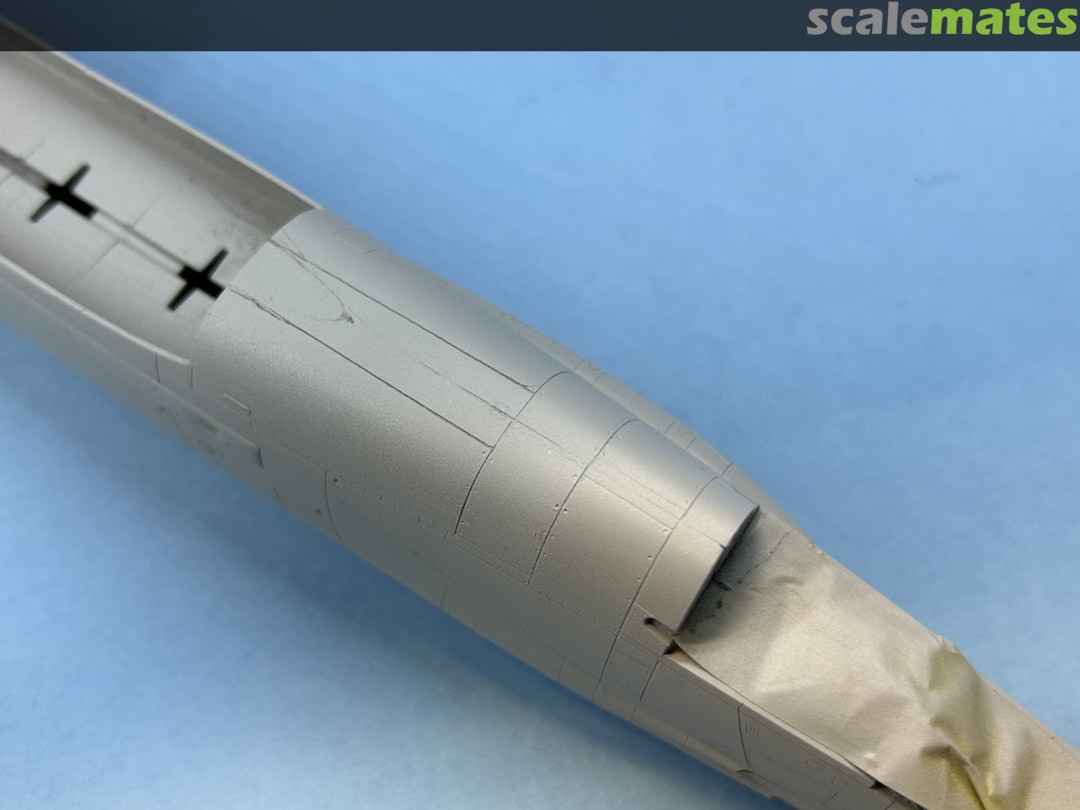
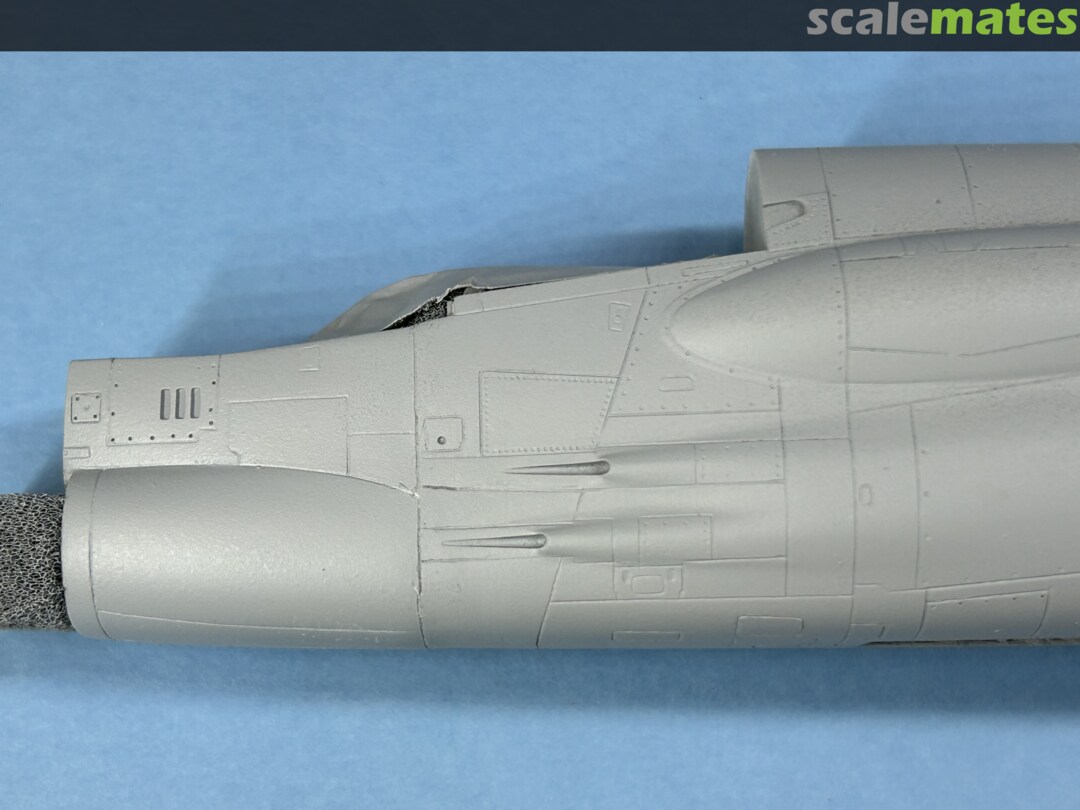
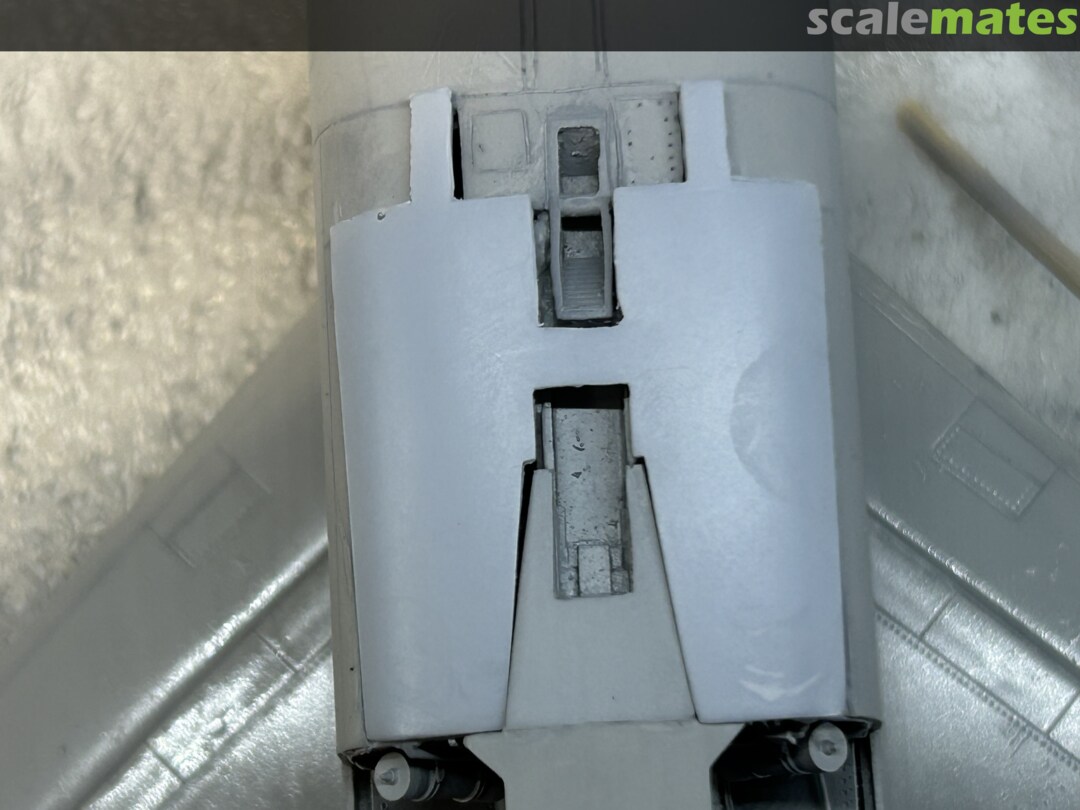
Attached the forward fuselage. Fit is far from perfect, with some slight steps on both sides to make flush, and some gaps all around to fill. Overall it looks nice though. The nose is going to be painted separately and glued on after. I also added the catapult pin to the airbrake bay.
1 20 August, 04:13
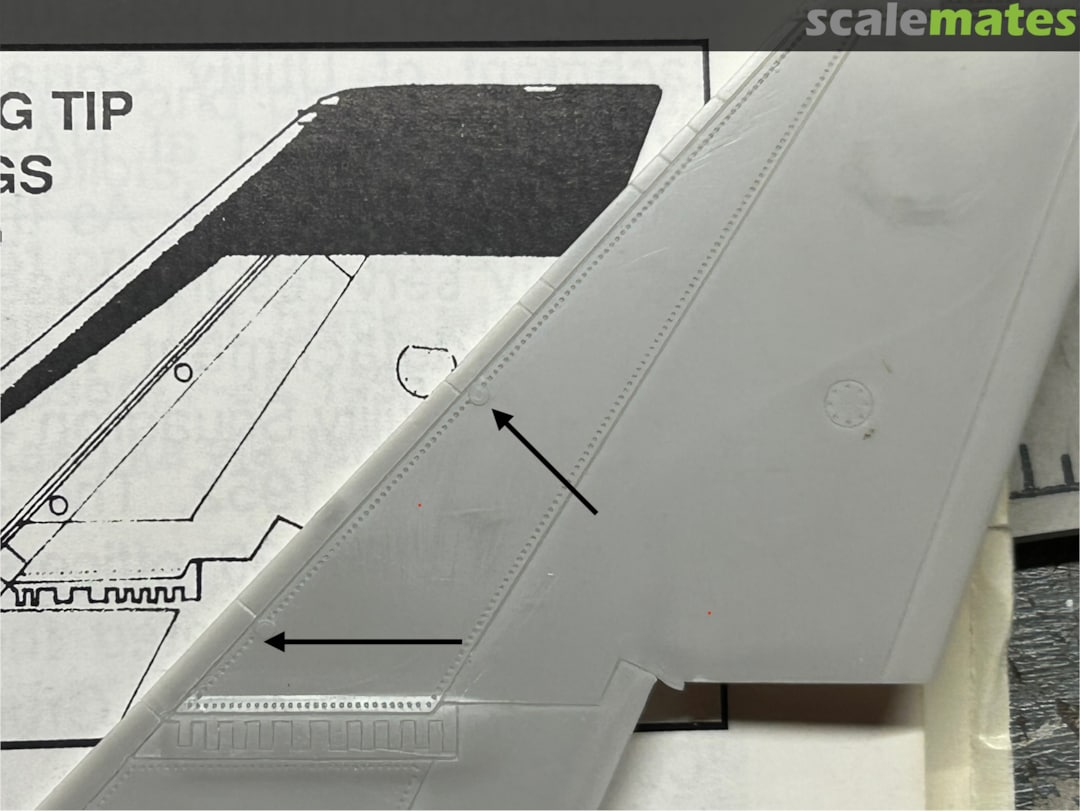
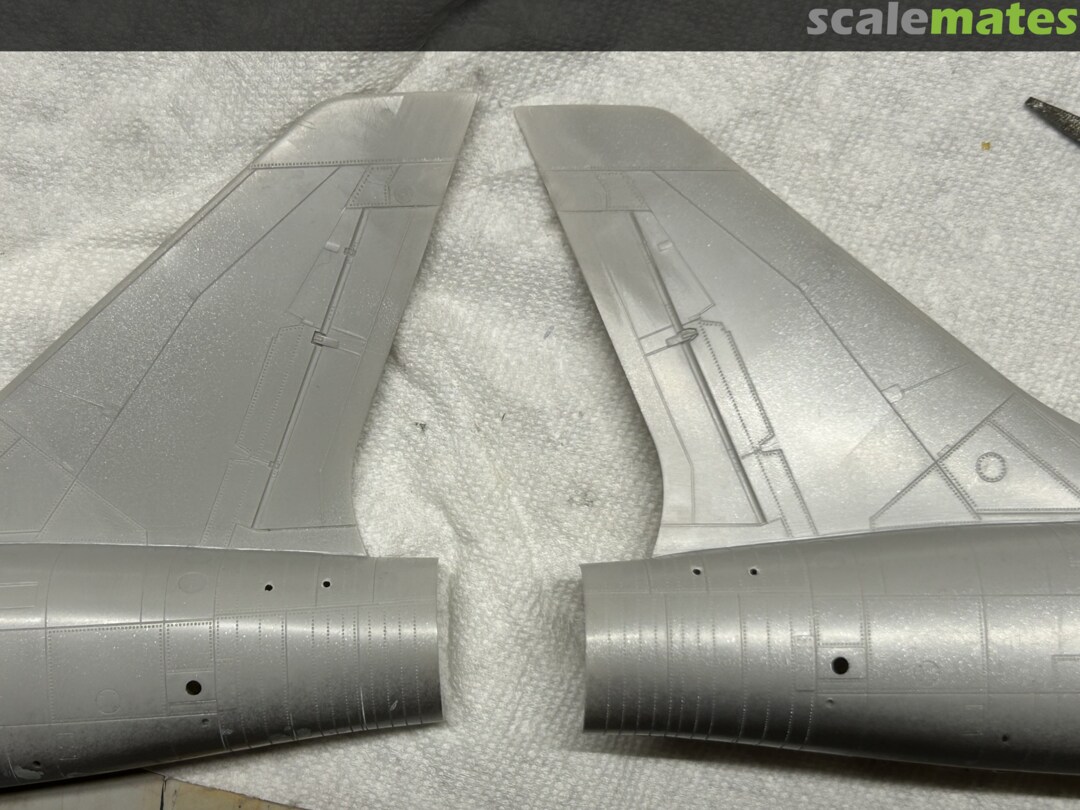
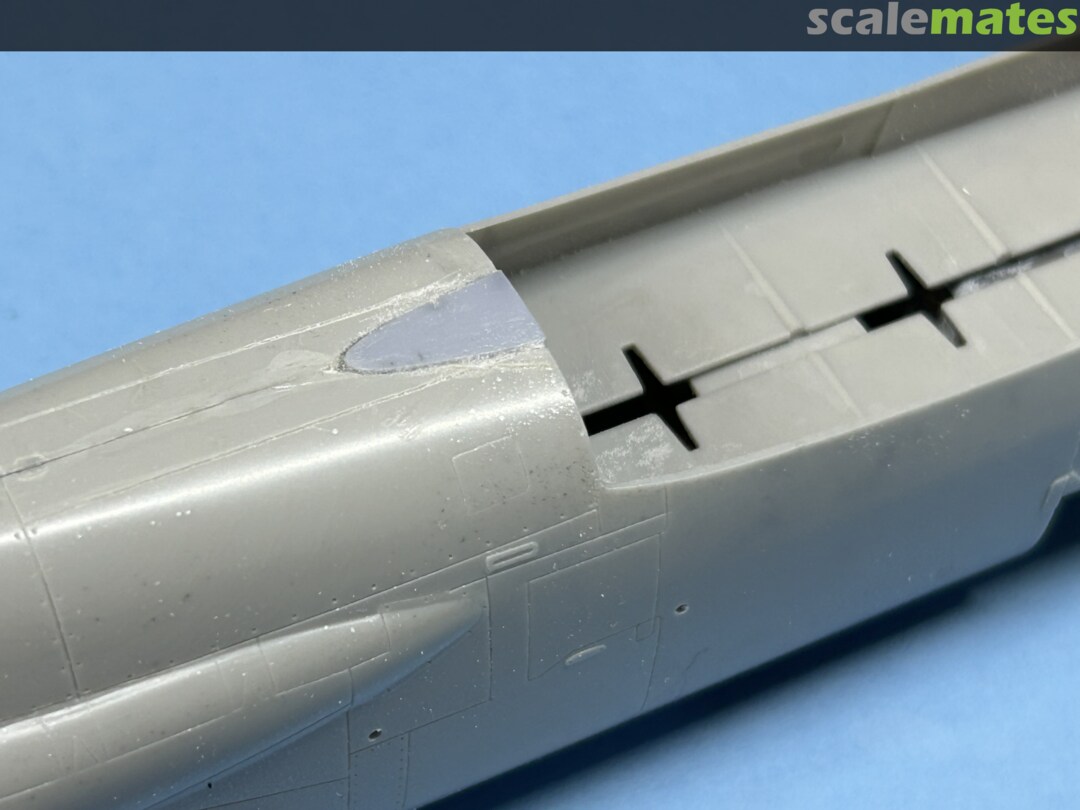
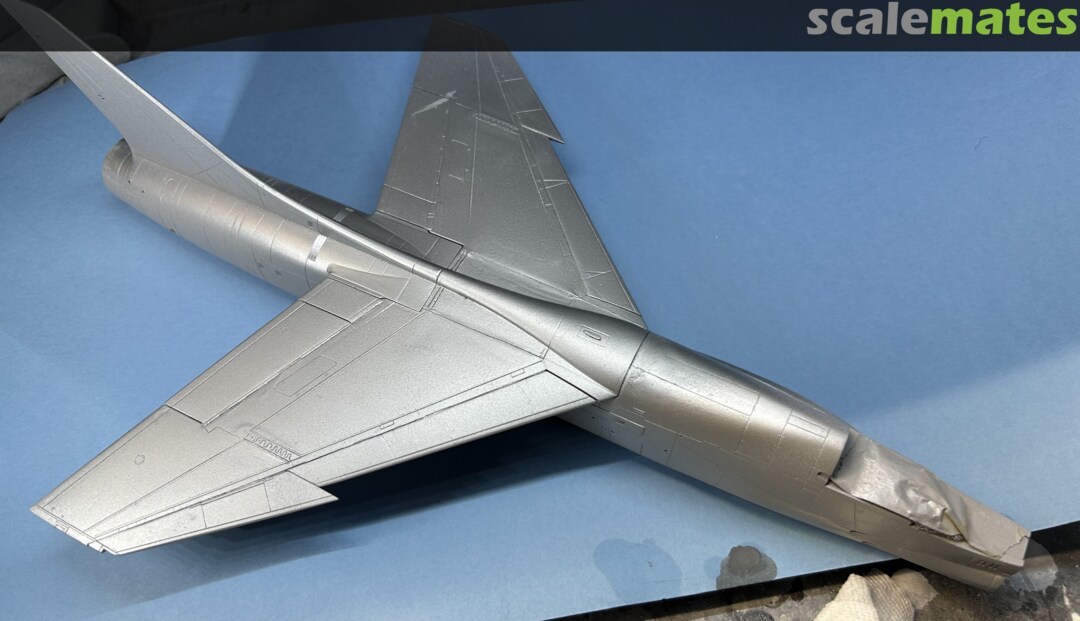
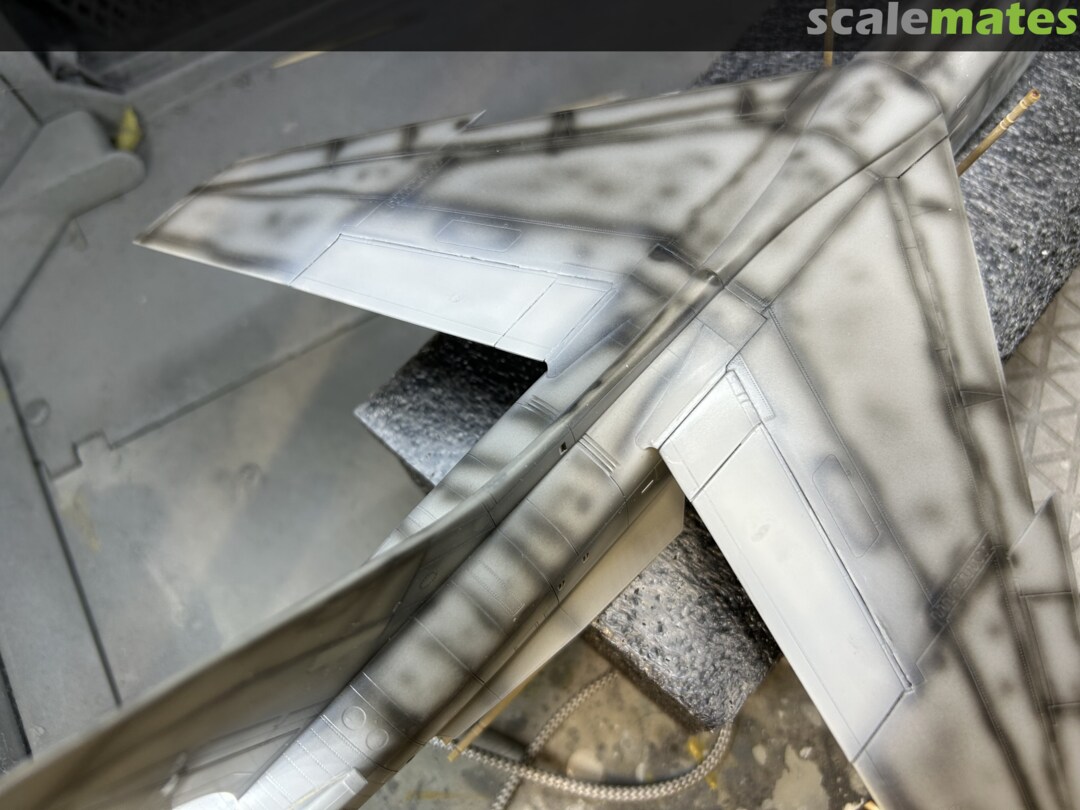
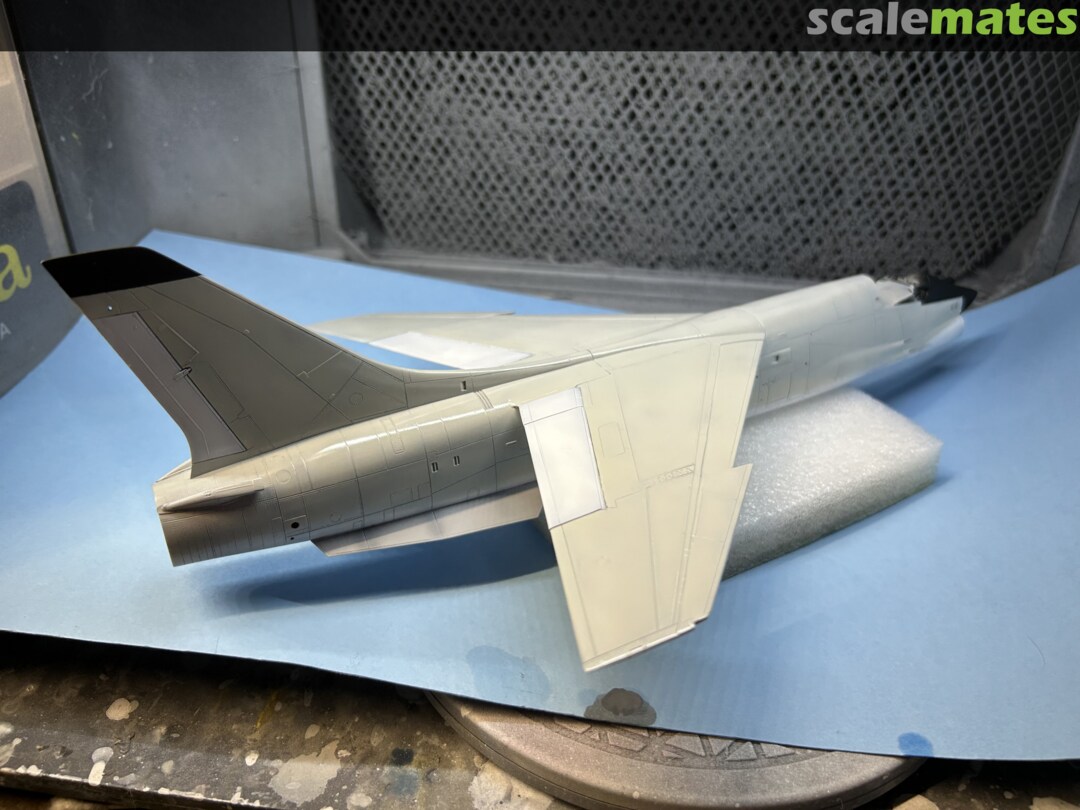
Filled some seams and restored some panel lines, especially places like the underside and joins. Also cleaned up some scratches and booboos
27 August, 11:56
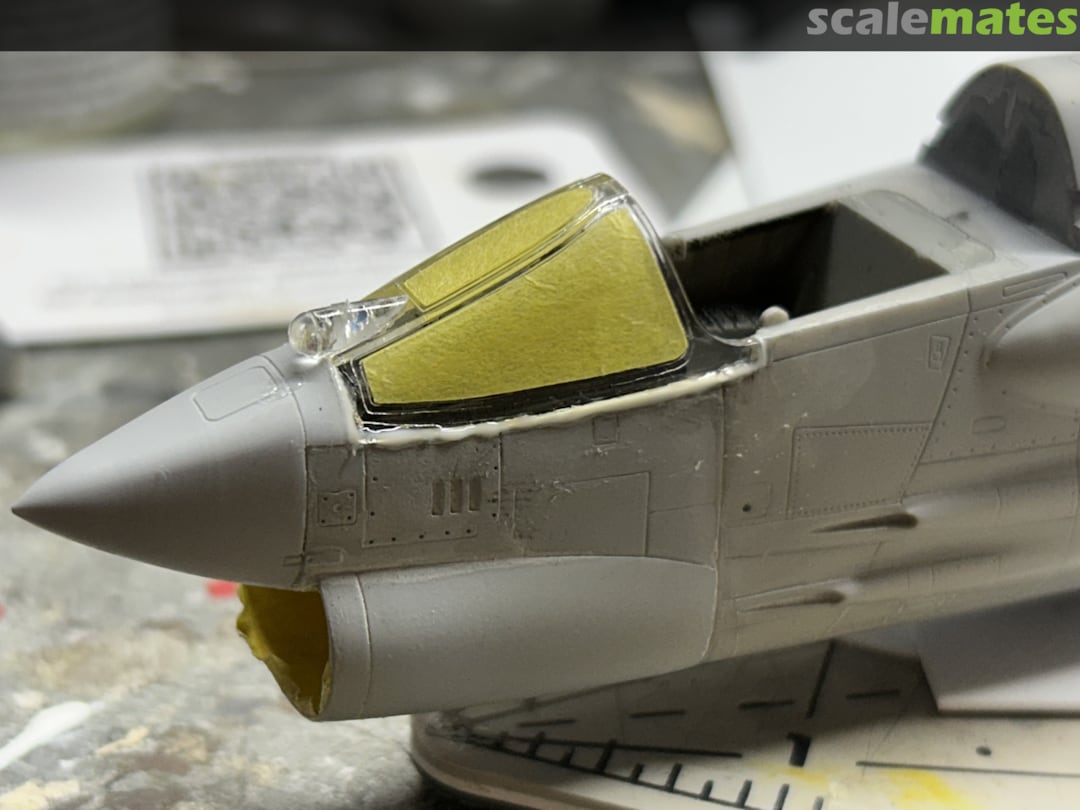
Glued together the instrument panel and panel coming, then glued on the canopy.
20 September, 05:01
Good to have you Maciej, this is the first CAT4 F-8 that I've seen anyone undertake, and I've also had help to make the nose more accurate with 3D printing. Should be the most accurate early-nose F-8 anyone's made 🙂
28 September, 15:00
Looking great Rando. Can't wait to see the finish. I keep hoping Hasegawa will release an RF-8…
17 October, 19:41
Thanks Nathan! Been a lot of work. Doubtful we ever get the RF-8 they should have made. I have a crazy plan to make an RF-8 from the Hase kit, RVHP, CAT4, and a 3D printed nose cone. Maybe with that sacrifice, a kit maker will finally make one!
17 October, 23:34
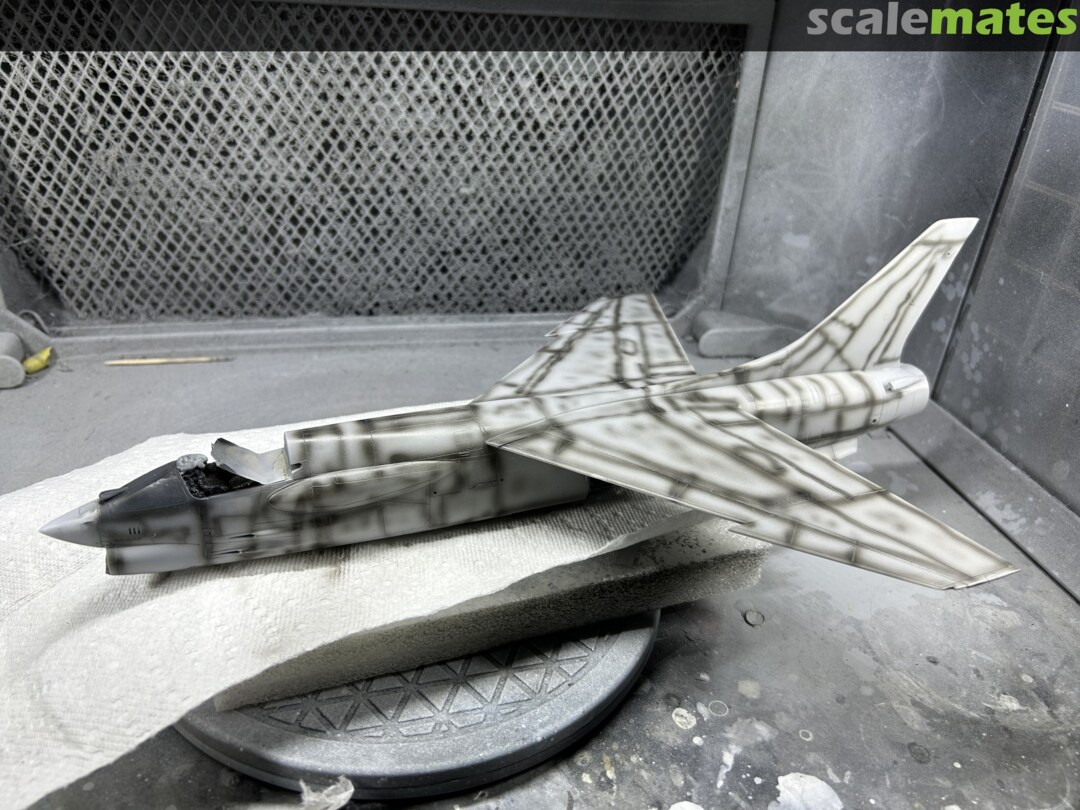
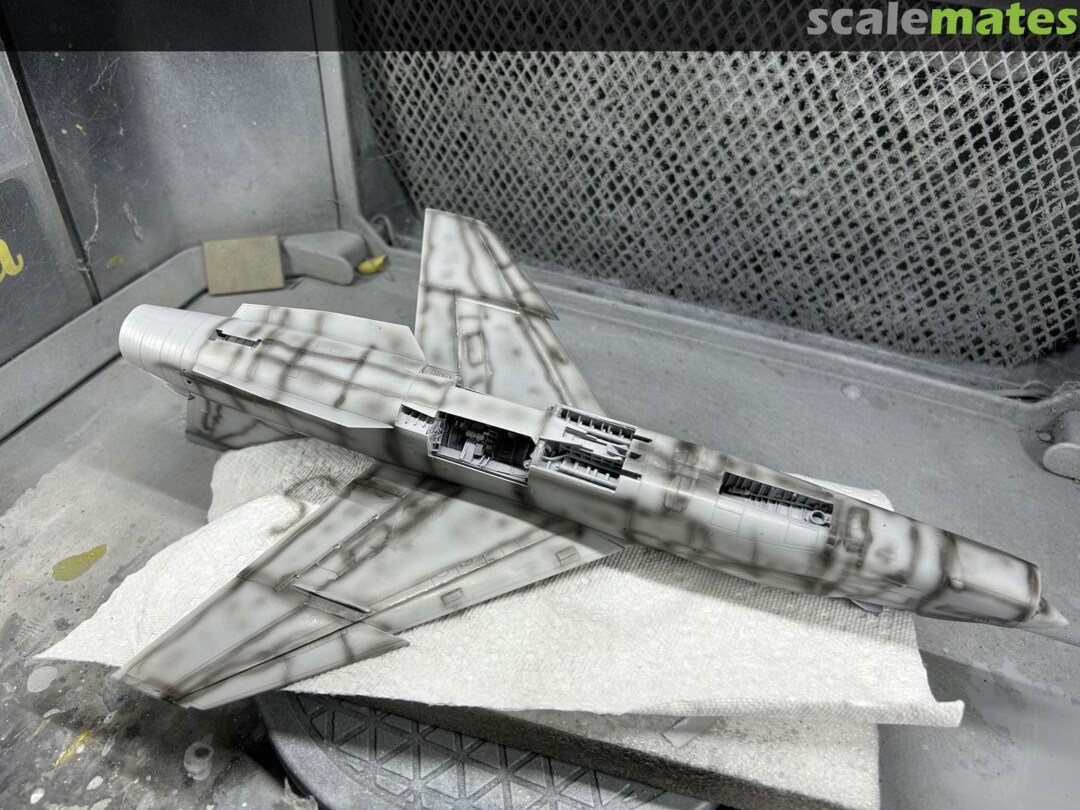
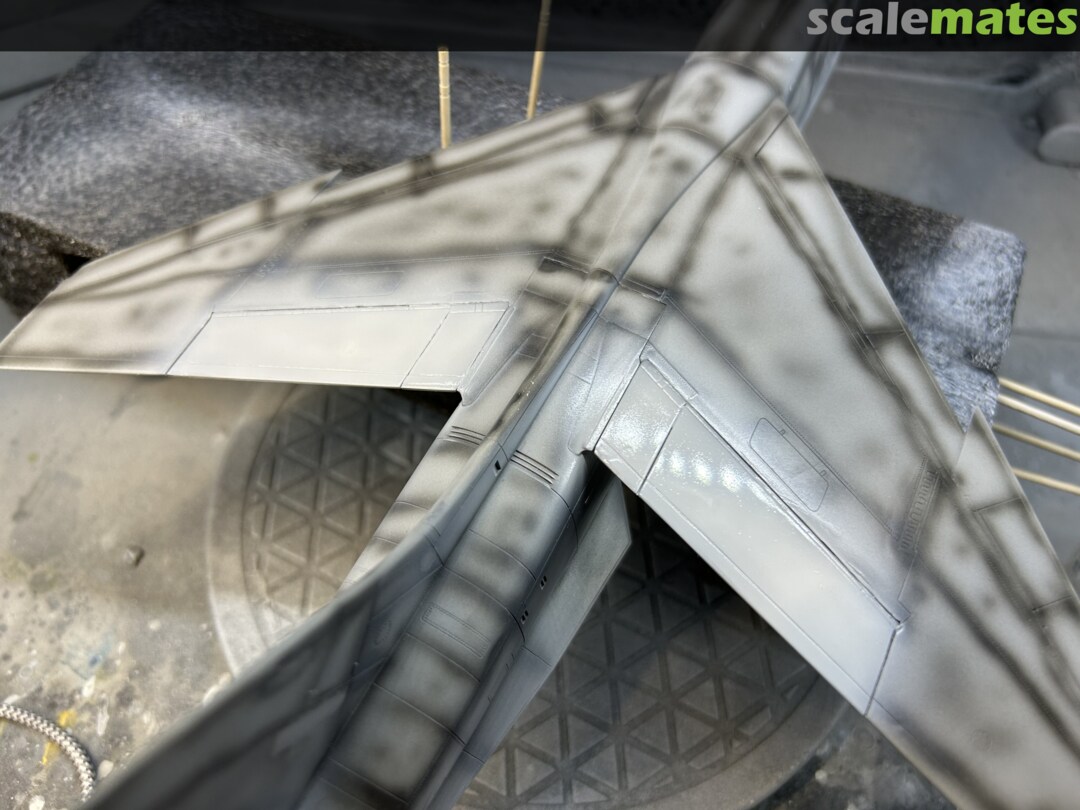
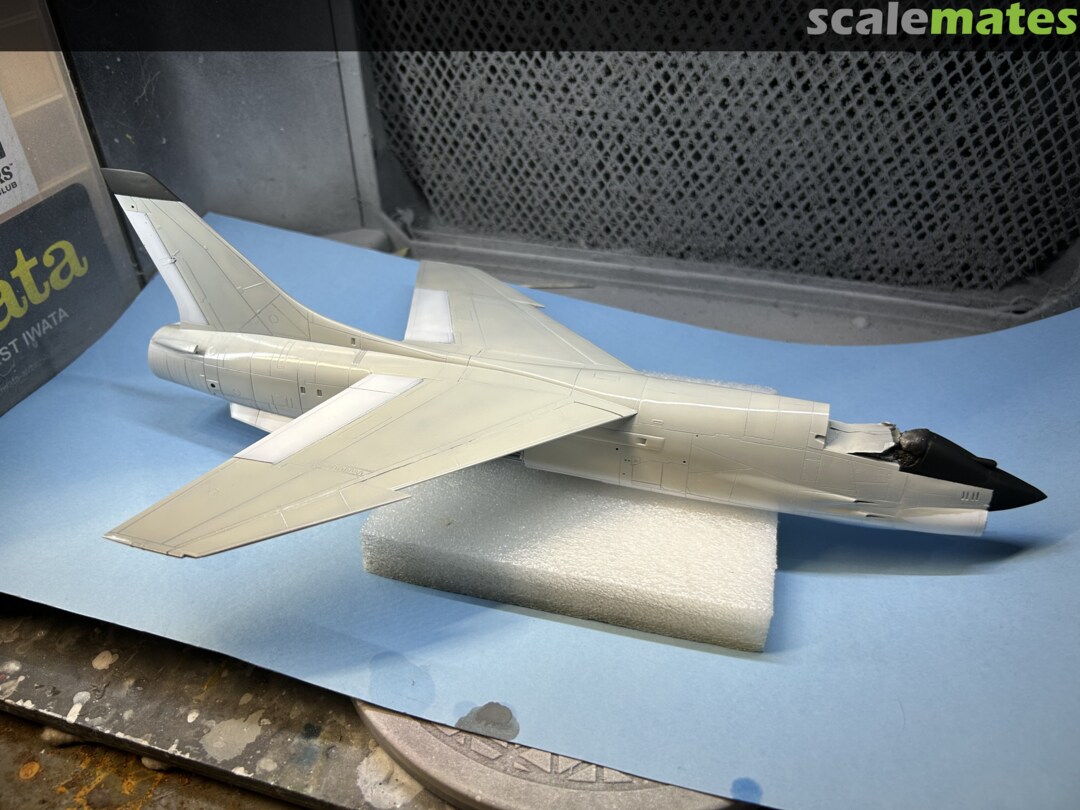
Main paint job is on. Next is to paint the tailpipe. I also had a spaz attack and spilled grey out of my airbrush, which ended up under the wing masking beneath. So that will need some fixing as well.
21 October, 11:43
Great work. You've managed to make a monochrome paint scheme not look boring.
1 22 October, 09:35
Great work Rando! It's good to see that the CAT4 parts fit good with the Hasegawa fuselage!
1 22 October, 10:23
Wow thanks guys! This has been a long tough project. I've been patient but I'm also anxious to finish it so people can see how the CAT4 parts build up. Also excited I'm using this 3D printed nose cone, which is genuinely accurate. You don't see many backdated F-8s built, and I think this is the most accurate one yet.
3 22 October, 20:38
The patience is paying off. I'd say that's one of the most important skills of a modeler.
1 23 October, 02:58
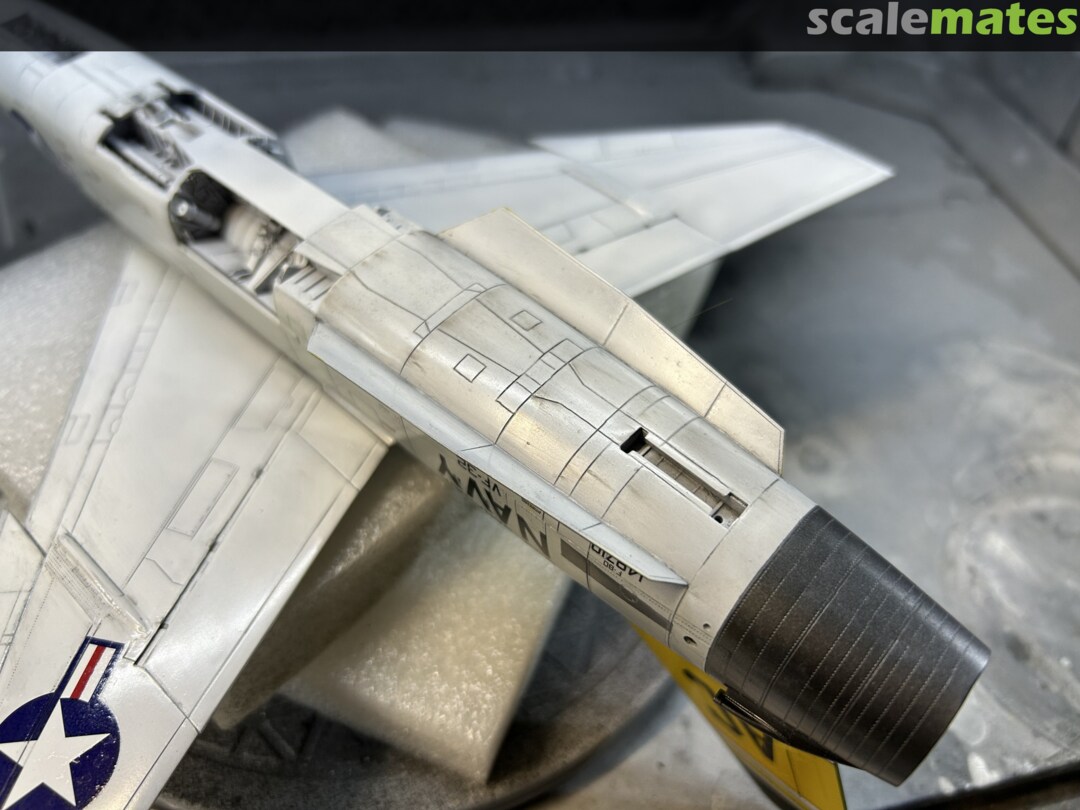
Painted tailpipe gloss black, then layered Gunze Super Metallic Iron and Aluminum to get a semi-shiny, not-too-bright look
26 October, 04:32
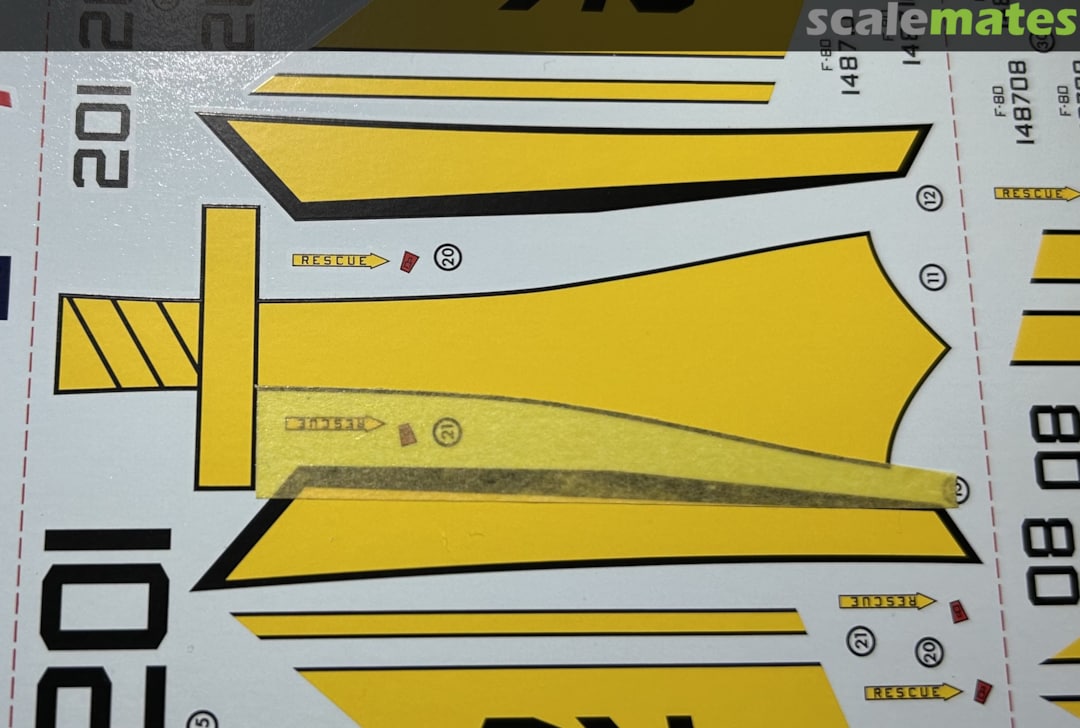
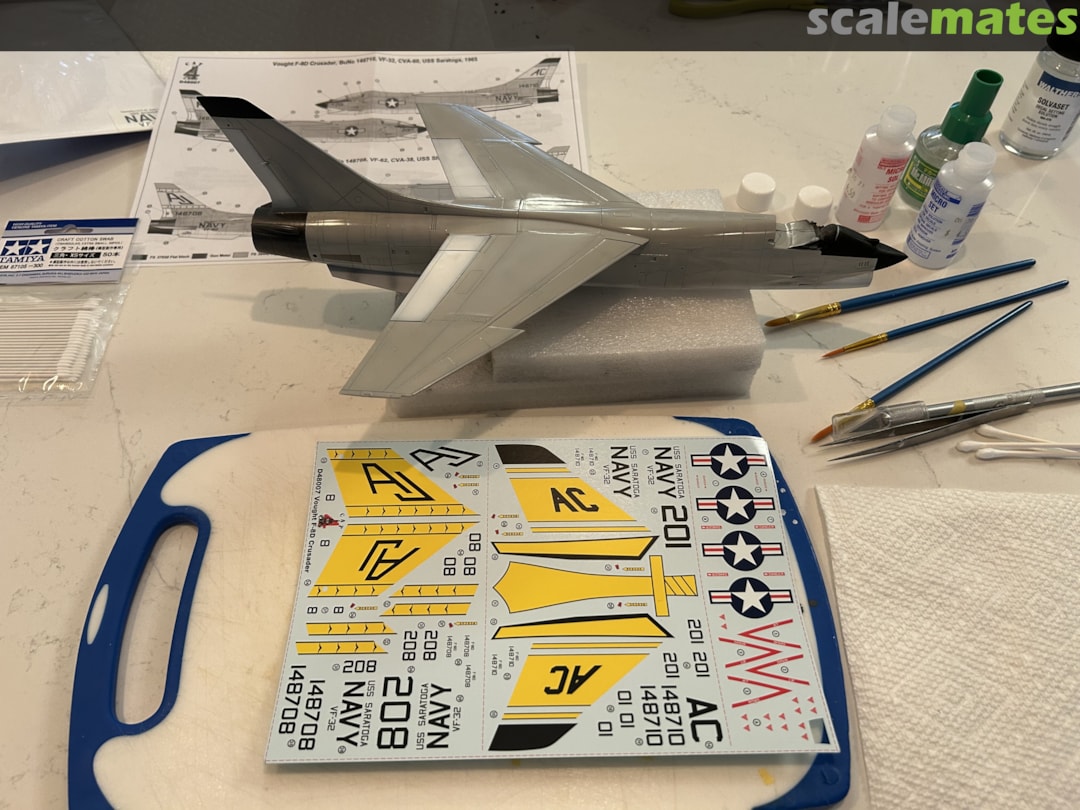
Unfortunately the CAT4 decals are too brittle. It was always a concern, especially with these large ones that would need a lot of adjustment. Now I have to consider plan B, which is painting them on from photocopied masks, or plan C, an F-8D from the Furball sheet.
1 29 October, 16:40
Well that's not optimal. The painting would be challenging but fun.
2 29 October, 23:13
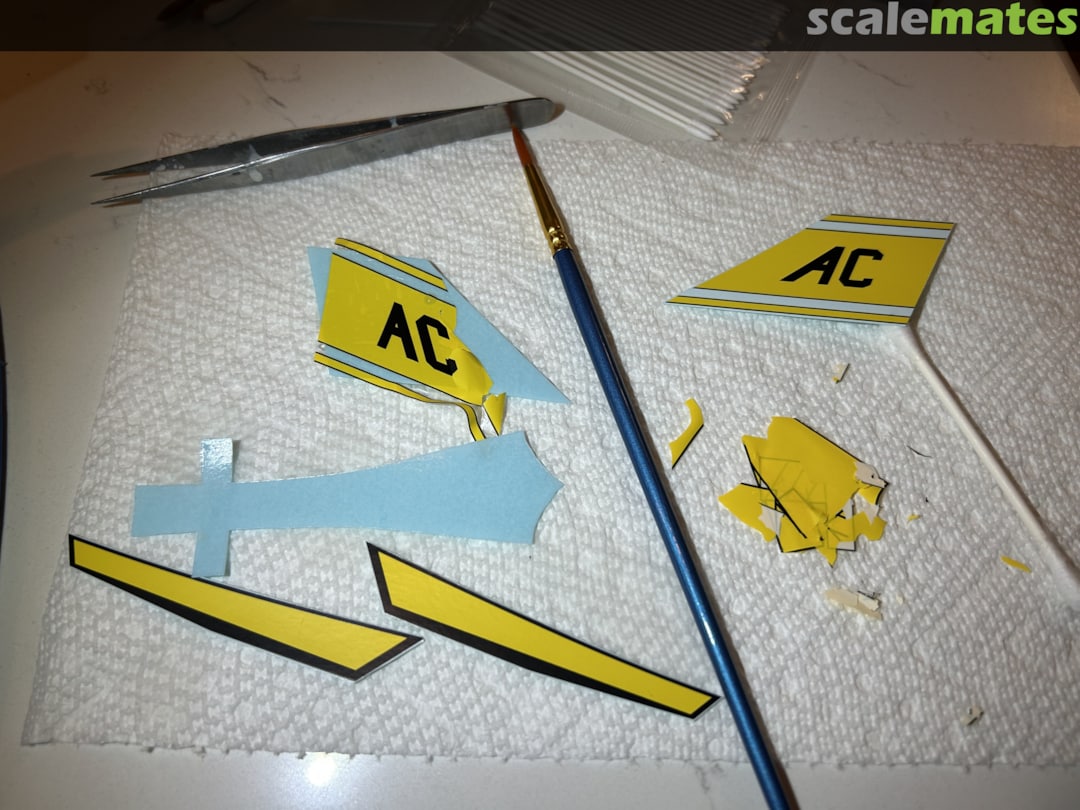
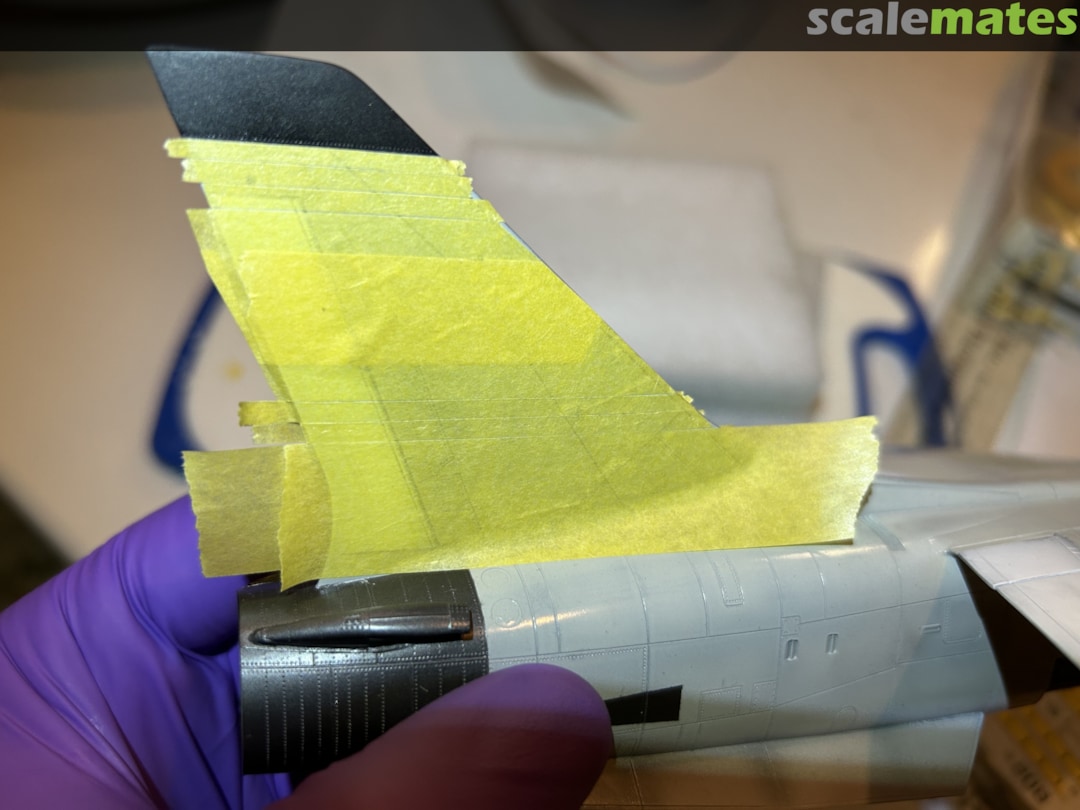
I'm going for it—hell yes, even the sword. I made masks by cutting strips from photocopies of the decals and lining them up next to each other to get them spaced perfectly. Then removed the masks that helped with alignment.
2 30 October, 02:33
It's always better to make masks insted of using such big decals! It's a lot of work, but the result will look much better!
2 31 October, 11:55
Thanks Tom and Nathan, I'm both excited and anxious to see how this will go. I realized last night after testing a couple more CAT4 decals out that them breaking was probably due to the decal water being too hot. So at least the ship/unit and nose number markings are still usable. Trickiest part here I think is capturing the thin black pinstripes. I have black stripe decals, but will probably take as much time as I need to get masks perfect and paint them on.
31 October, 12:11
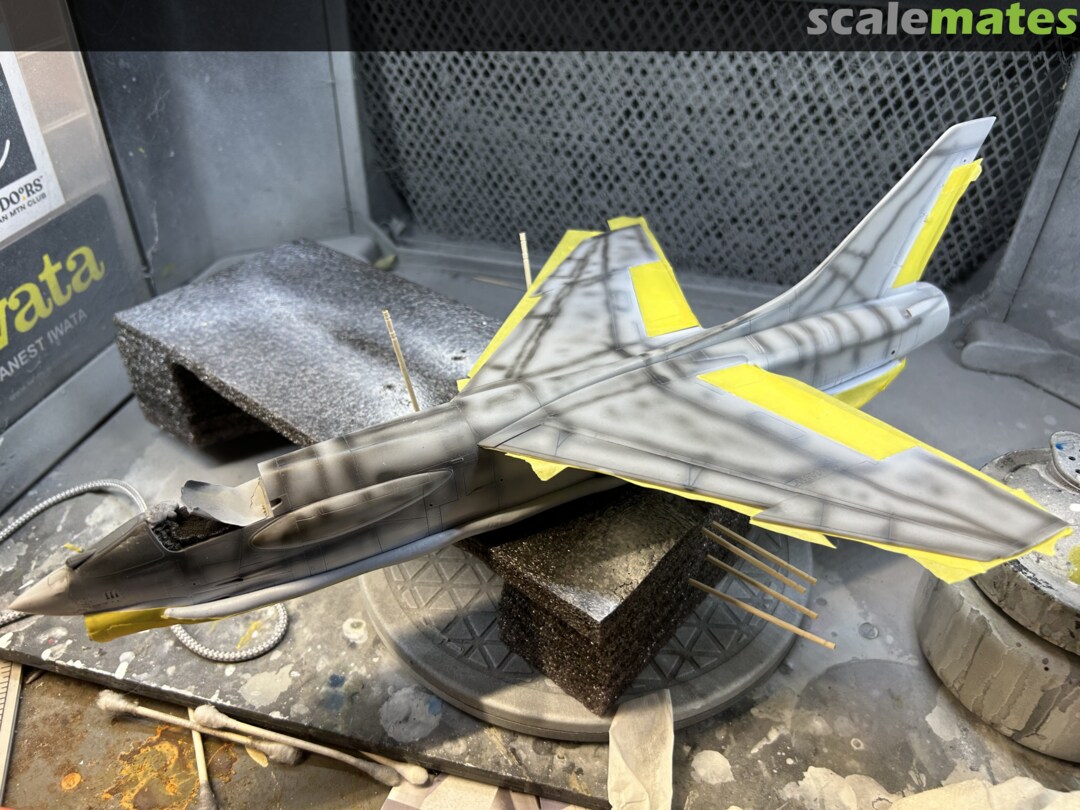
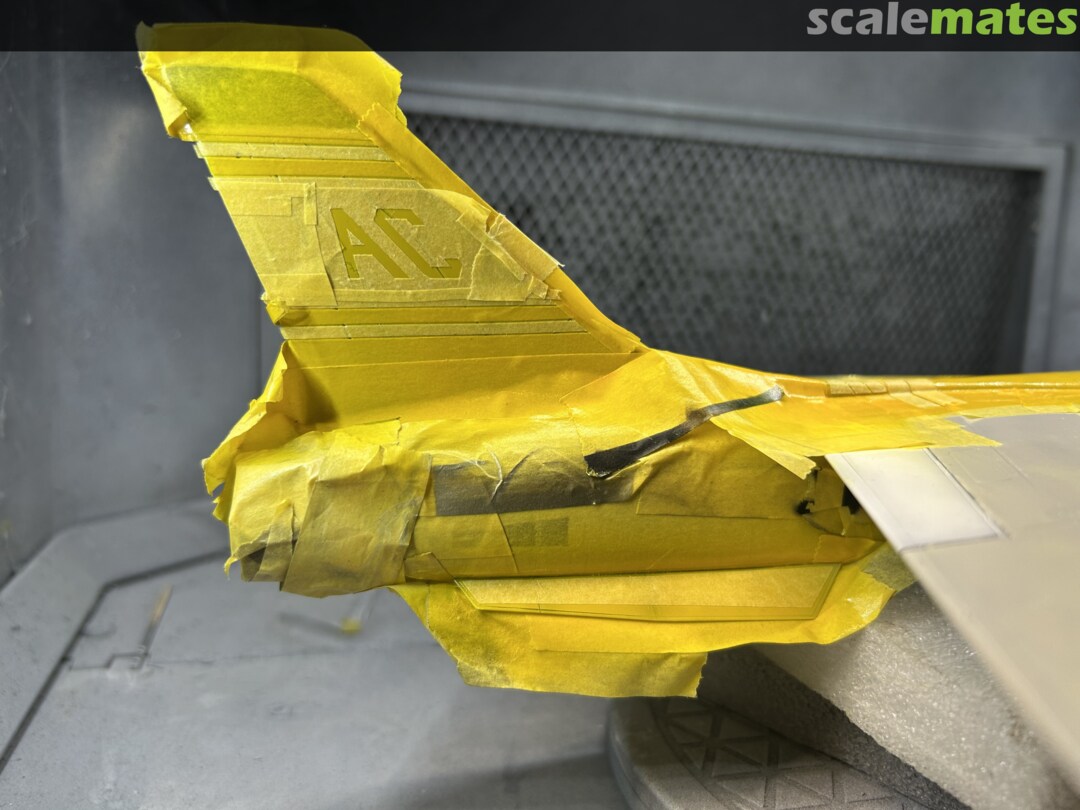
Yellow is a bear…not a color you can fudge as easy as the grey or even white and make it look like cool weathering variation. Had to sand down and repaint a couple spots. Fingers crossed that I am almost through the negative modeling
1 5 November, 12:32
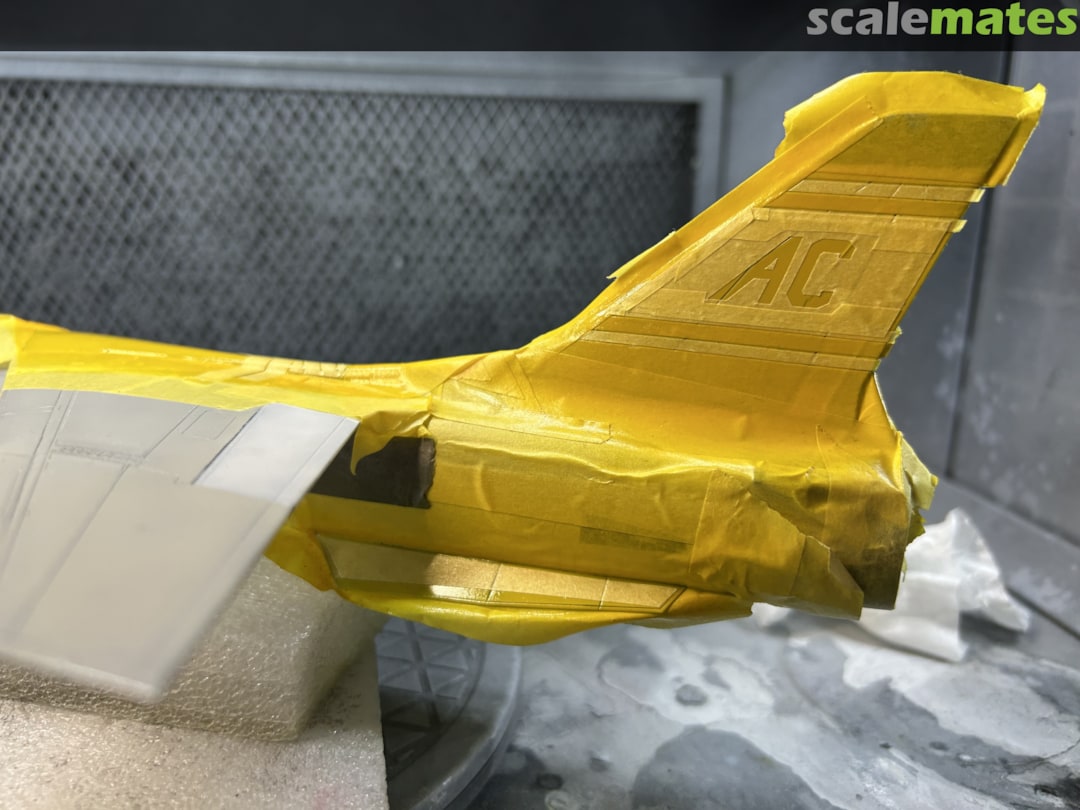
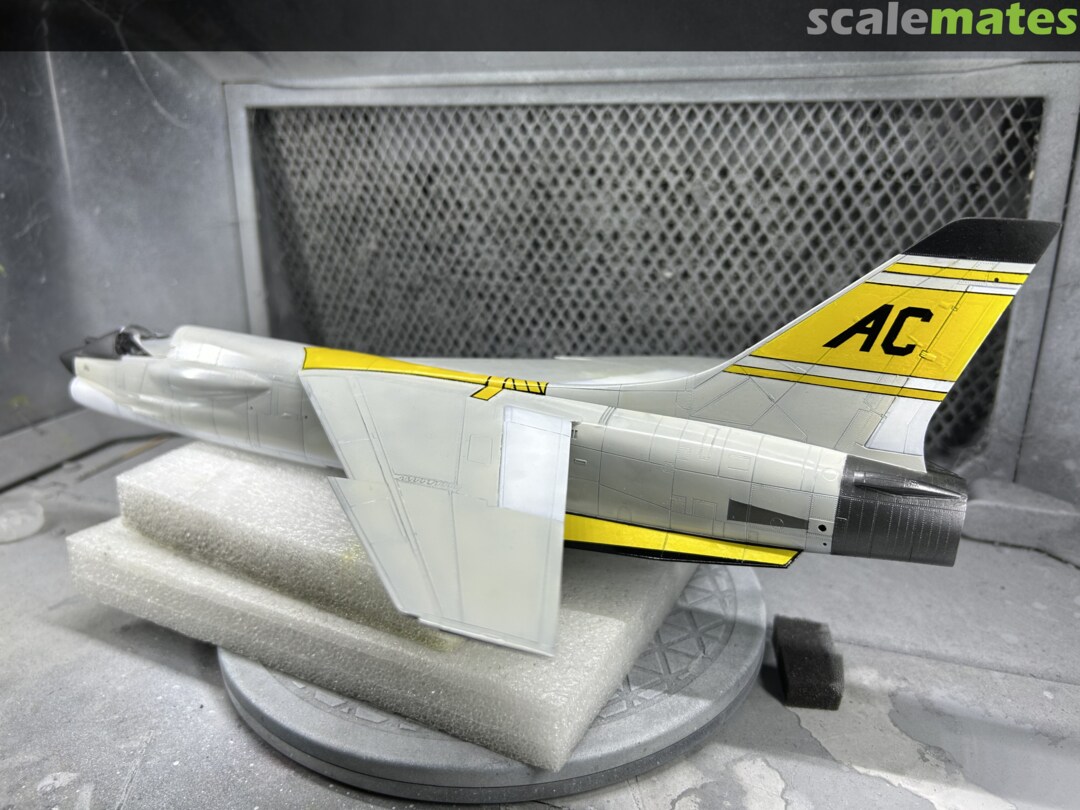
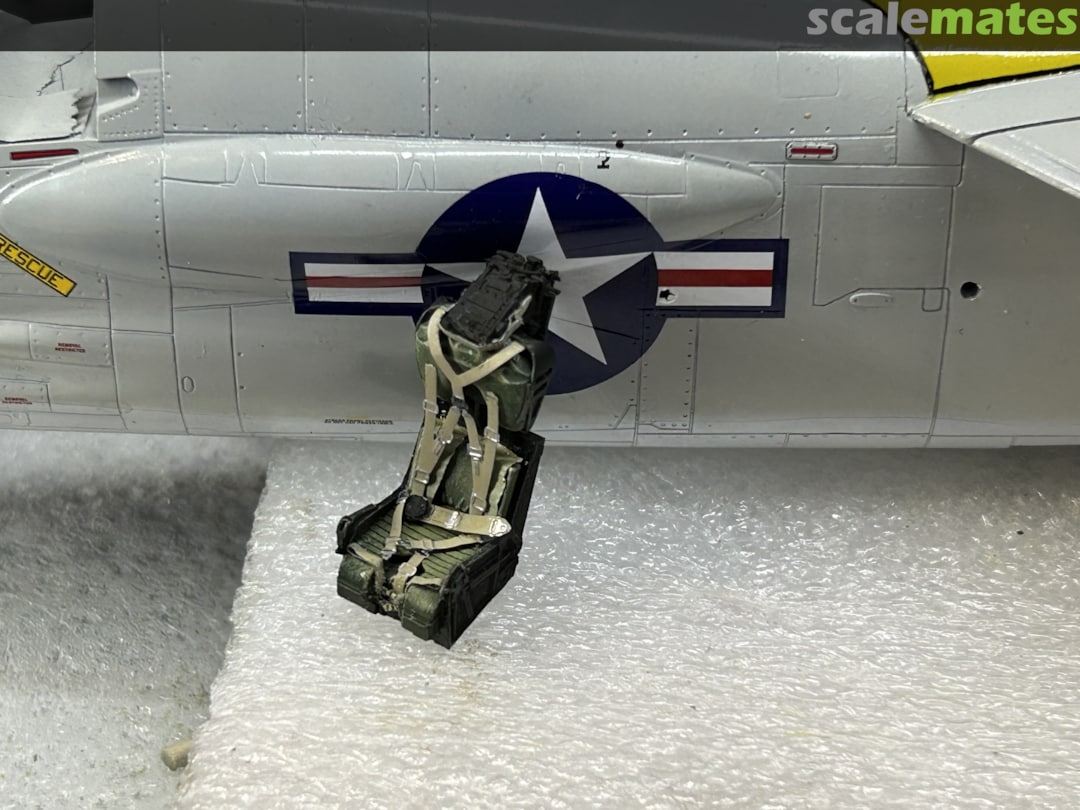
So I put on the final coat of yellow tonight and made the masks for the tail codes and stripes. As tricky as this is, I'm enjoying it far more than the Eduard ejection seat, which has painted photo etch that I accidentally spilled 91% IPA on. This lifted all the painted on features. I'm thinking I'll have to remove them and repaint them myself. As cool as the details of this seat are, I found the Wolfpack ejection seat a lot simpler to paint.
1 8 November, 03:44
Yellow is a particularly difficult and beautiful color to get right. It's looks like you are going to make it work!!! Take a look at my RF-101C build. I repainted most of it 3 or 4 times to try and get it right…
1 10 November, 05:44
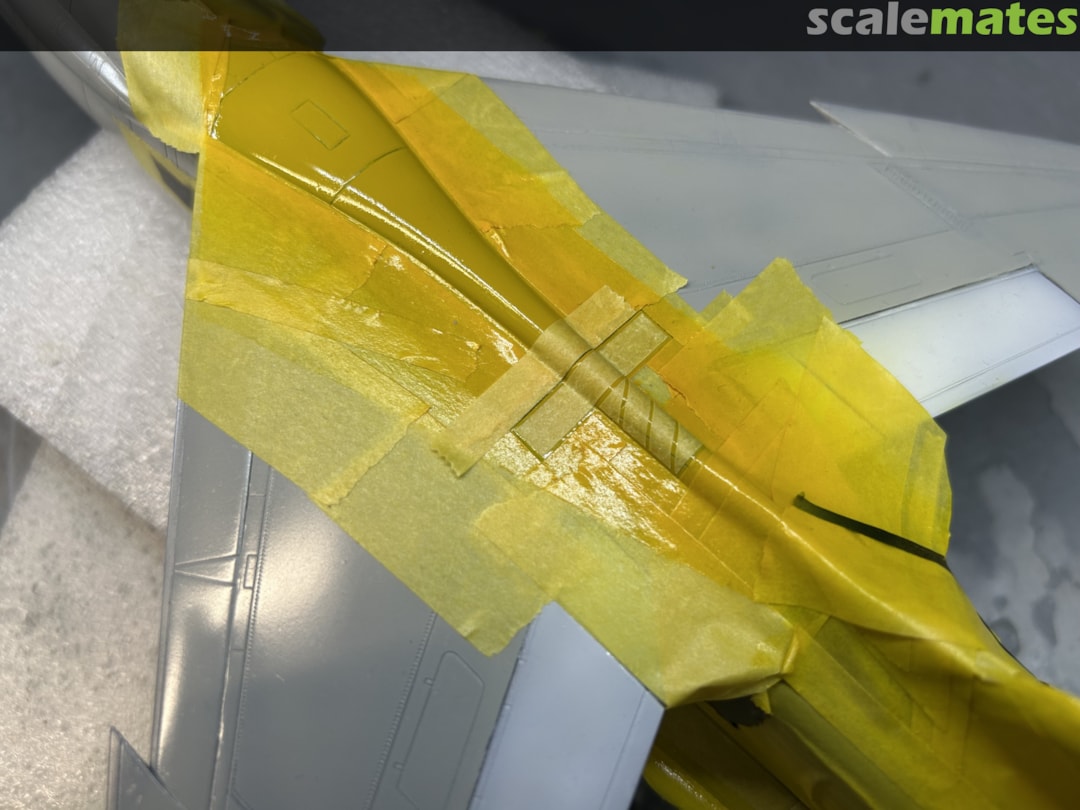
Thank you for checking this out gents! Marlin--that Voodoo is a marvel and I can only hope I build something that compares. Fingers crossed I only have to paint this once! I have reset and recut the various masks for this so many times, especially the tail stripes, which have very thin black pinstripes. I have a huge mess of tape and photocopies as evidence.
I'm very happy with how the "AC" masks look. I cut a least a few before I was satisfied with the sharpness and congruence of all the lines. Just started applying Gunze gloss black, soooo looking forward to seeing the result.
1 10 November, 13:49
I noticed the amount of tape and the "AC" looks like it's really sharp! Great work!
1 10 November, 17:27
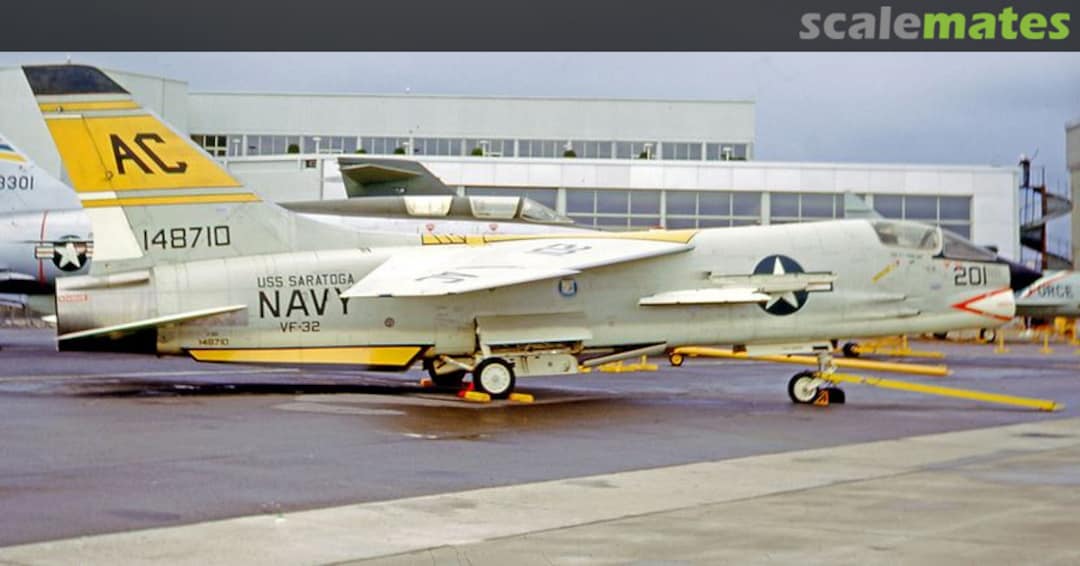
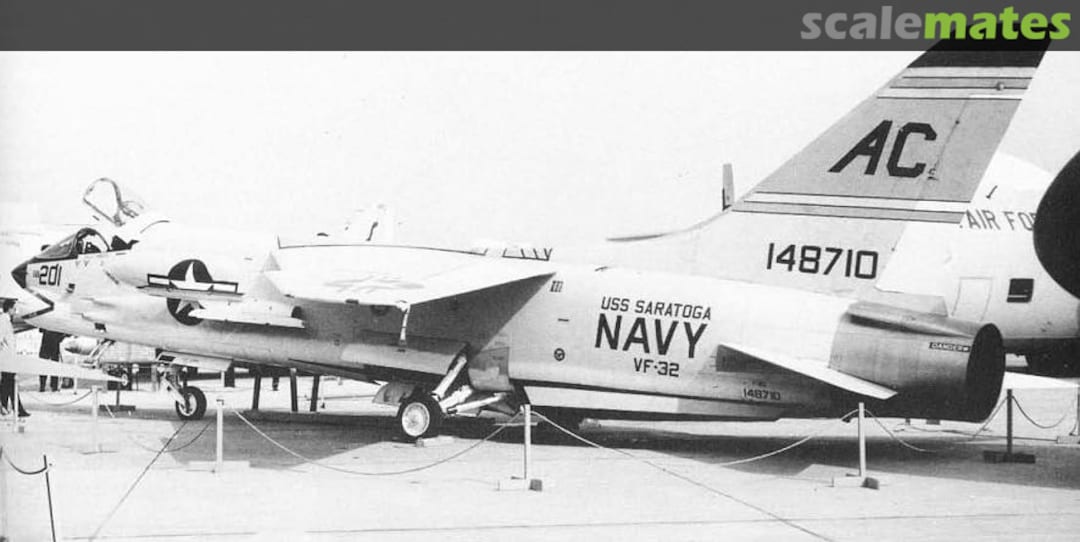
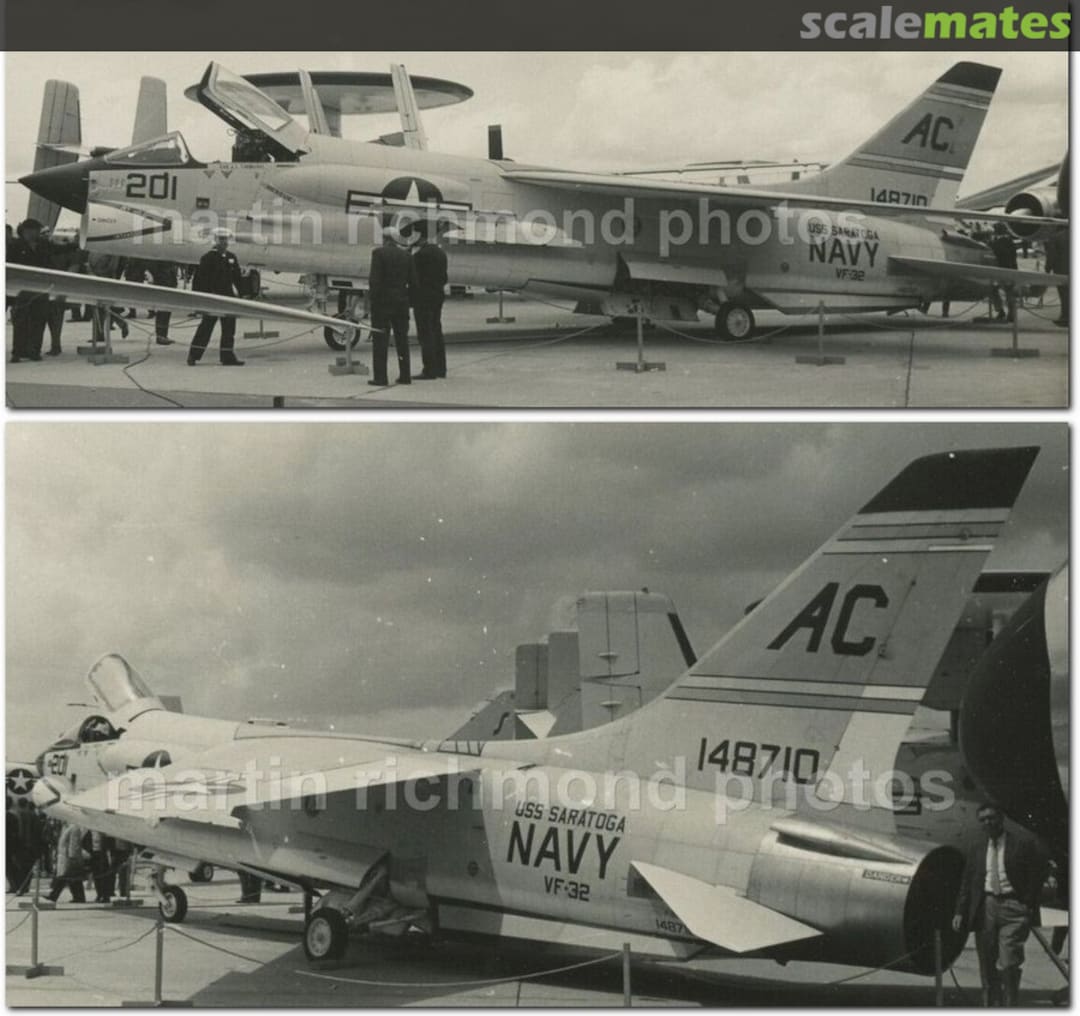
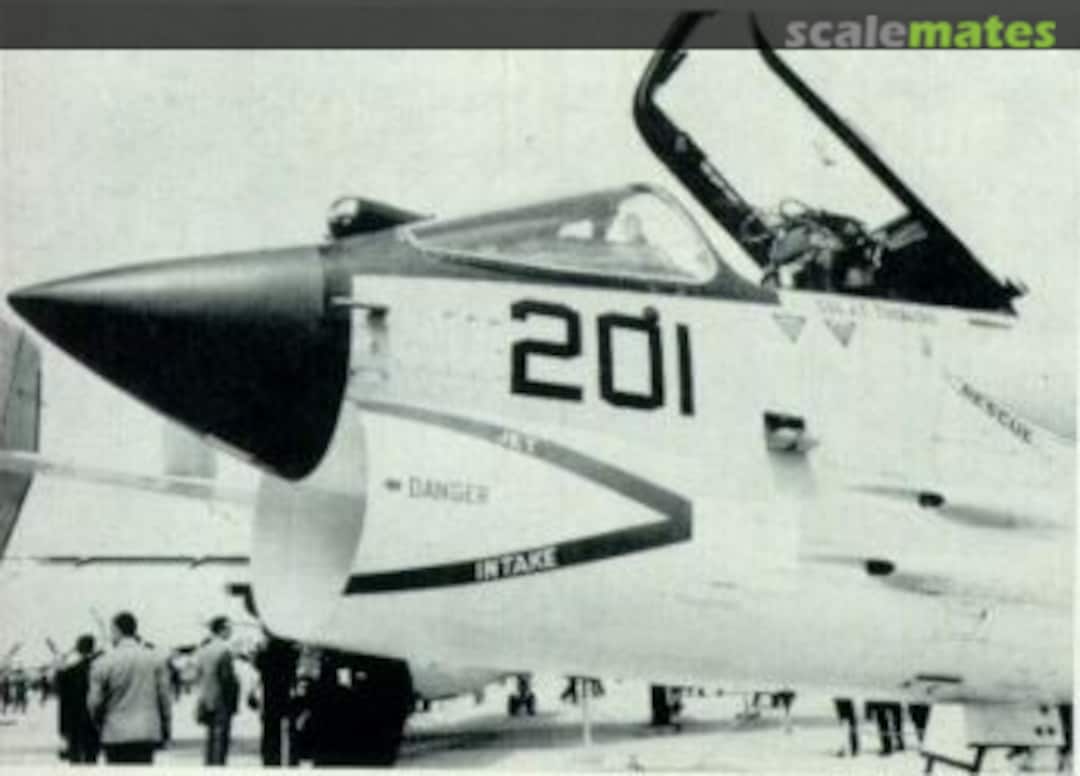
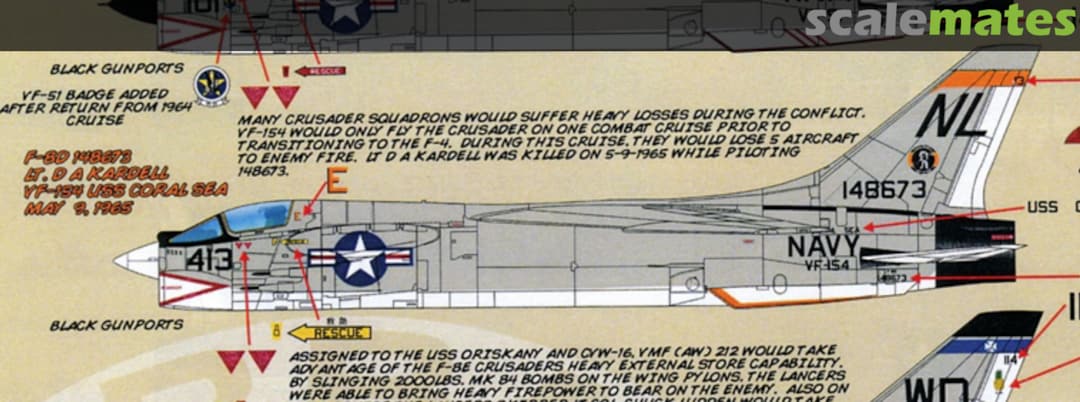
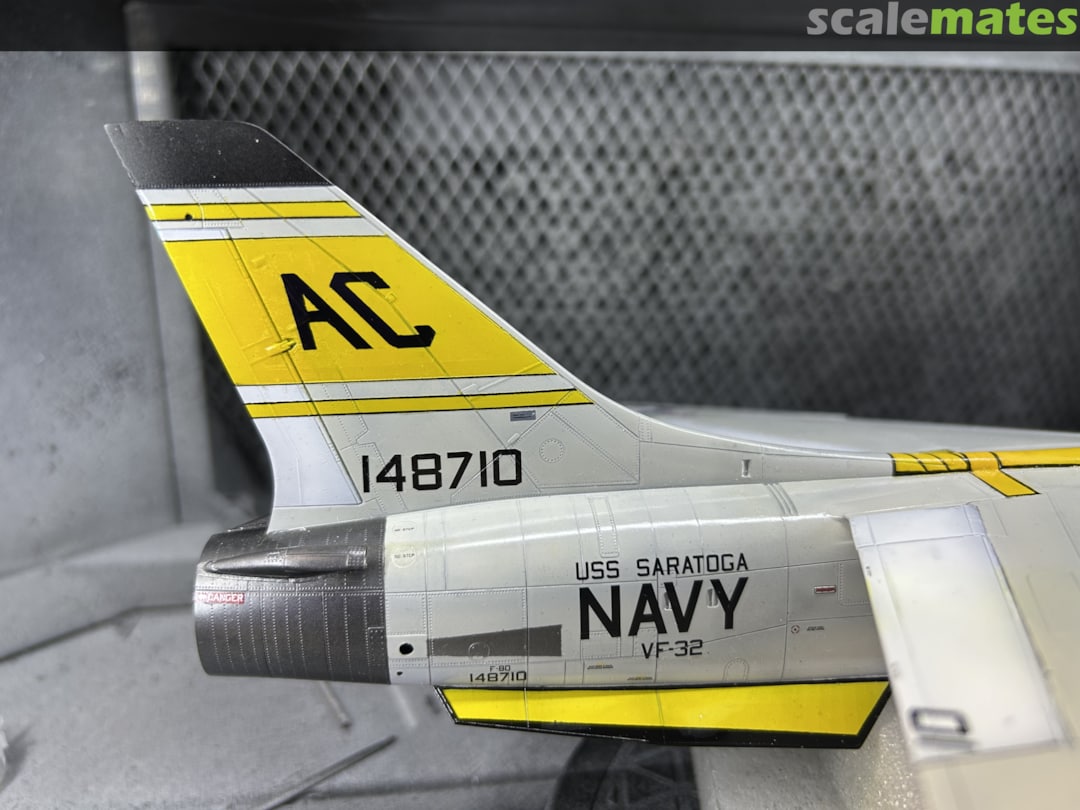
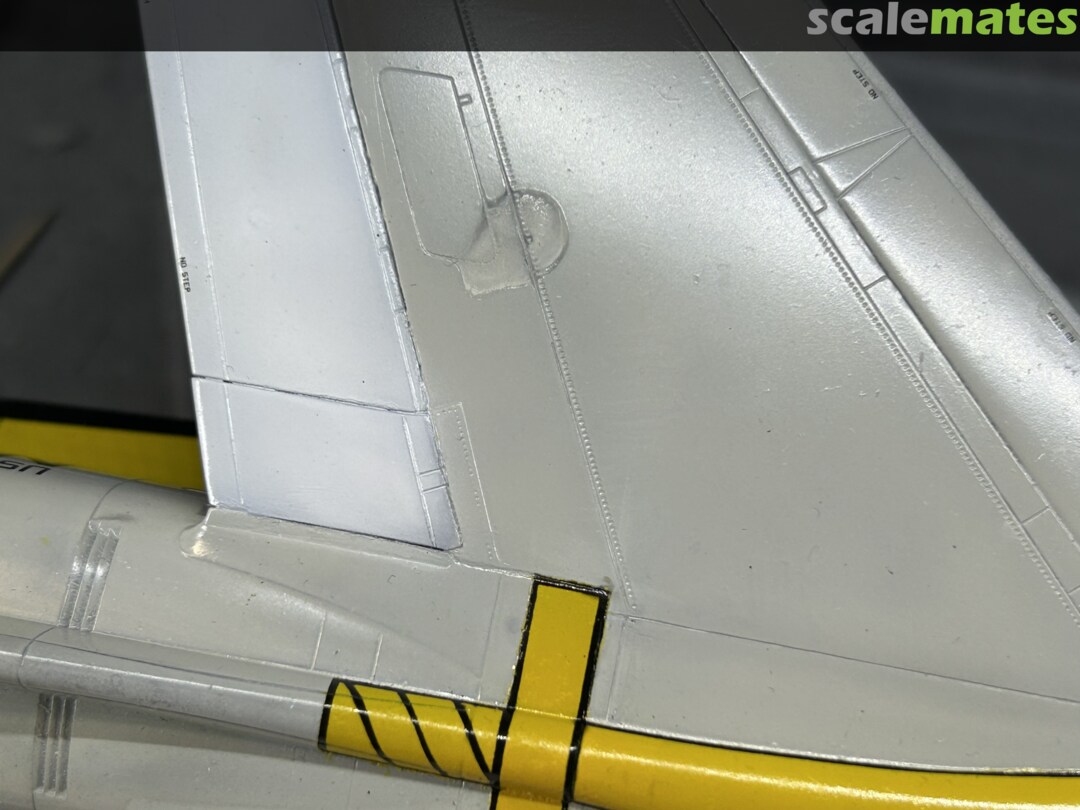
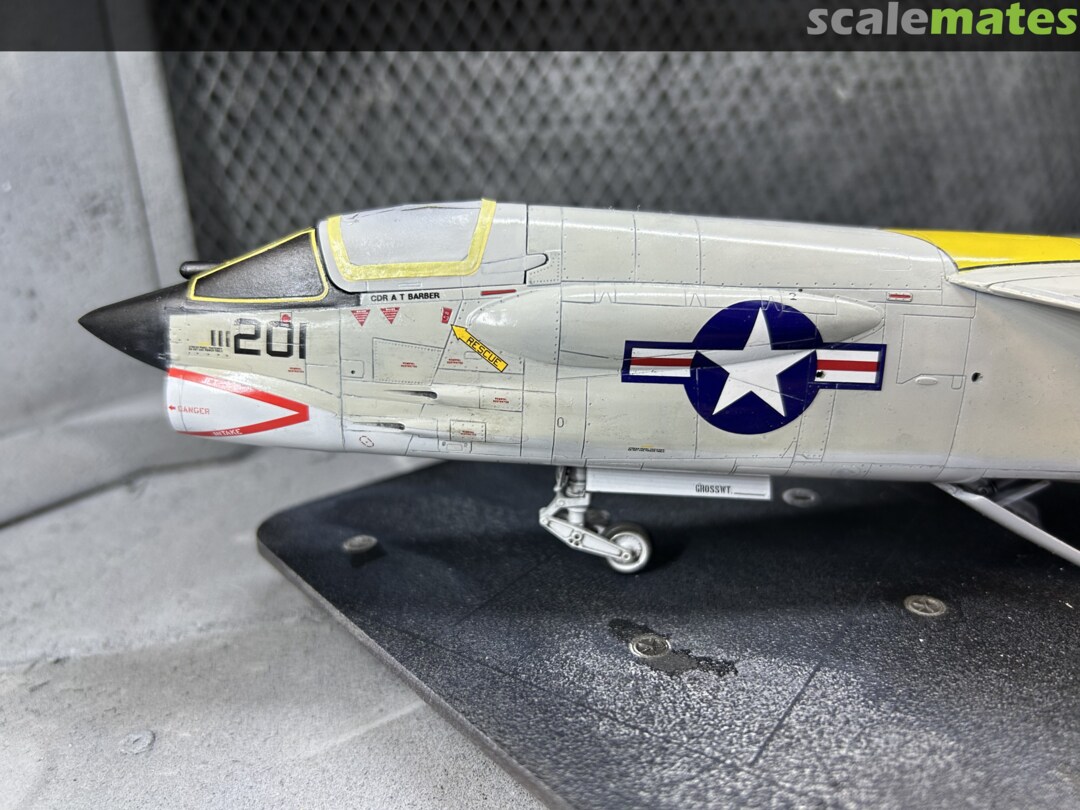
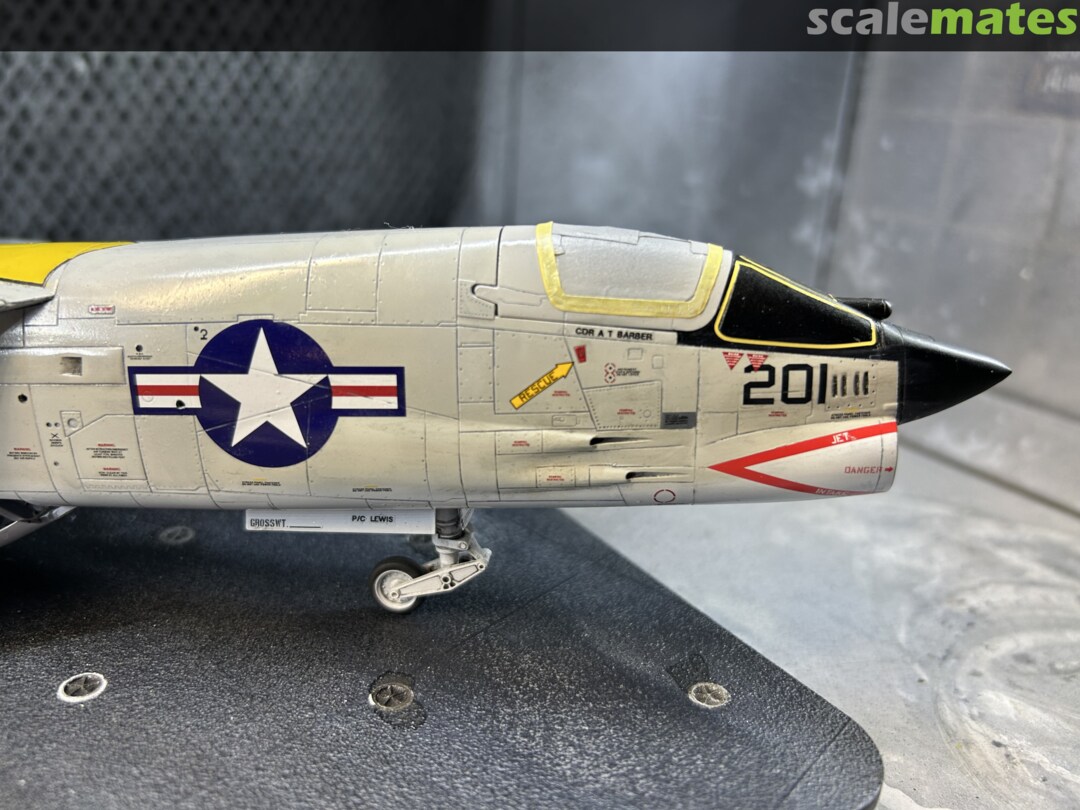
Thanks Marlin--I had planned to repaint the starboard "AC" all along, since the CAT4 decal is way too chunky looking. I derived the correct font from a scaled photo of the real aircraft (image 114)
1 10 November, 18:03
Yellow is translucent and darker as on the photo... and you needed to coat several layers because of that.
Next time always a white or pink base before yellow... there is no free lunch with the yellow 🙂
This means I am following with interest and feeling with you through your every step 🙂 👍
2 10 November, 21:24
I find a thin undercoat of Mr. Surfacer 1500 worked will on the RF-101C to prevent the translucent appearance of the yellow...
1 10 November, 21:53
Yeah I should have definitely done an undercoat with the yellow, had to do too many coats. I did lay down some similar dark and light greys over the white part of the tail. If I pull the masks off and feel compelled to paint it again I'll put down a proper undercoat. Good to have you Sergej
2 10 November, 22:13
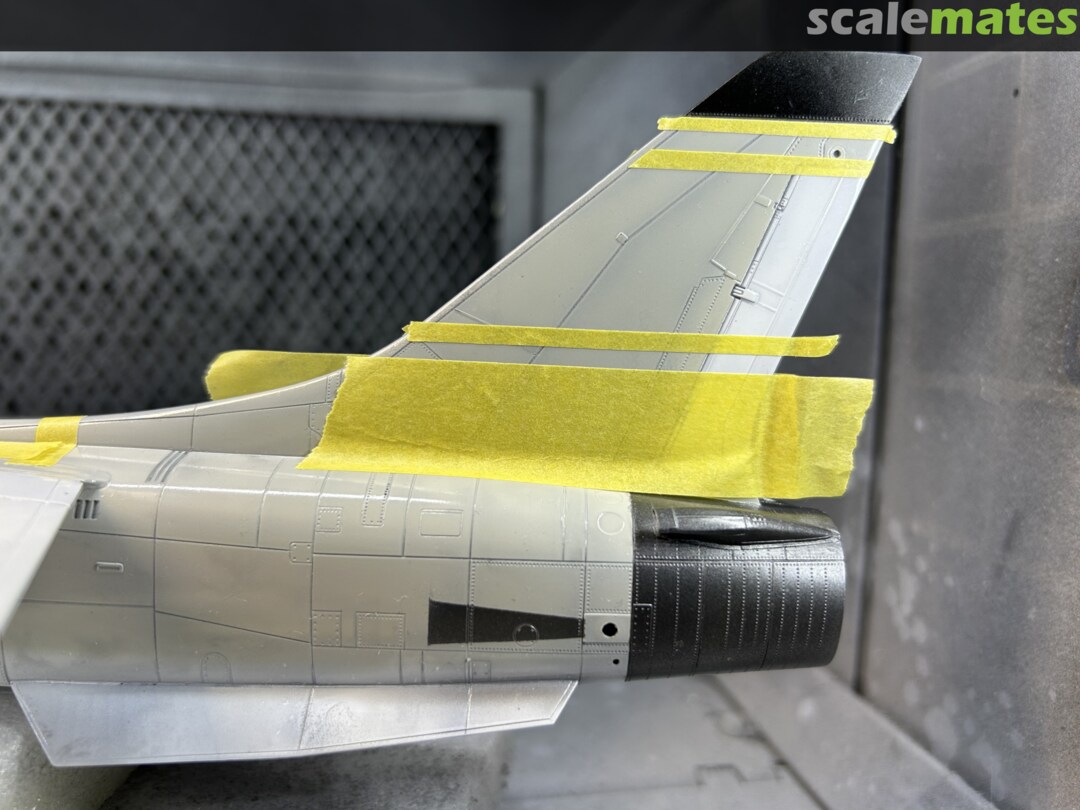
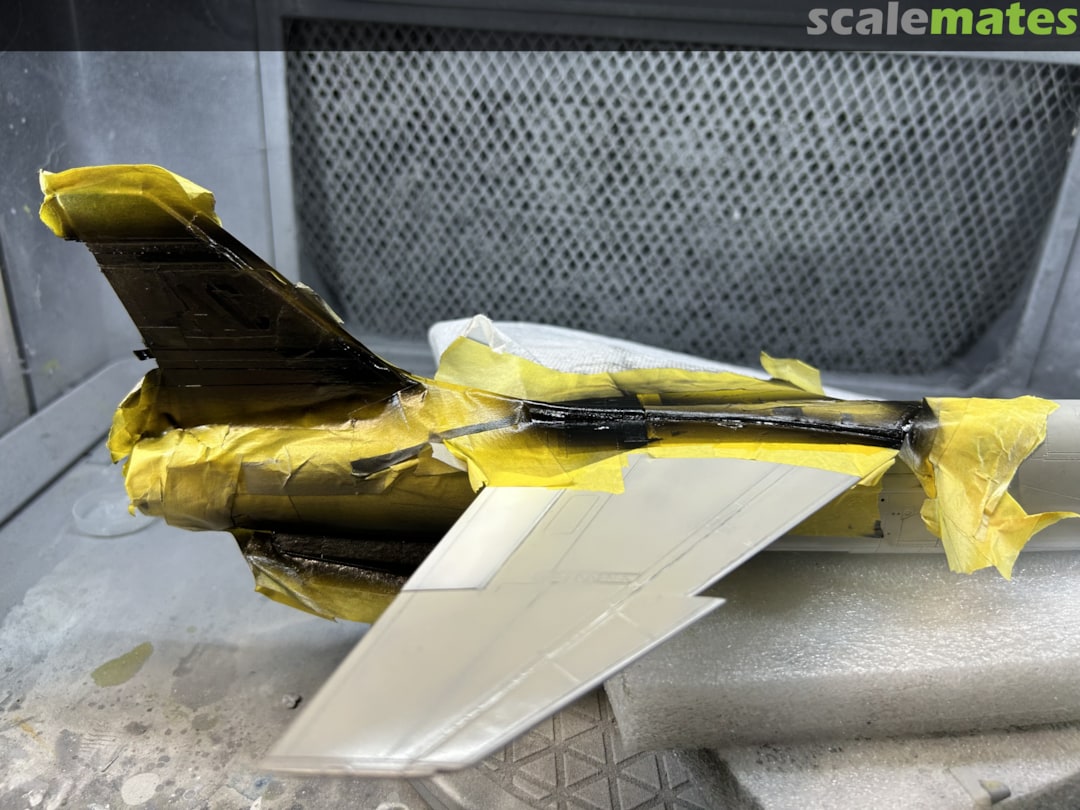
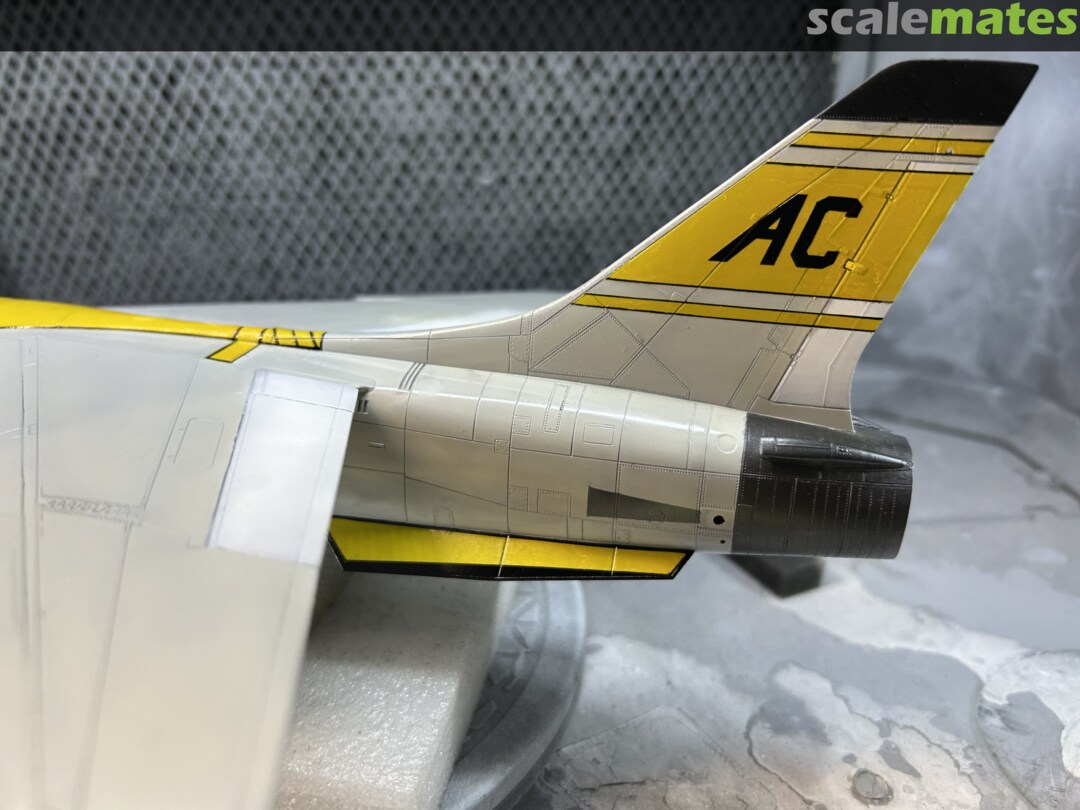
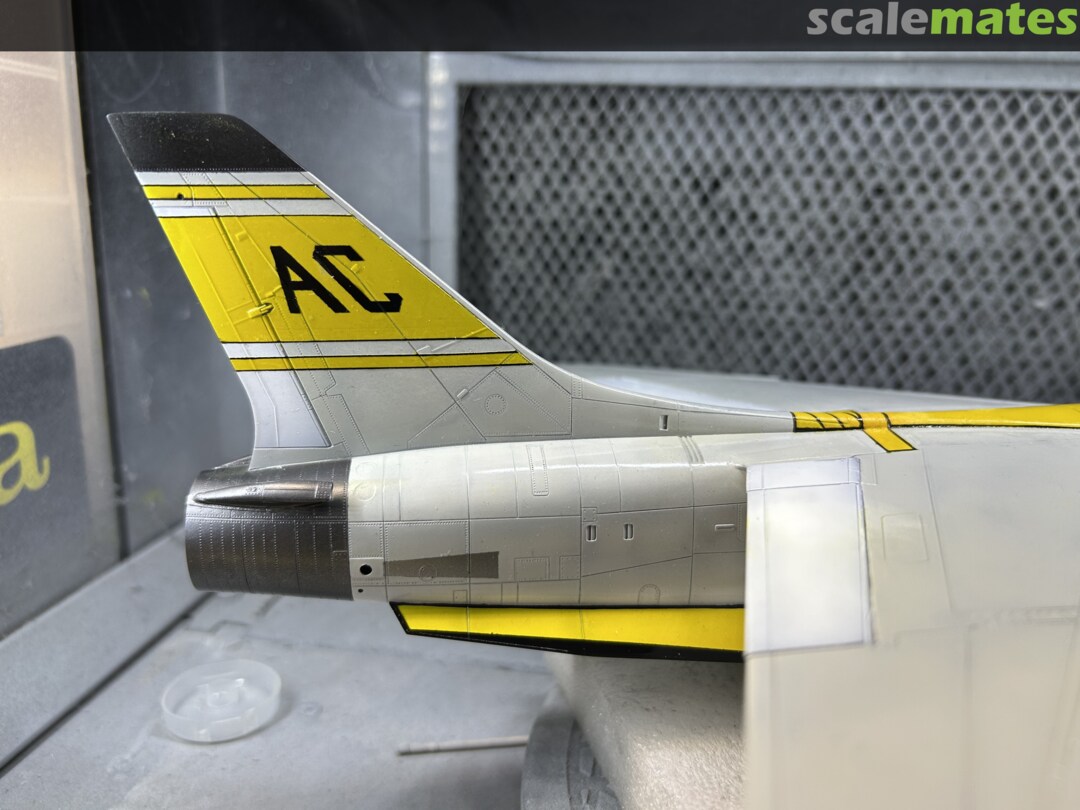
And here we are. Some touchups will be needed here and there. Also gently sanded off some areas where overspray got through. All in all it's turned out
1 11 November, 12:32
Hey nice! With the black outline the yellow seems bright enough. I like 👍
2 11 November, 12:48
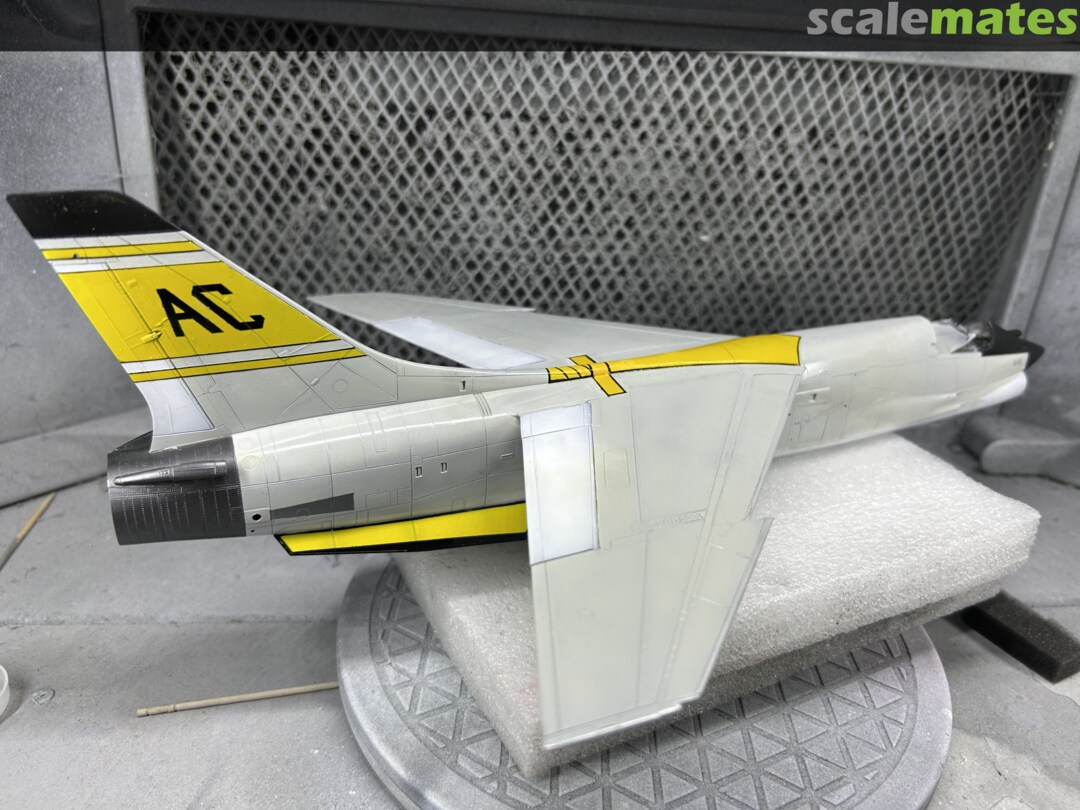
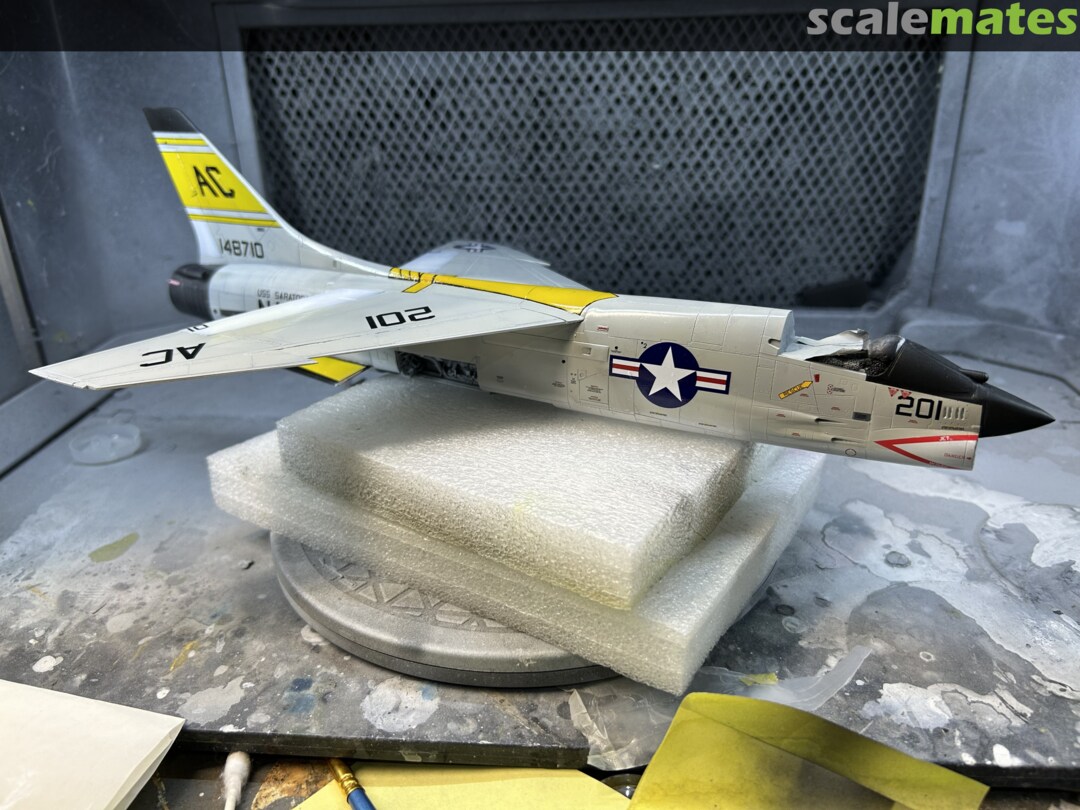
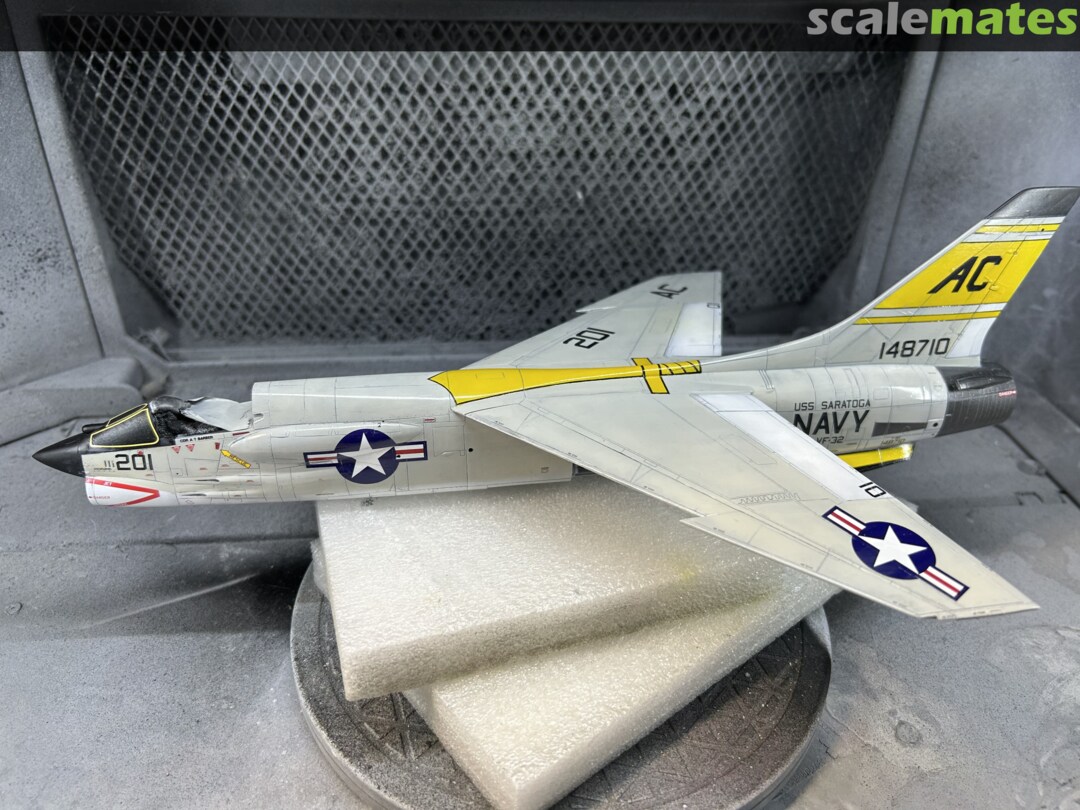
Thank you guys! Super thrilled that the paint has worked out this well. Got back to why I started that detour in the first place. There's a few decals on that CAT4 sheet that I can't get from anywhere else, mainly the wing letters/numbers and Ship/NAVY/unit block. Even though I might have ruined them with hot water previously, I still find these decals dicey to work with. Used warm water this time and Micro Set/Sol. They don't move around well, and tore in a couple places that were thankfully fixable. All worked out though. This jet is a future MiG Killer and featured on the Furball sheet (as an F-8H with VF-51 markings), which has the same BuNo., and all the insignia/stencils I will need. So it will be Cartograph bliss from here on out.
3 12 November, 14:07
Fantatic paint job Rando 💪🏻 It was the right way to paint the tailmarkings! It looks much more better than the decals.
2 12 November, 18:04
Thanks Tom, I indeed took some inspiration from your Skyhawk that had some painted on colors, which looked great. This definitely gives me some confidence for what I could do in the future for other models.
Got most of the decals and stencils on. Now it's onto the many many things to do to finish up. Had to make a list so I won't forget anything.
1 14 November, 04:57
What a lovely bird. And such a nice choice of markings. This must have been the fastest crusader ever built!
1 15 November, 05:03
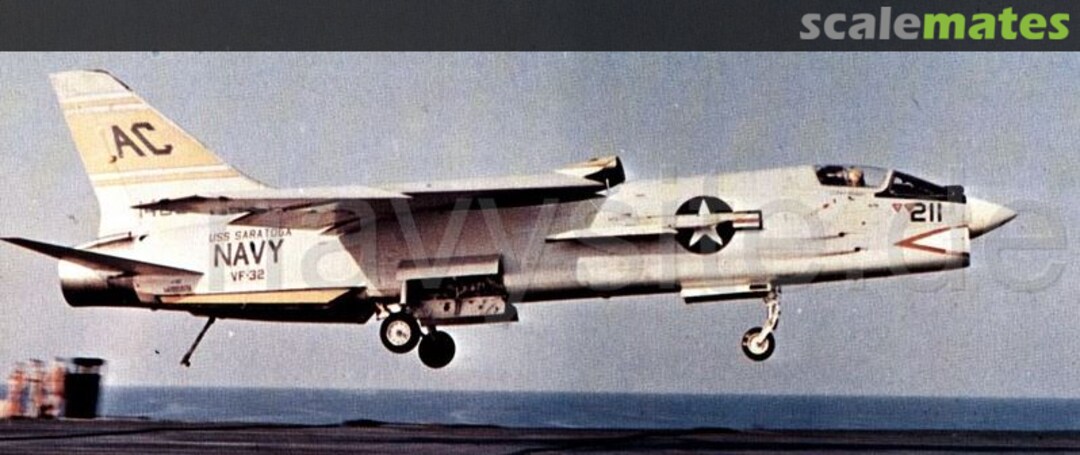
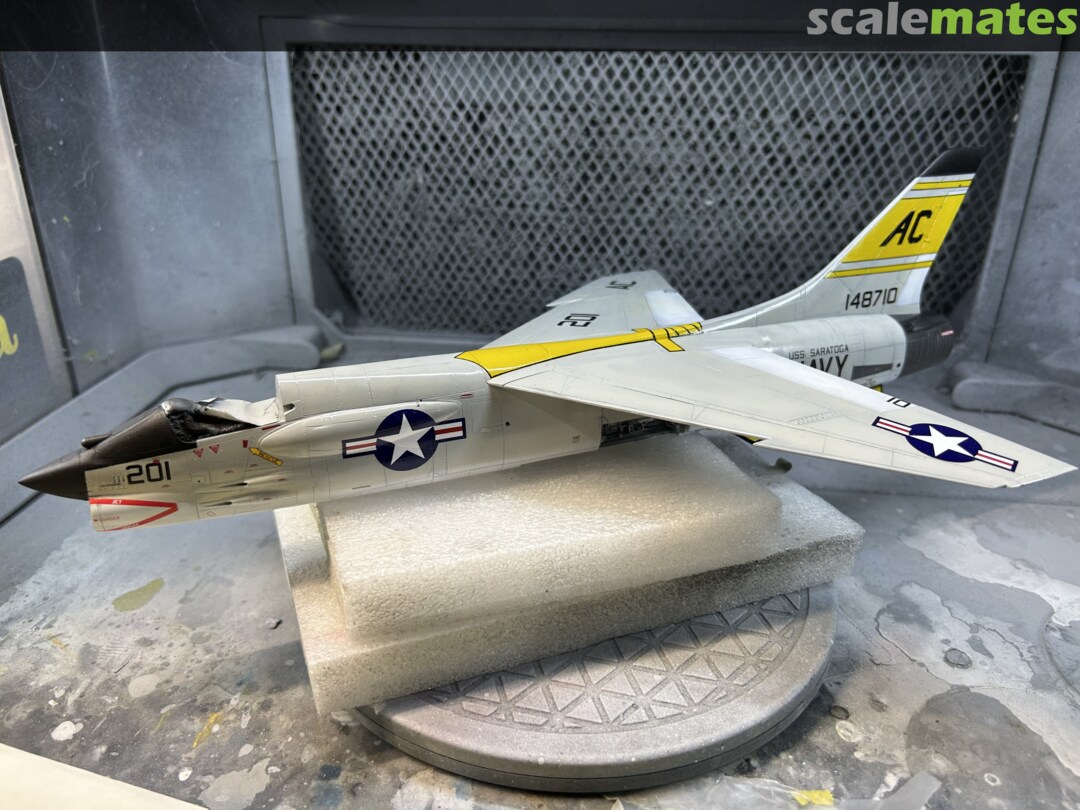
Thank you Roman! The VF-32 markings sure are unique and were fun to make. Matter of fact you're correct too, this is an F-8D, which was the fastest of any Crusader variant 🤓
2 17 November, 23:22
Before I got the clear coat on over the decals, I realized I wanted to fix the starboard tail code. I was not happy with how it looked, compared to the other side it had some smudgy, unclean lines. So I sanded it off, restored the yellow underneath, and repainted it with a fresh cut stencil. Much happier with the overall look. Should have this jet glossed and weathered soon.
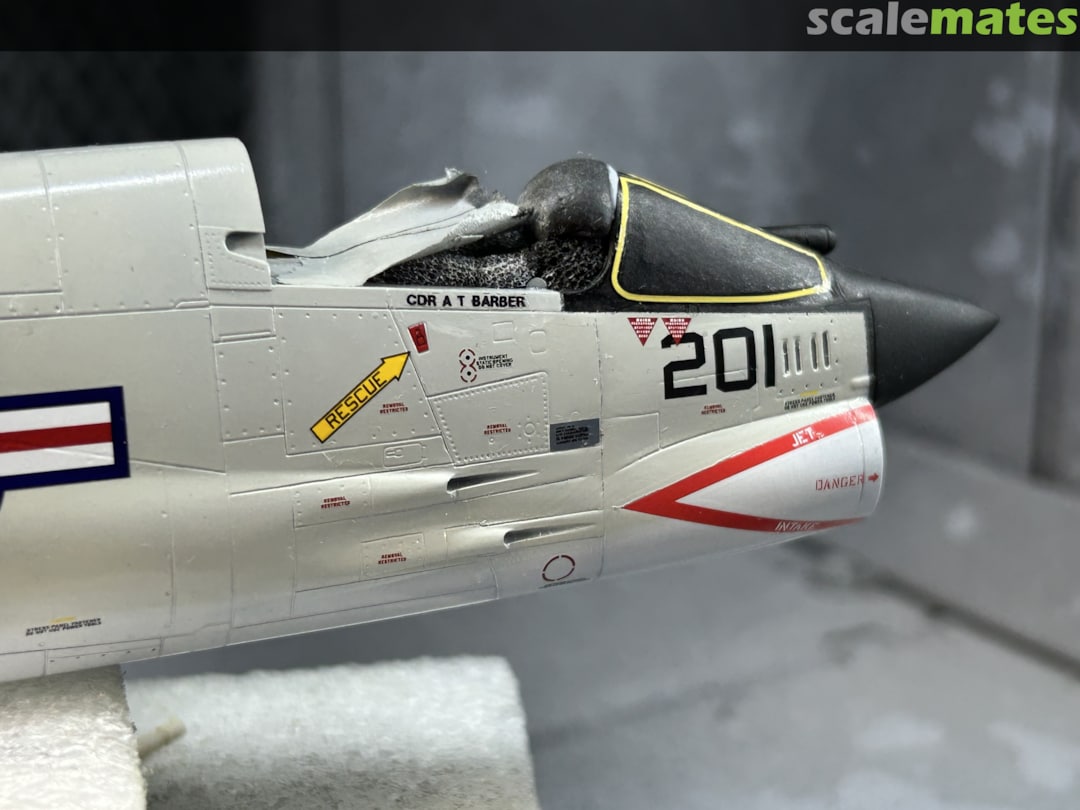
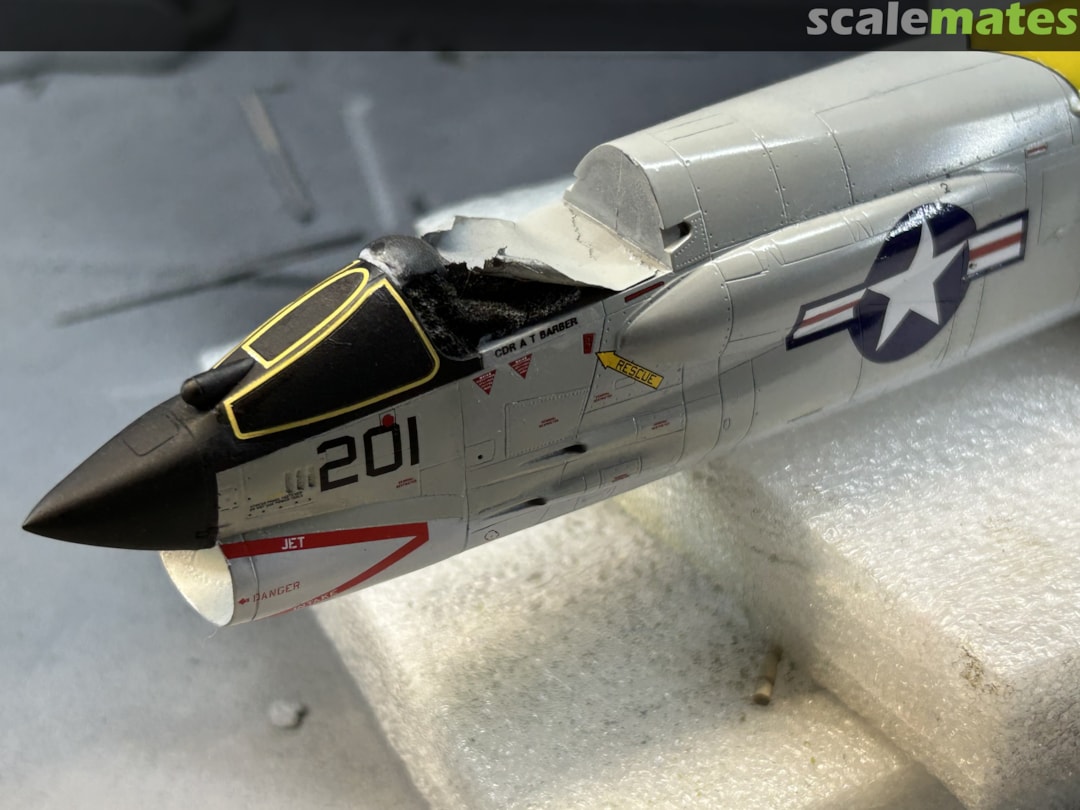
Other things I've done include adding a pilot's name to the cockpit walls. For the window frames I used Furball decals; as nice as these are, I'll definitely be painting these on with New Ware masks next time. Also mostly done with the ejection seat. This was an annoying hurdle because I ruined the original colors with 91% IPA and had to repaint them.
1 22 November, 13:44
Yeah they're decals, I had them in the stash so decided to try them. Paint masks would be the way to go next time though.
1 22 November, 14:09
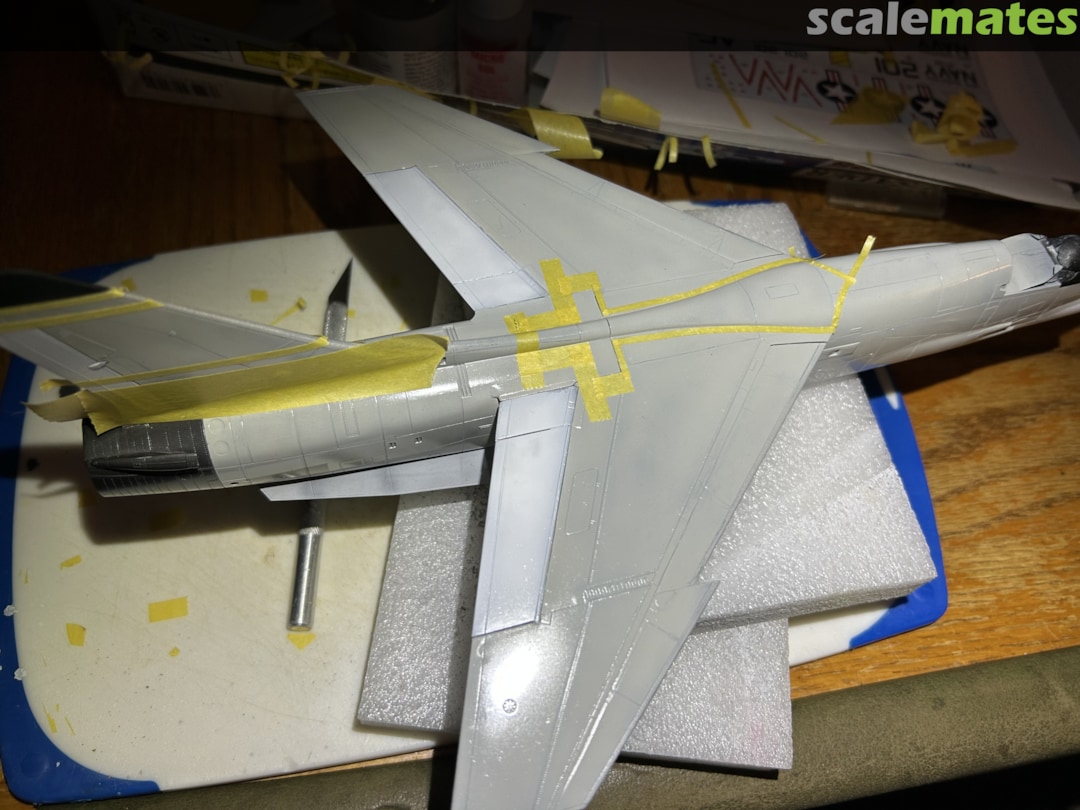
Ugh god save me from the negative modeling. I have been fussing with trying to clean up parts of the stripes and lines, then tonight a big fat drop of 91%IPA on my glove landed on the wing. I should be thankful that this is much more fixable than if it ended up on the yellow. I gotta finally put a clear coat on the decals and get this thing weathered and assembled.
1 26 November, 04:42
Careful use of 2500 grit sandpaper and perhaps a little Tamiya polish then wash with water and buffing with cotton t-shirt. Once that's done, I would carefully add a little primer (very thin) and then return the gull gray. For me, this happens from time to time...
1 26 November, 04:53
Better IPA than lacquer thinner. Go as Desert Marlin said and learn from the lesson 🙂
1 26 November, 06:38
Thanks for the good advice gents, I think this is the second time you've helped rescue an ugly smudge Marlin. I'm weathering and panel lining the F-8D now. I don't like the look of over-emphasized panel lines, I find it unrealistic, so I always use grey panel liner and reduce them with terpenoid on a q-tip. I'm also not looking to over-weather this Crusader, it was on a sunny Mediterranean cruise in 1965 and they showed it off at air shows, so it was pretty pristine. I did go for some streaking on the underside with Tamiya tape and weathering compound (got the idea from John here on Scalemates).
1 3 December, 05:03
Heck of a project and conversion to take on but you're doing a bang-up job and the finish line is in sight! 👍 If there's a next time, I'd suggest base coating any yellow areas with white or pink (yes, pink) first to make the pain-in-the-ass yellow easier to work with and cover better so you don't have to put on multiple coats.
2 3 December, 16:43
Thanks John—absolutely doing that next time. Another thing that's been reinforced is any touchups always benefit from a layer of primer. I found myself putting on way too many layers of paint at certain points and still having a different shade underneath.
2 3 December, 17:00
Yeah for touch ups I learned the hard way just to go ahead and mask off an entire panel and recoat. You can still have some variation but it's at least more passable than a splotch right in the middle of one.
2 3 December, 17:10
Almost done with final assembly. It's subtle, but the canopy frame doesn't quite match the shade of grey on the fuselage, so I'm spaying on some more gull grey. Just some more weathering, clear coats, and detail bits to add, and she's done!
9 December, 14:57


