

Hobby Boss F-14D Tomcat VF-101
 1June 14, 2025I'll try to do something like this...will see.
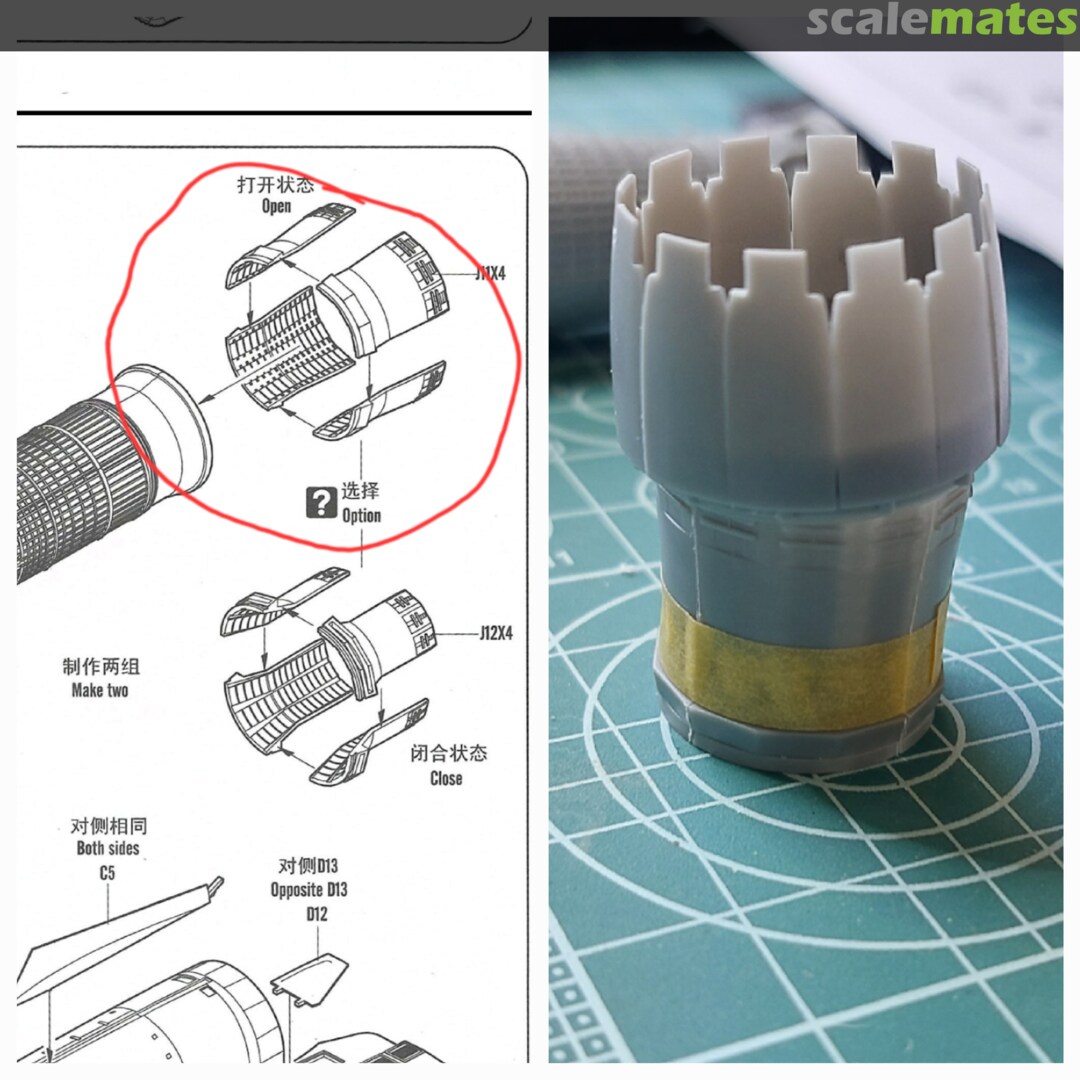
 2June 14, 2025Starting a new project, this is going to be a bit messy as I ain't following a specific order. Starting with the air intakes, changing the ramp configuration to parked (or subsonic flight) mode.
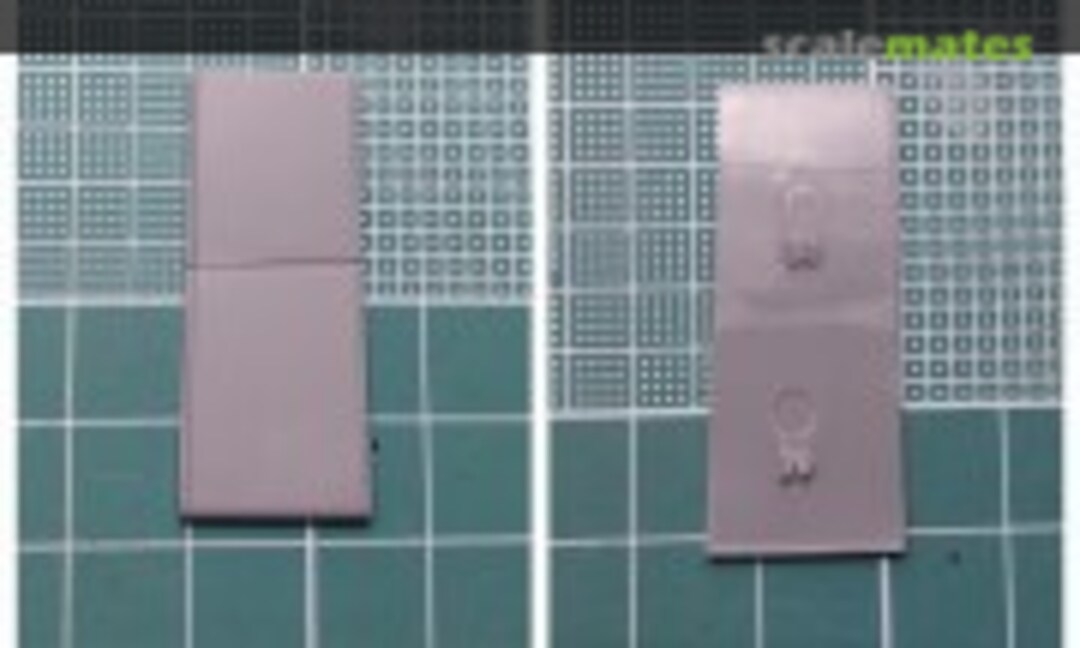 3June 14, 2025Deepened the grove between the ramps to add flexibility to the part and sanded the clevis almost to the base.
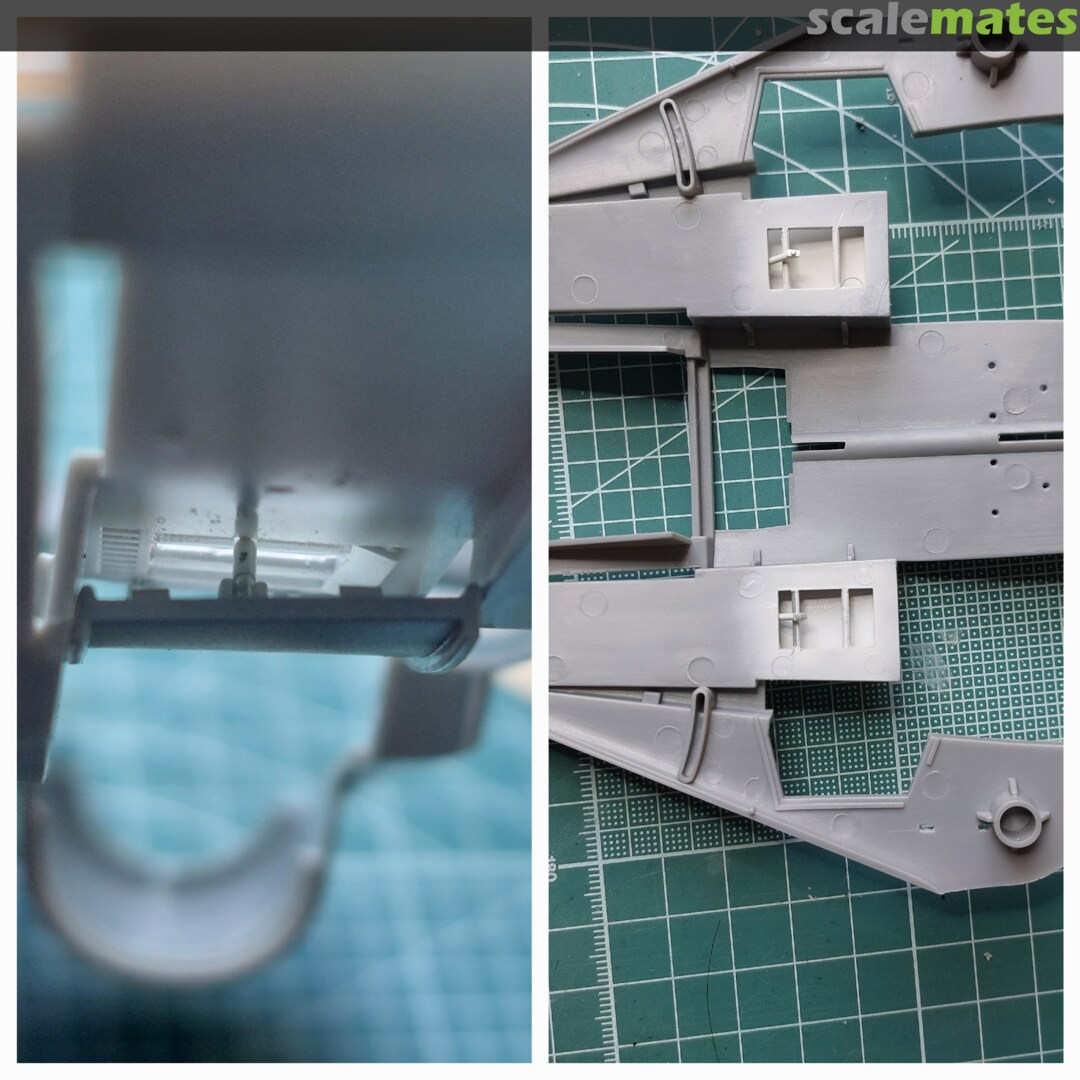
 4June 14, 2025The 2 ECM antennas are not present in D model, so they're removed. Also covered the holes for the rear ramp actuator.
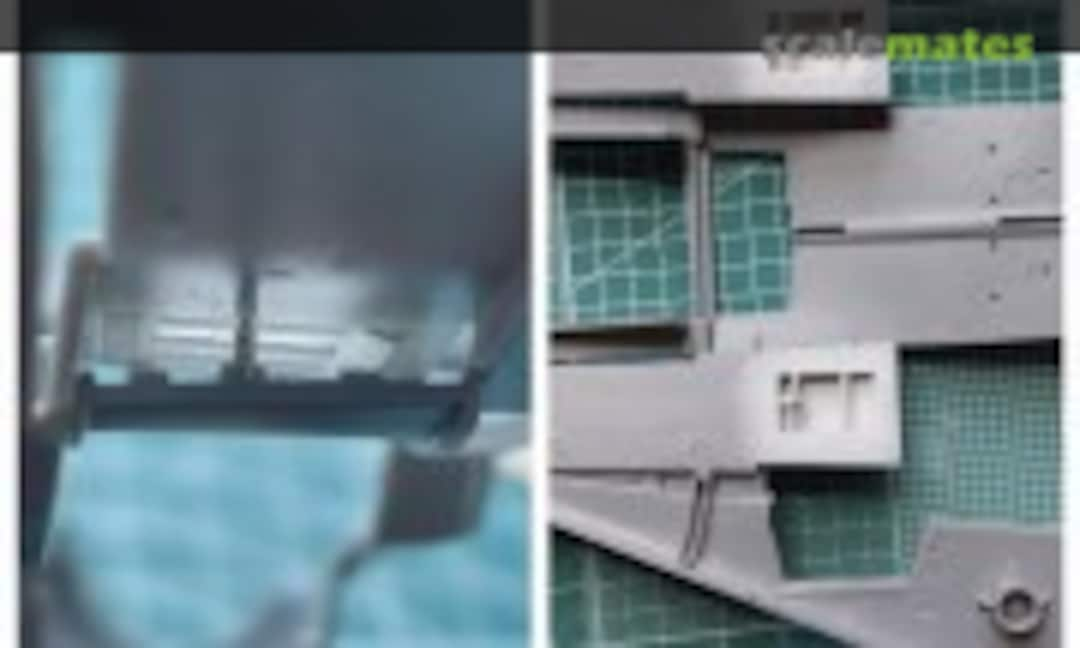 5June 14, 2025The rear actuator should be pointing forward, and the top going through the upper vents. To avoid a big modification, just connected the actuator to the ramp but in an angle pointing backwards a passed through the holes. Also added the stops on both sides as a tinny improvement. Almost impossible to see once finished..."locuras del modelista" 🙂
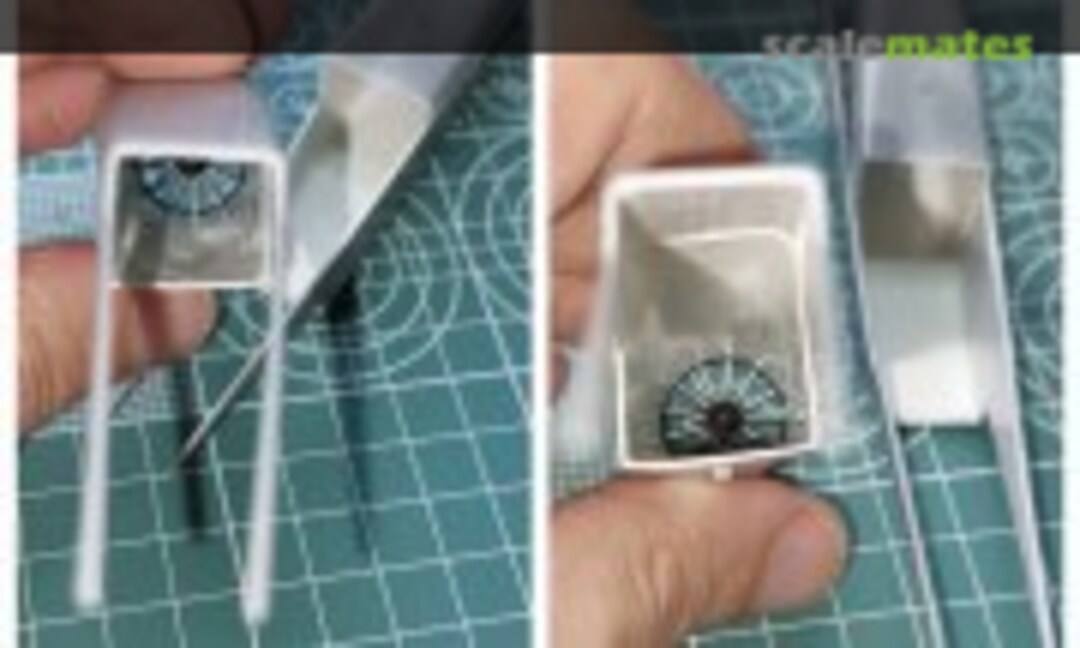 6July 31, 2025Engine inlet saga. Inlet ducts were ok, the seam was not that bad after sanding, but the joint with the fuselage another story. Requires much more sanding but will not end up perfect.
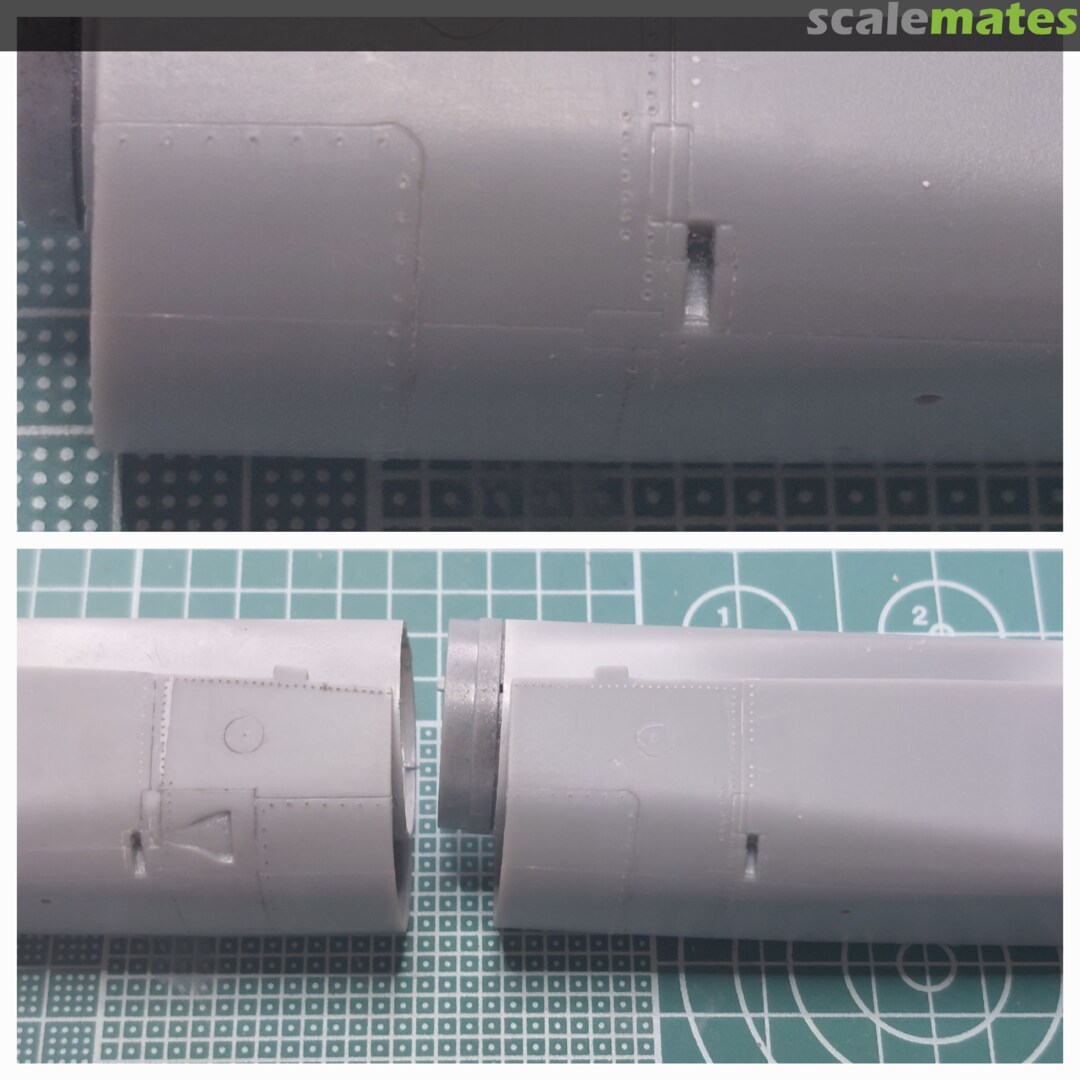
 7July 31, 2025Scribing sections of the inlets and correcting other lines. The kit's quality is poor in this area.
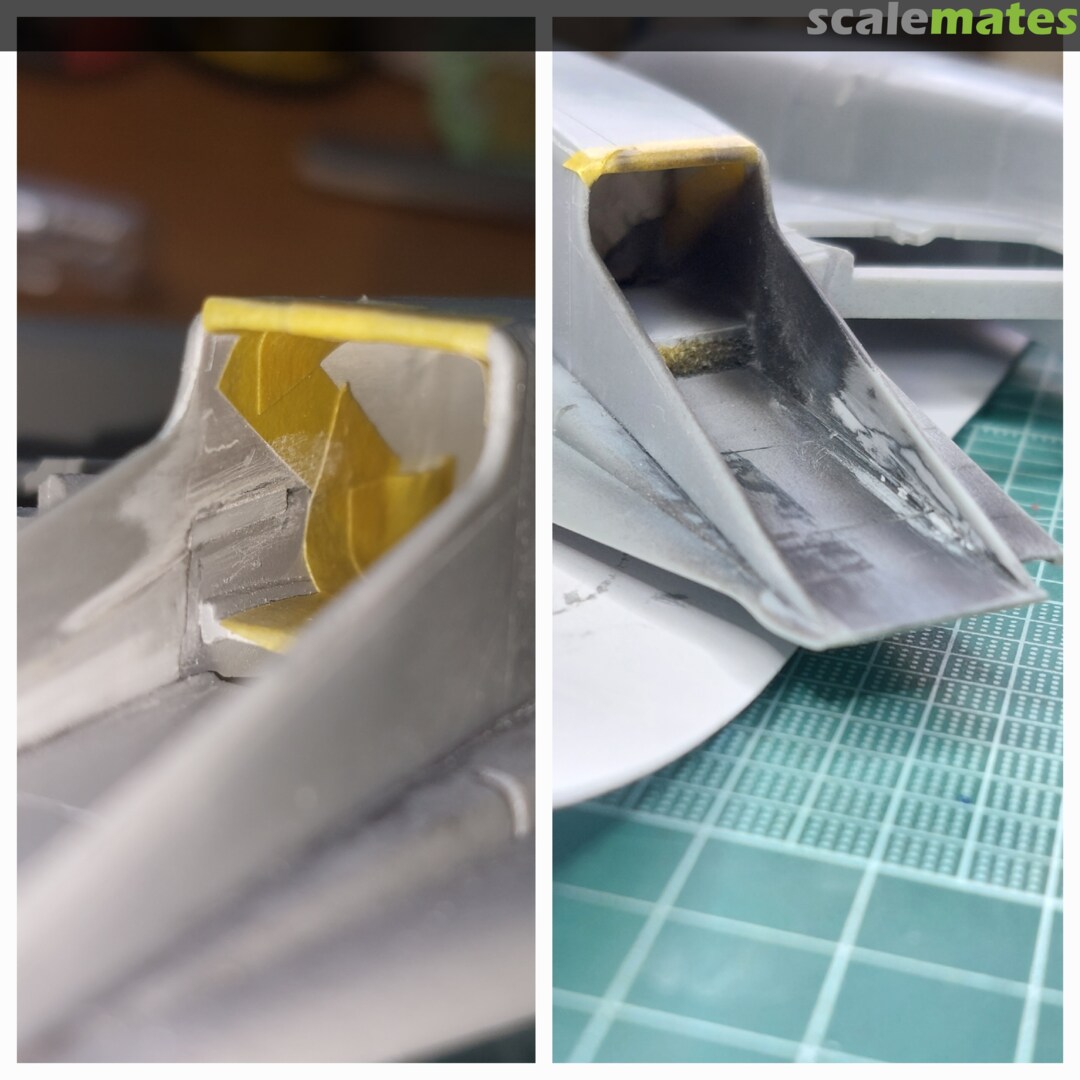
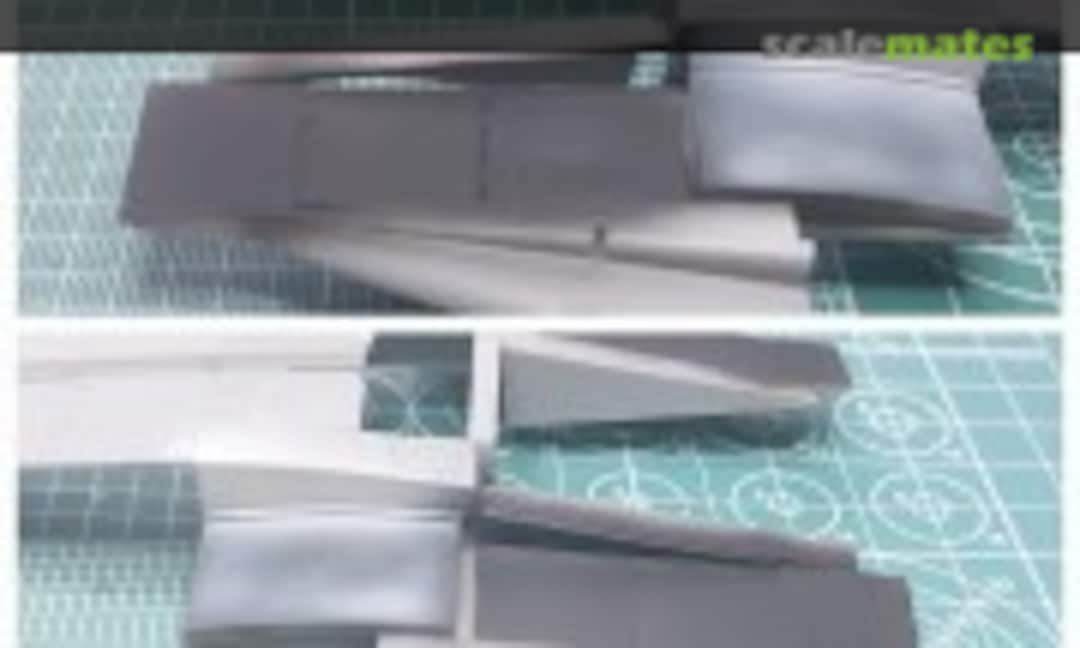 8July 31, 2025Changing the configuration of the ramps add a new problem, it left a triangular hole in the inner wall that has to be covered.
 9July 31, 2025On one side it was added a piece of plastic to the fuselage, on the the other side I realized it was better to add it to the inlet and avoid the seam.
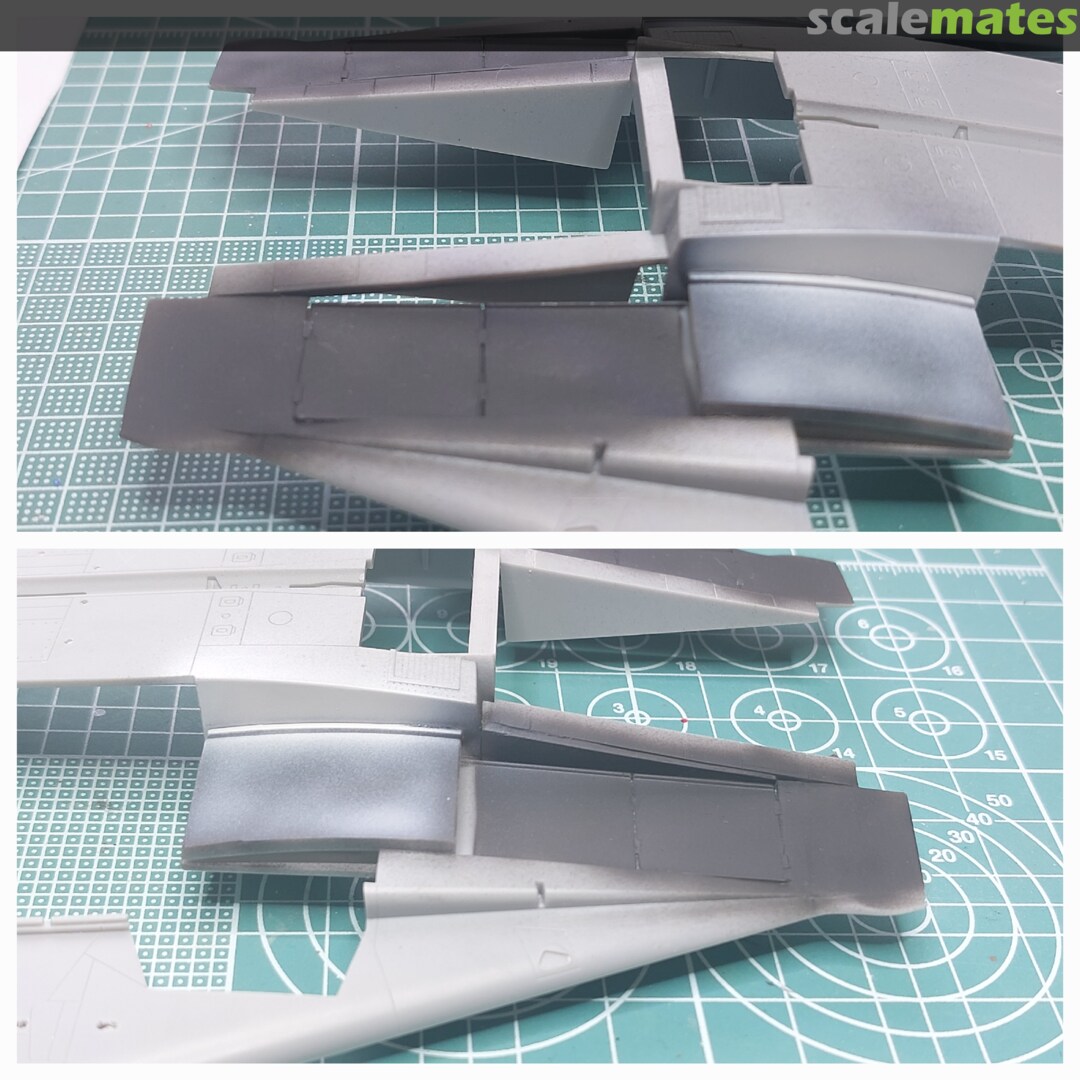
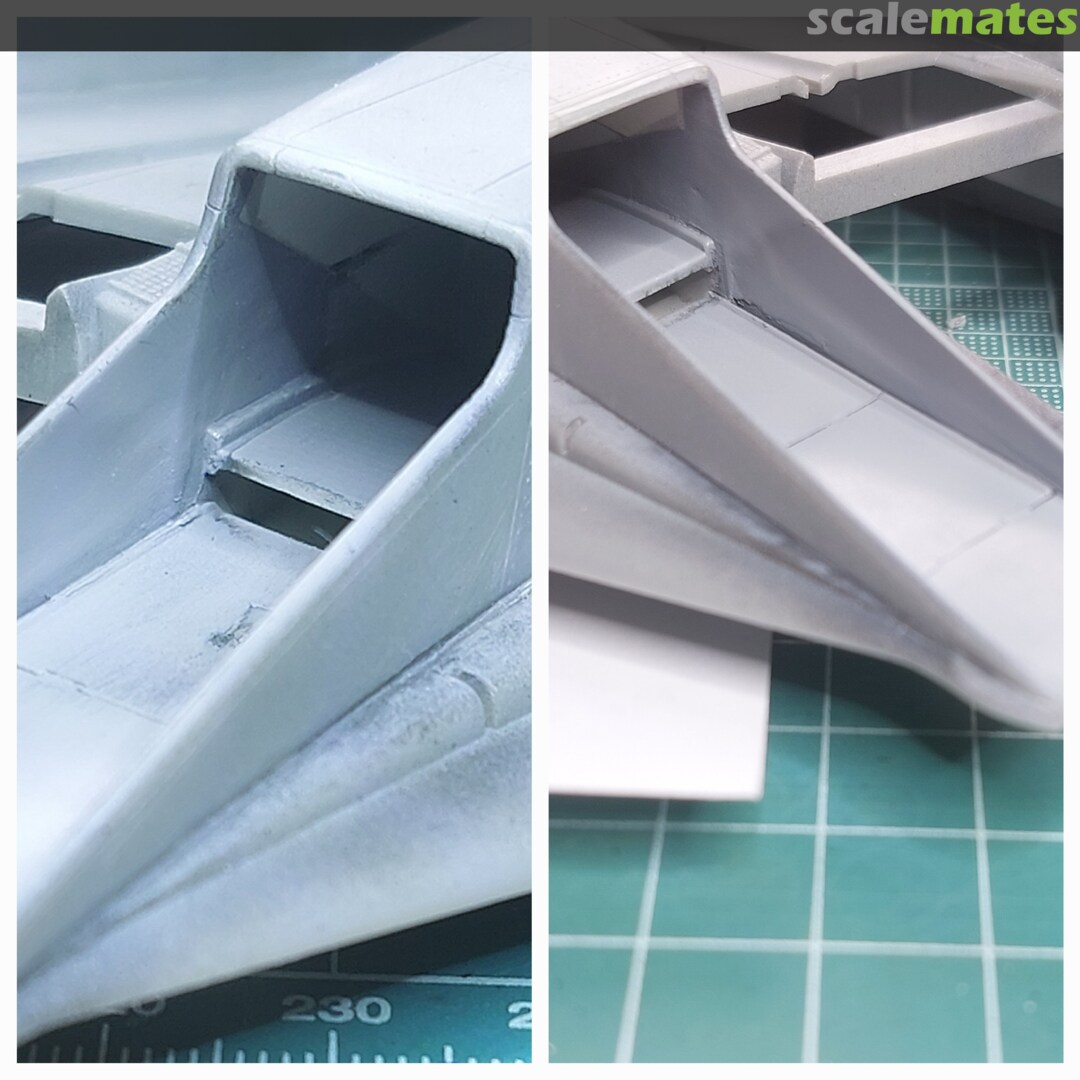
Also the inlet edges are plastic cutters! Trimmed them to have a more rounded section. 10July 31, 2025Result after masking and painting the inner surfaces.
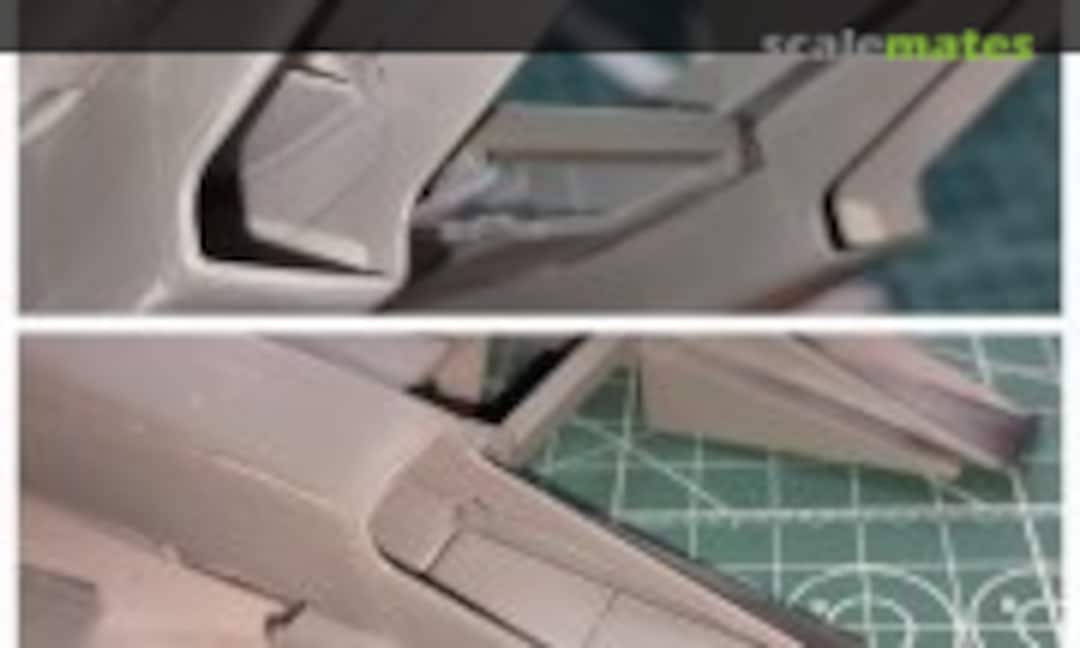 11July 31, 2025...adding the plastic to the inlet was a good idea (upper picture), but still the seams are awful.
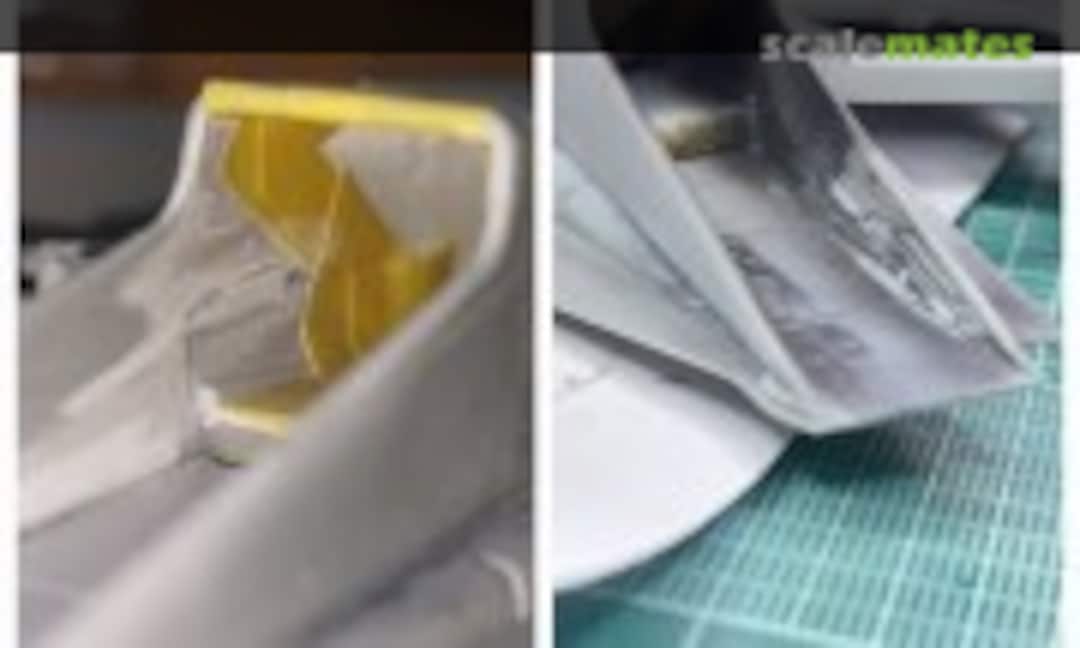 12July 31, 2025So...more sanding.
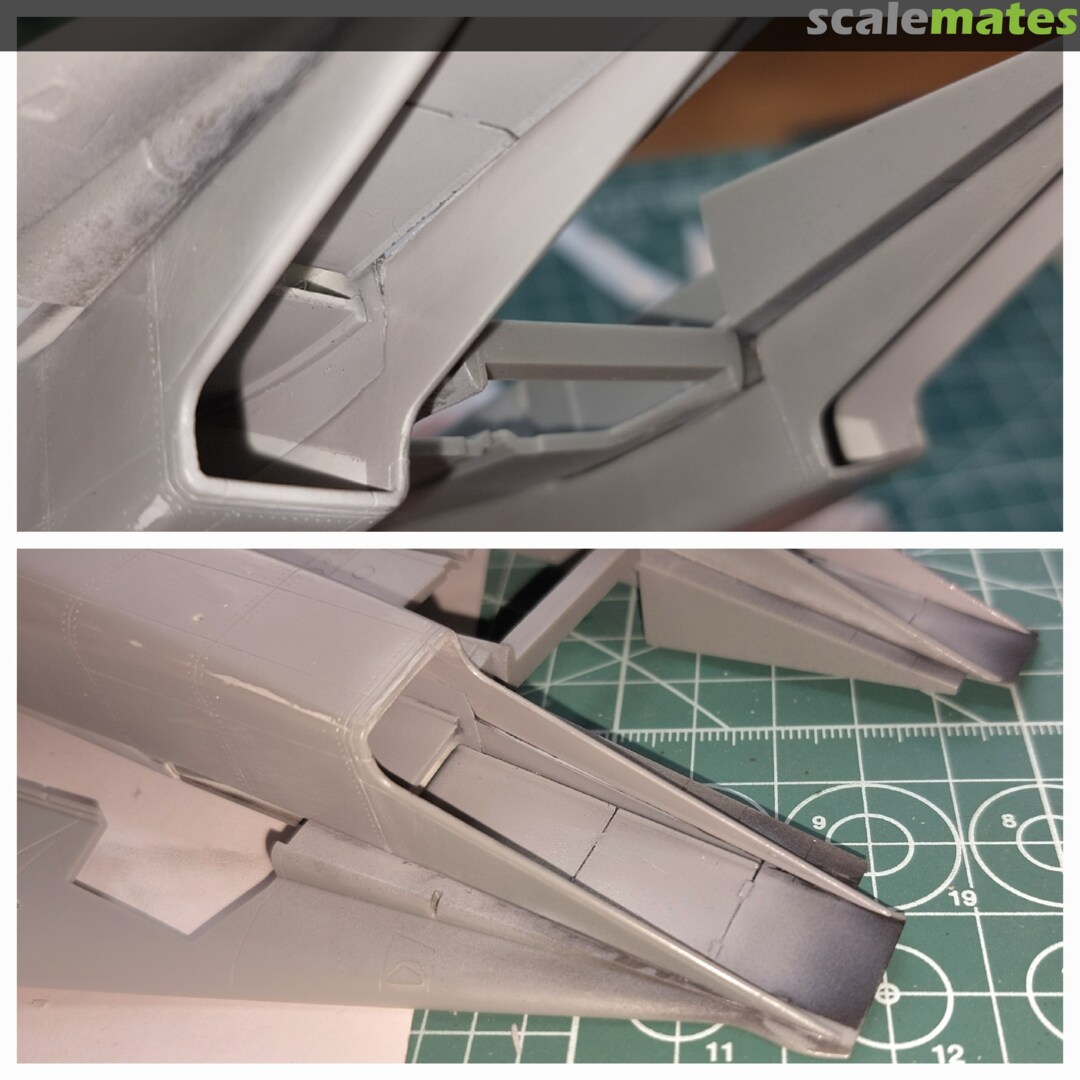
I tried to fix just the front area painted in gray, to keep it simple 🙂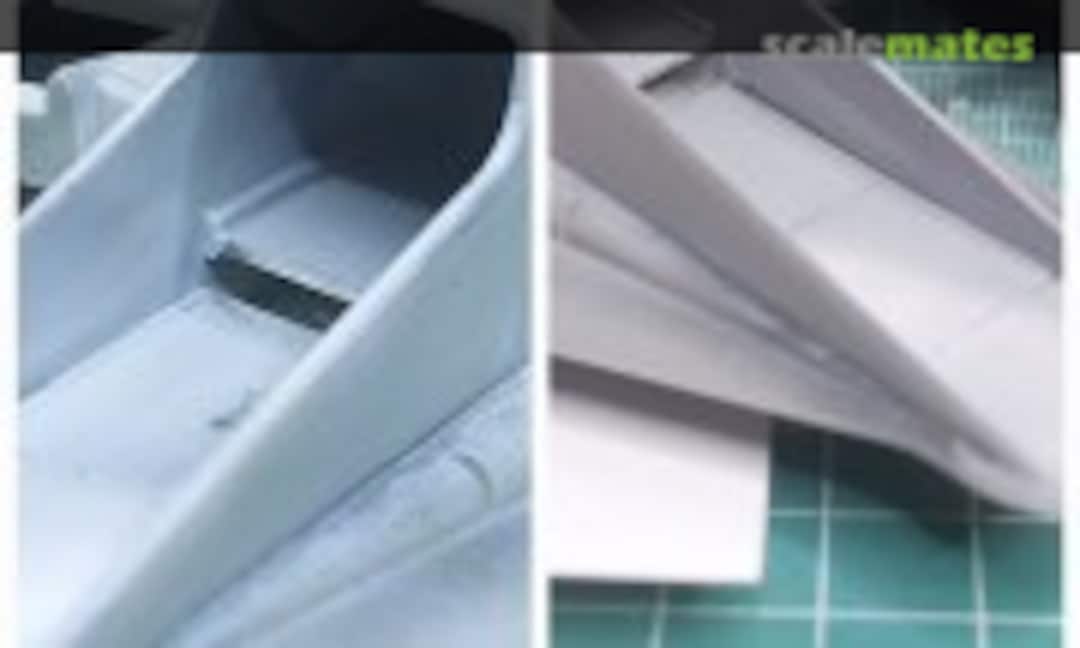 13July 31, 2025Final? result, there are a few bits that I will fix later.
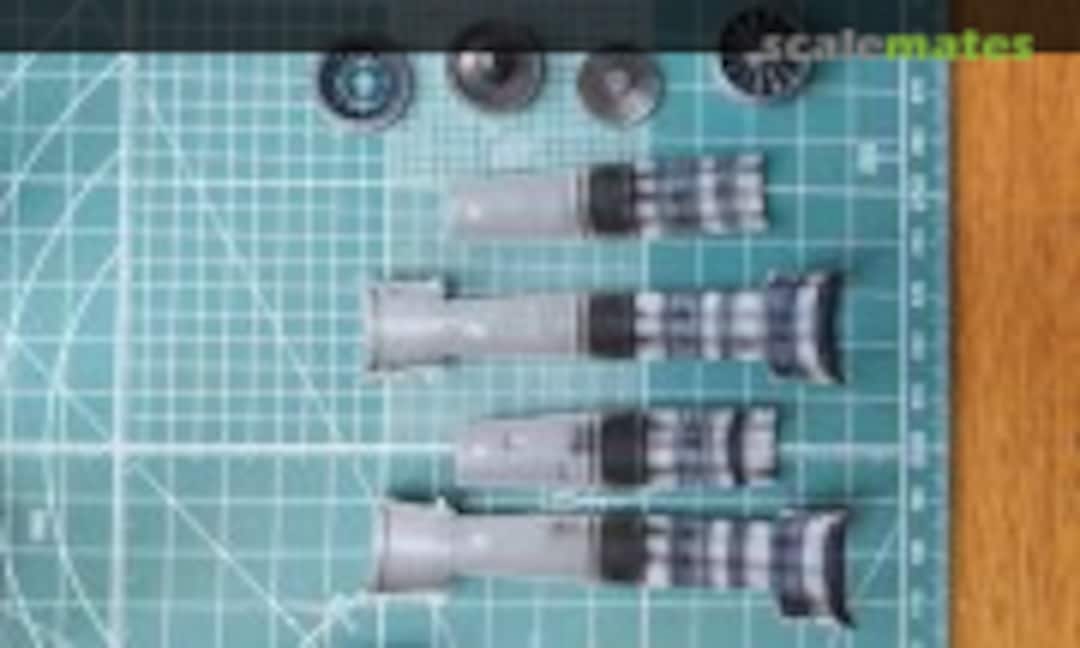 14August 2, 2025
 15August 2, 2025
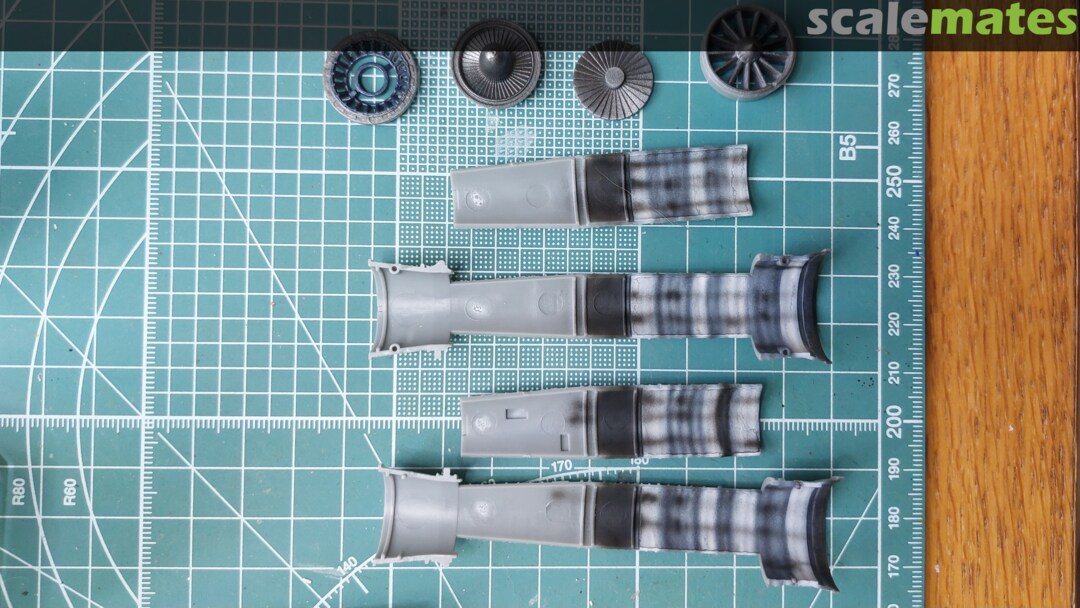
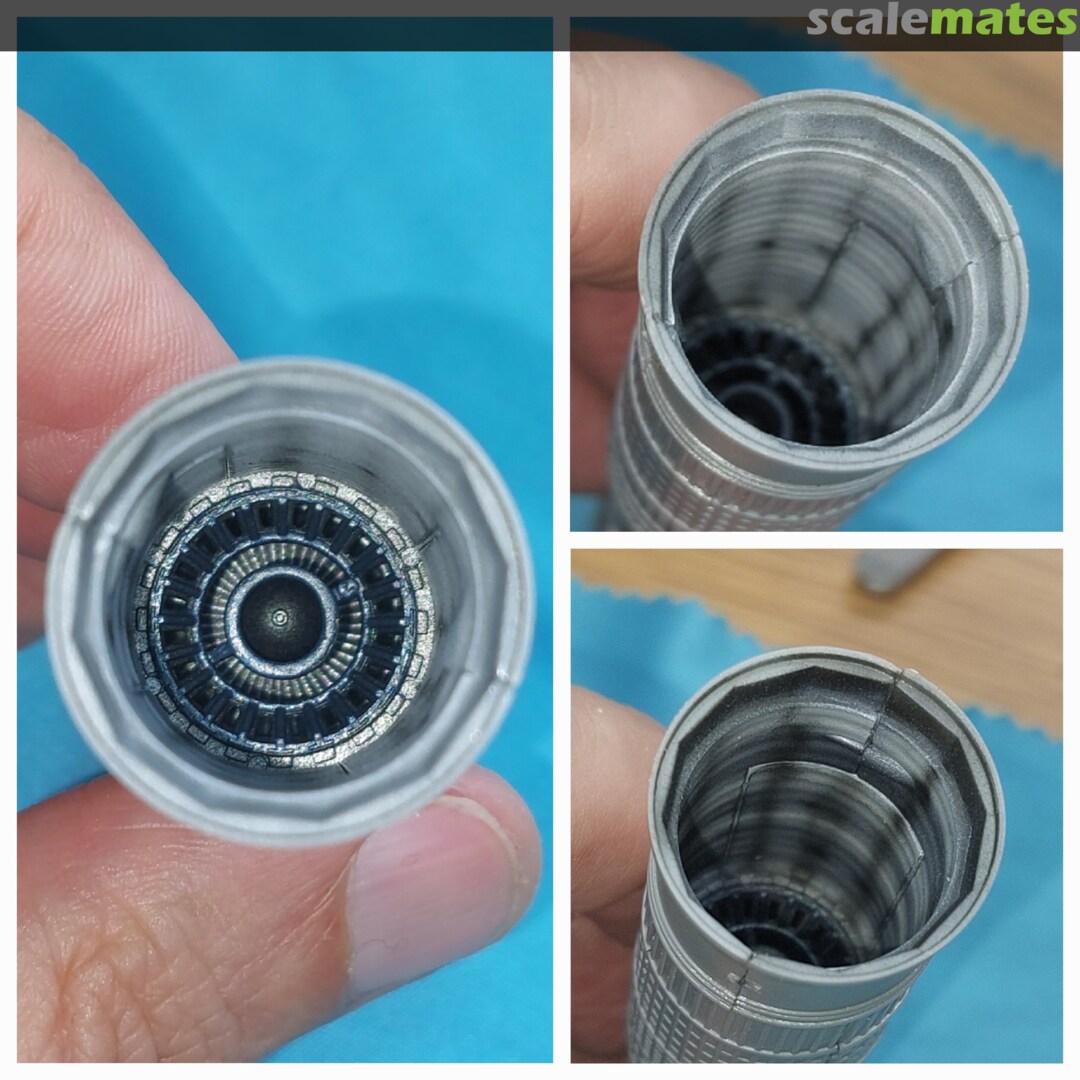
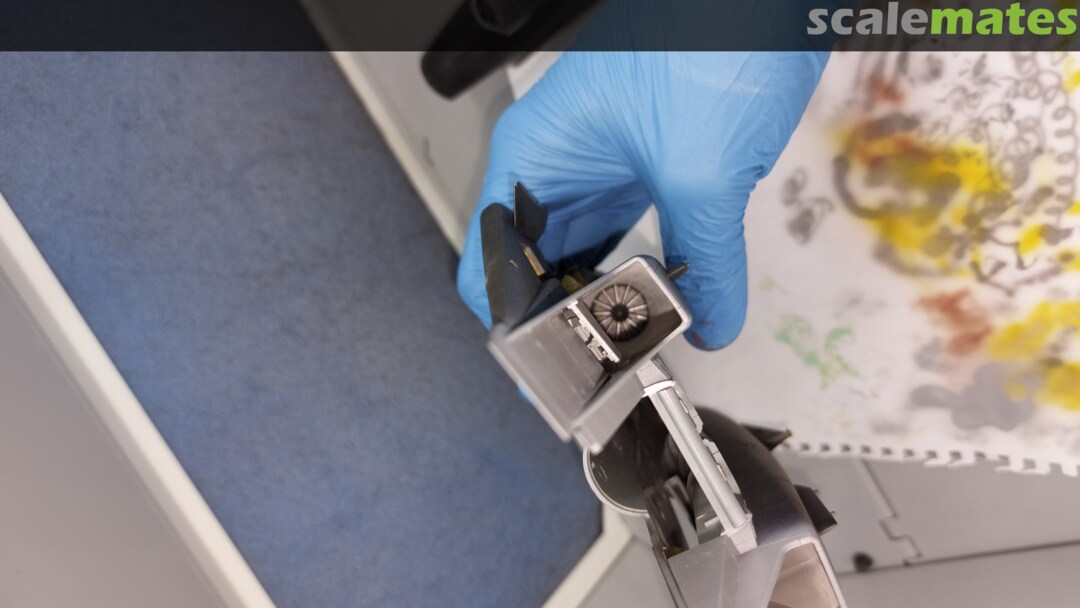
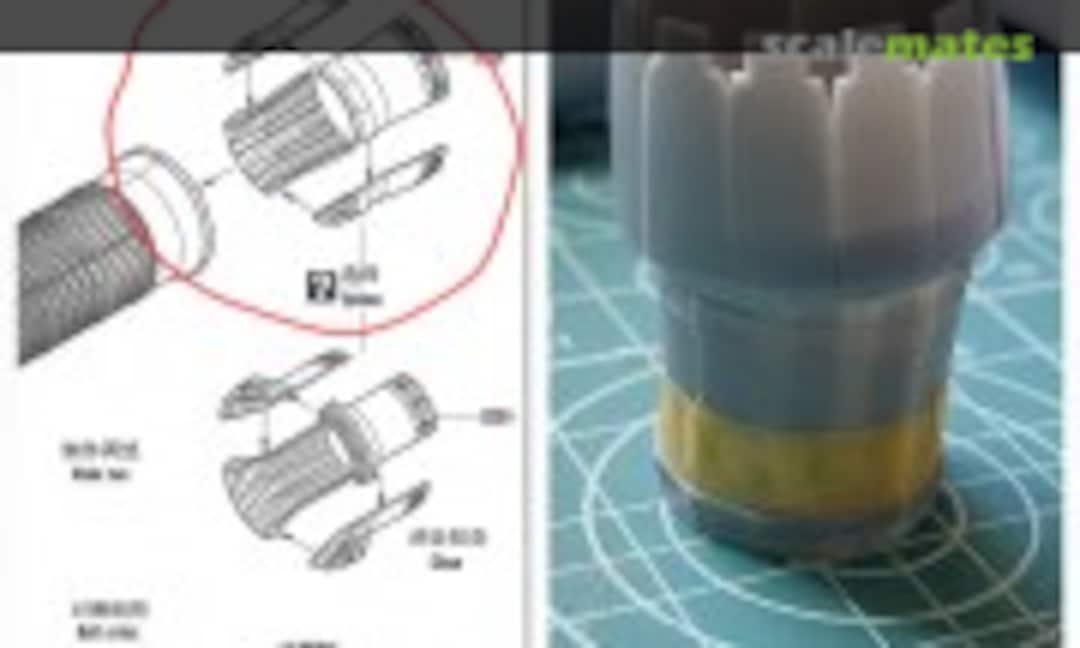 16August 2, 2025My recommendation, don't attach the nozzle's movable leafs to the engine, I found out that the external nozzle hardly goes through.
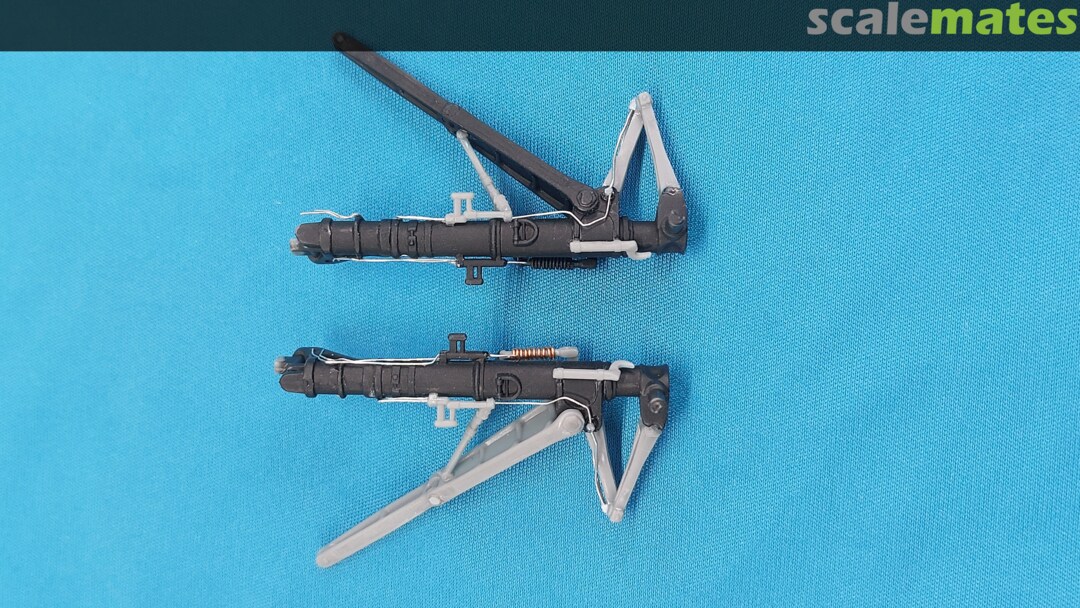
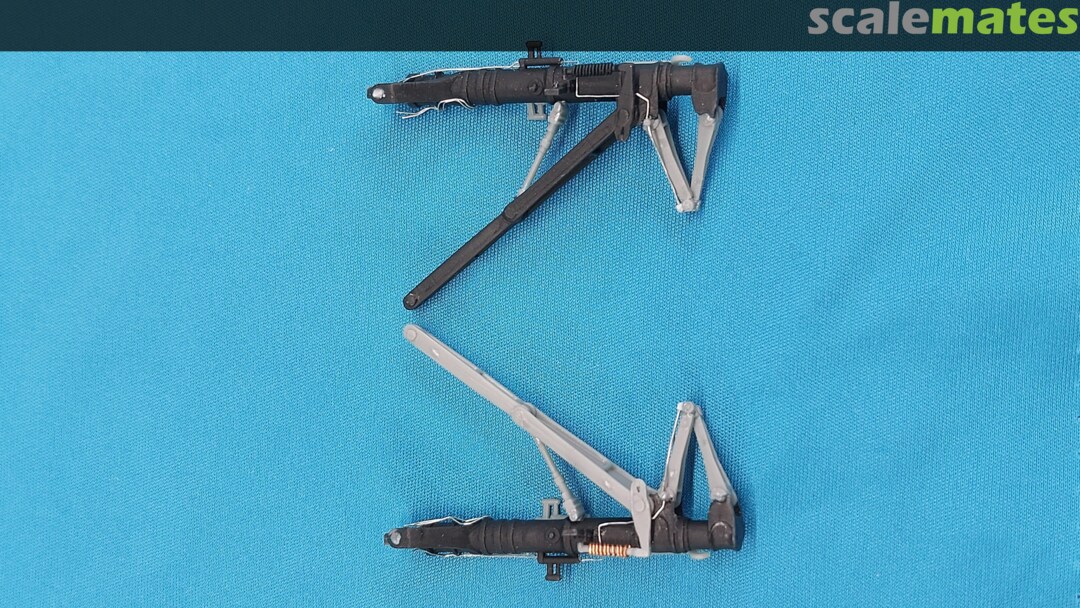
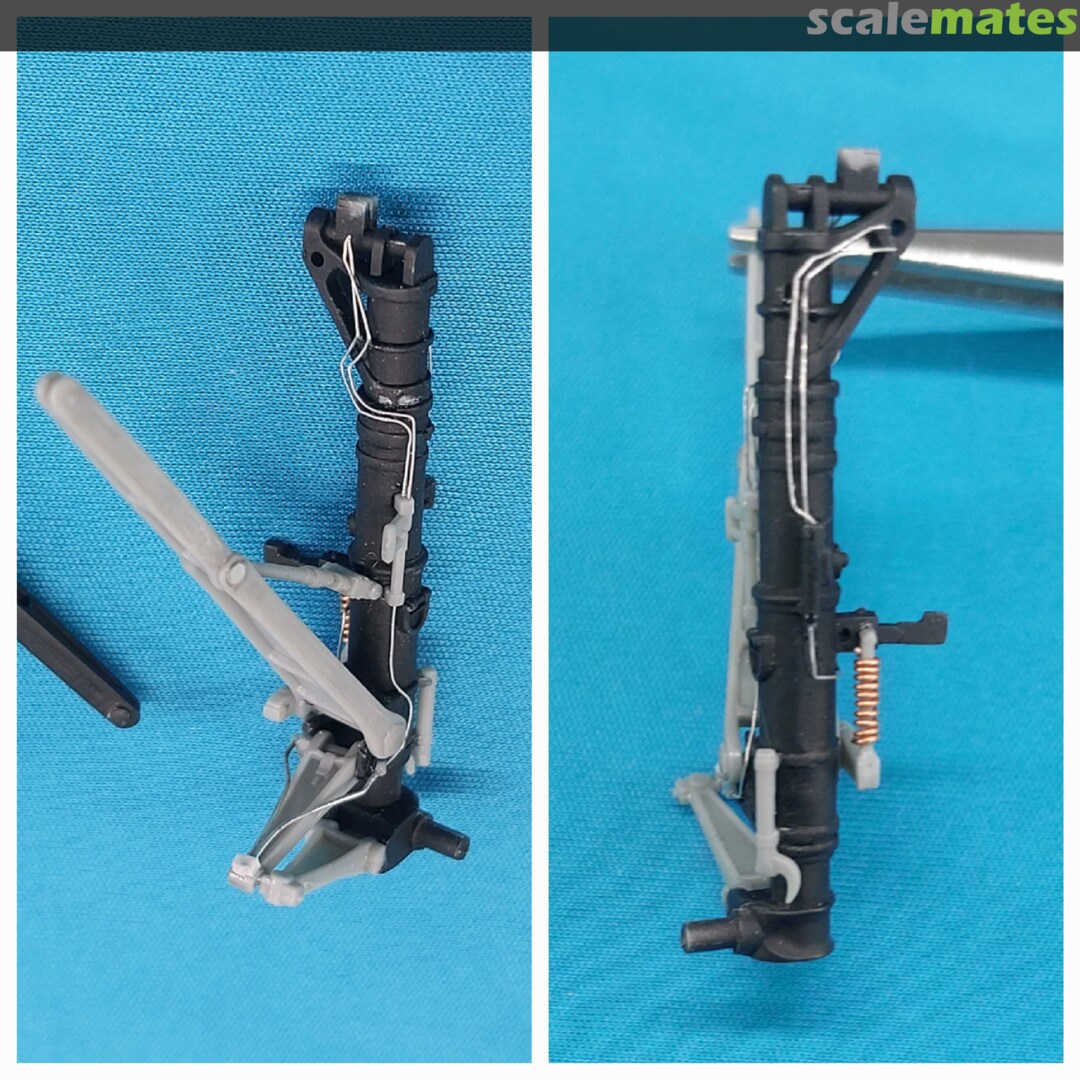
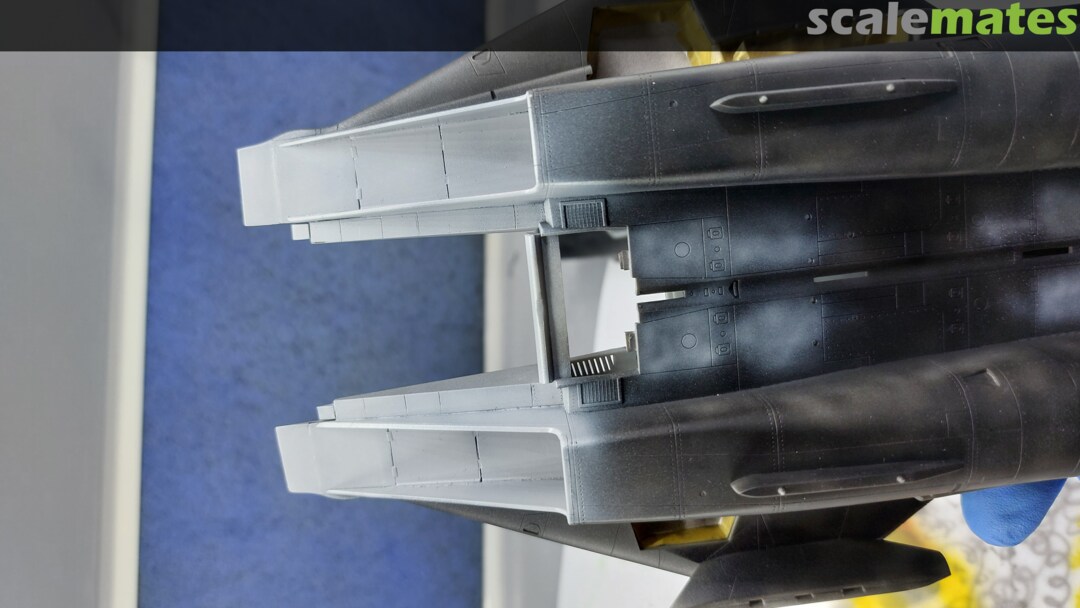
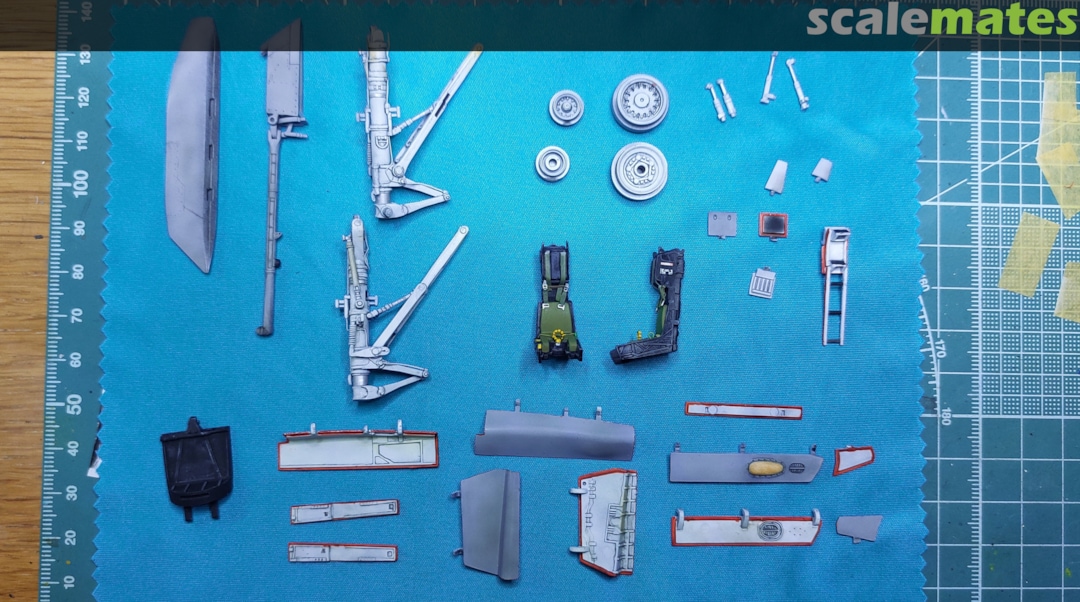
 17August 2, 2025Main gear bays are so far the best of the kit, almost trouble free. Already painted and light washed.
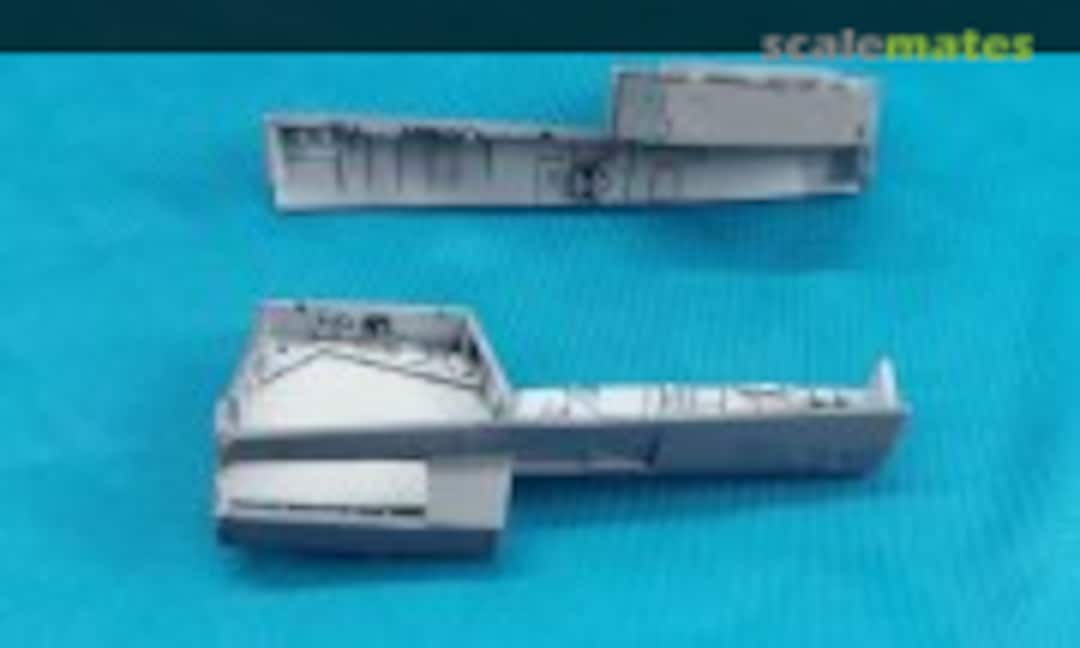 18August 2, 2025
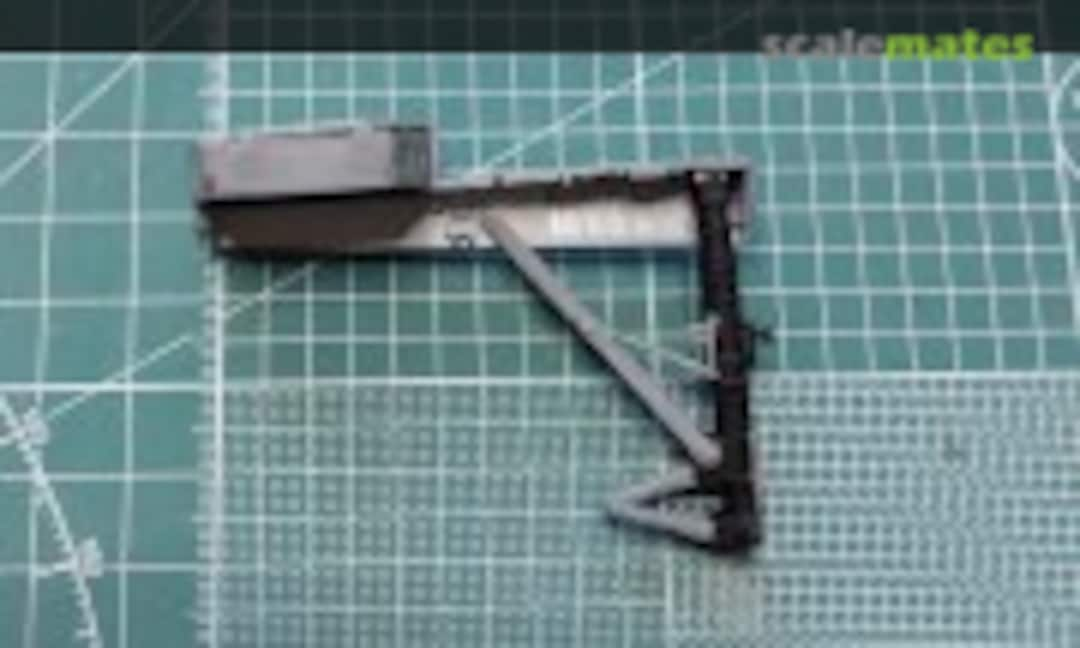 19August 14, 2025Before gluing the bay to the fuselage, I used it as jig to assemble the main gear.
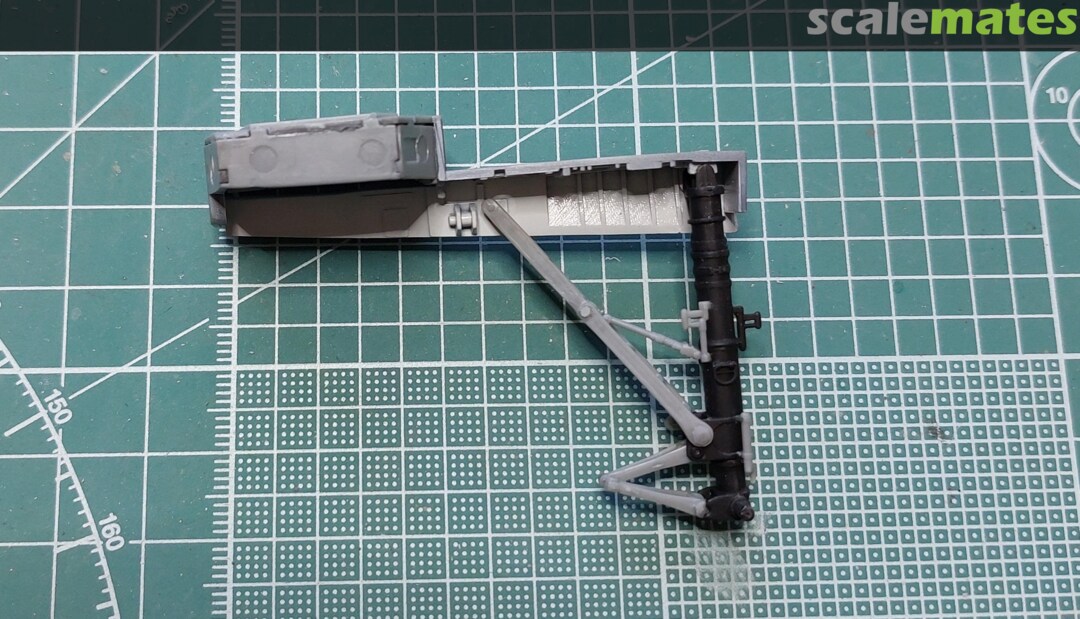
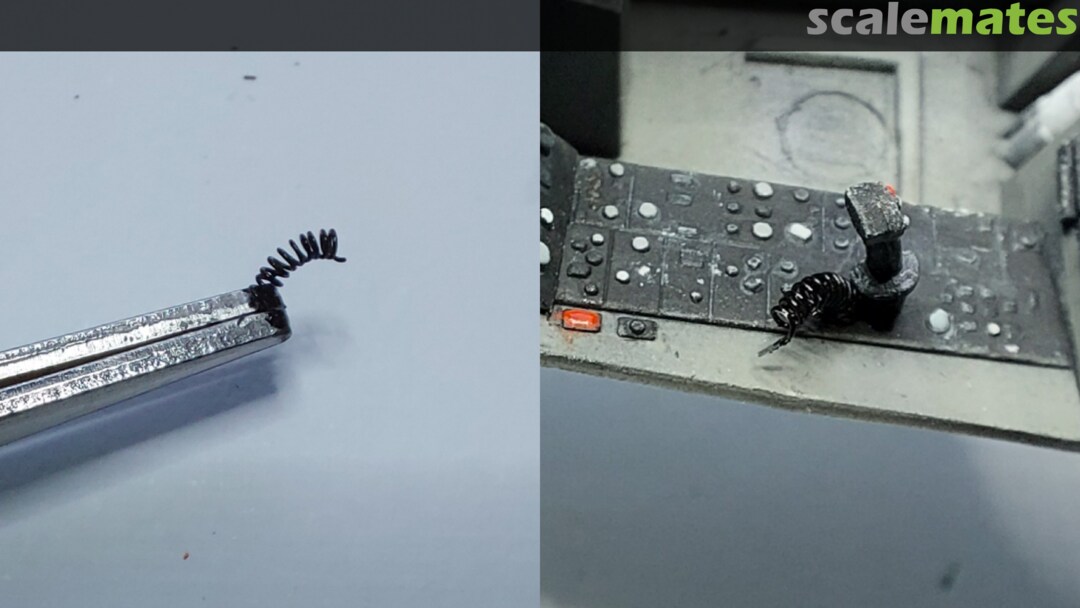
I've removed a lateral pin that fix main strut to the bay, so it can be installed later.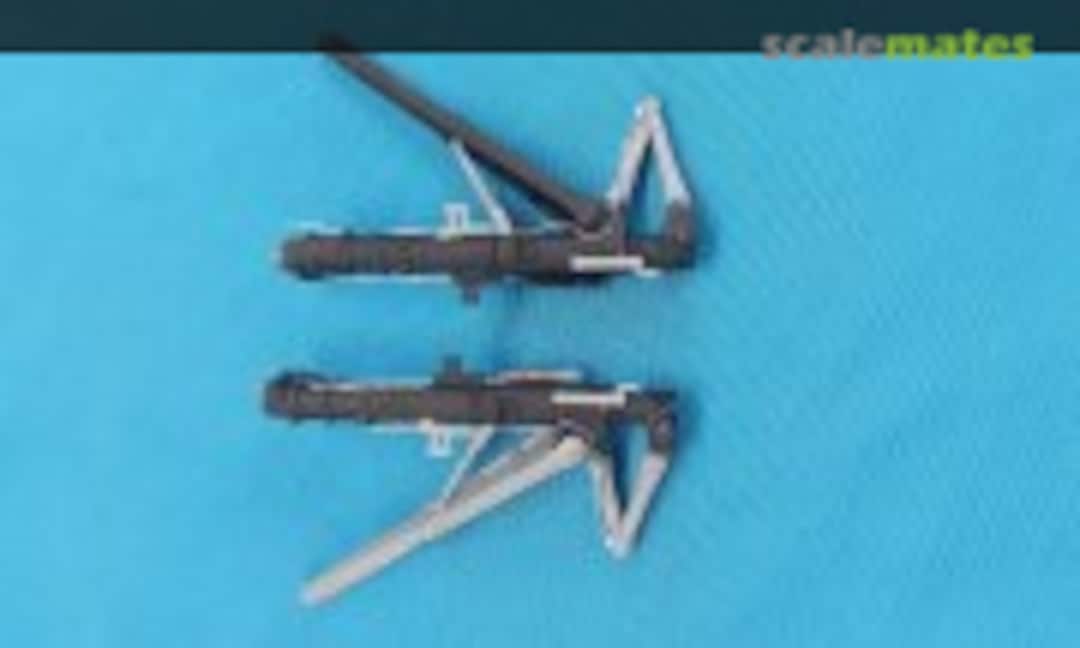 20August 14, 2025Adding a few pipes and the spring of one of the actuators.
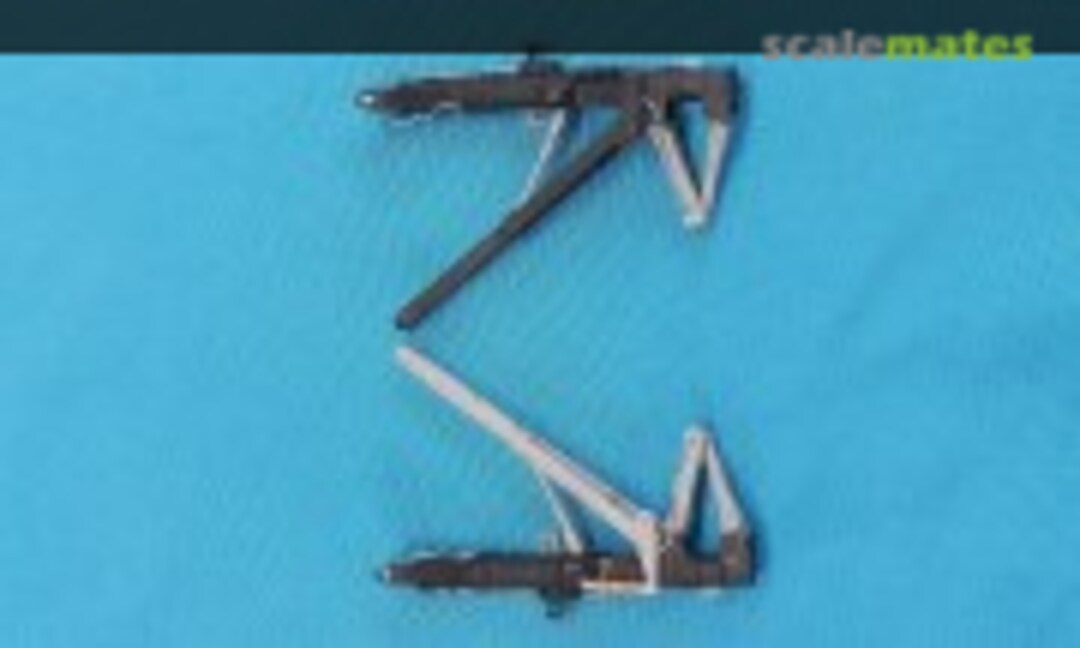 21August 14, 2025
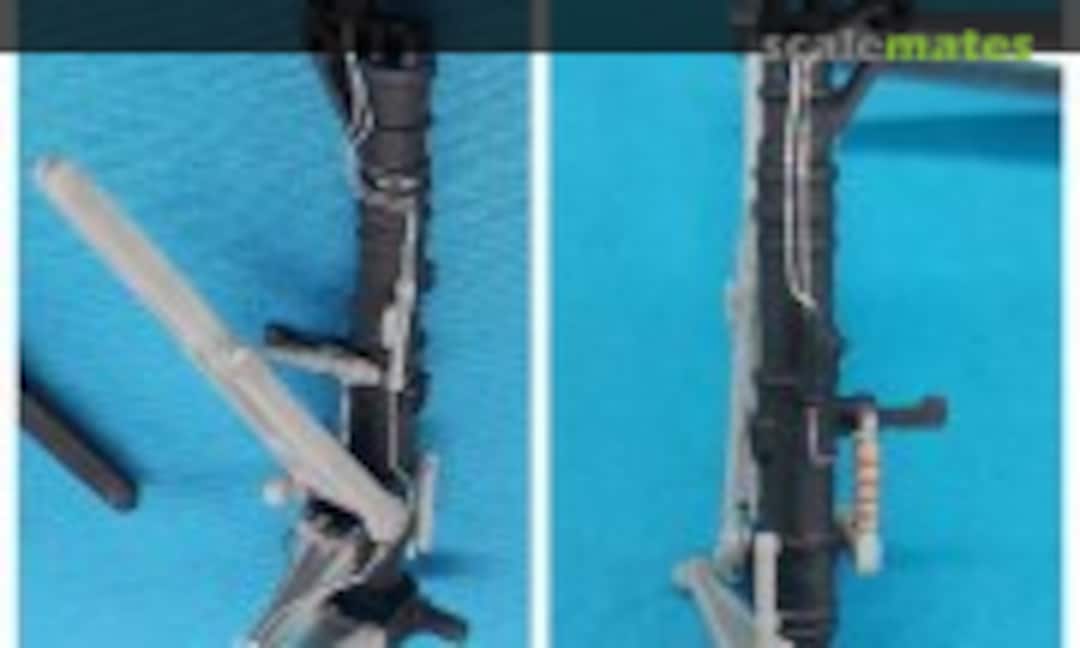 22August 14, 2025
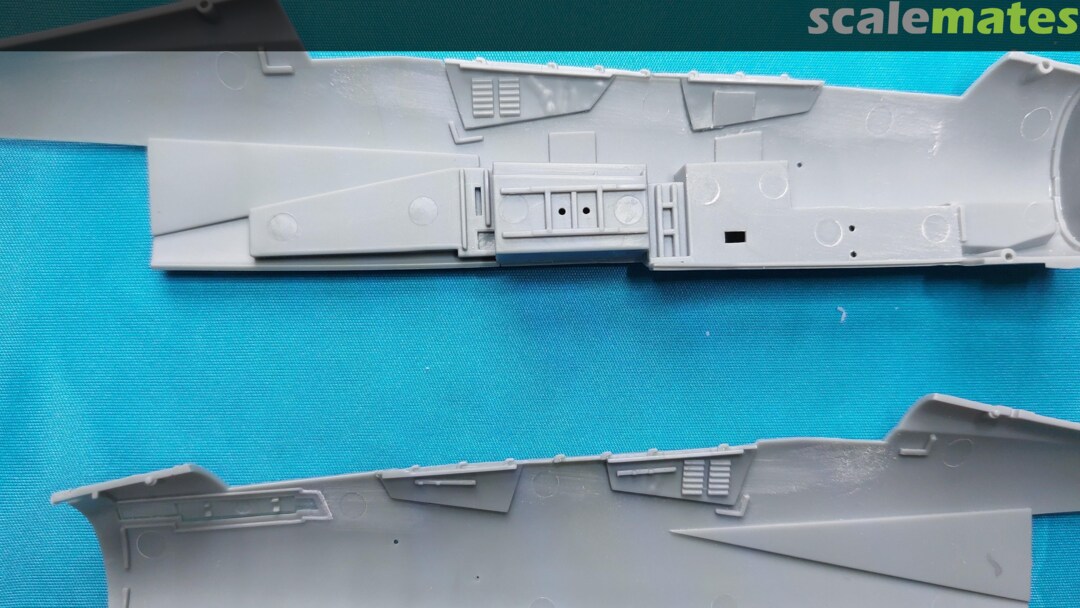
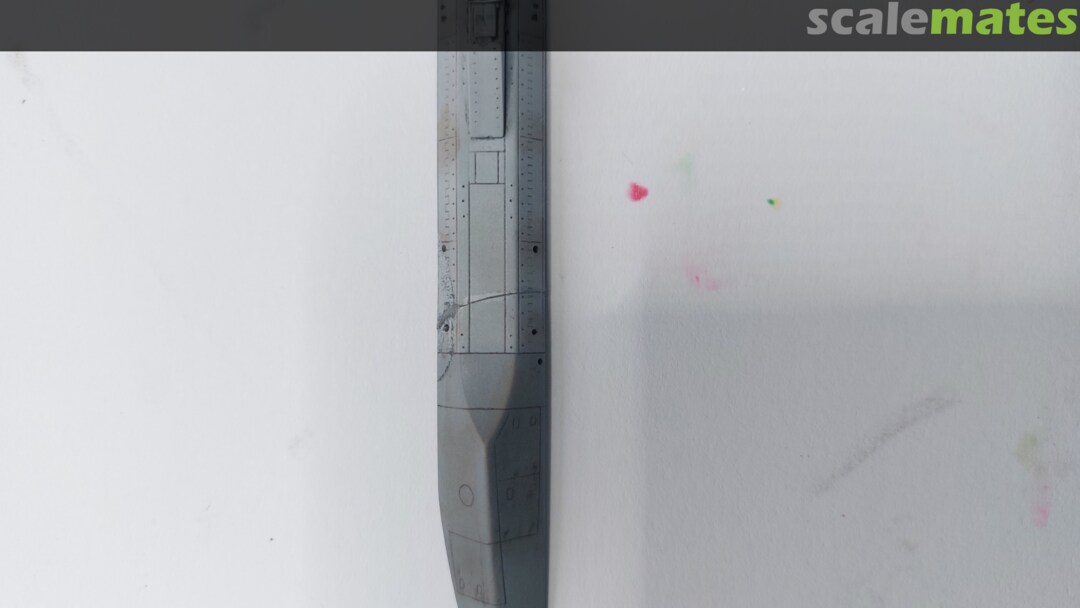
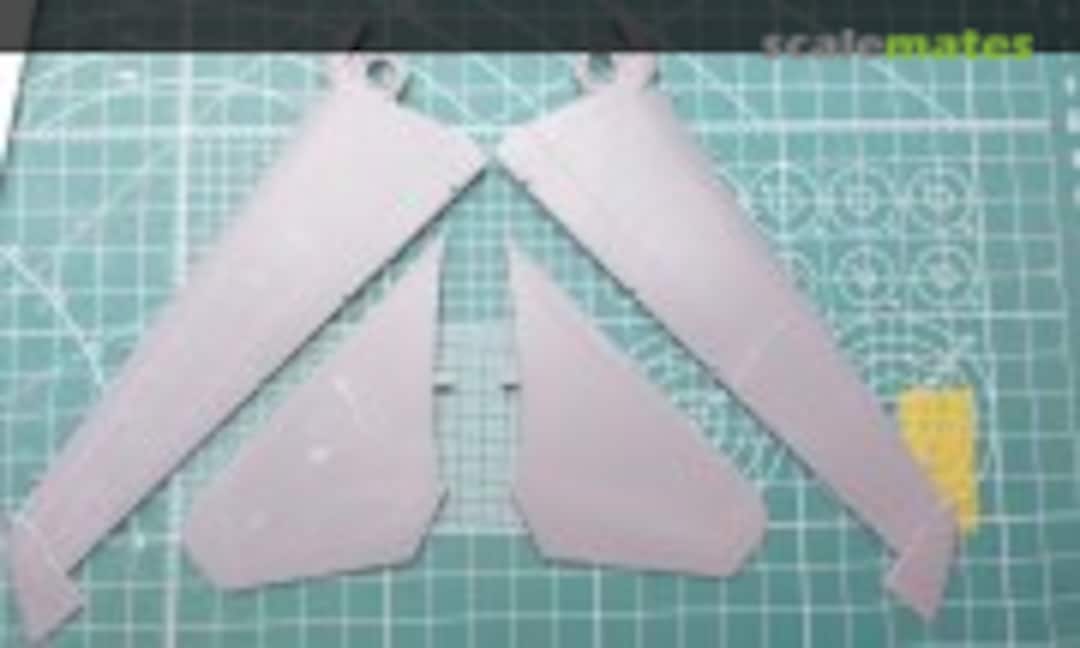 23August 14, 2025Another sanding saga, I decided to cover most of the riveting and other details from the wing and the horizontal tails (also removing its reinforce plates on the pivot point)
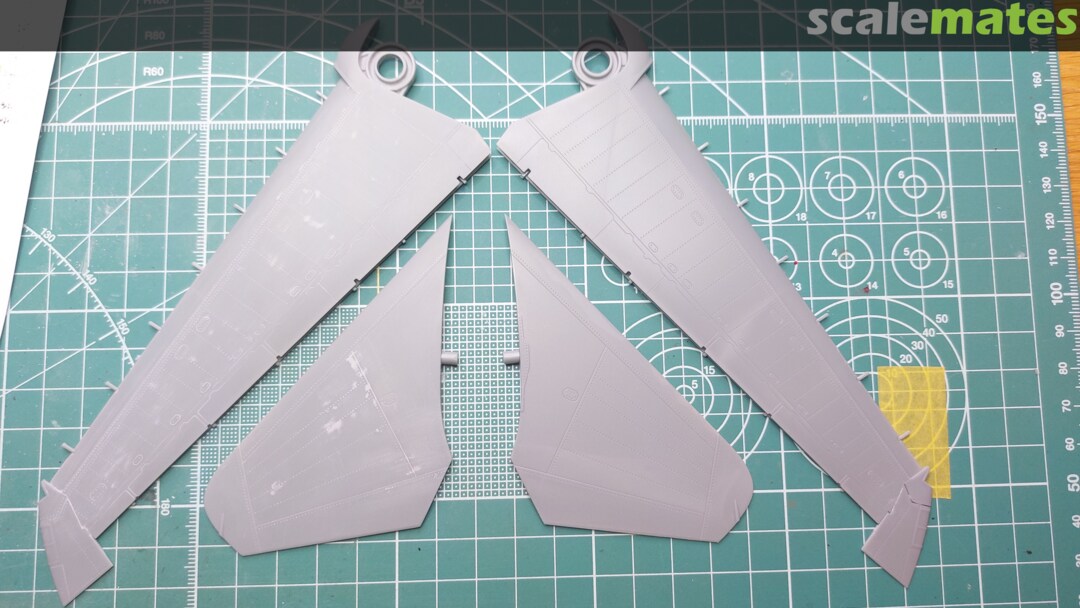
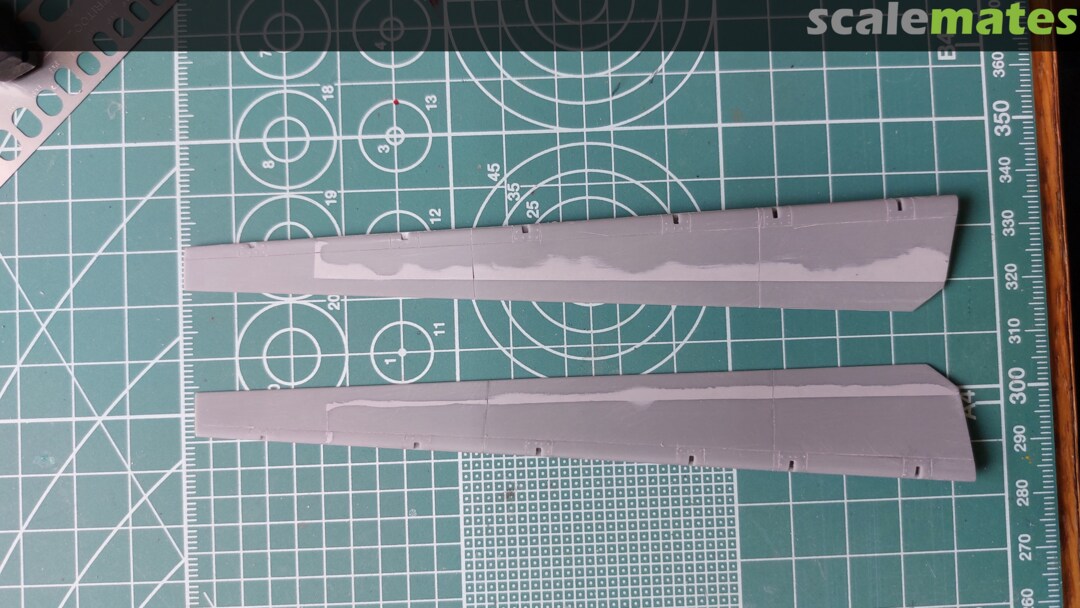
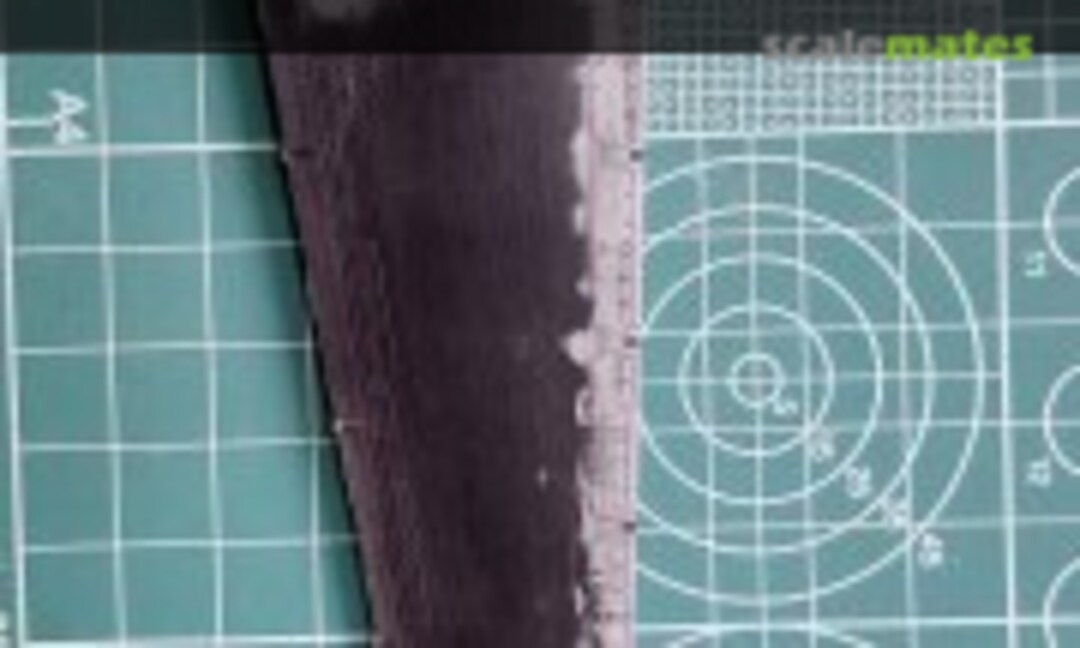 24August 14, 2025One of the wings already primed in black ( I forgot to take pictures before that) and it was a back a forth of filling, sanding, priming, sanding,.......
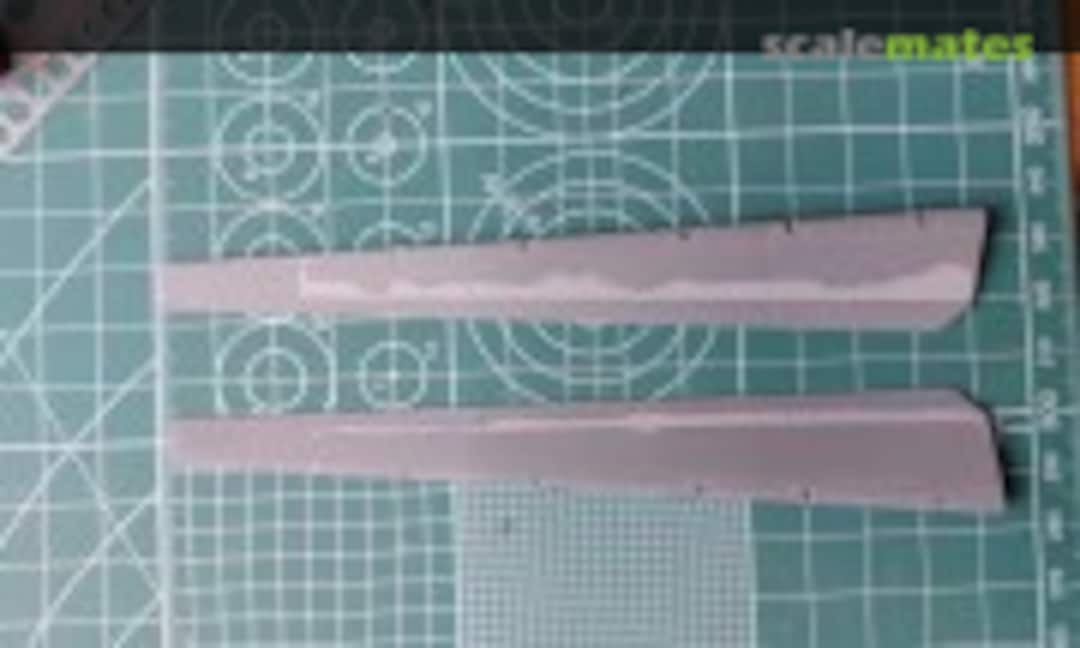 25August 14, 2025Trailing flaps, makes me think that this kit was designed by more that one person. While the wings have extra details, the flaps have none on the lower surface and they are made of two parts with the joint in an odd place.
 26August 14, 2025Again, more filling and sanding to then scribe the details of the lower surface....and again I forgot to take a picture before priming.
 27August 14, 2025Wings are almost complete. 3 more tips, the flaps hinges are OK if the flap is set down, but for Up position their look like bumps, so the extra material has been removed. Cut a section of the pivot's ring to allow the installation of the wings later. The leading edge surface requires serious trimming and sanding, so the leading edge flap lays flat with the wing's upper surface.
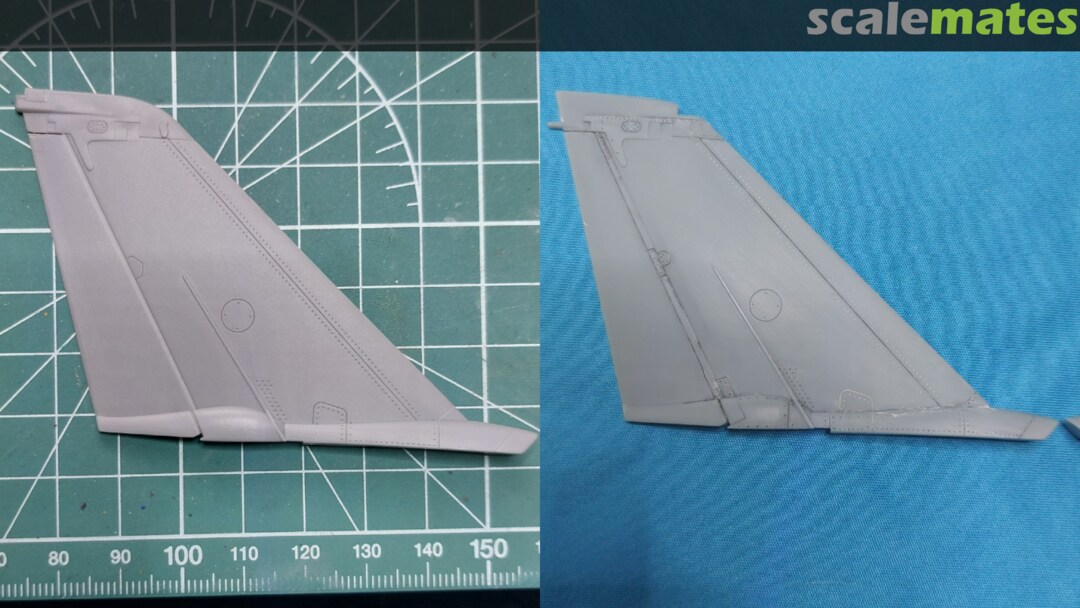
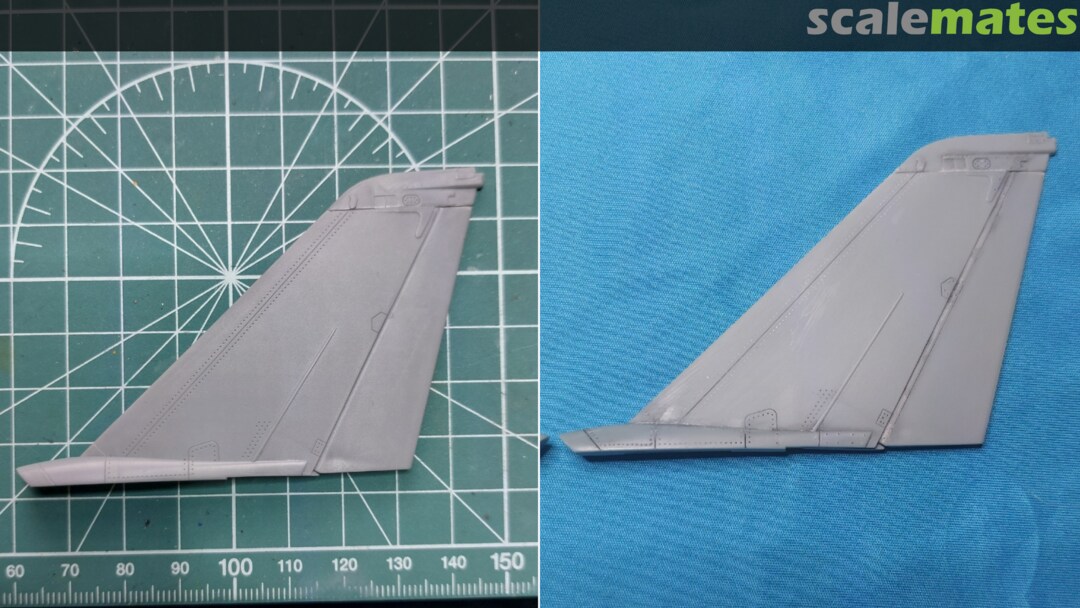
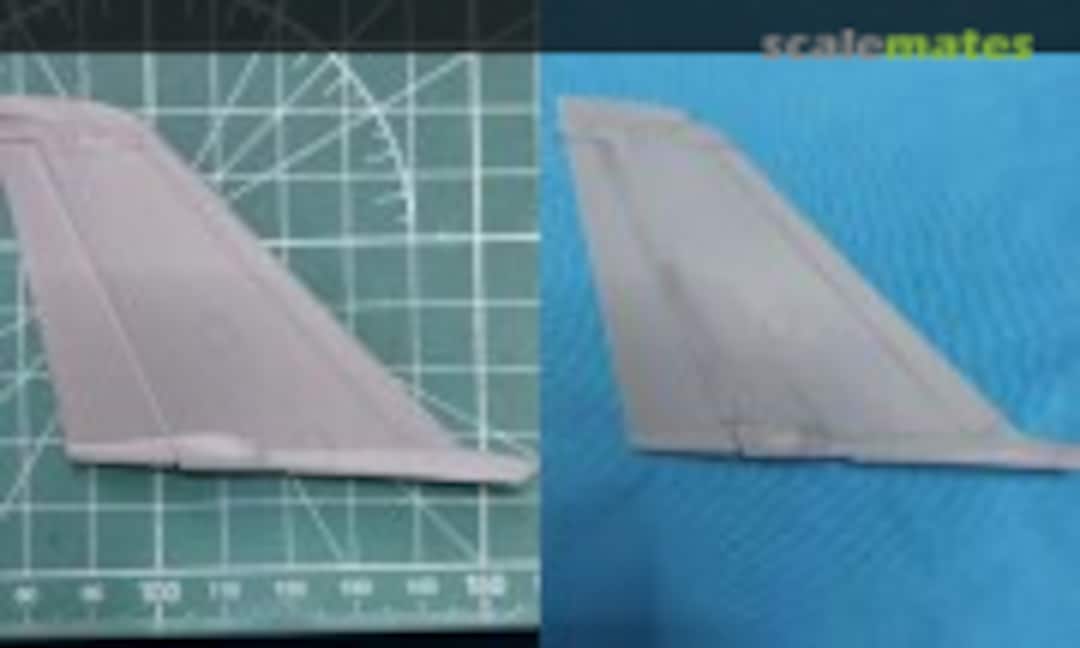 28August 26, 2025Vertical tails before and after. Panel lines and rivets/screws, cover some, added others.
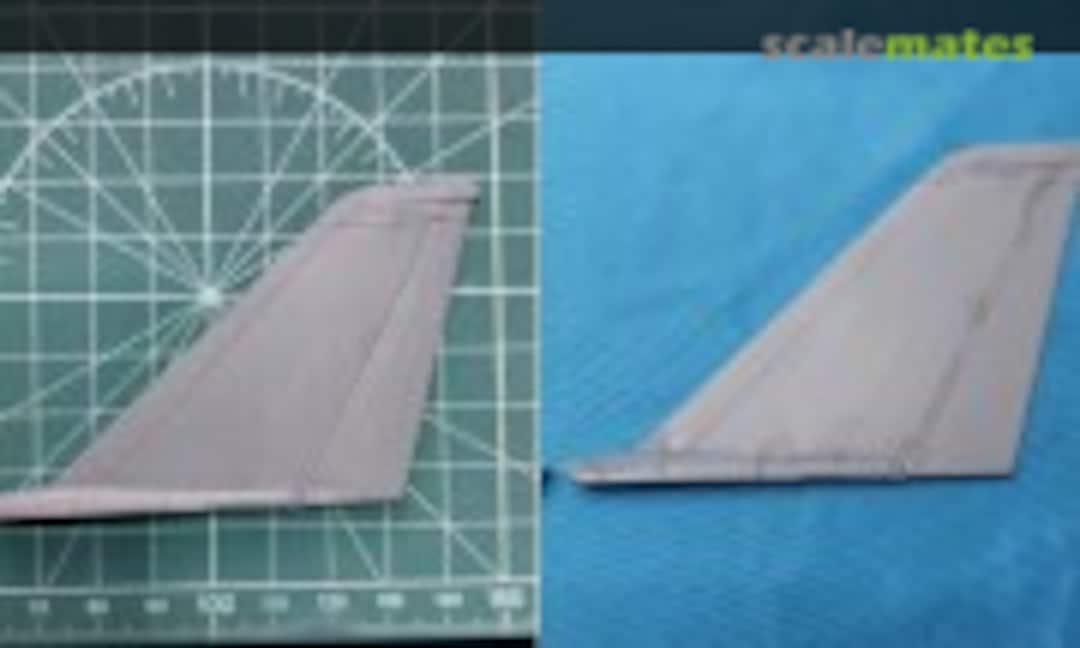 29August 26, 2025
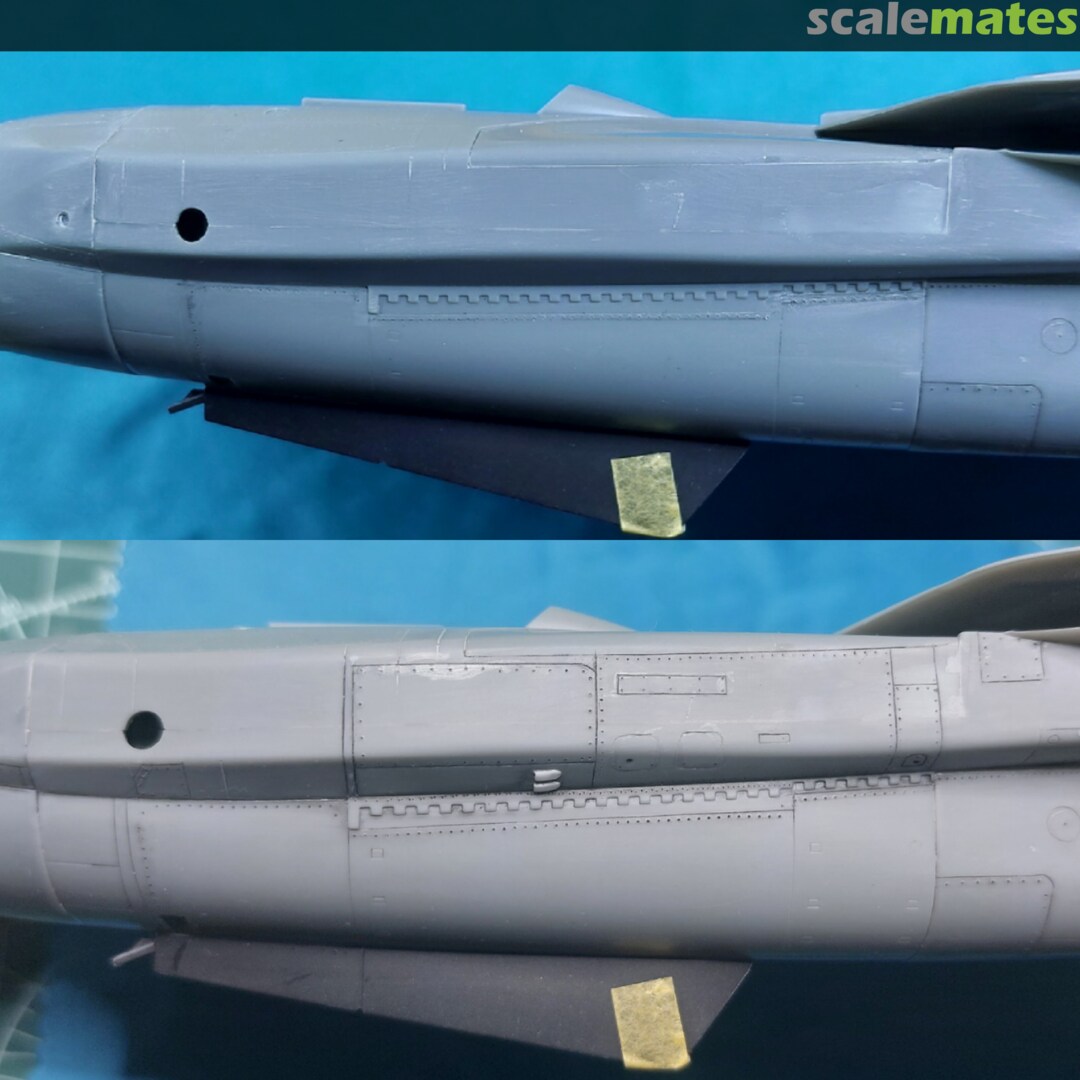
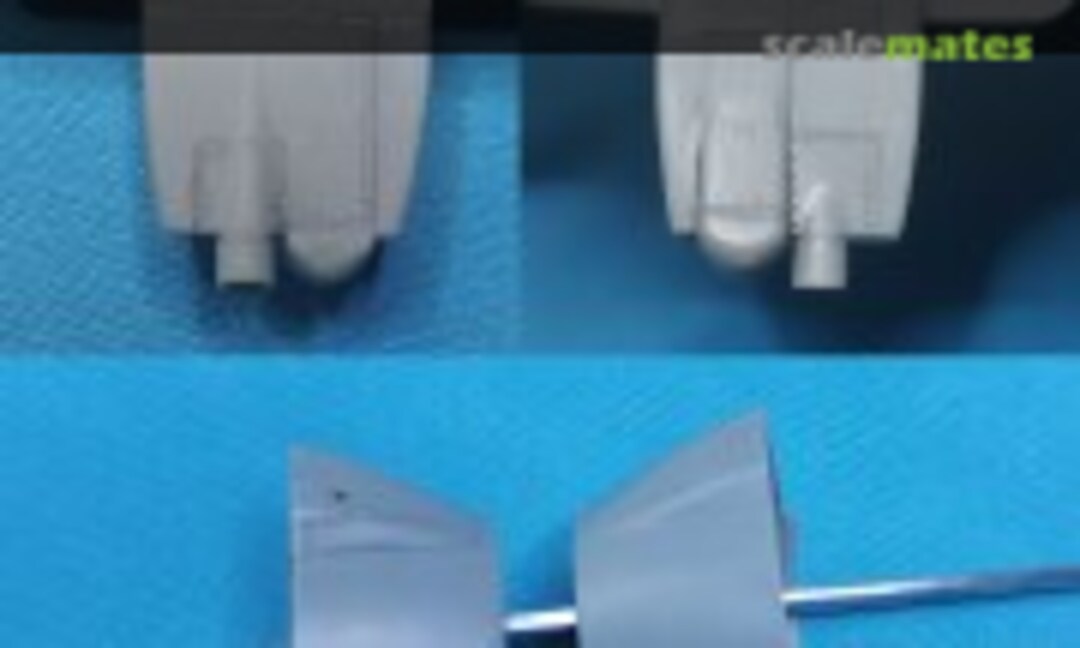 30August 26, 2025With the fuselage's halves glued together, time to add a few details.
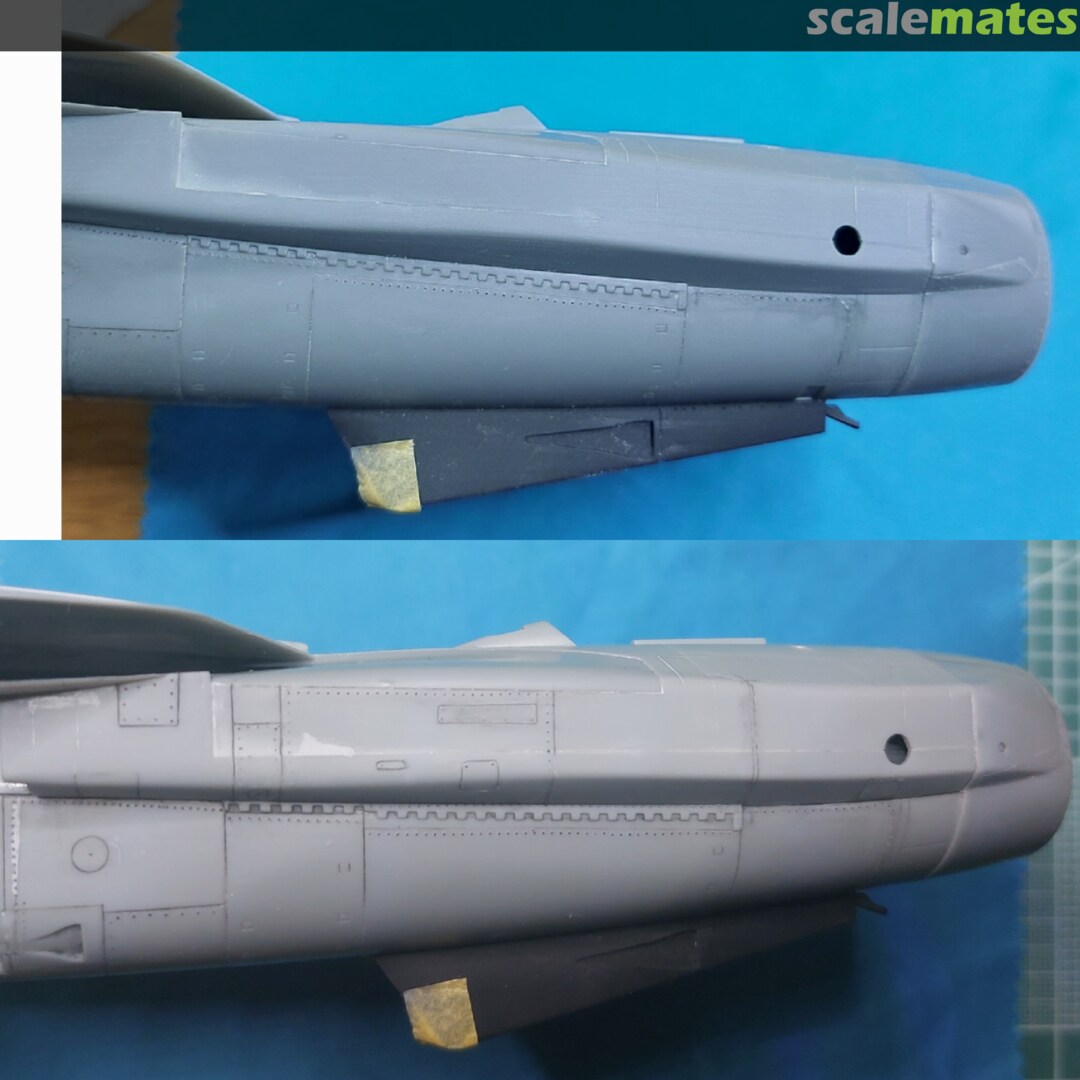
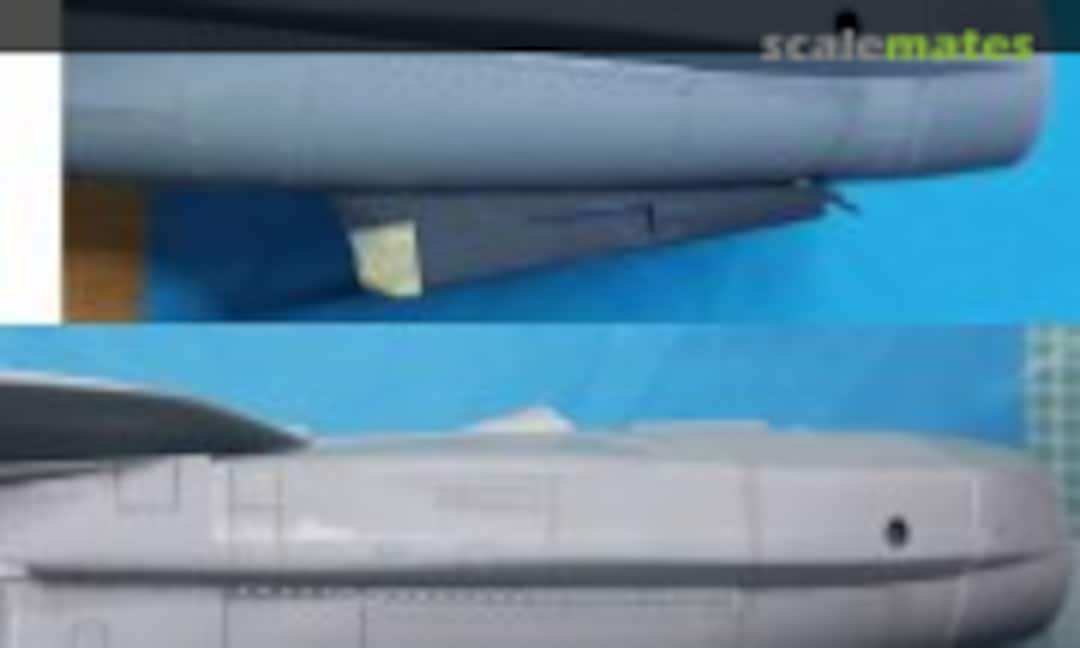 31August 26, 2025Improvement of the sides, paneling and adding other details.
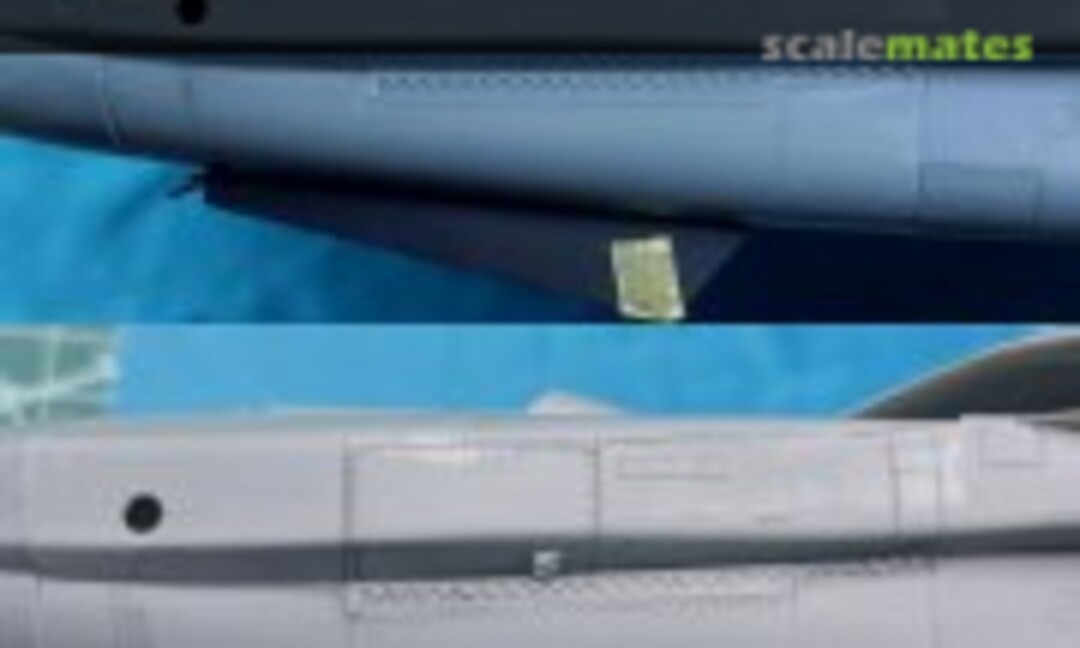 32August 26, 2025
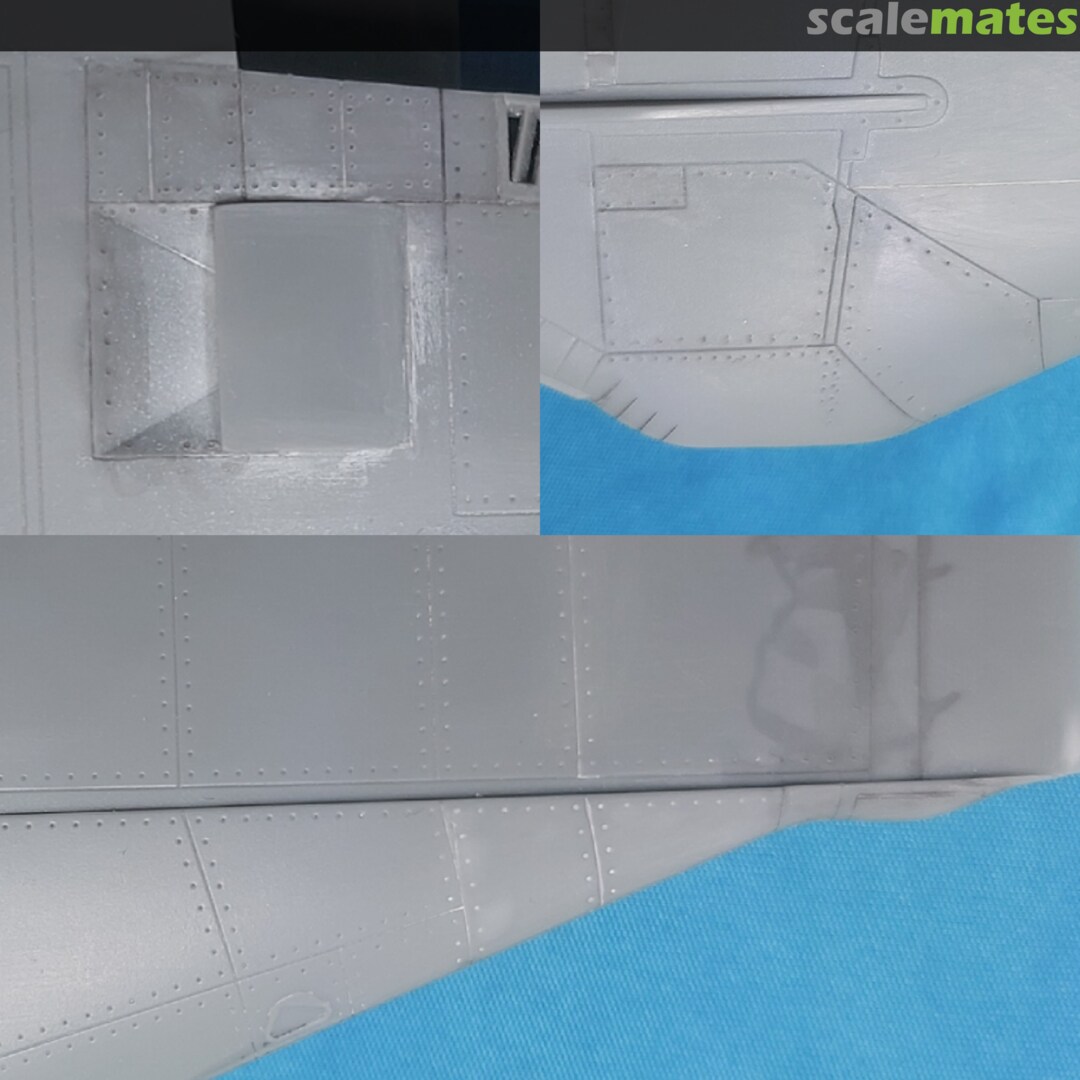
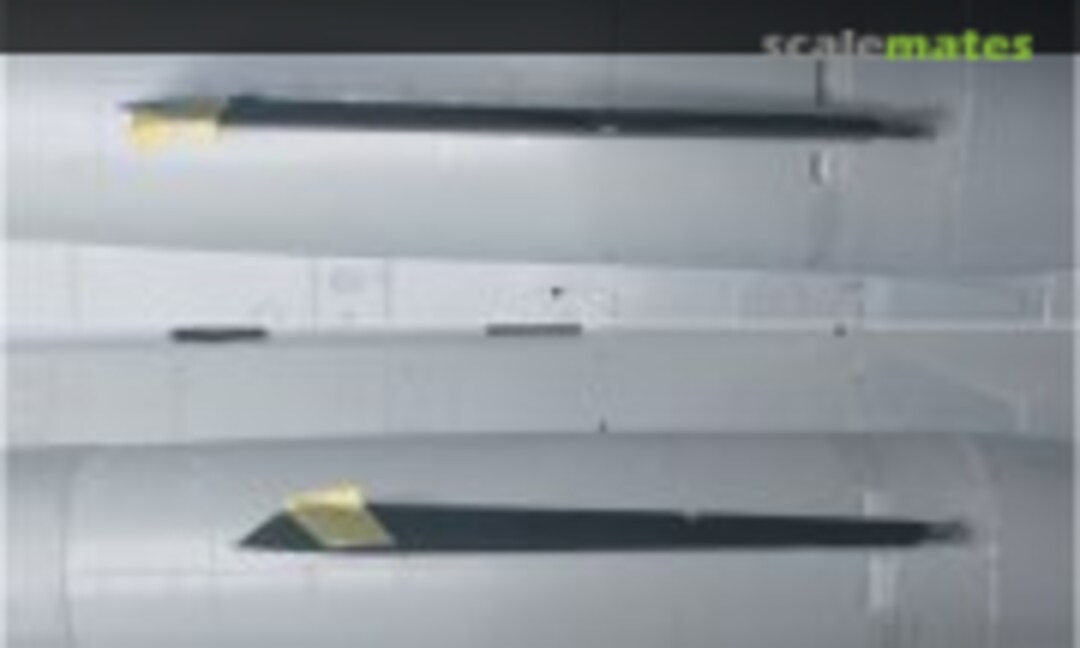 33August 26, 2025Also adding a couple of access doors and vents on the bottom surfaces.
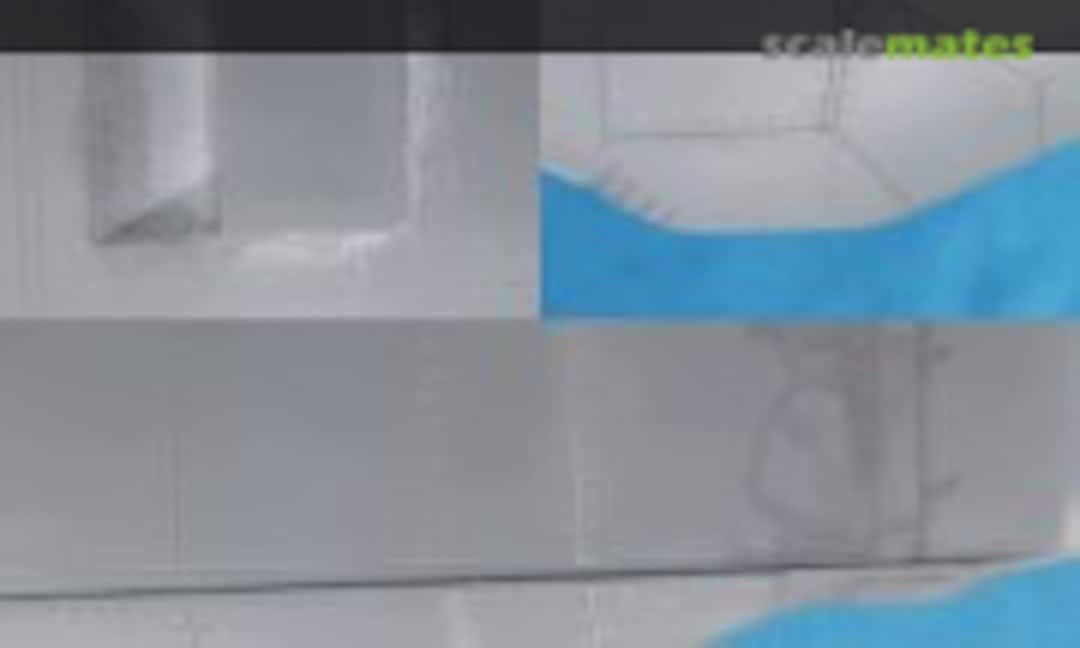 34August 26, 2025Other improvements on top surfaces.
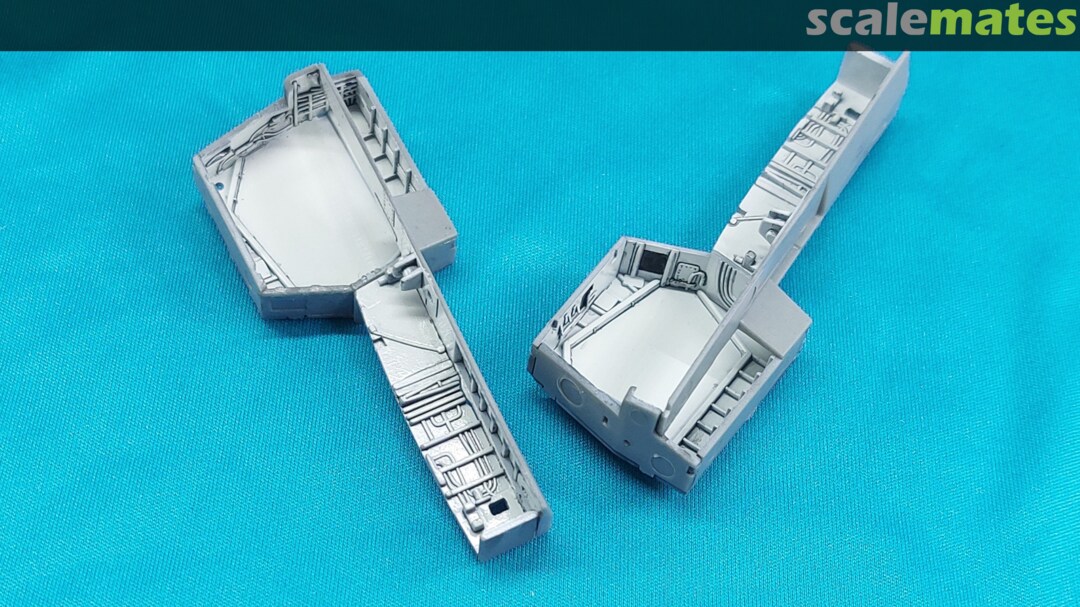
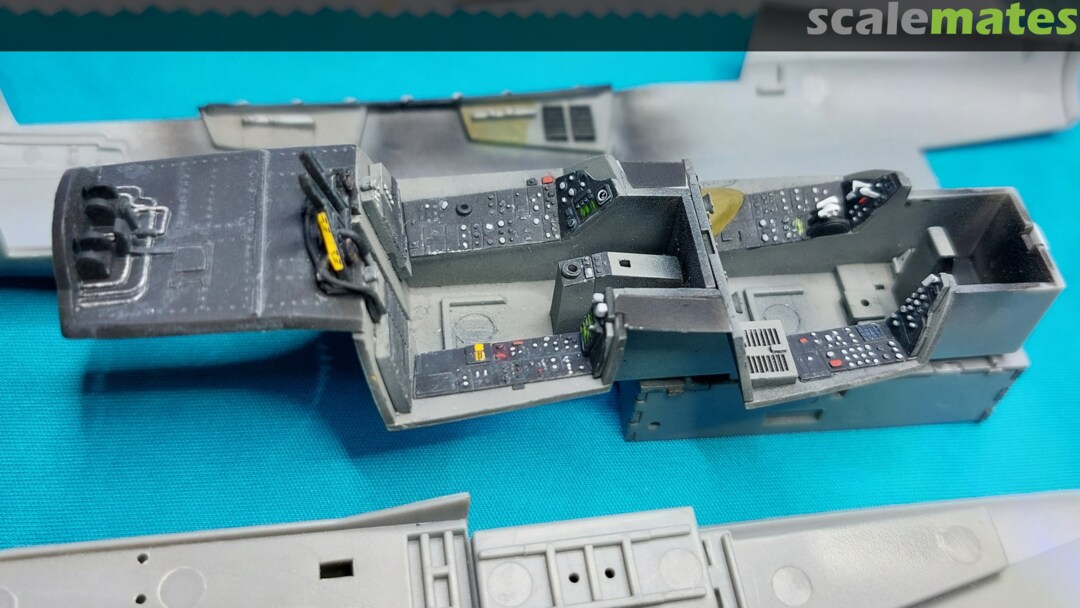
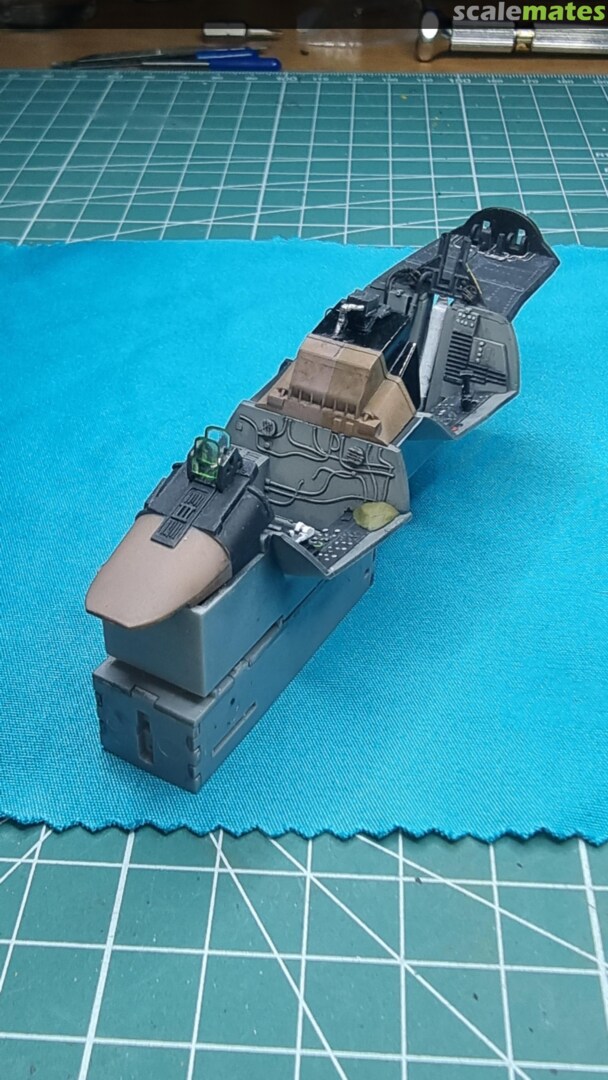
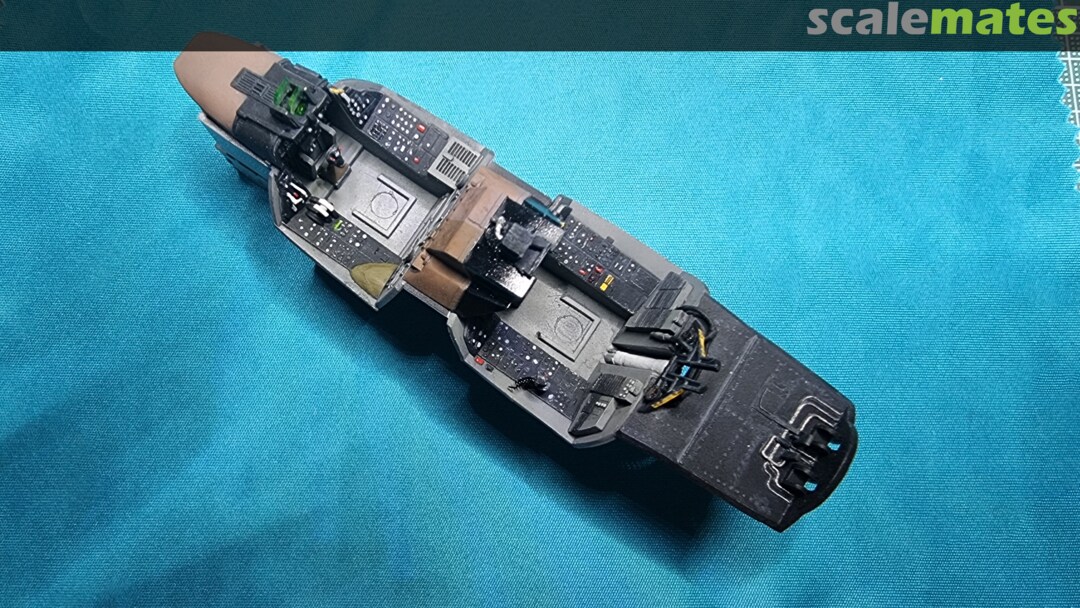
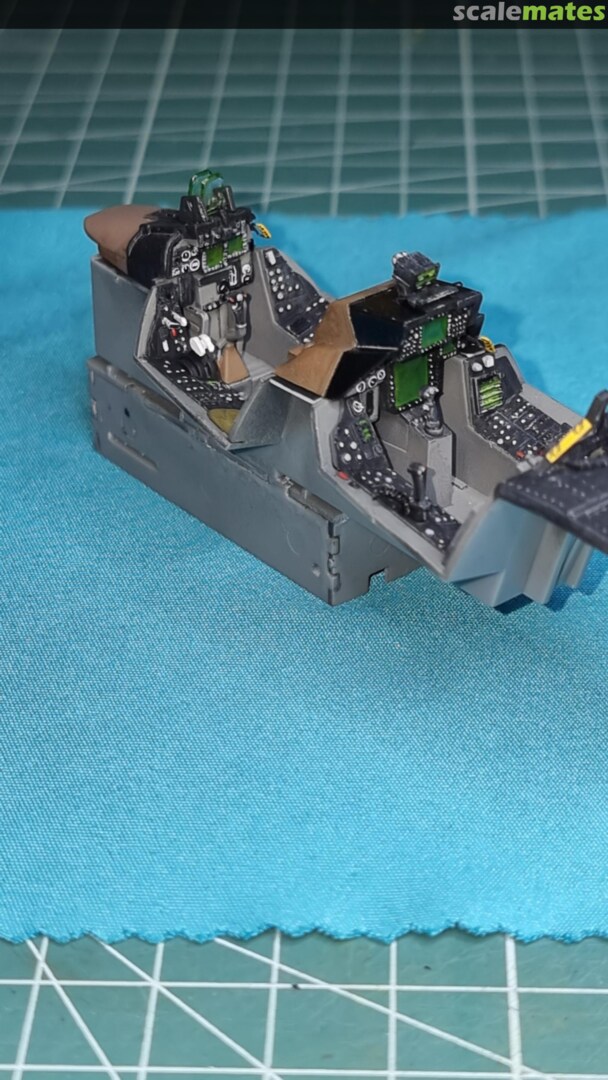
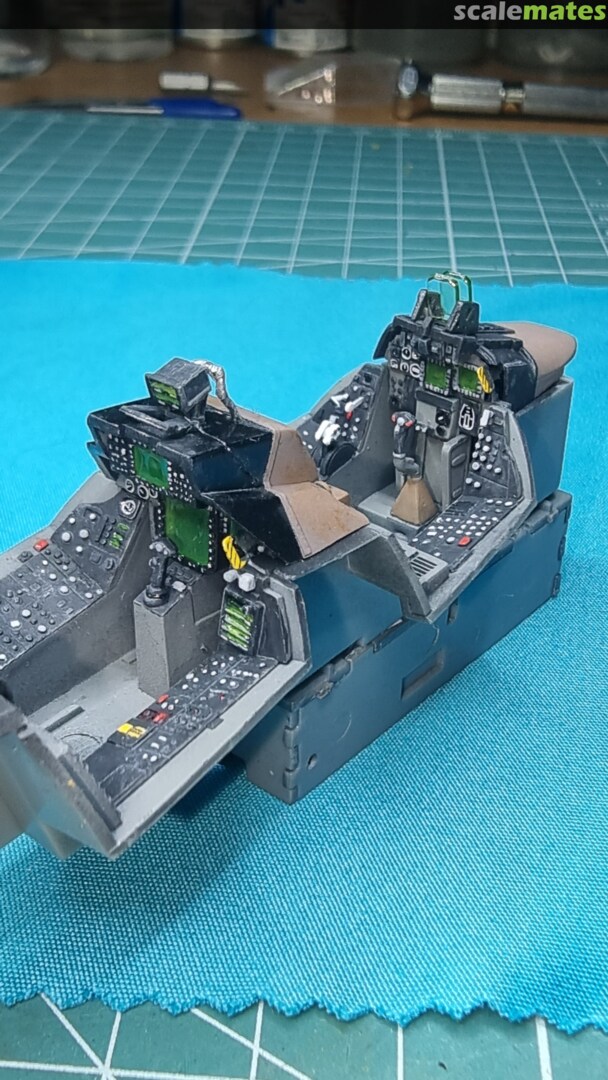
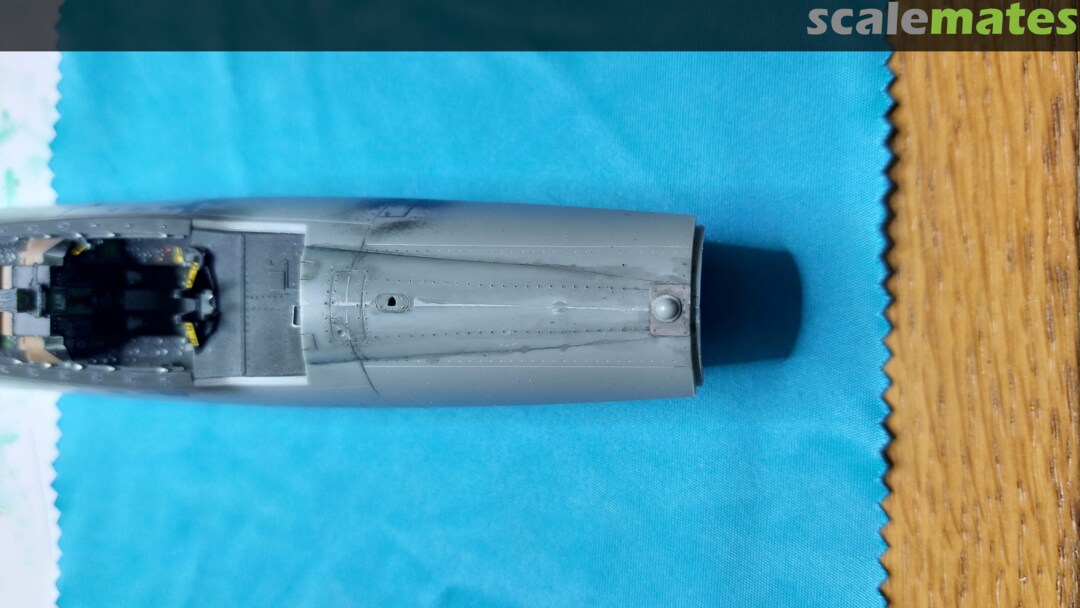
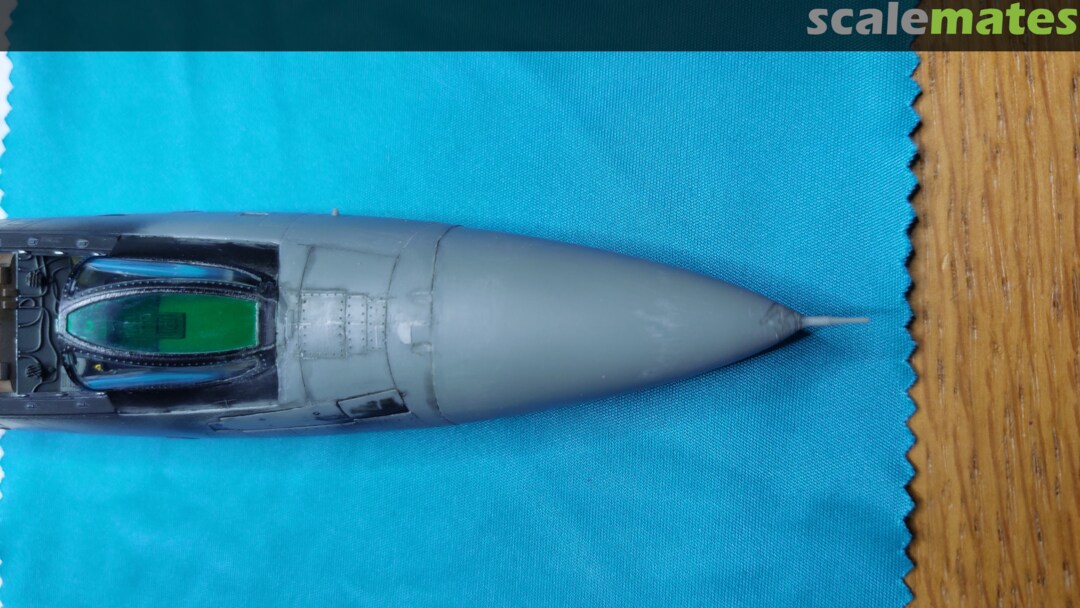
 35September 2, 2025Jump into the cockpit. Added the pedals, some of the levers and a/c pipes.
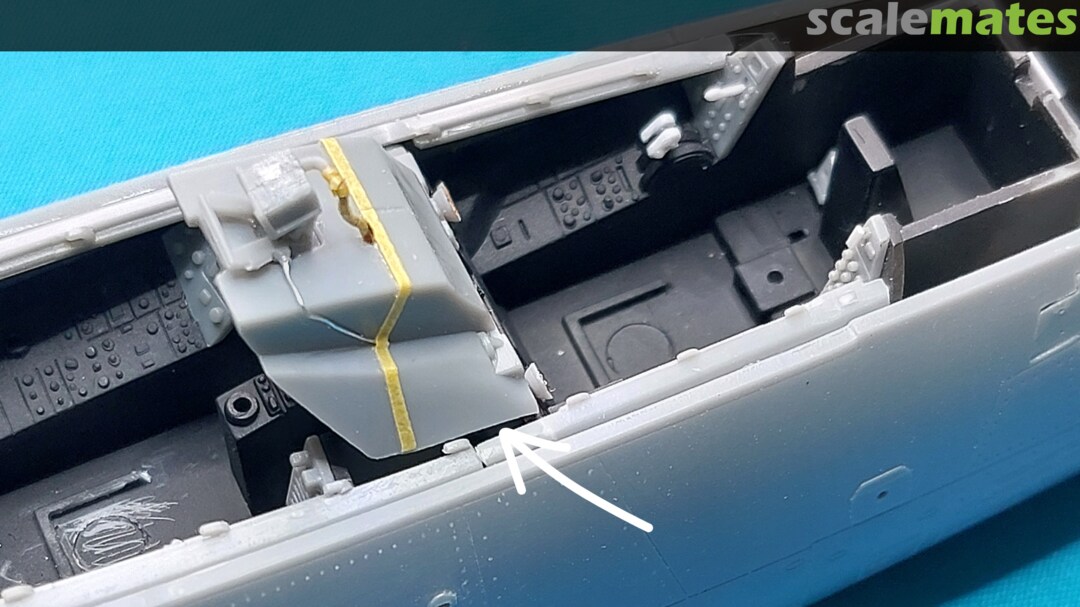
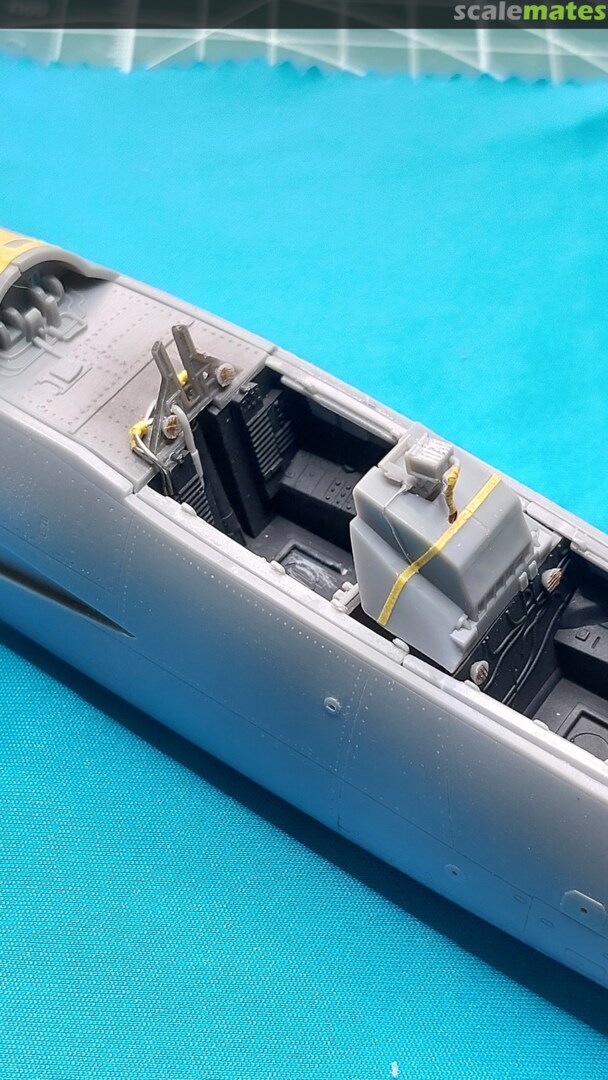
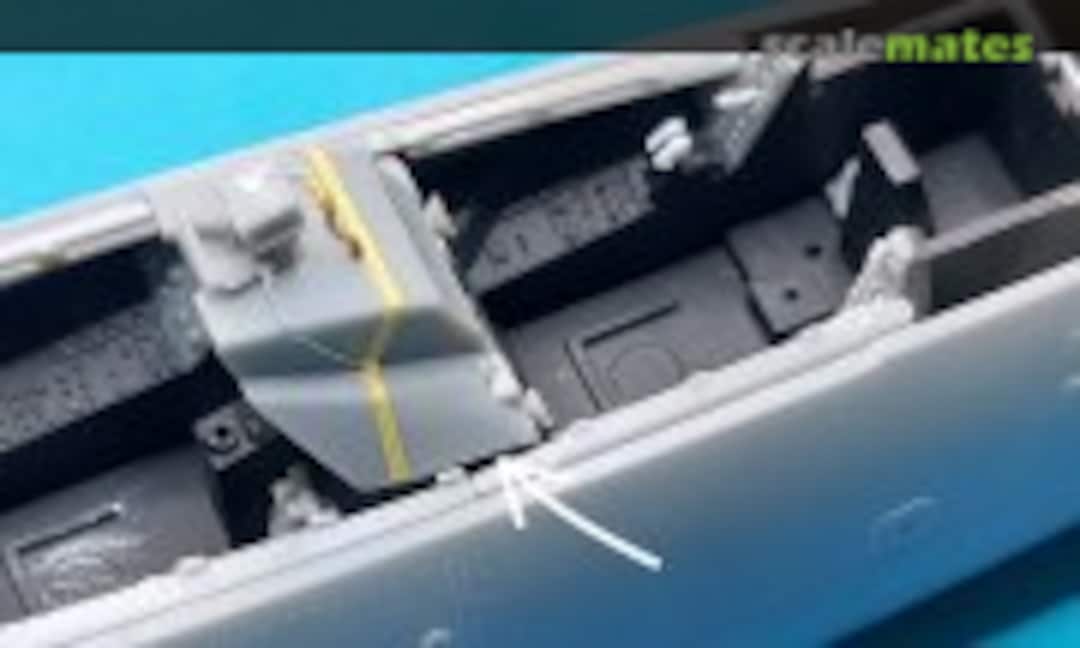 36September 2, 2025More scratch building on RIO's console. Added the tape to simulate canvas' hem.
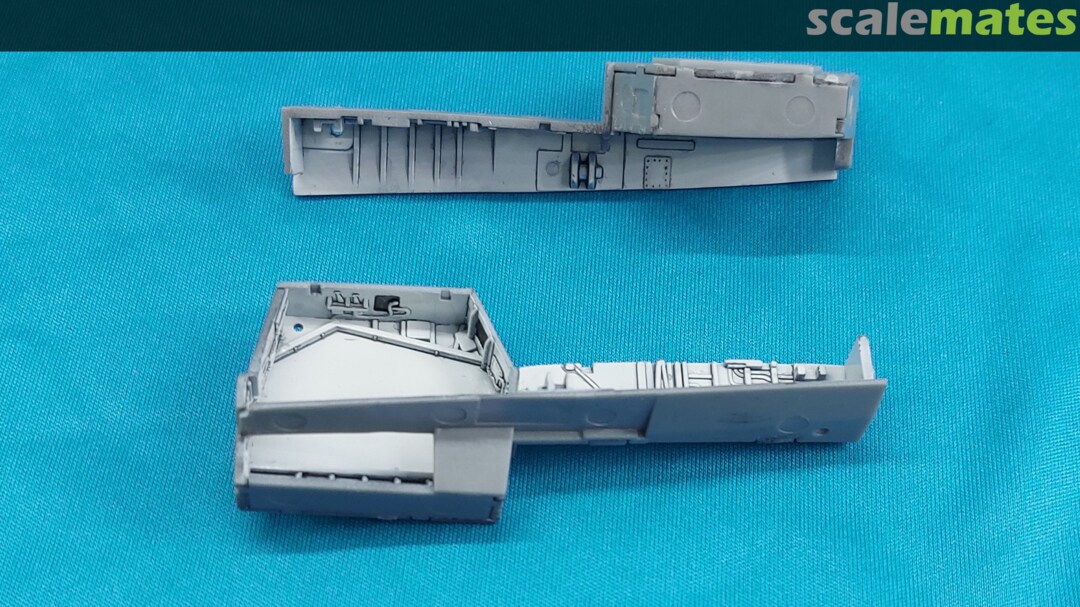
Also on each side there is a gap that I covered with a piece of plastic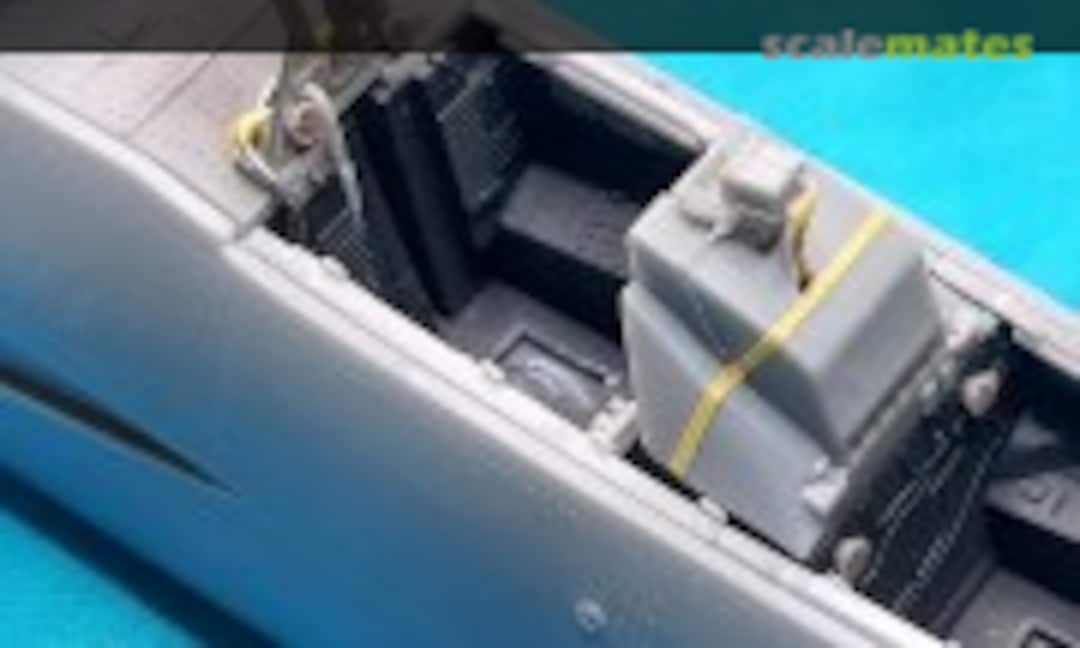 37September 2, 2025Tried to simulate the vents of the a/c with wiring, end result was not the best. Will have to think in another way next time.
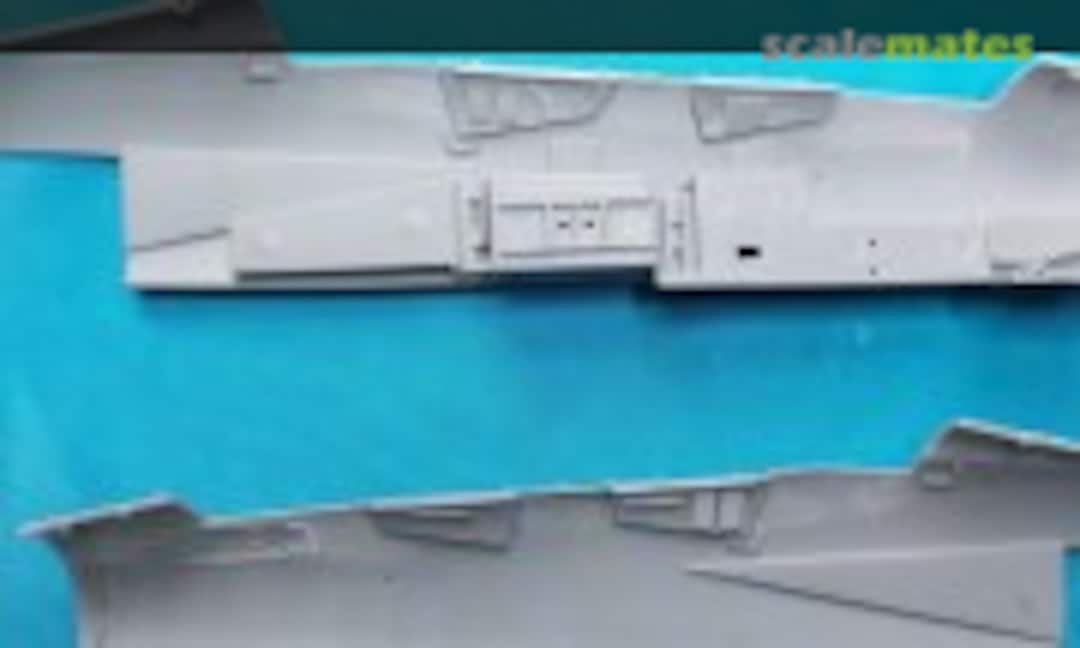 38September 2, 2025During the dry fit, I glued the side panels to the fuselage, it will make easier for painting and also to better align the upper part were the canopy seats.
 39September 2, 2025Plastic bits to cover the gap.
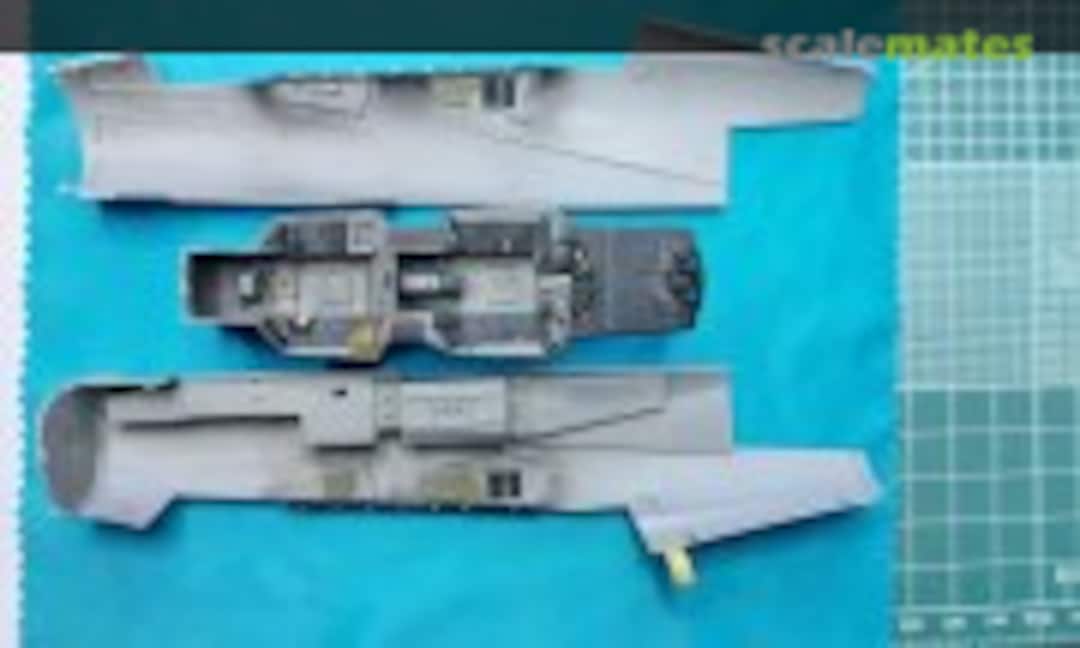 40September 2, 2025
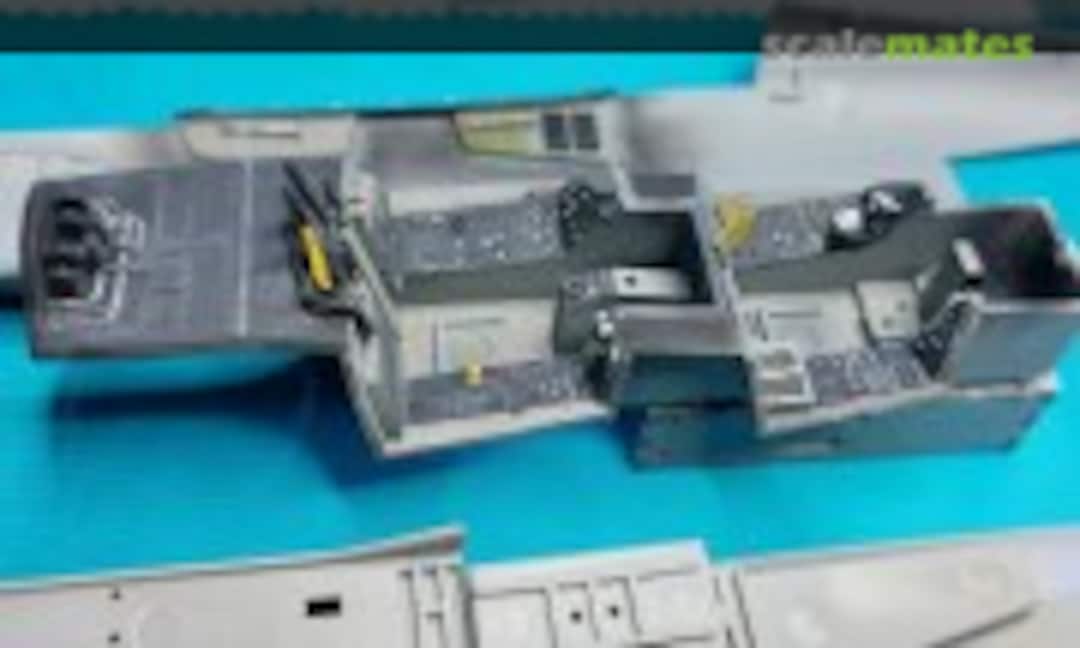 41September 2, 2025
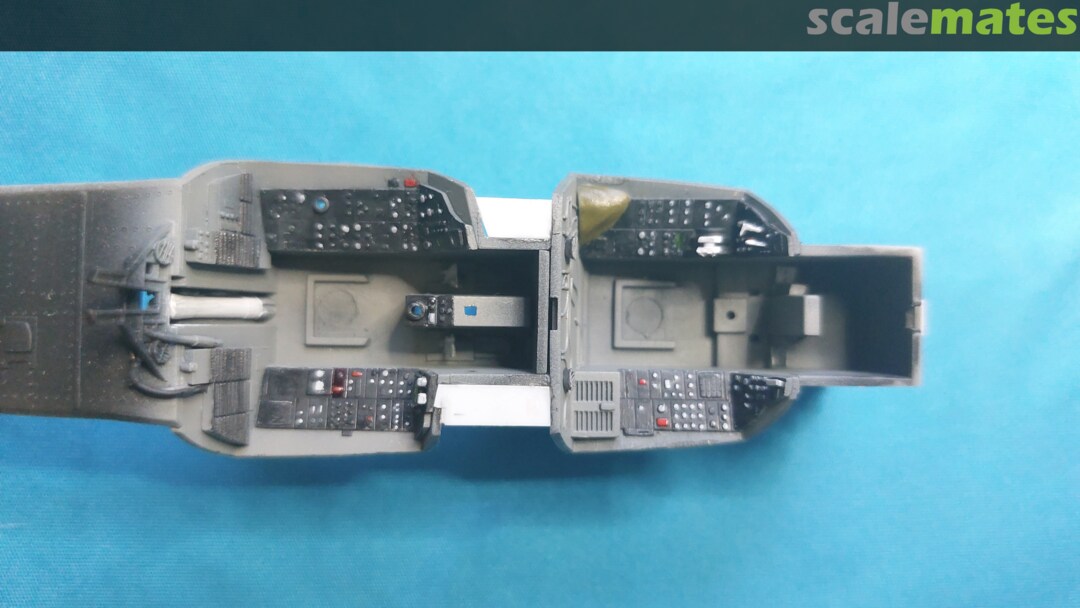
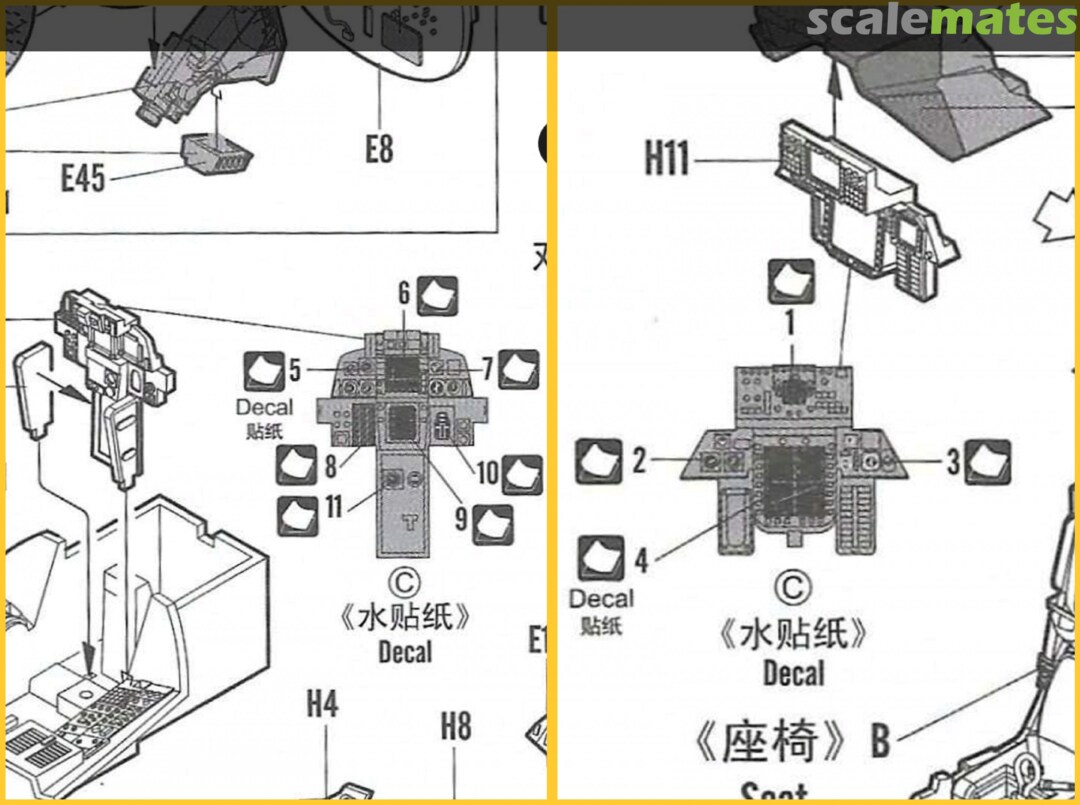
 42September 2, 2025A comment about instrument panels' decals. The assembly shows the right part, the sketch to positioning the decals something completely different (B model maybe). So some of them are useless. I cut and positioned each dial individually.
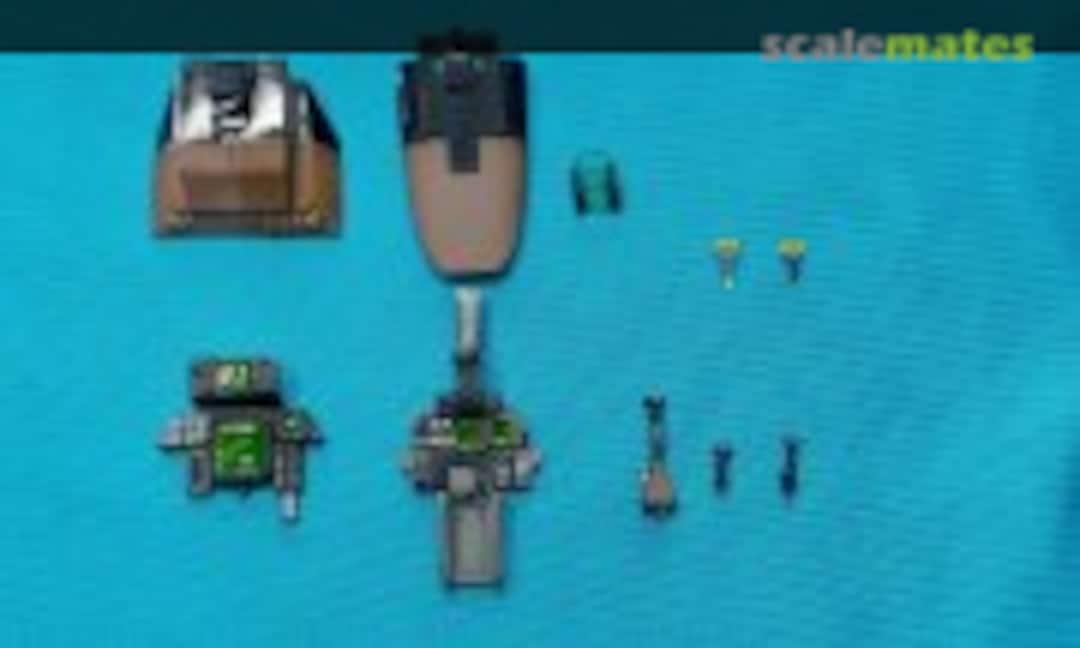 43September 2, 2025All other bits done
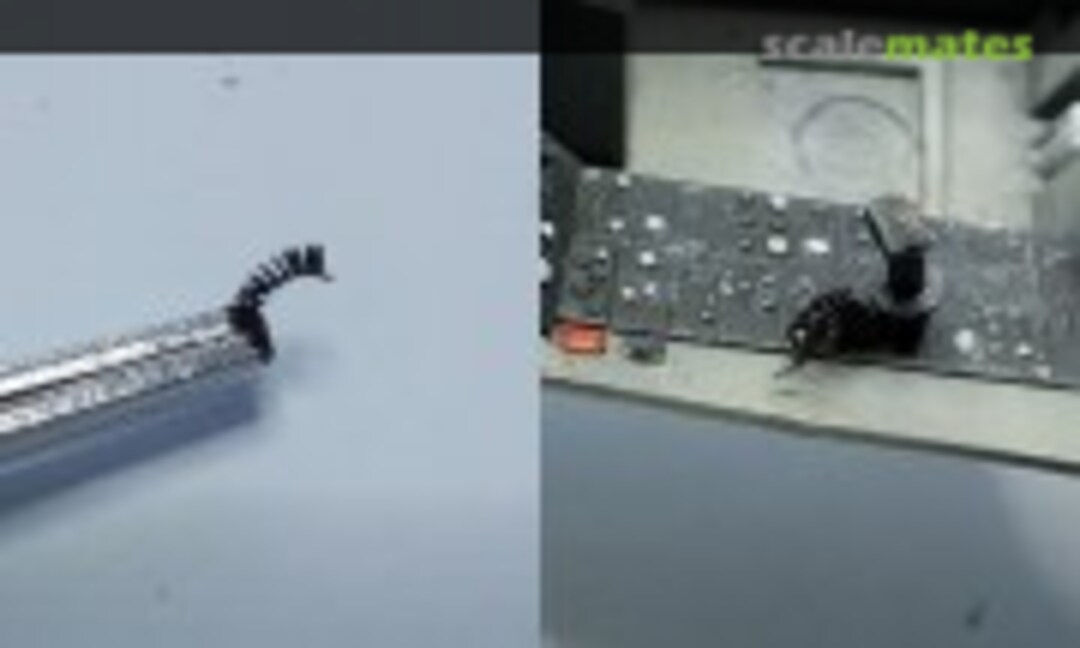 44September 2, 2025...and one more detail.
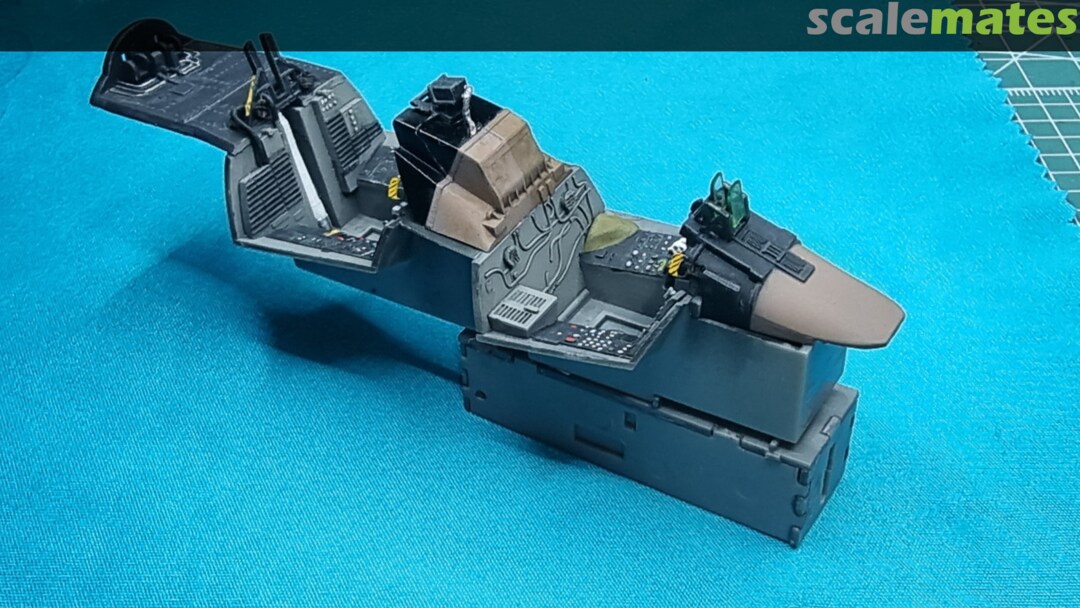
 45September 2, 2025Cockpit finished...almost, no seats, no flight.
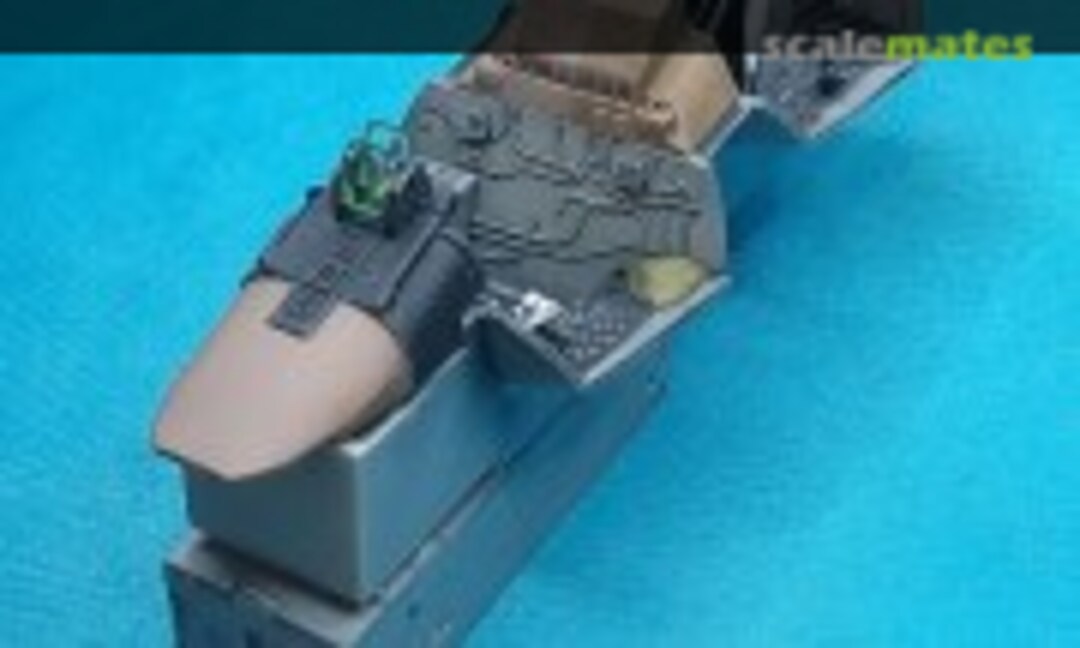 46September 2, 2025
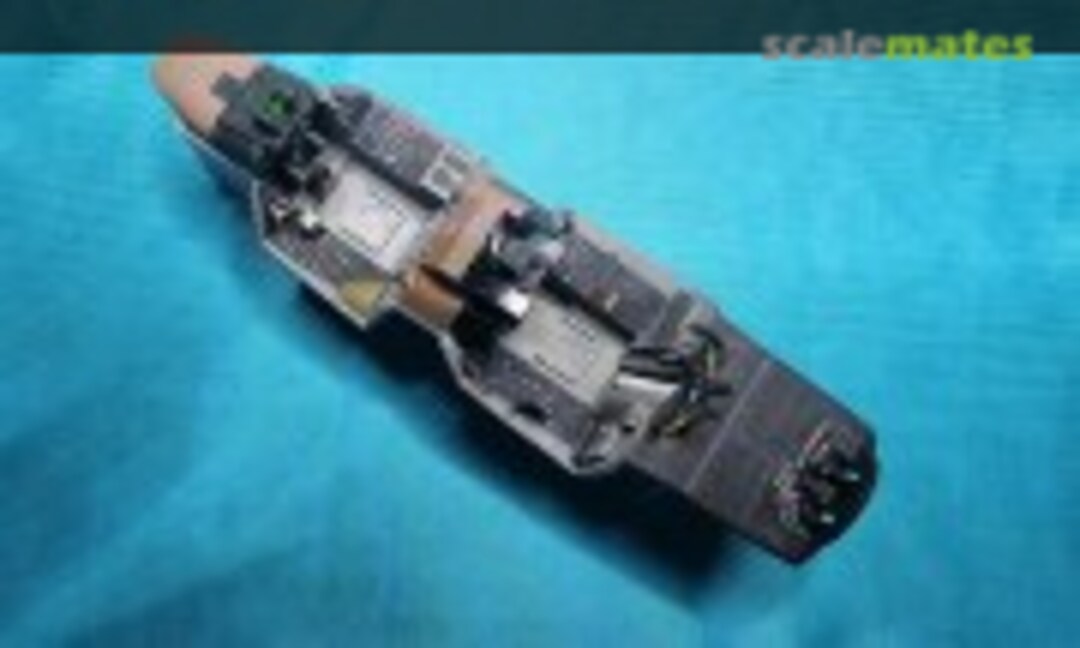 47September 2, 2025
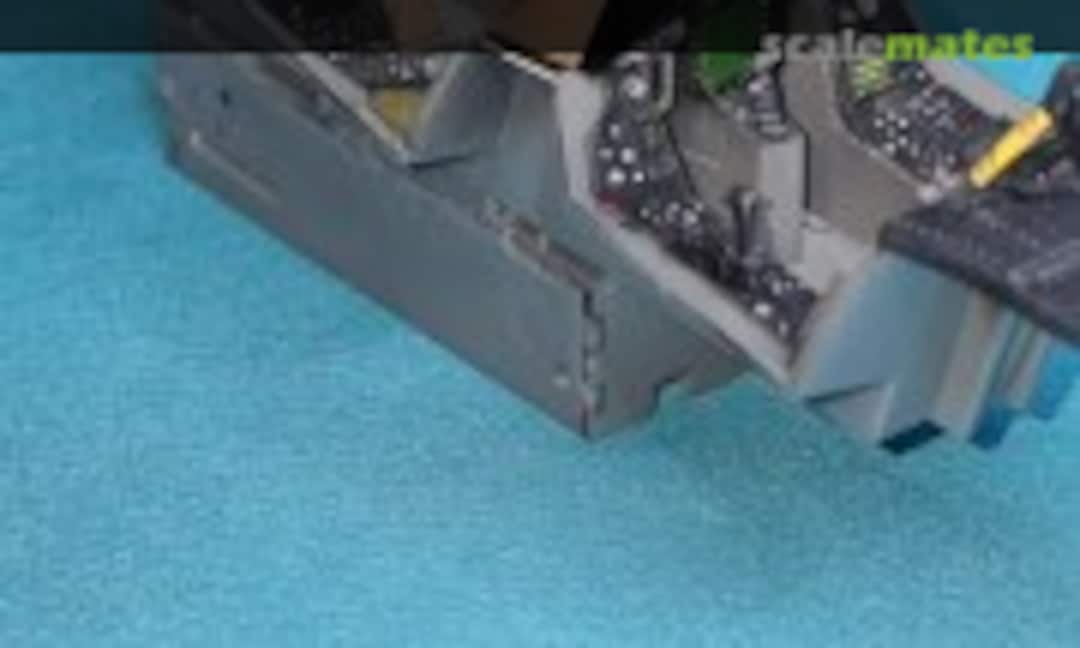 48September 2, 2025
 49September 2, 2025
 50September 2, 2025
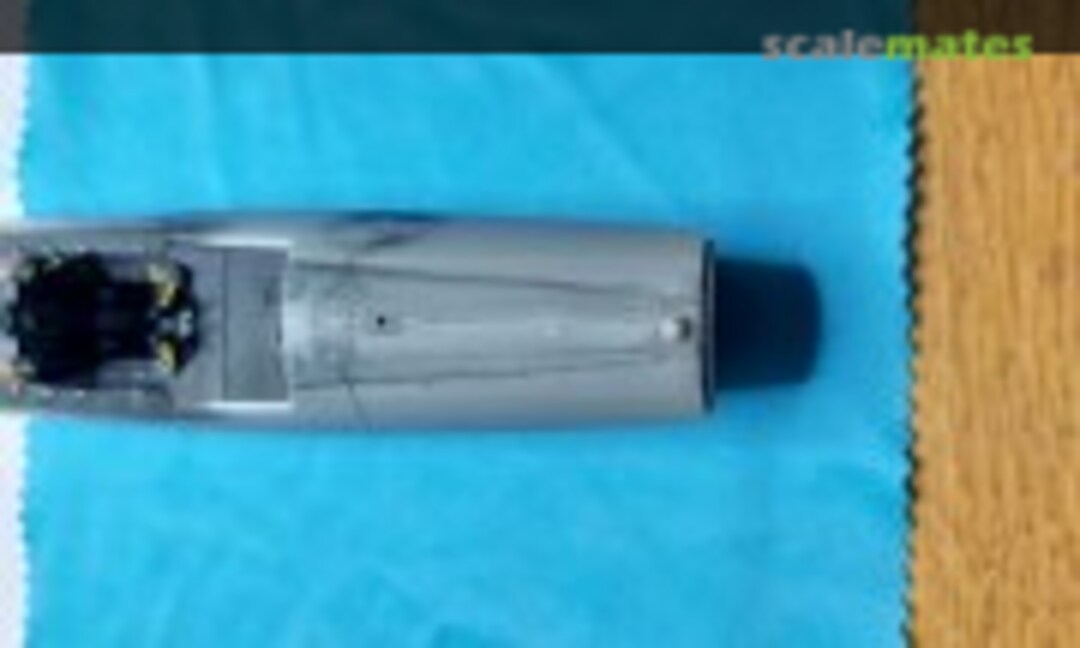 51September 20, 2025Scribing and additional riveting at the spine. Also added the base plate for the GPS antenna
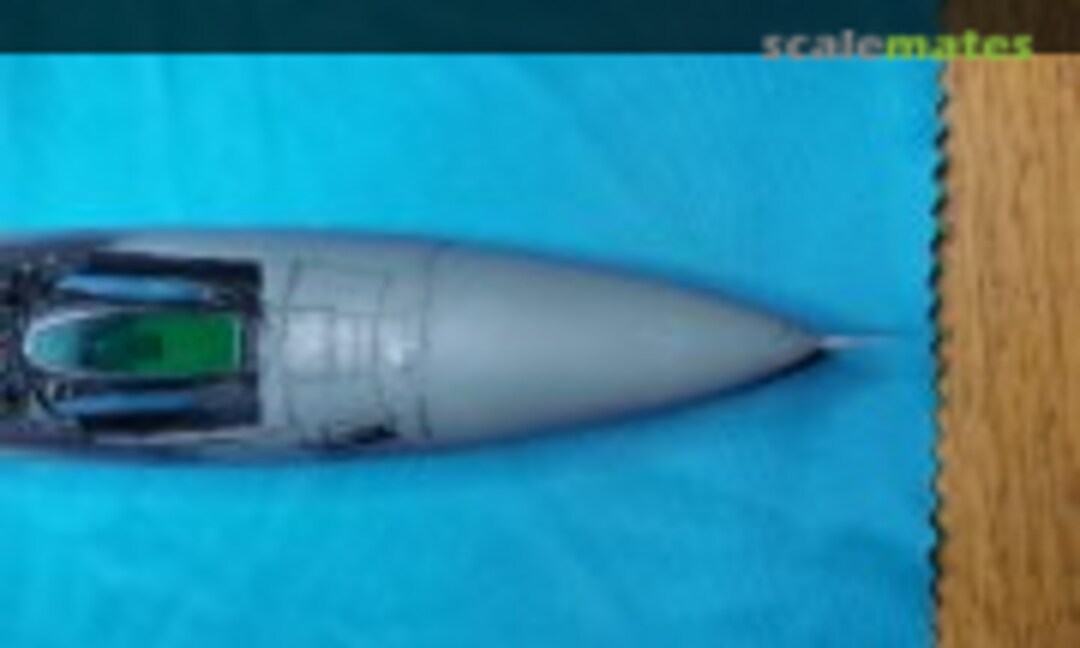 52September 20, 2025More scribing in front of the windshield.
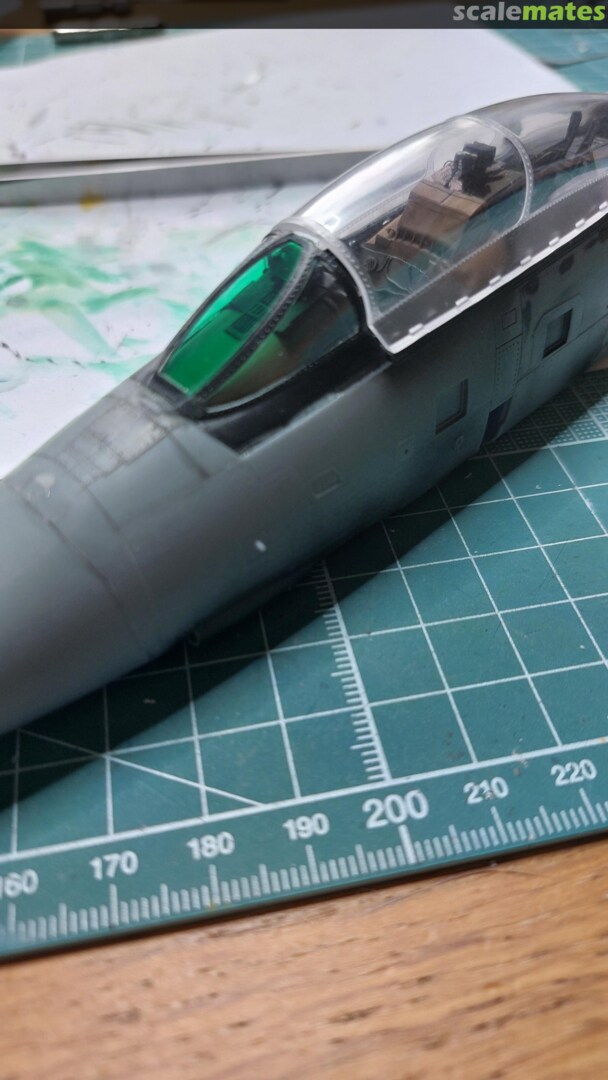
 53September 20, 2025Take extra attention to the canopy and windshield. The fit is awful!
Lucky me I planned to keep it open.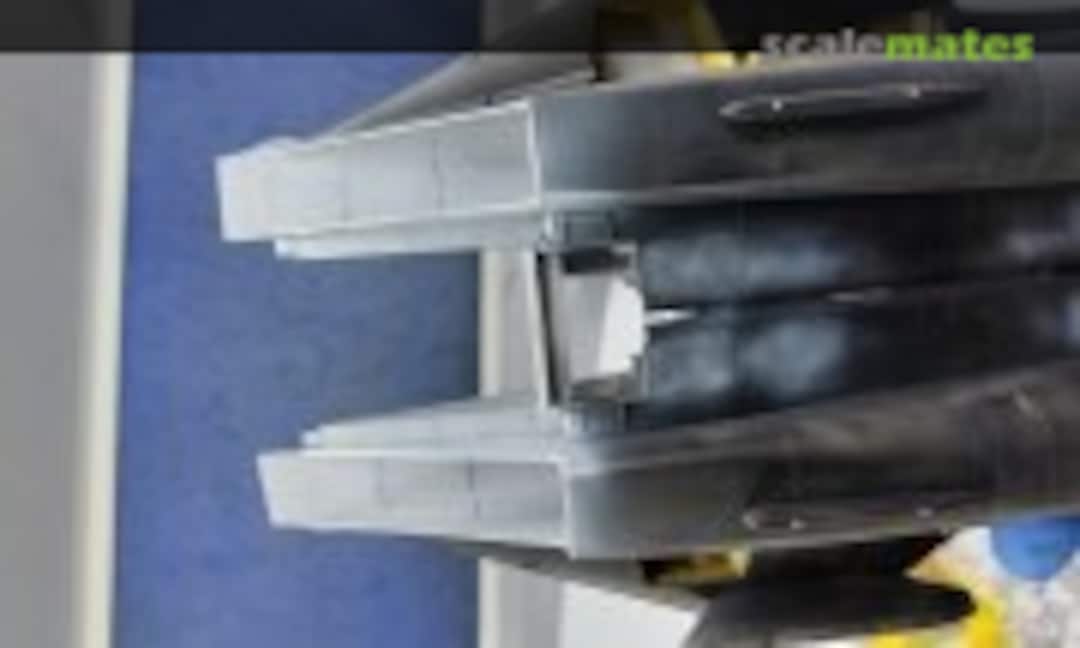 54September 20, 2025Added a piece of sprue to keep the surfaces flush when they're glued together.
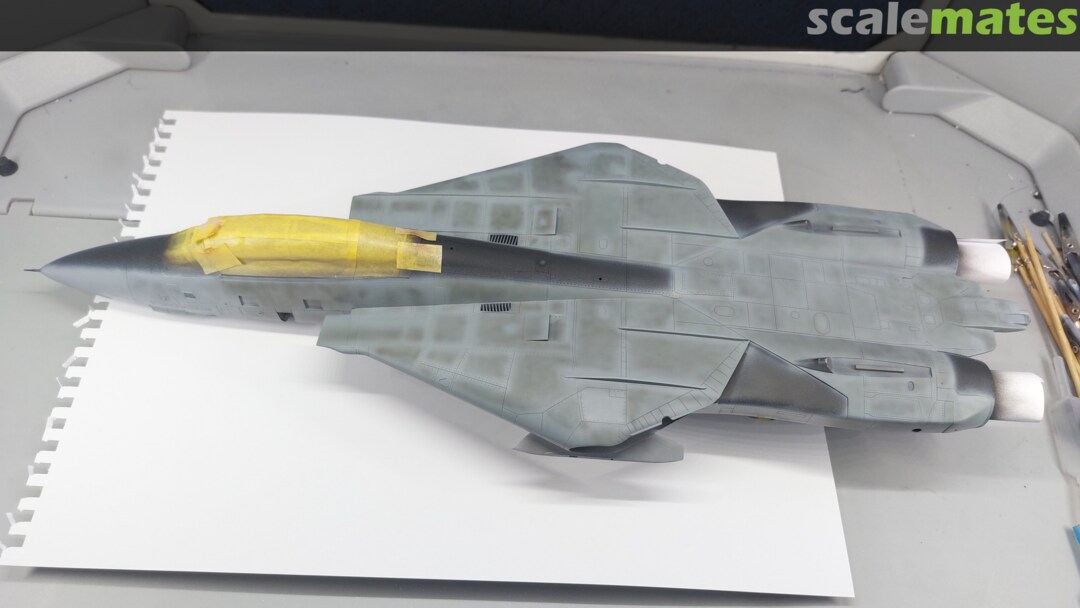
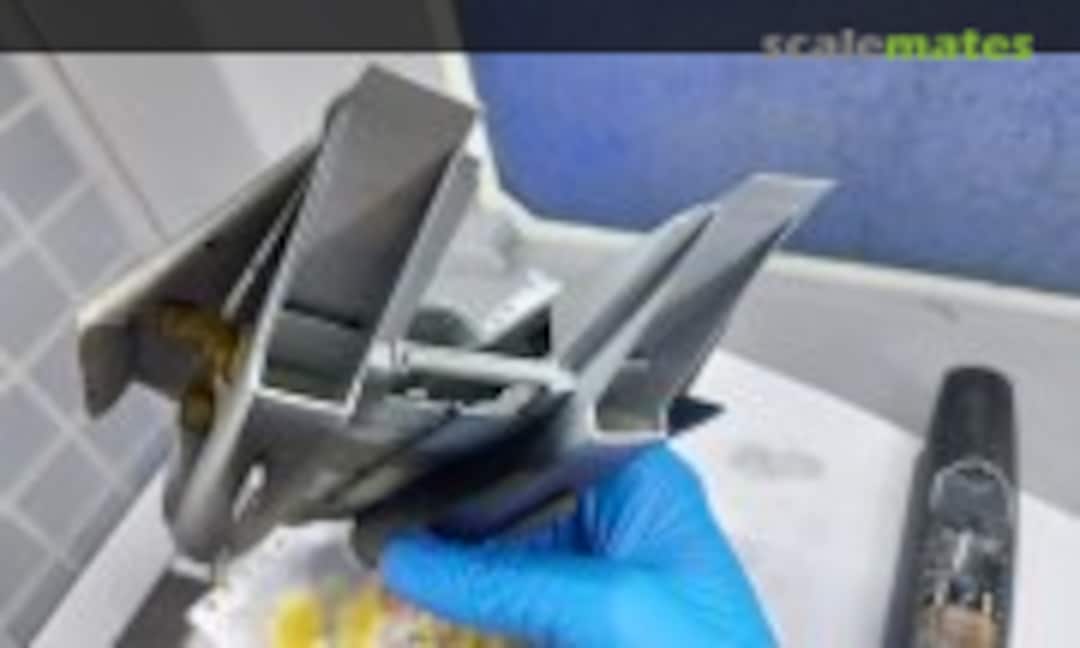 55September 20, 2025And final painting of the inlets and other areas that are more difficult to reach out once the front fuselage is connected.
 56September 20, 2025
 57September 20, 2025Starting to look like a cat.
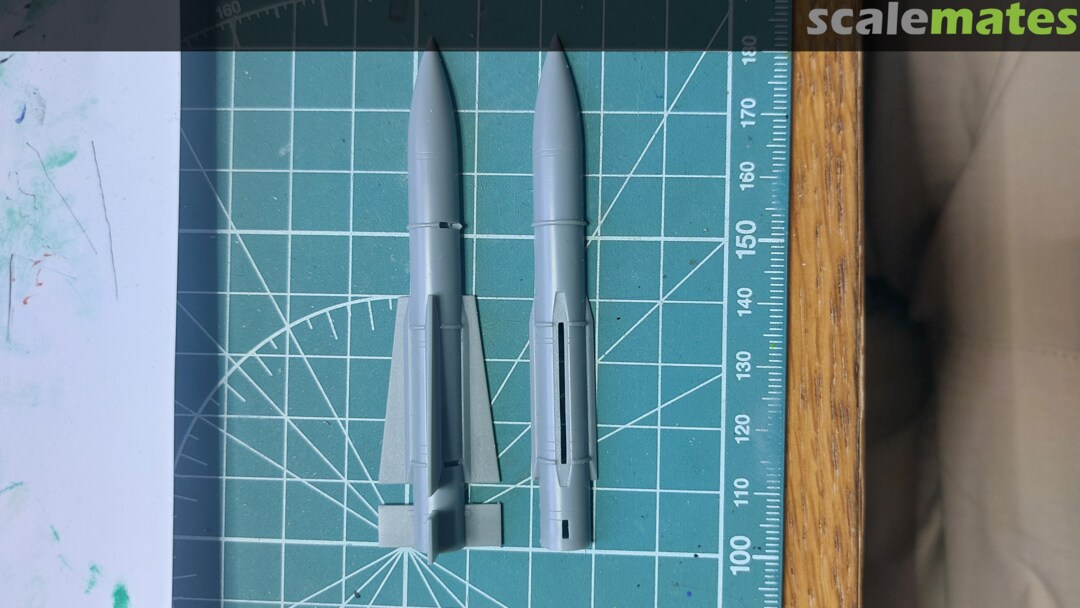
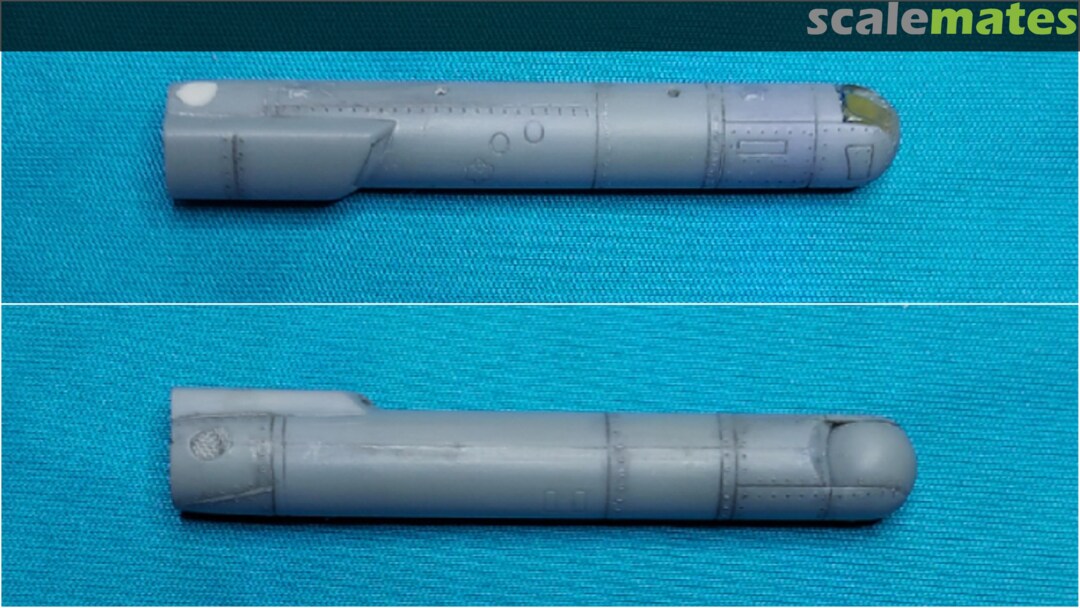
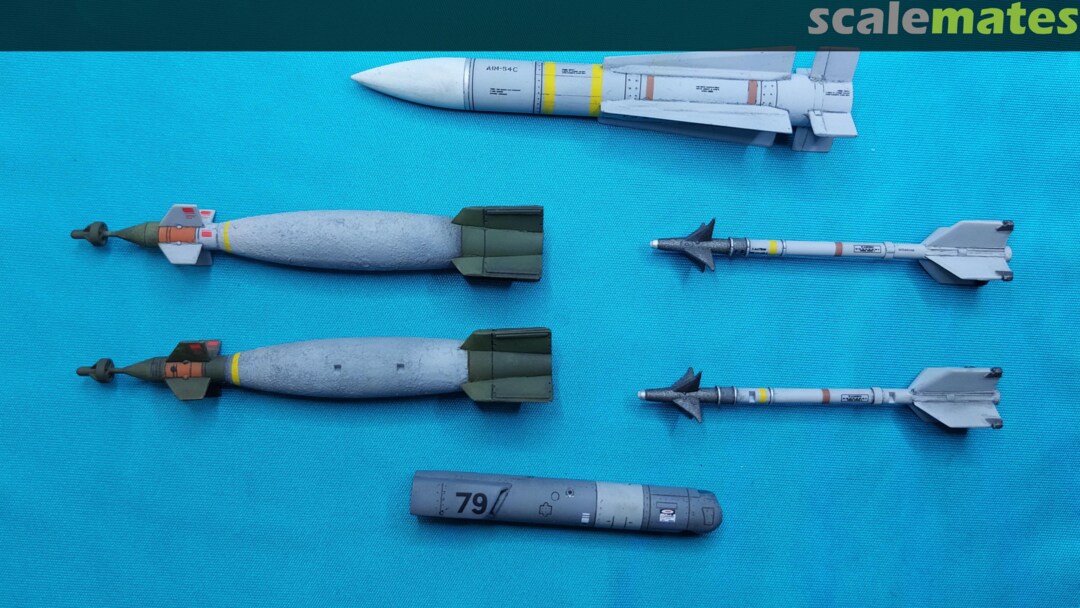
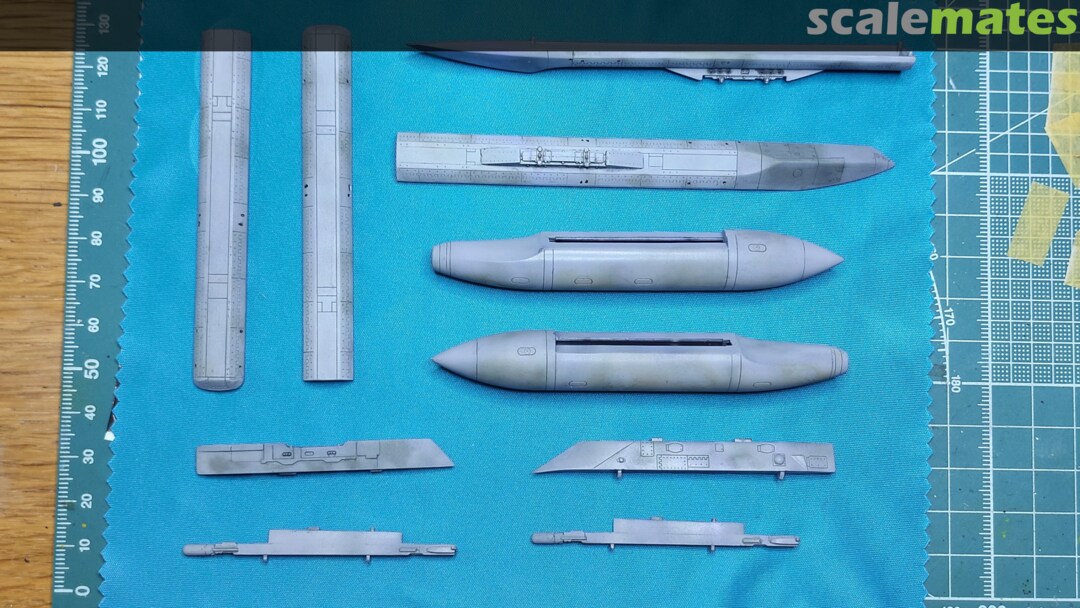
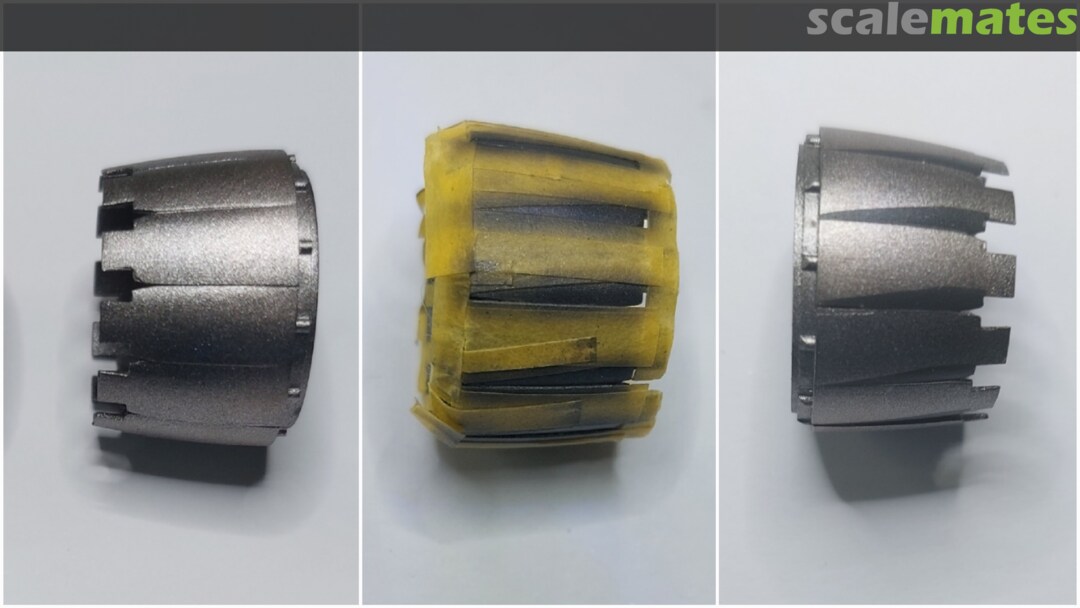
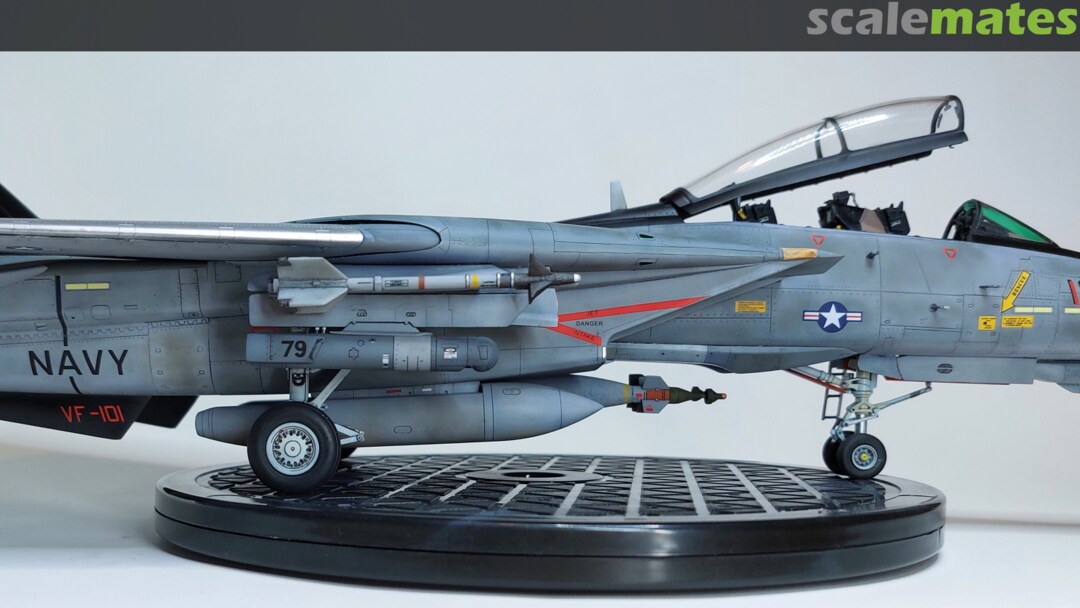
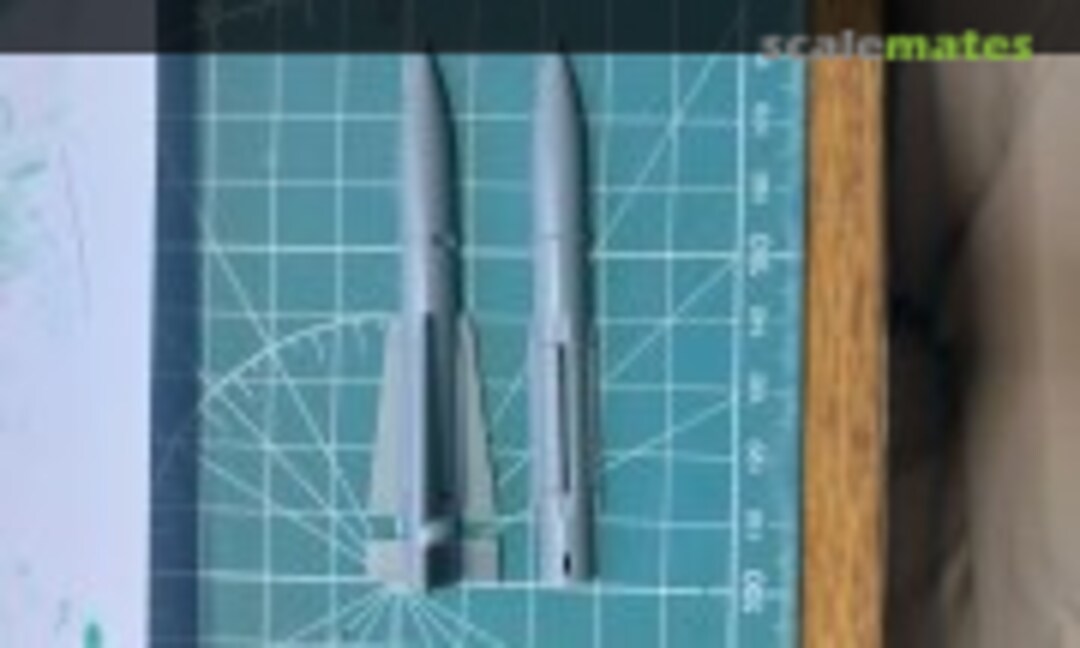 58September 21, 2025Moving to the weapons, the Phoenix missile looks good, but has 3 rings that I'm not sure what they tried to represent, so all were removed.
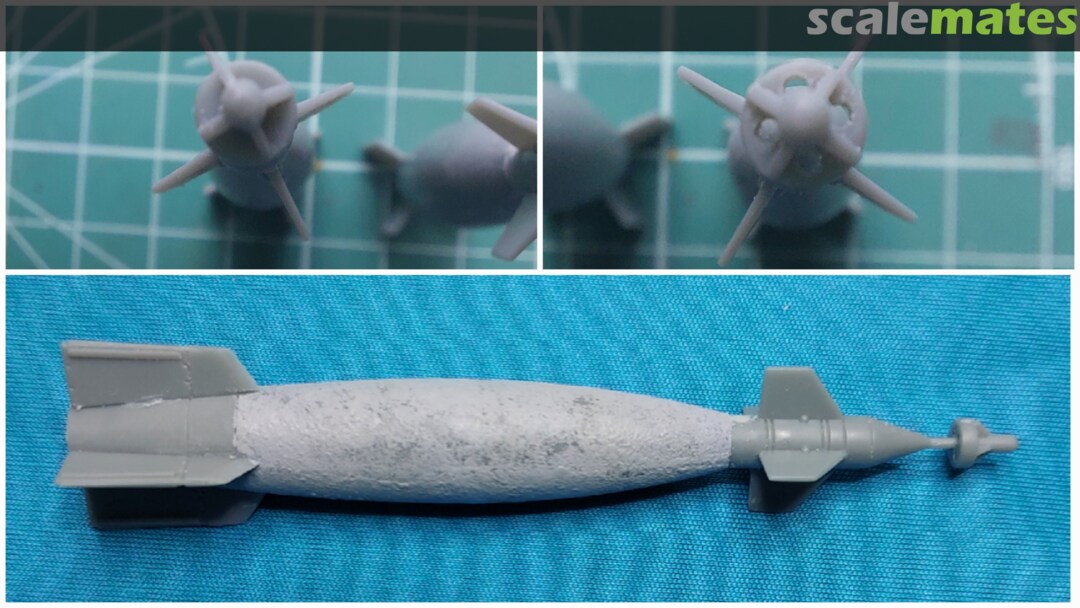
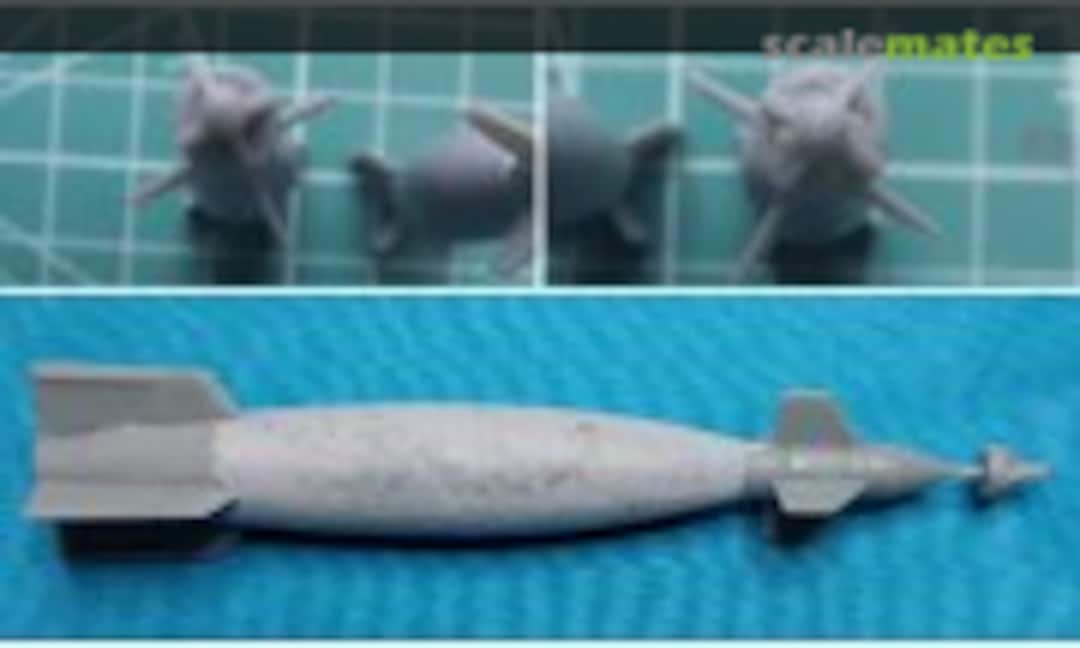 59September 21, 2025Gbu-12 (by the shape and length, more likely gbu-16), this is my 1st attempt trying to replicate the thermal insulation using Mr hobby surfacer 500.
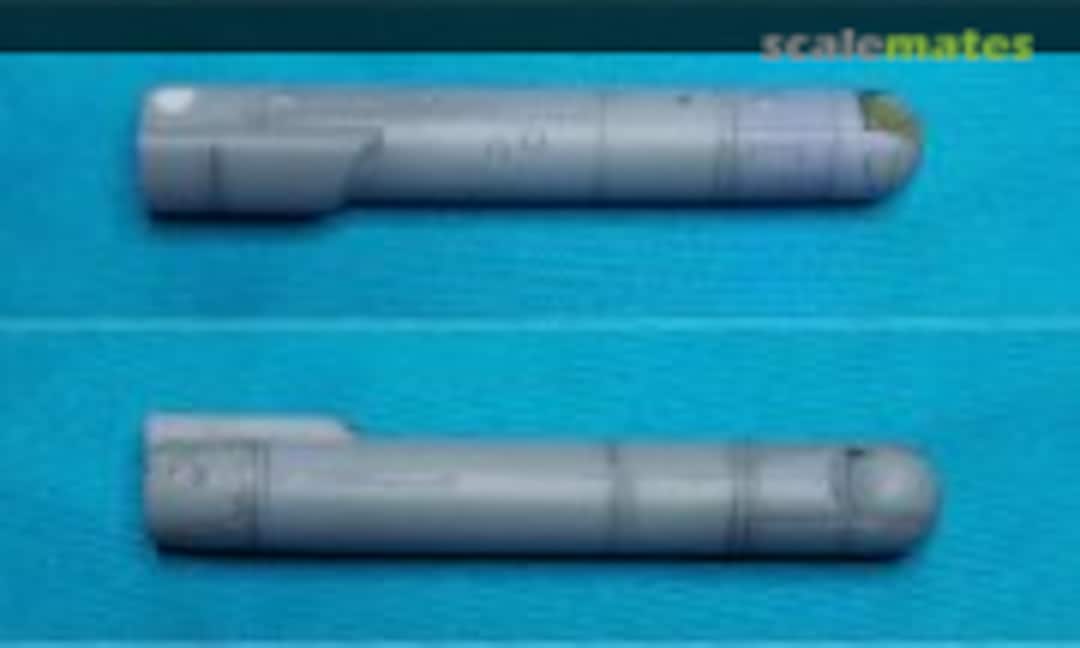 60September 21, 2025Lantirn pod, covered one of the exhaust vent on the top and adding it on the actual position at the bottom.
 61September 21, 2025
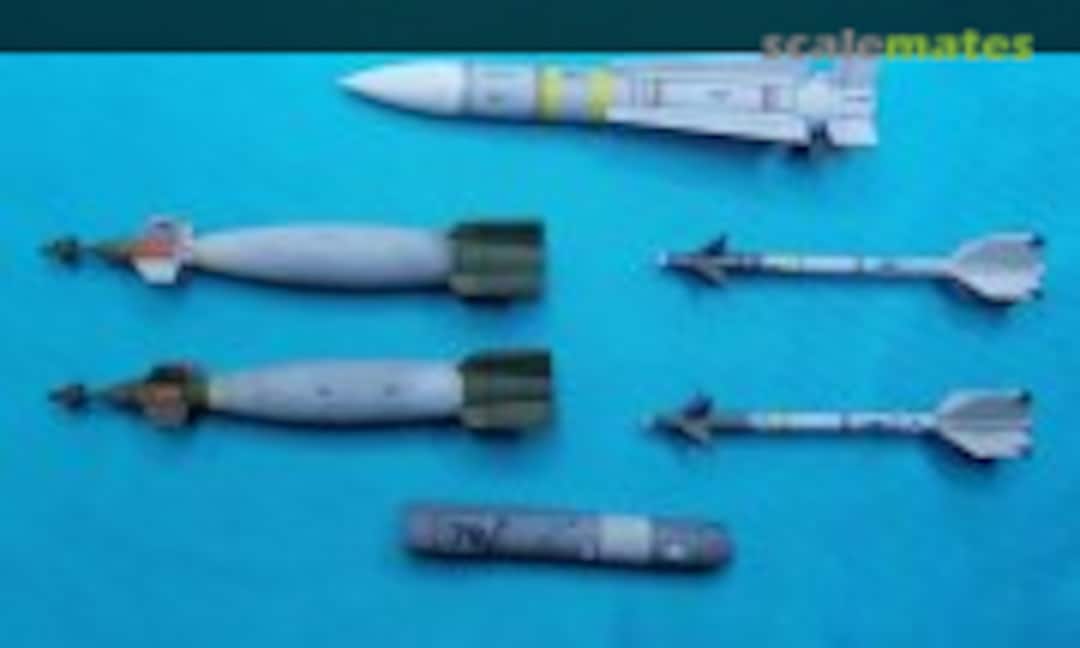 62September 21, 2025I've painted the color bands for the missiles, kit's decals are in 1 color only...black. if the 'C' after Aim-54 looks different, is because they come from spare decals from othet kits, I used them to replace the 'A' from the original one.
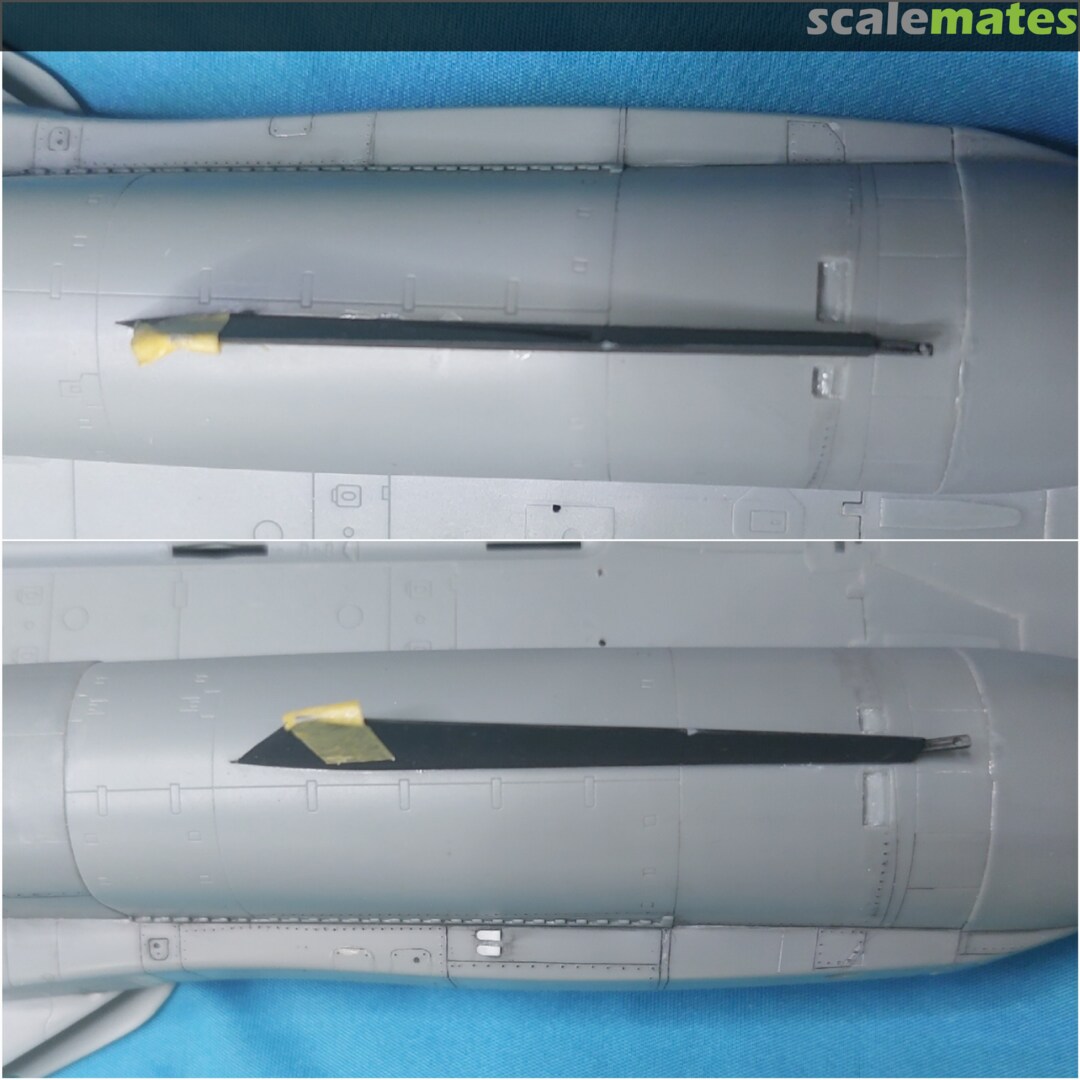
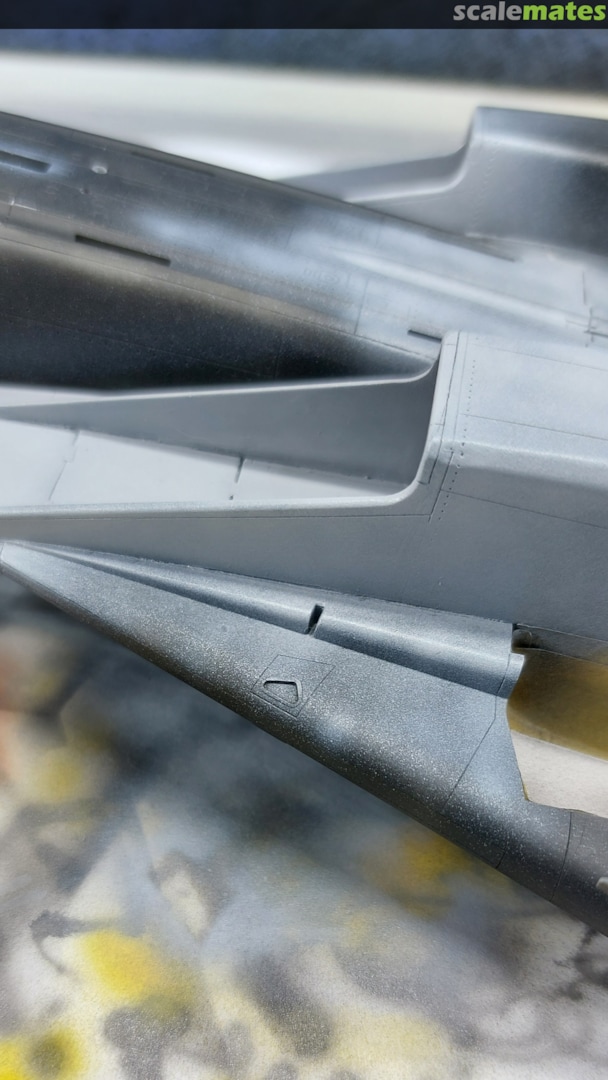
Also the numbers for the pod are from other kit's decals. 63October 11, 2025That small notch is for the installation of a ECM antenna on the B-model and has to be filled.
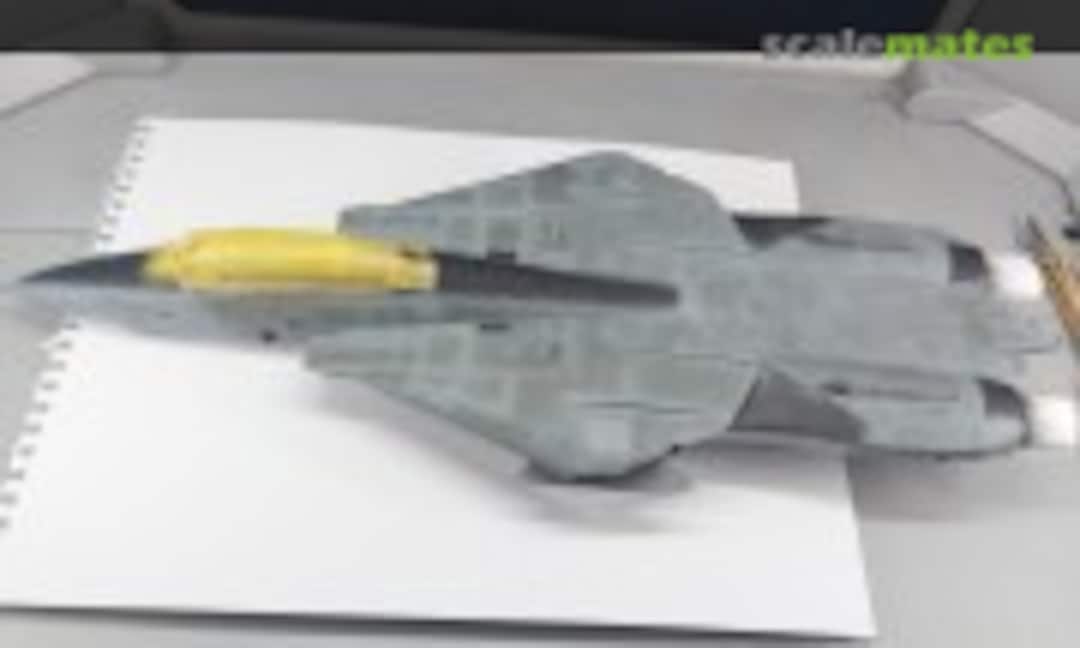 64October 11, 2025
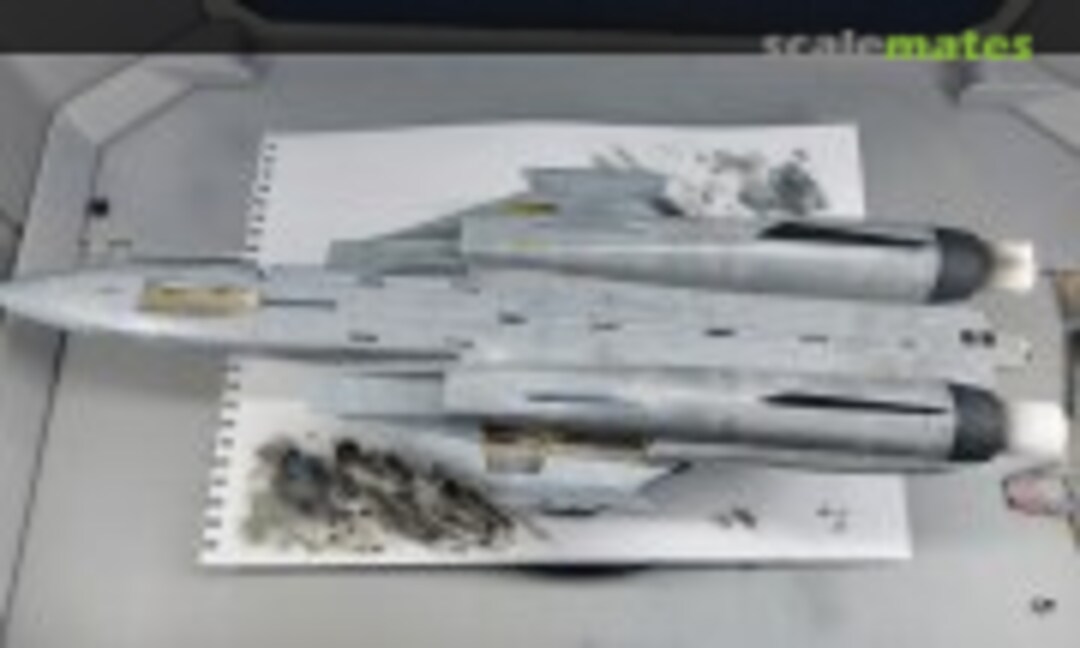 65October 11, 2025
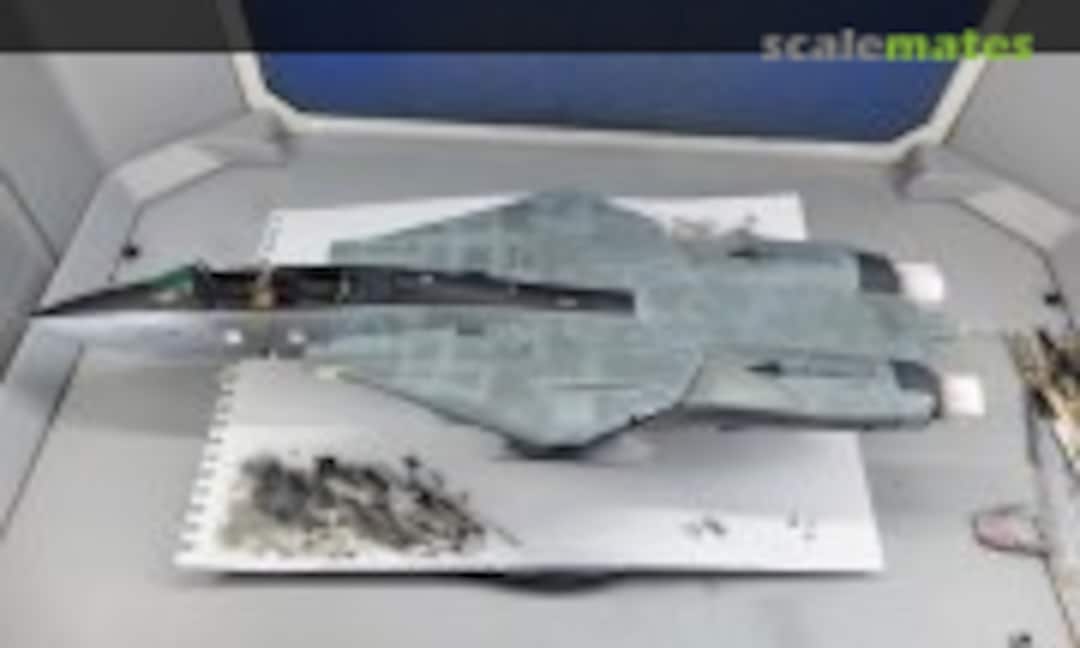 66October 11, 2025
 67October 11, 2025Vertical tails done and assembled onto the fuselage. More filler and sanding to cover the joint.
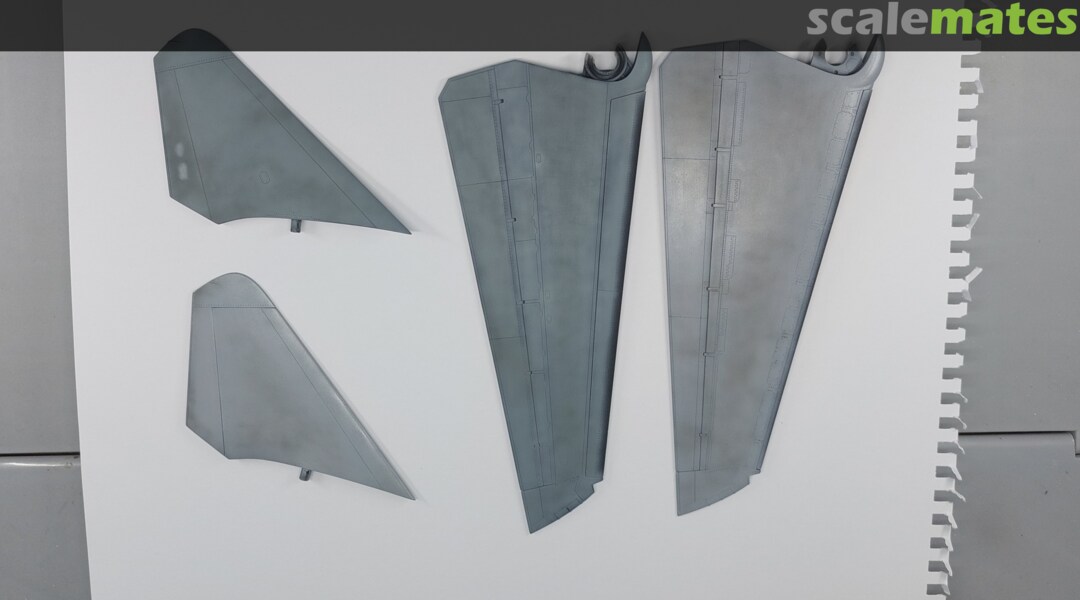
 68October 11, 2025Wings and horizontal stabs. also painted.
 69October 12, 2025Decals application completed.
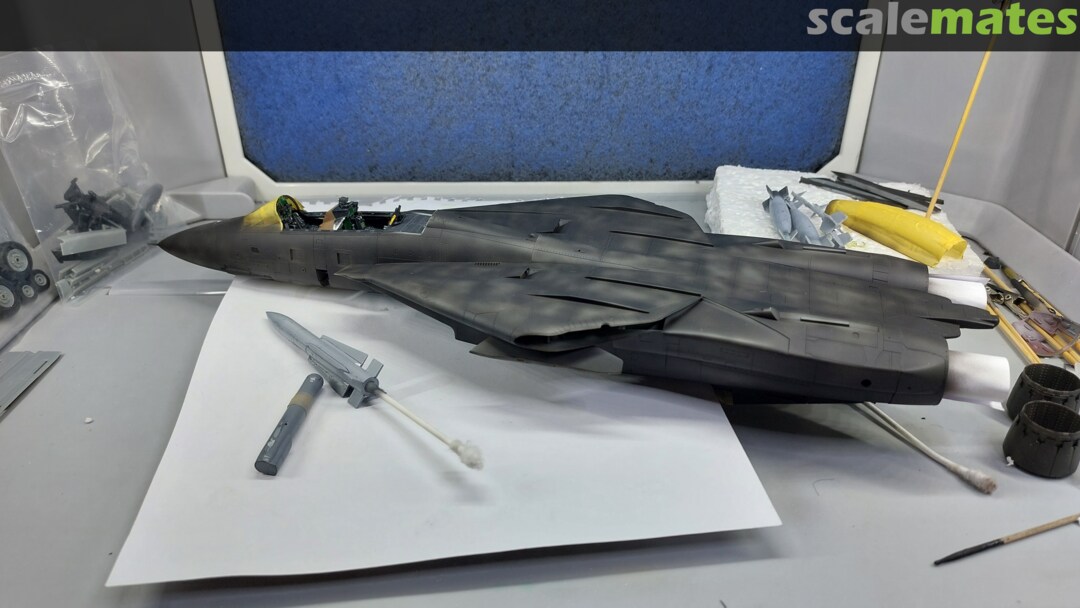
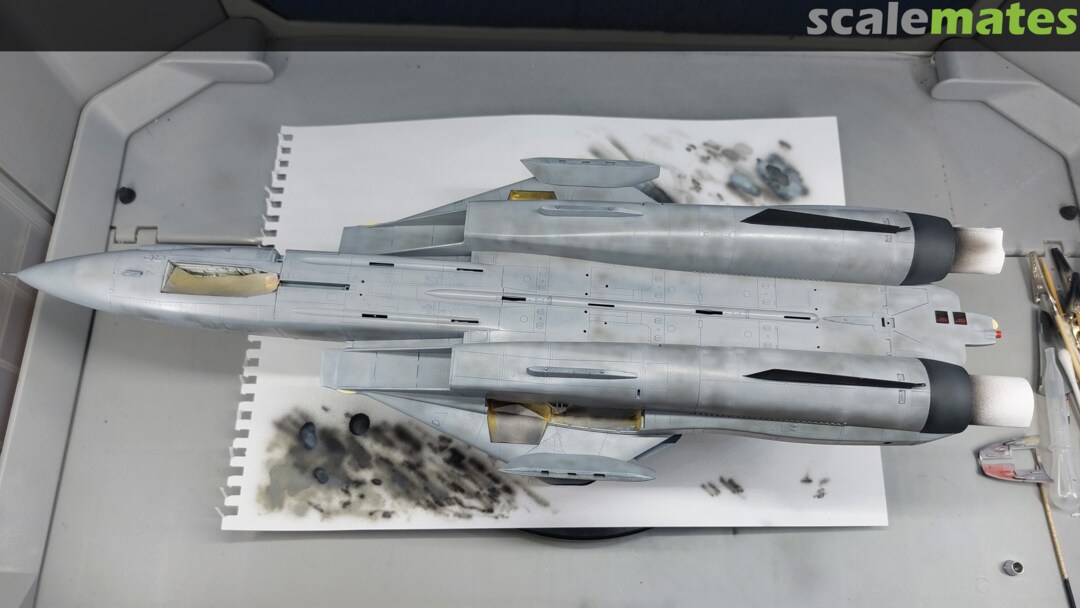
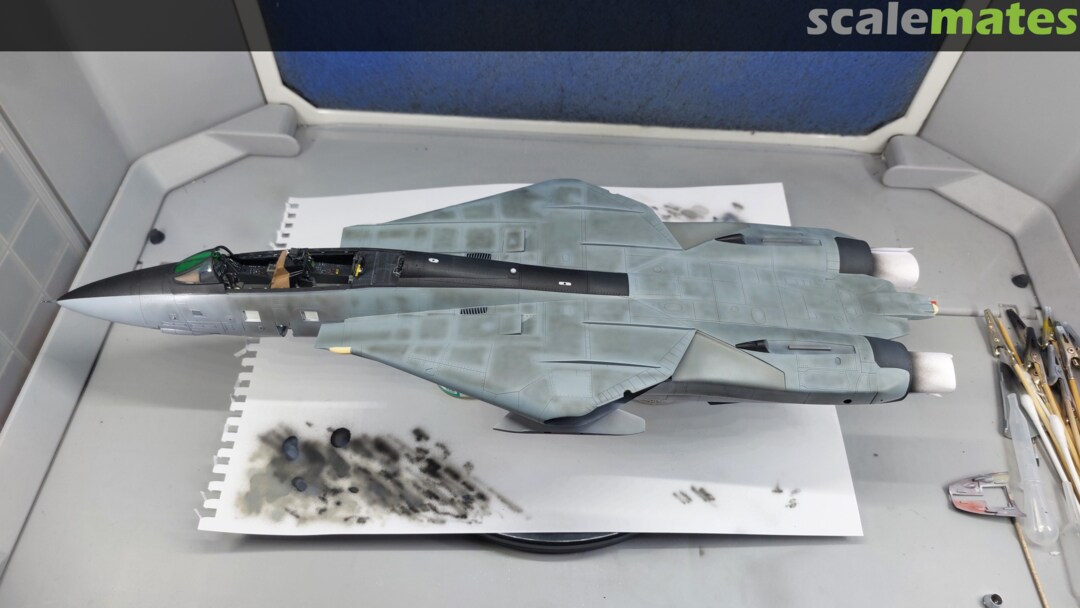
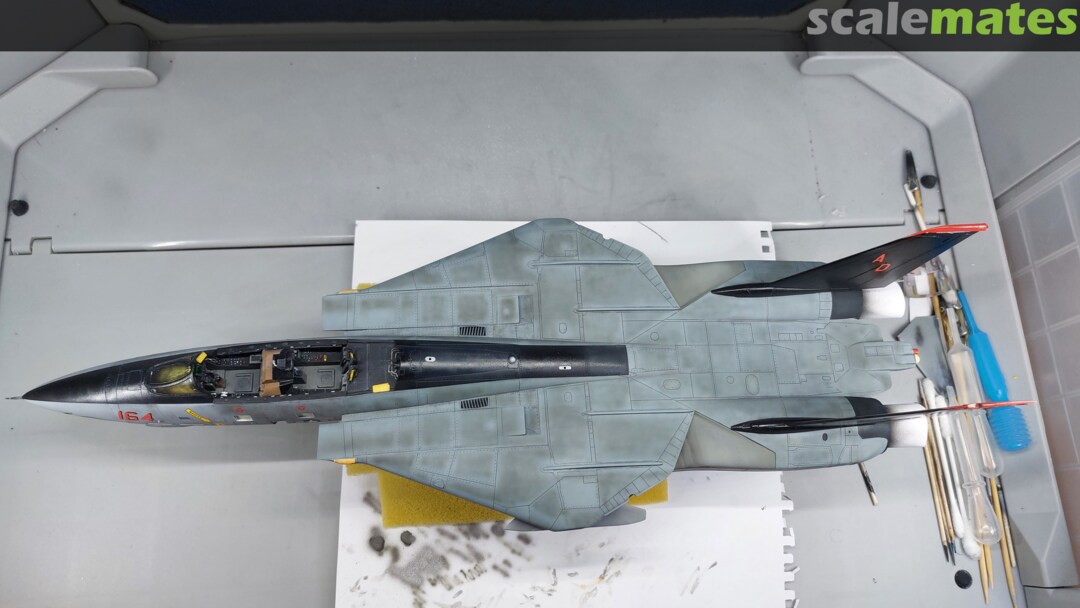
 70October 12, 2025Ready for weathering.
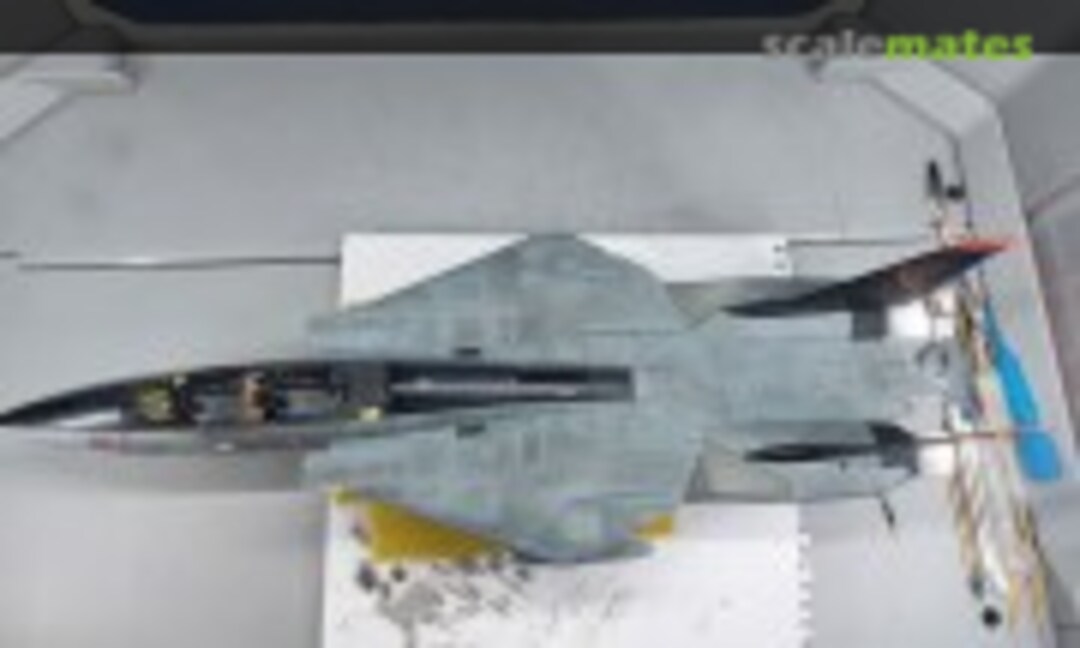 71October 19, 2025Wash and weathering completed. Didn't use oleo that much. Now time to paint the walkways and other details.
 72October 19, 2025
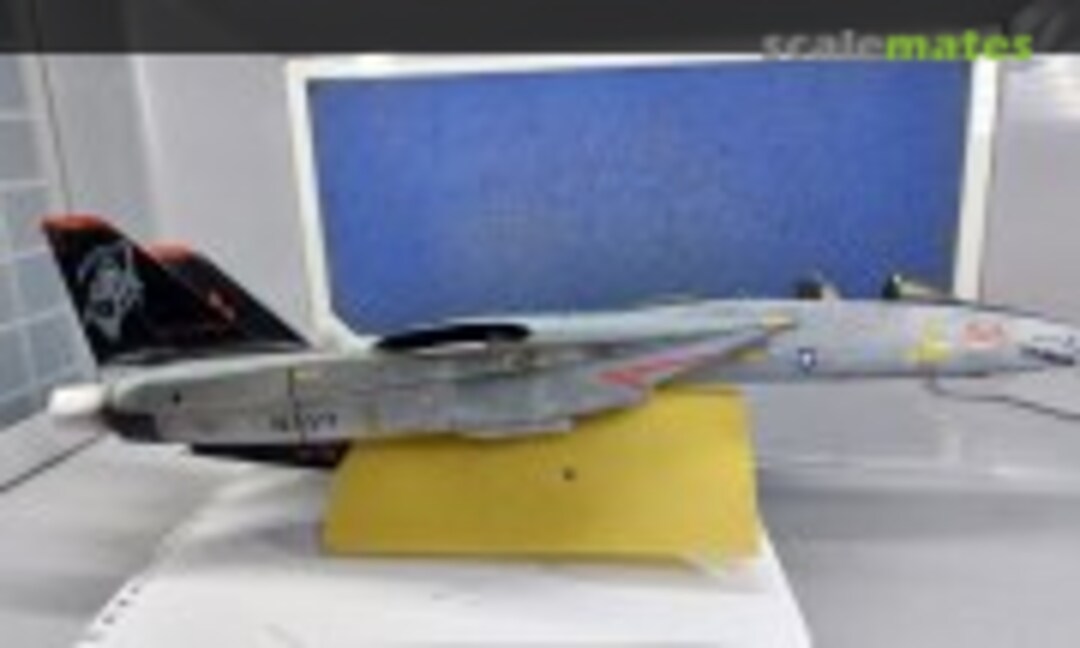 73October 19, 2025
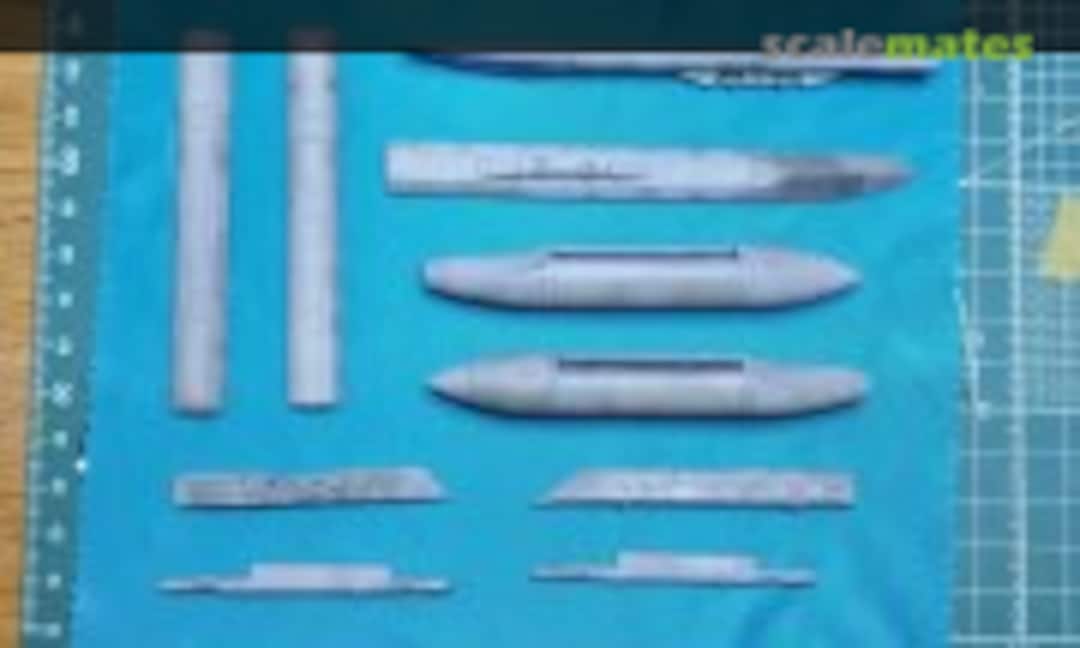 74October 19, 2025
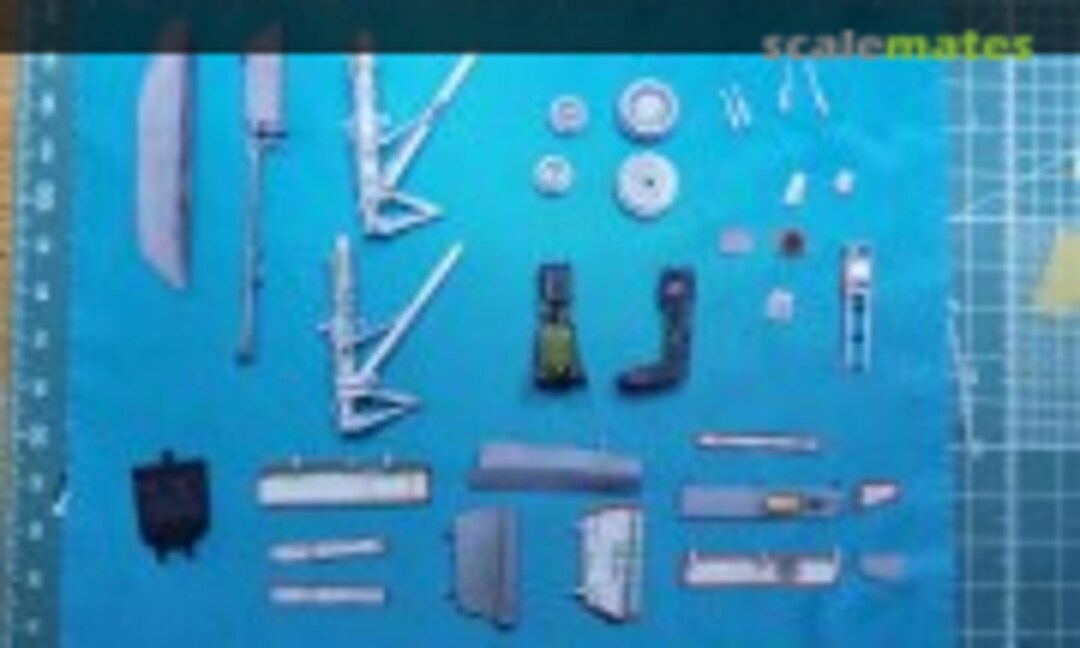 75October 19, 2025More bits completed.
 76October 24, 2025Walkways painted, with higher ratio of paint in the mix.
 77October 24, 2025Jig ready.
 78October 24, 2025
 79October 24, 2025
 80October 24, 2025
 81October 24, 2025Final result. Wings almost ready.
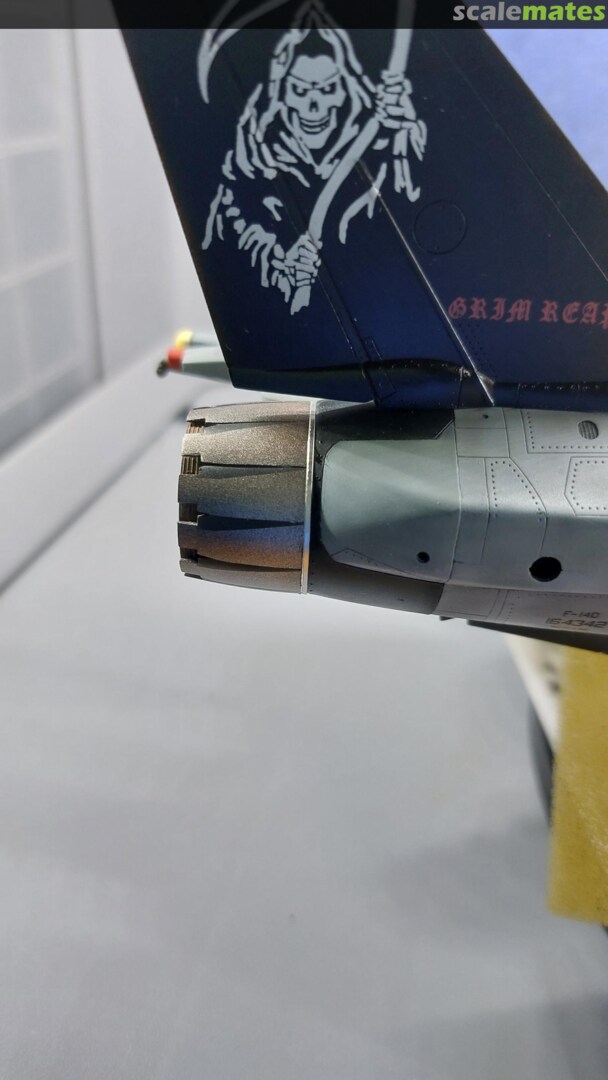
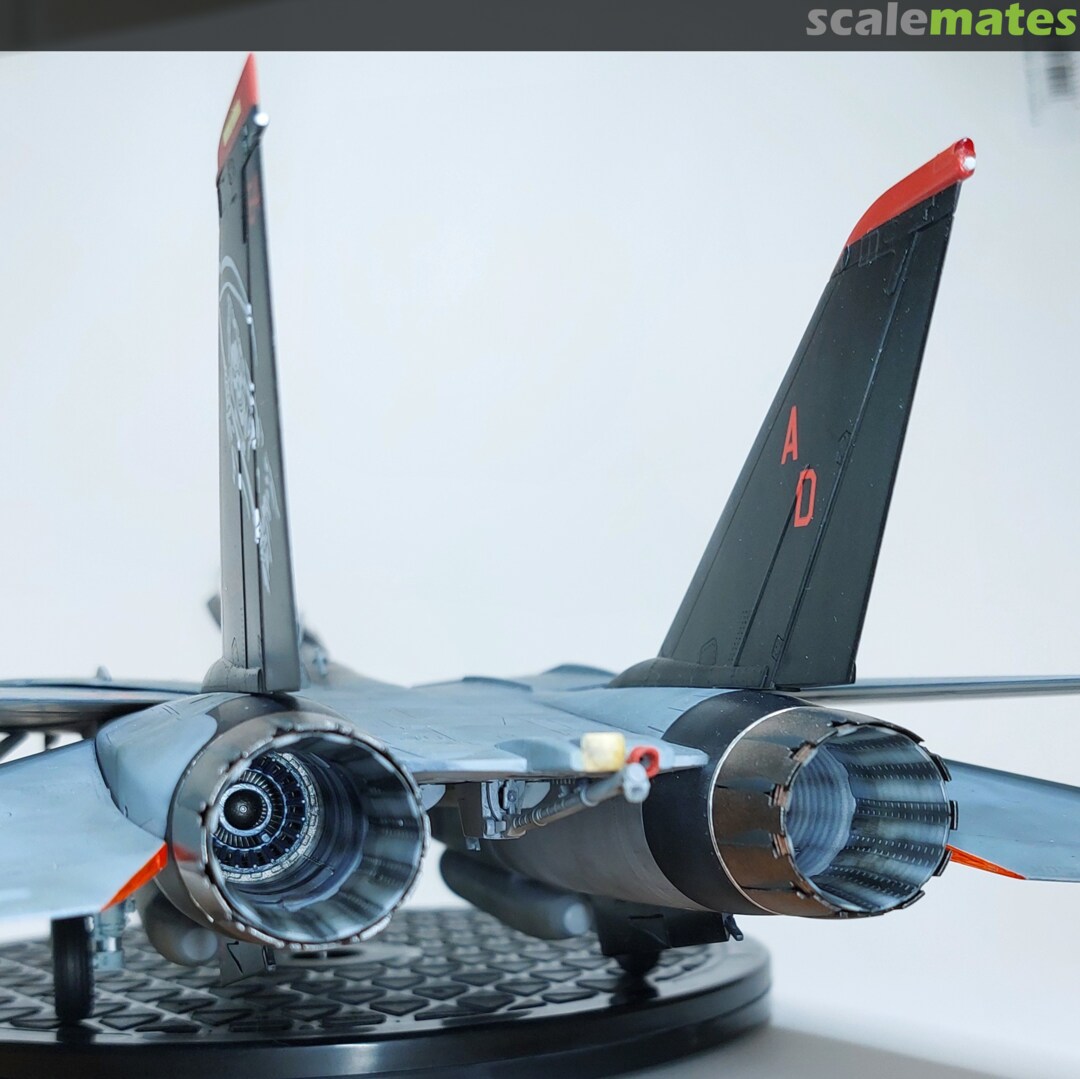
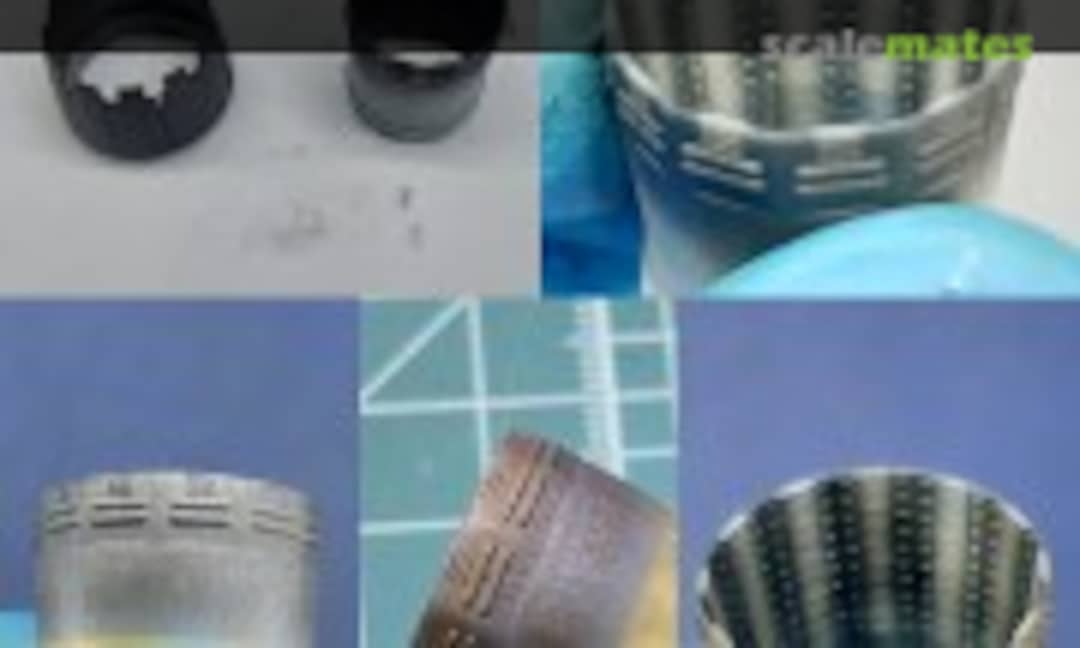 82October 26, 2025Small update, exhaust painting finished too. In sequence, black primer for both parts, then for the interior, painted strips with white insignia, then the other ones dark grey. Exterior, burnt metal. Finally, oils, sepia on the exterior, and black for the interior.
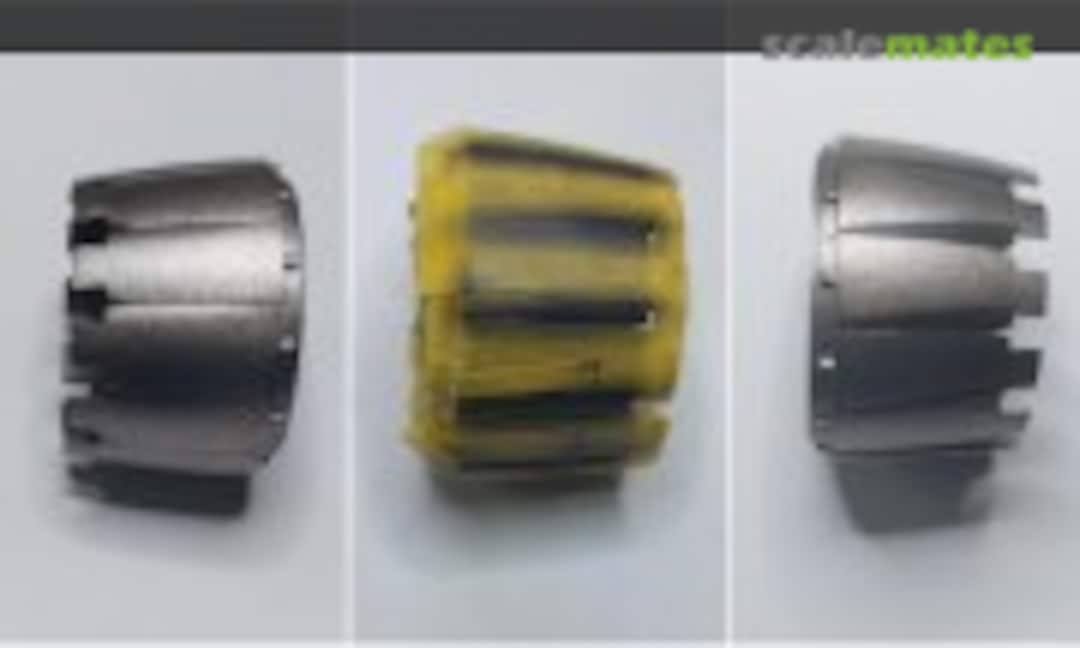 83October 26, 2025Petals painted with a mix of steel and bronze. And after a long time masking, dark grey.
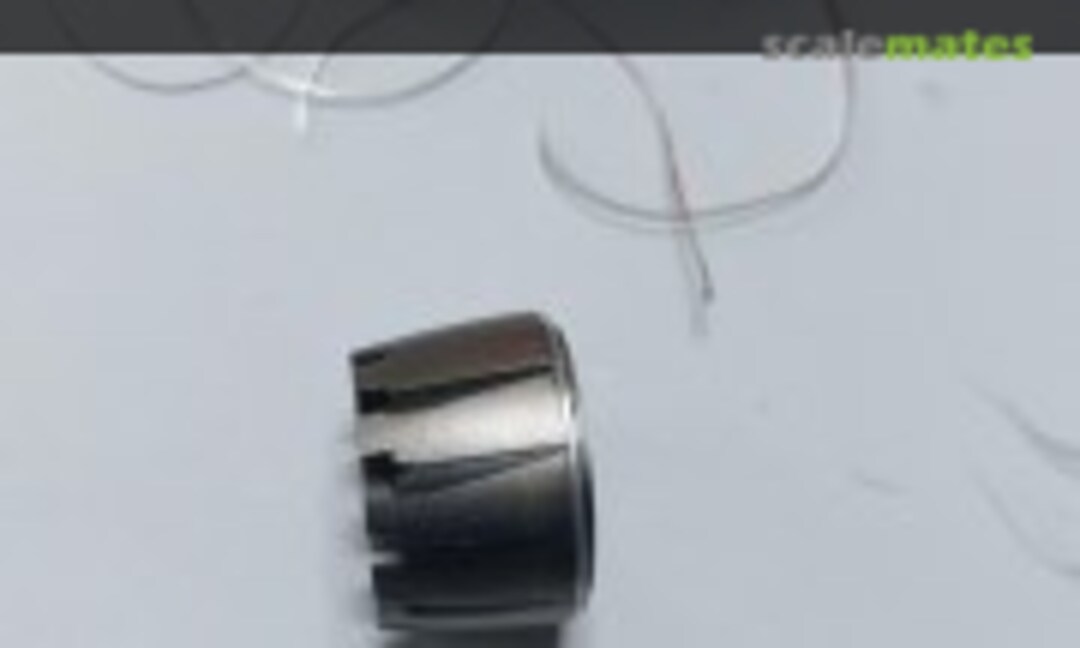 84November 5, 2025After several tries, I found that using strips from a coke can is the best way to simulate the metallic ring around the exhaust.
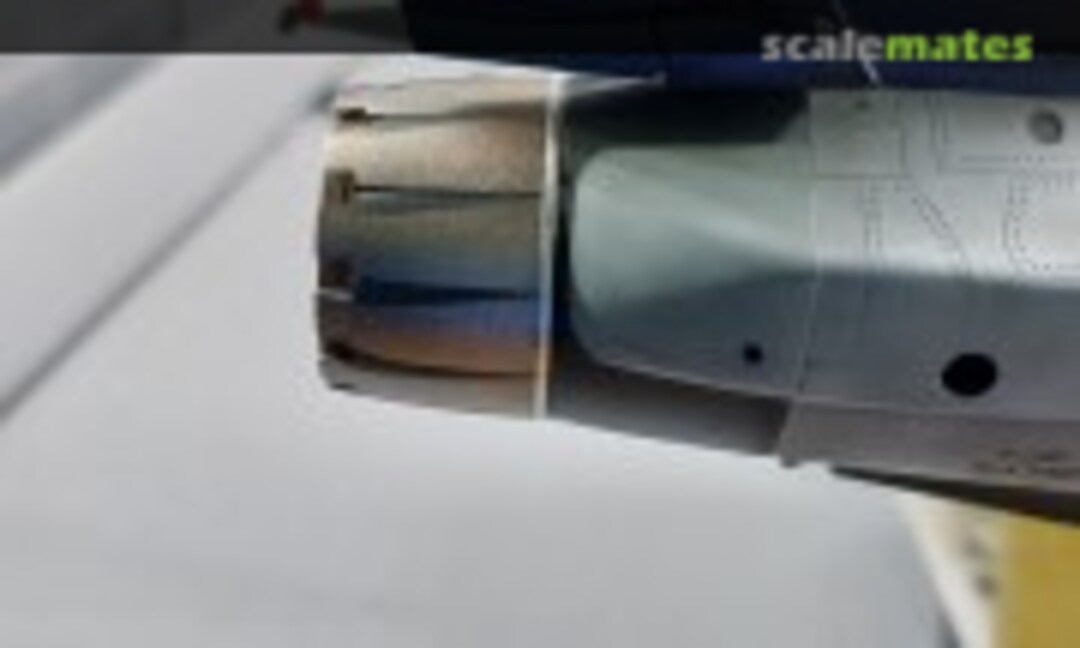 85November 5, 2025
 86November 5, 2025Stupid hands....time waisted repairing it.
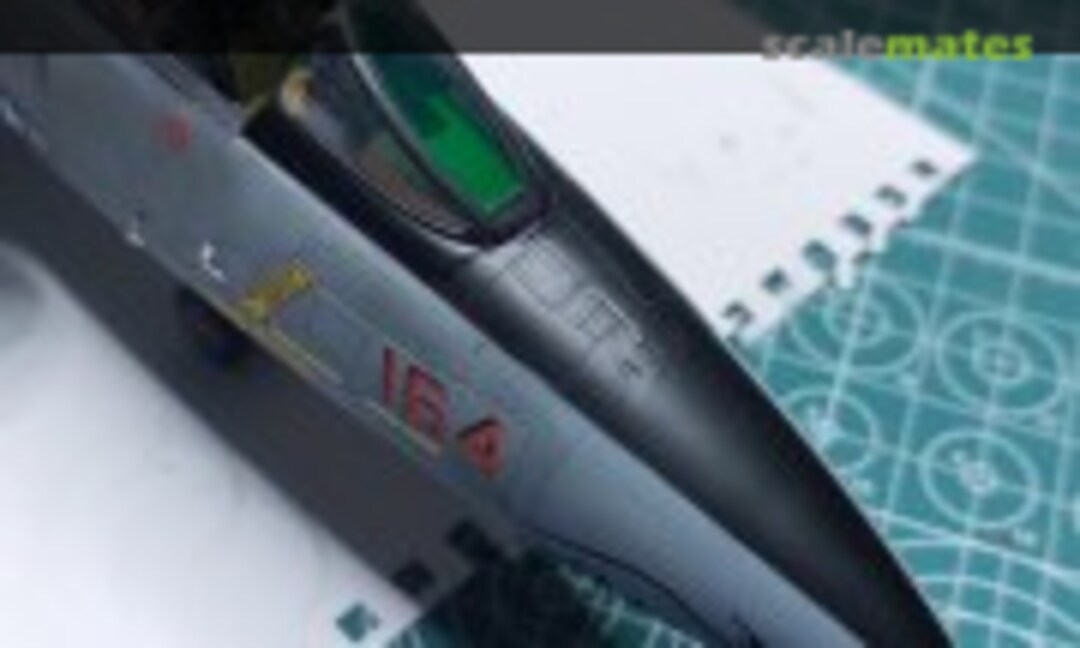 87November 5, 2025Last bit, the cord ahead of the windscreen.
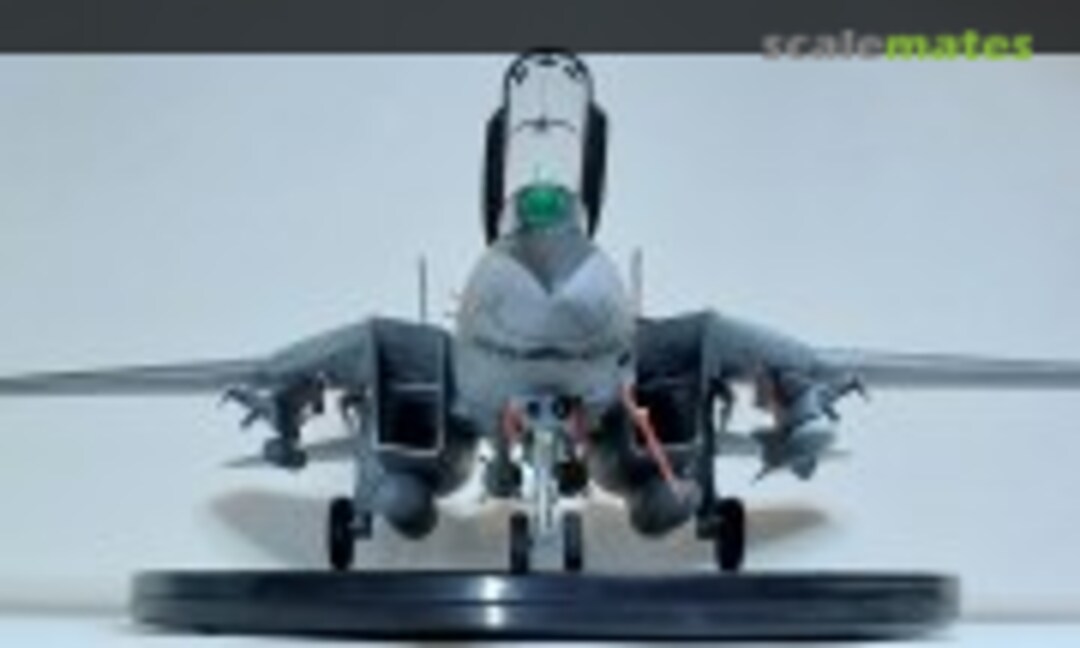 88November 9, 2025
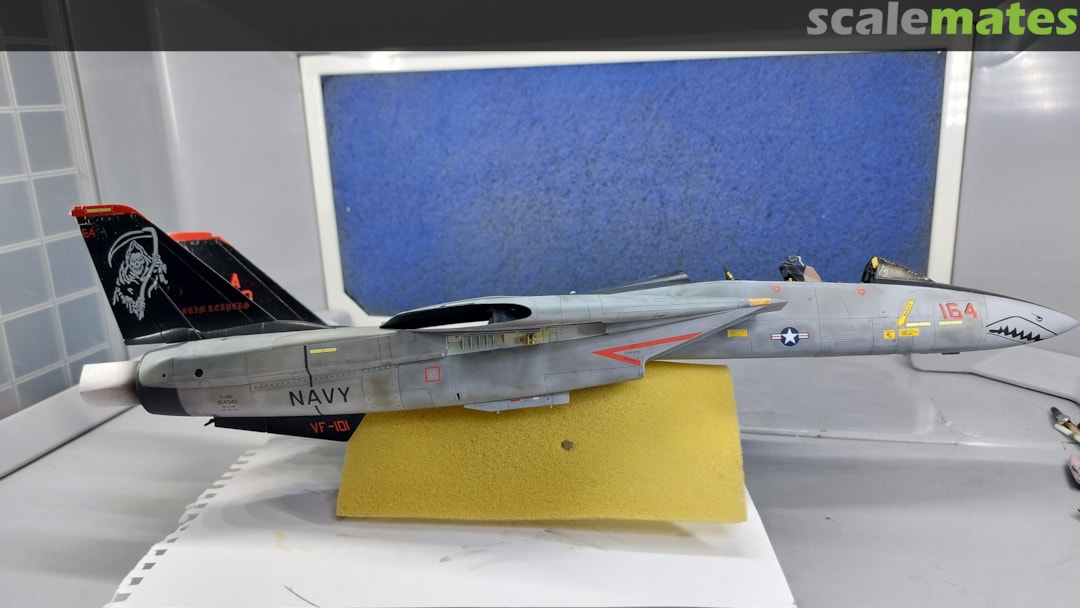
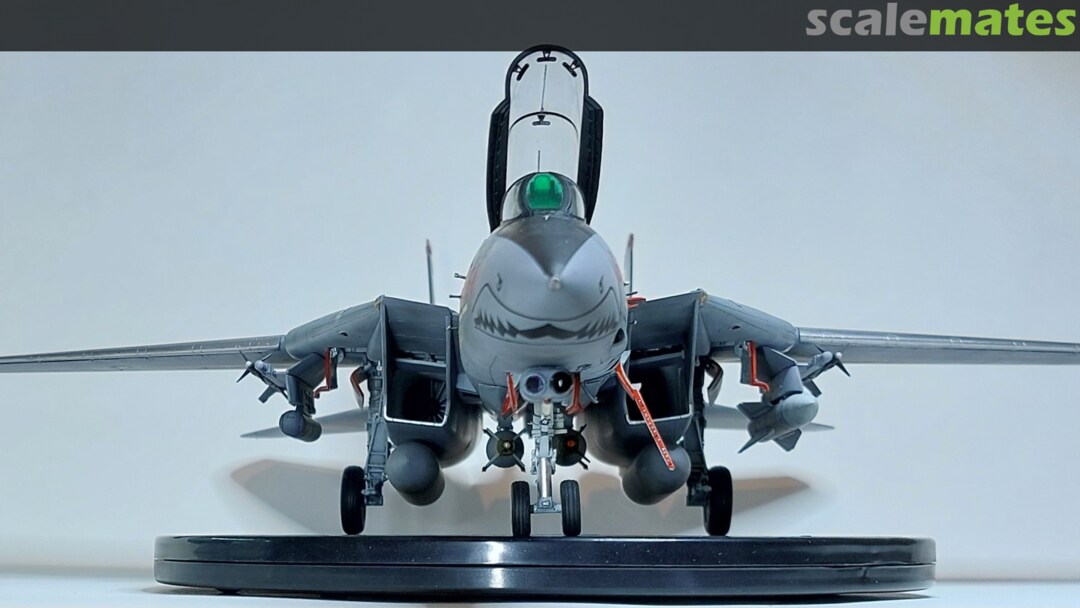
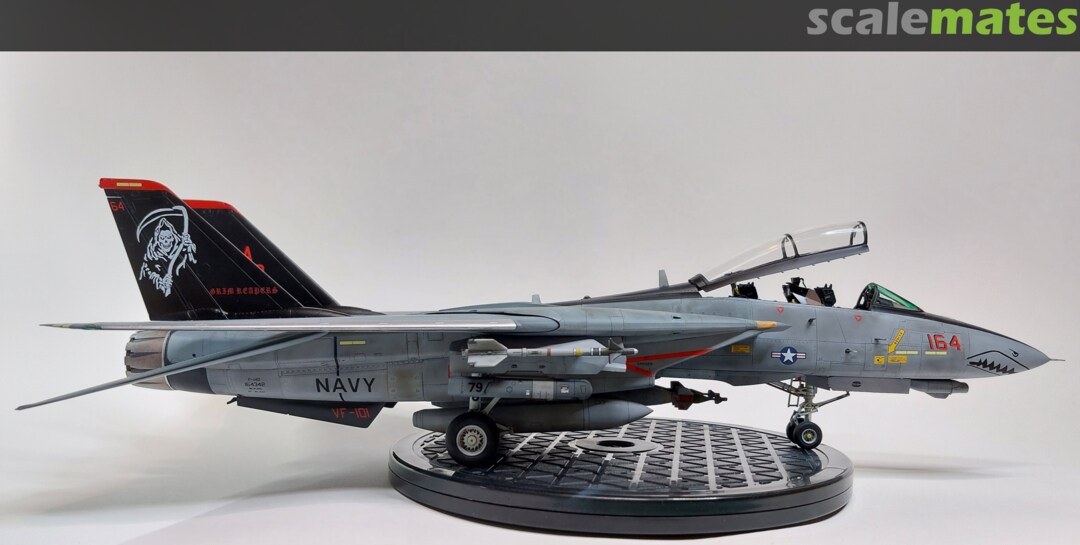
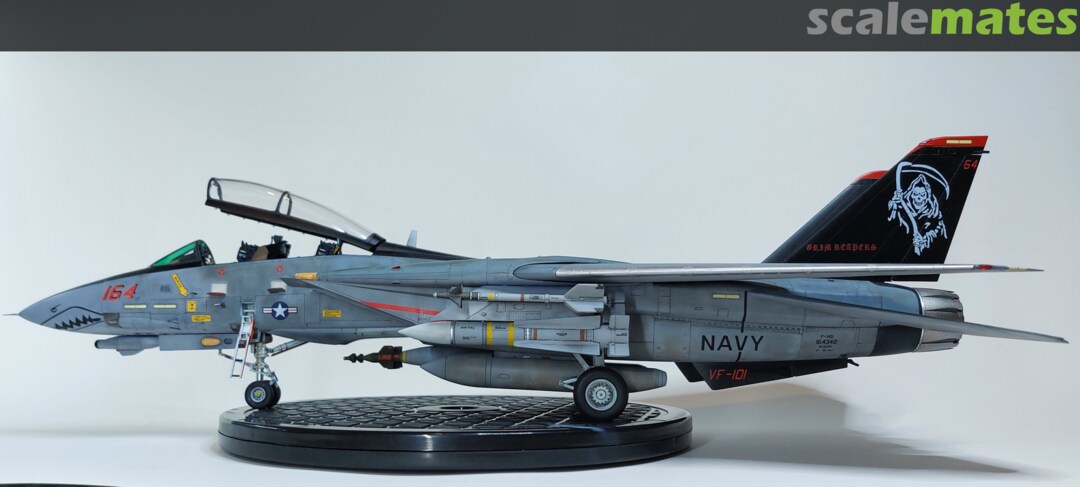
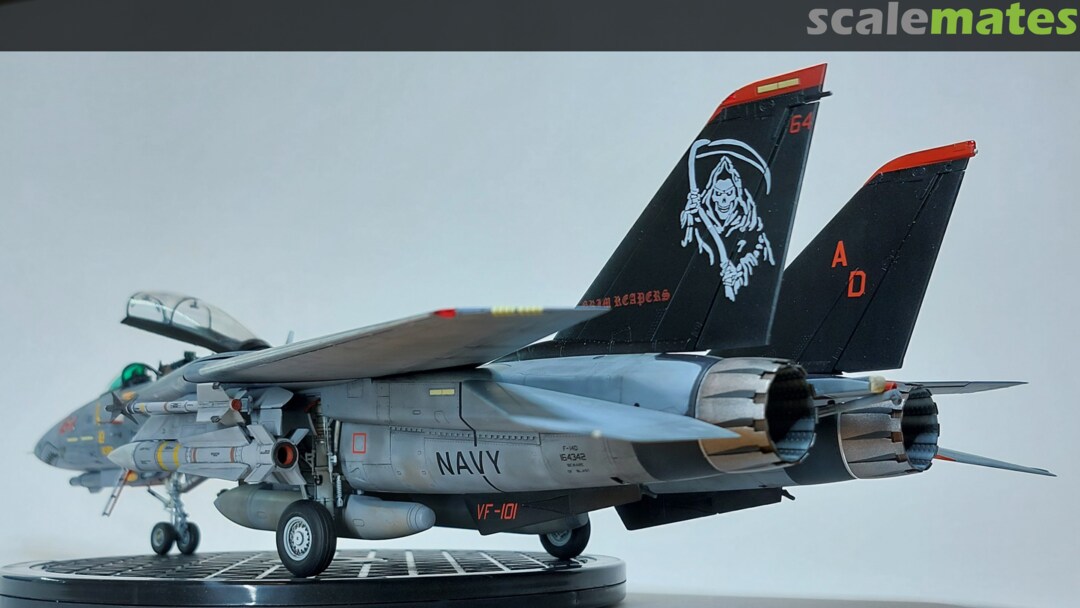
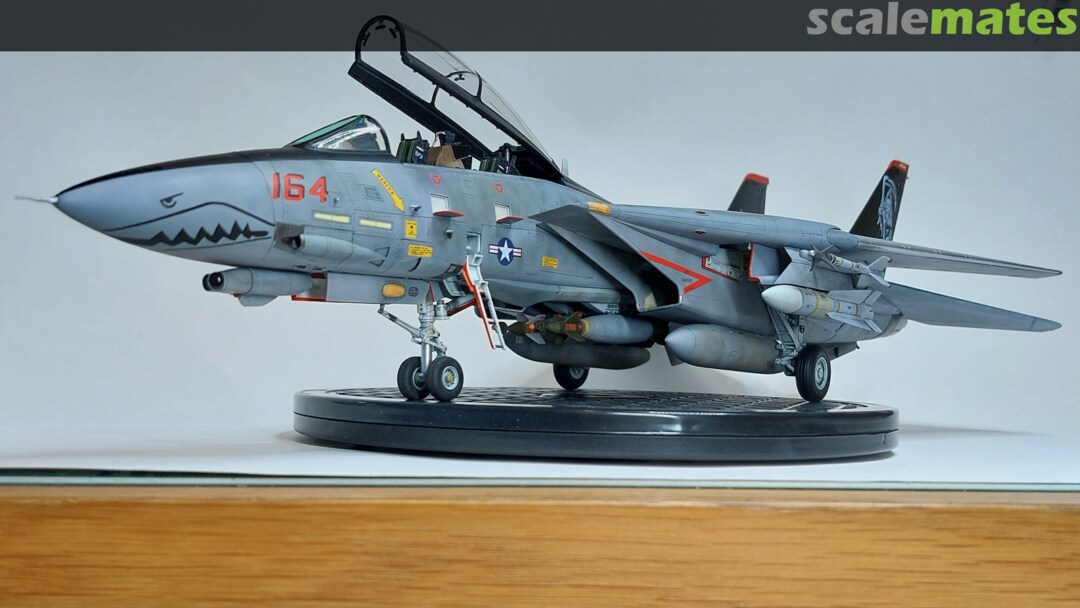
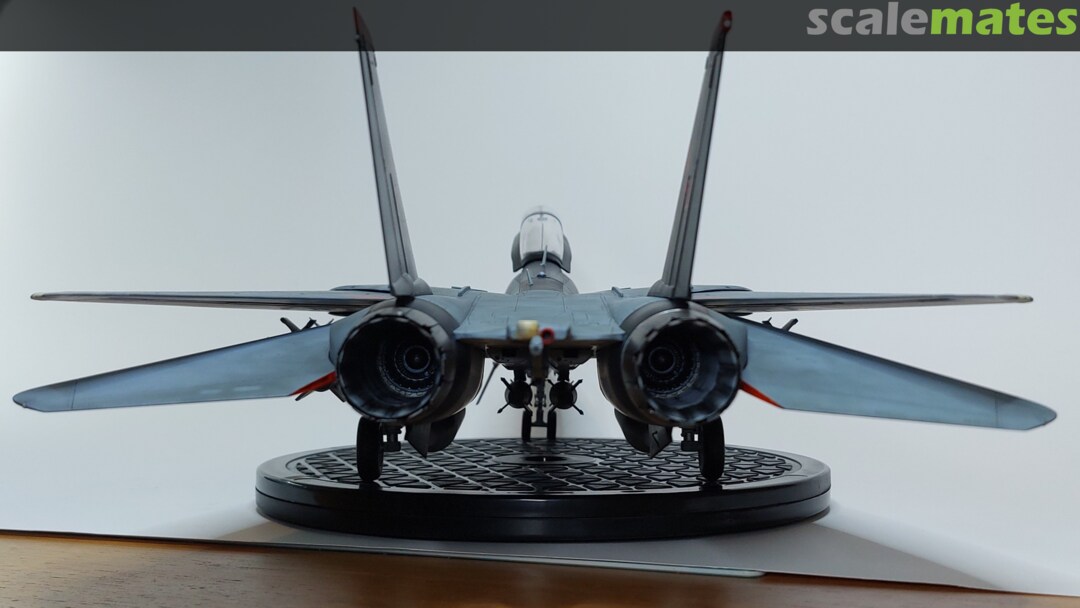
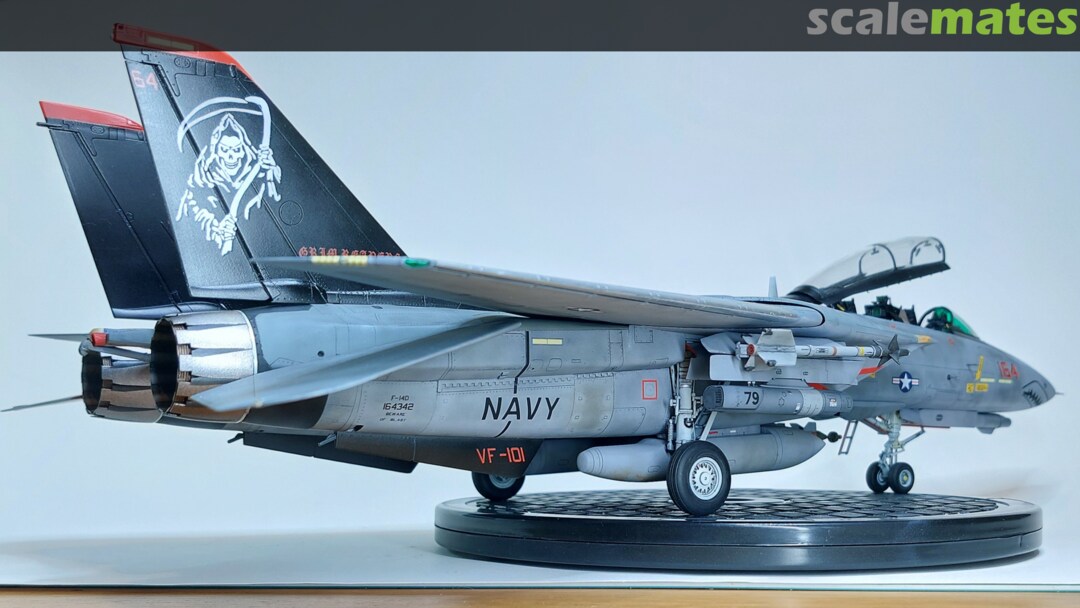
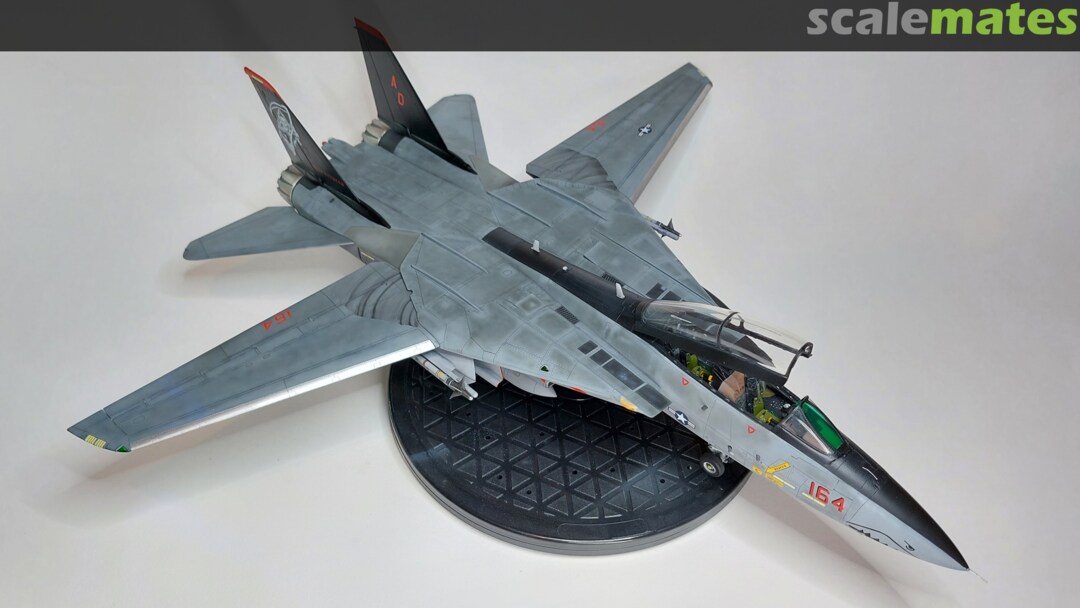
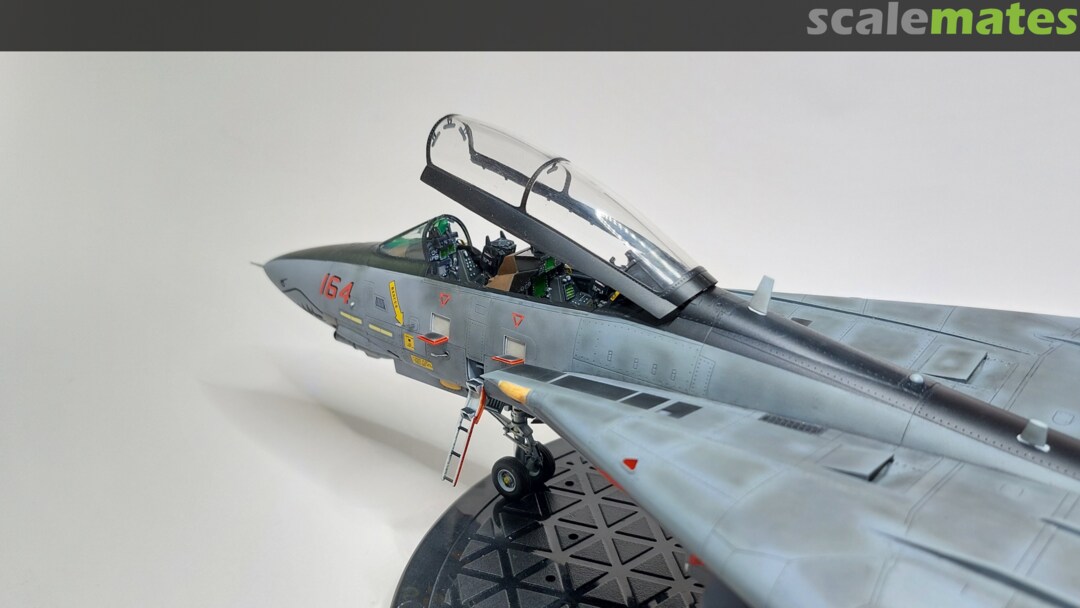
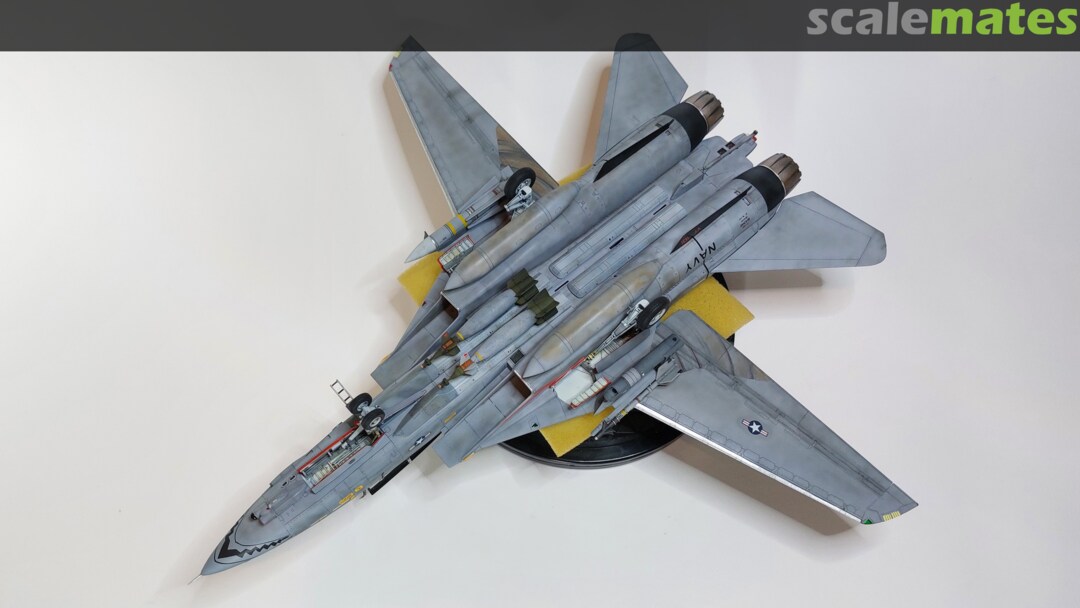
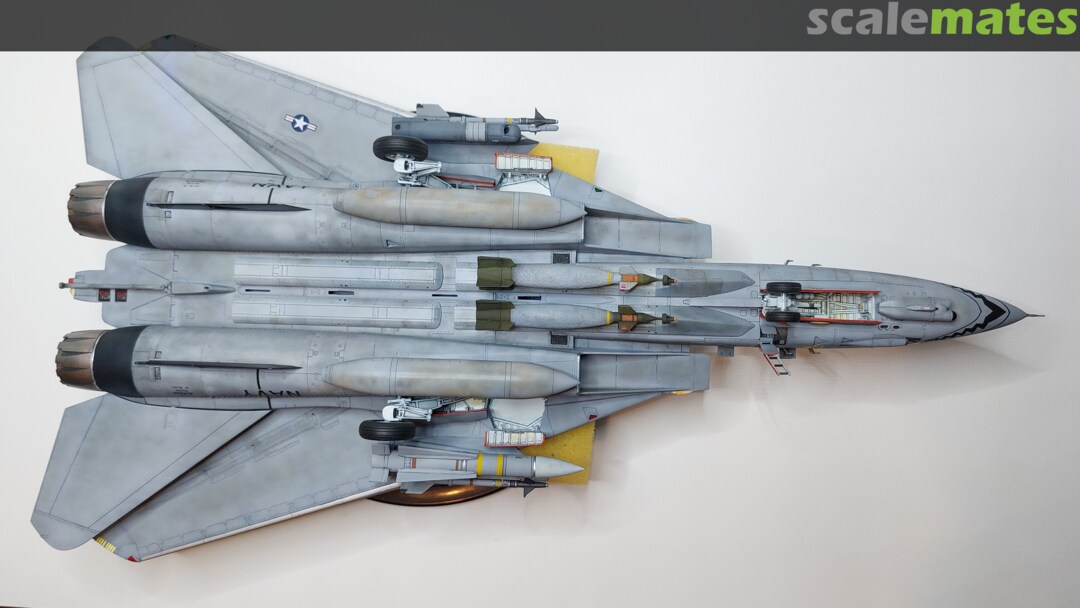
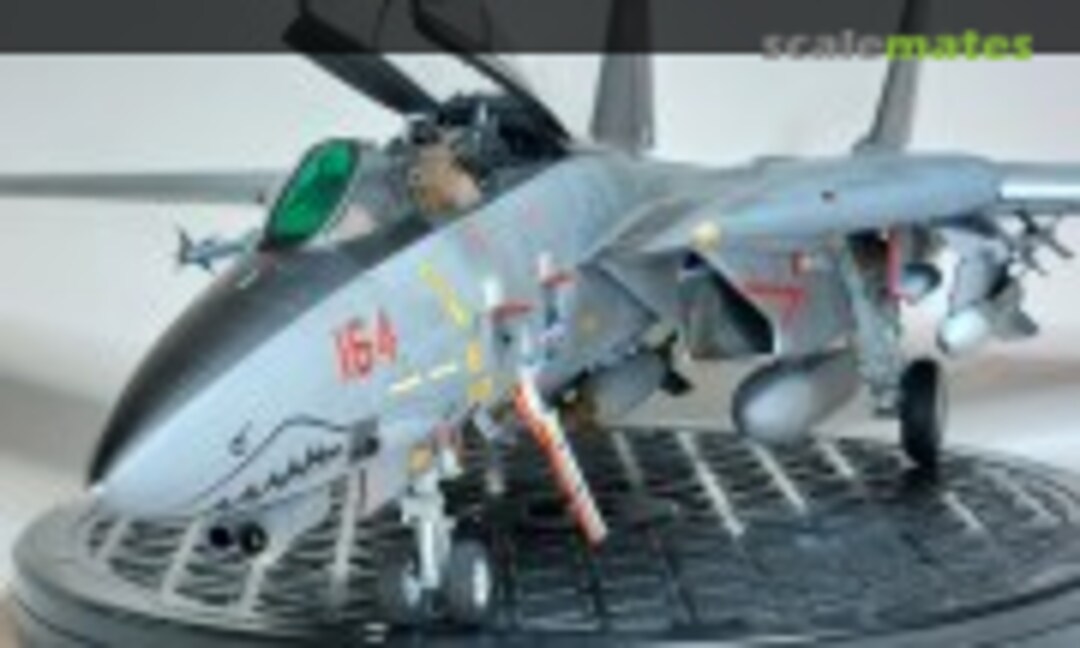 89November 9, 2025End result after almost 6 months.
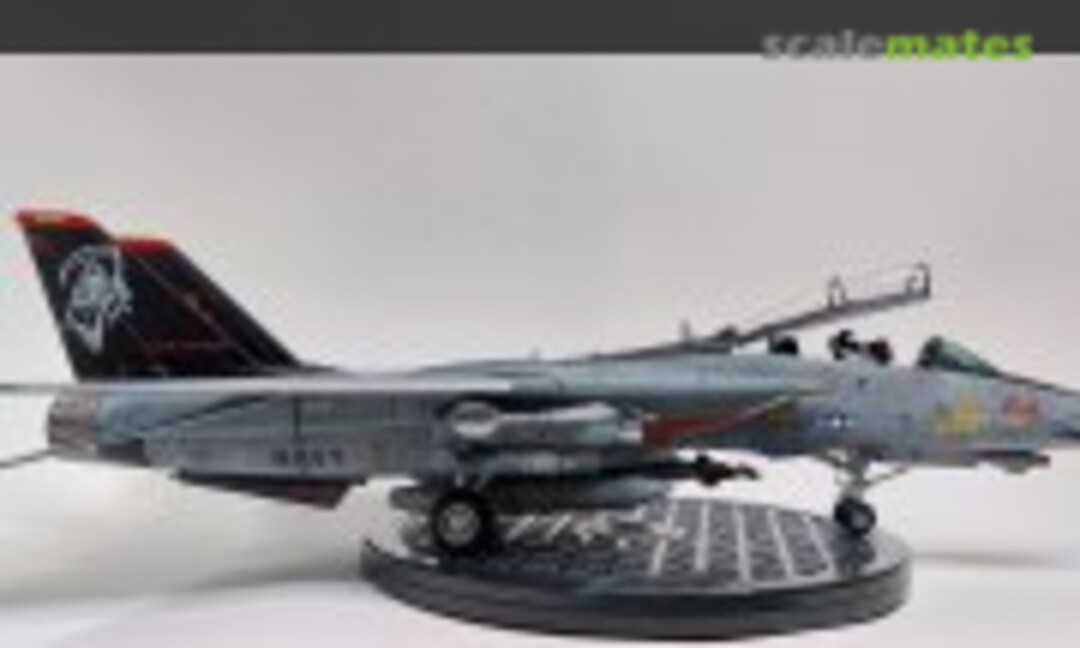 90November 9, 2025
 91November 9, 2025
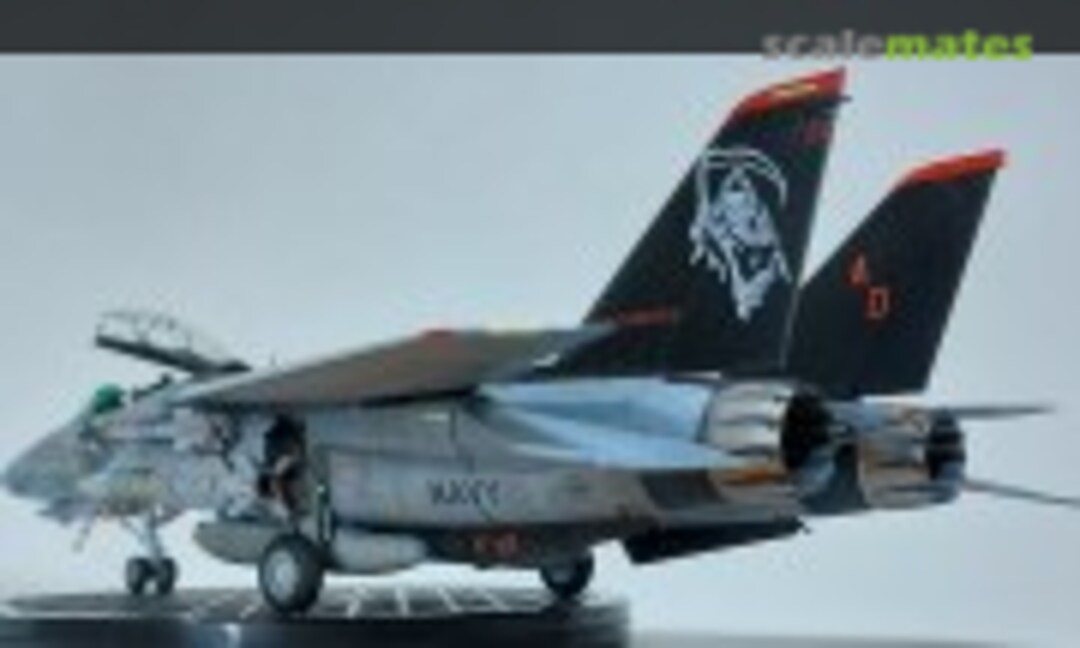 92November 9, 2025
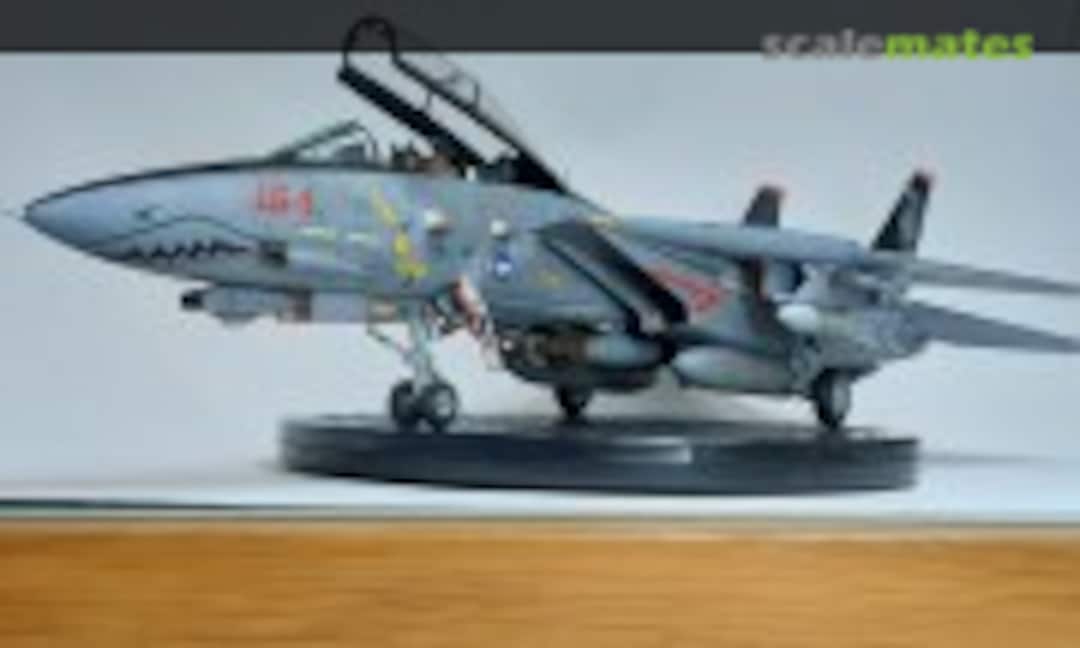 93November 9, 2025
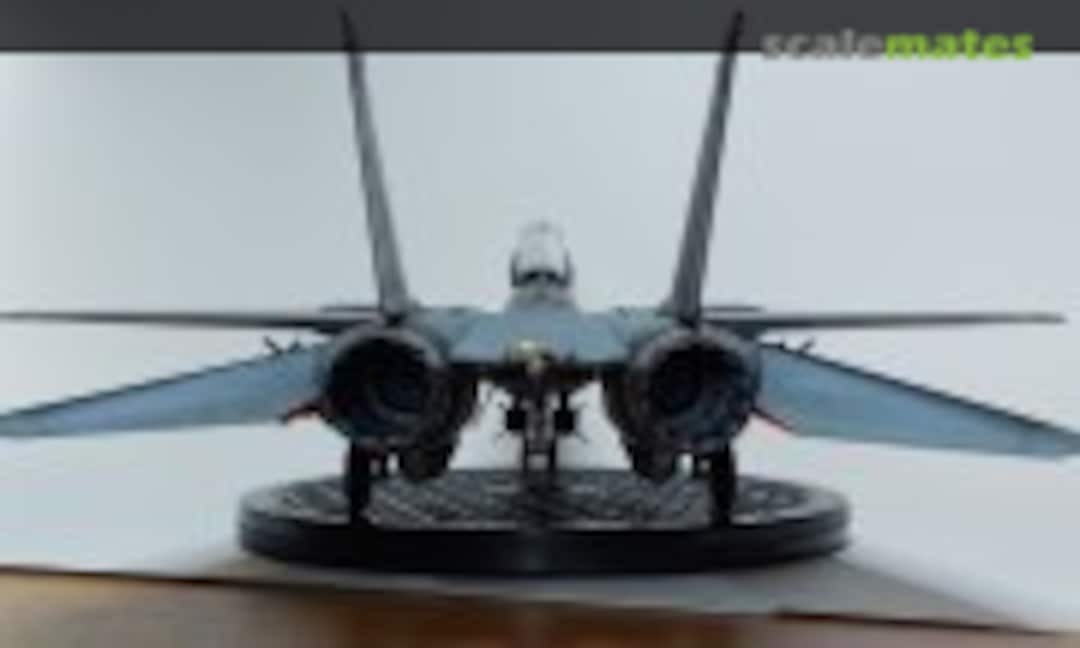 94November 9, 2025
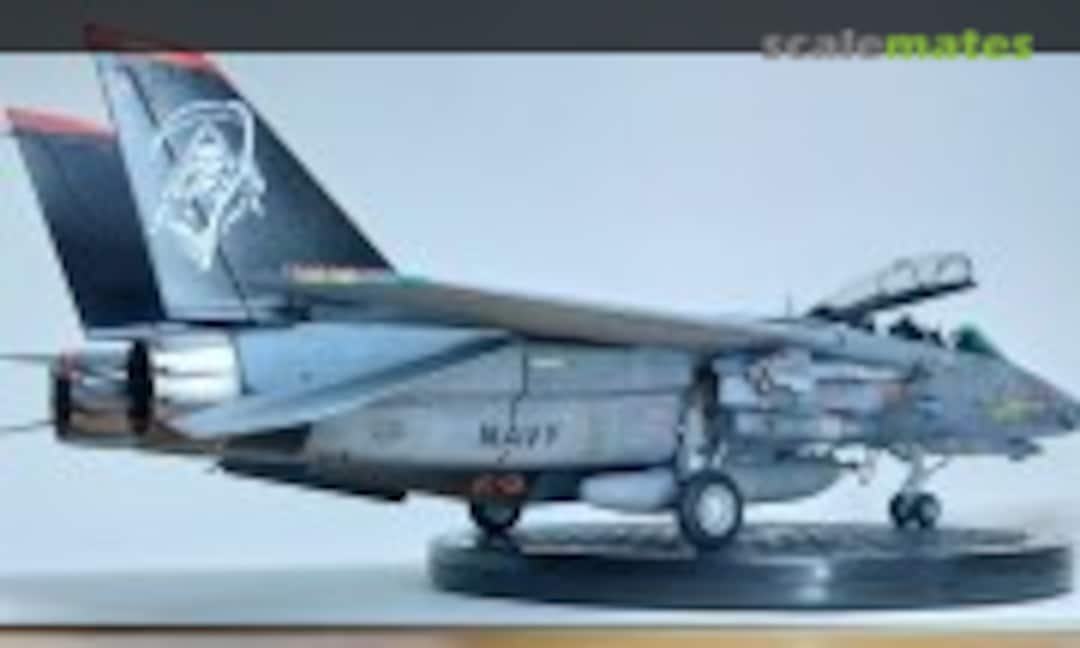 95November 9, 2025
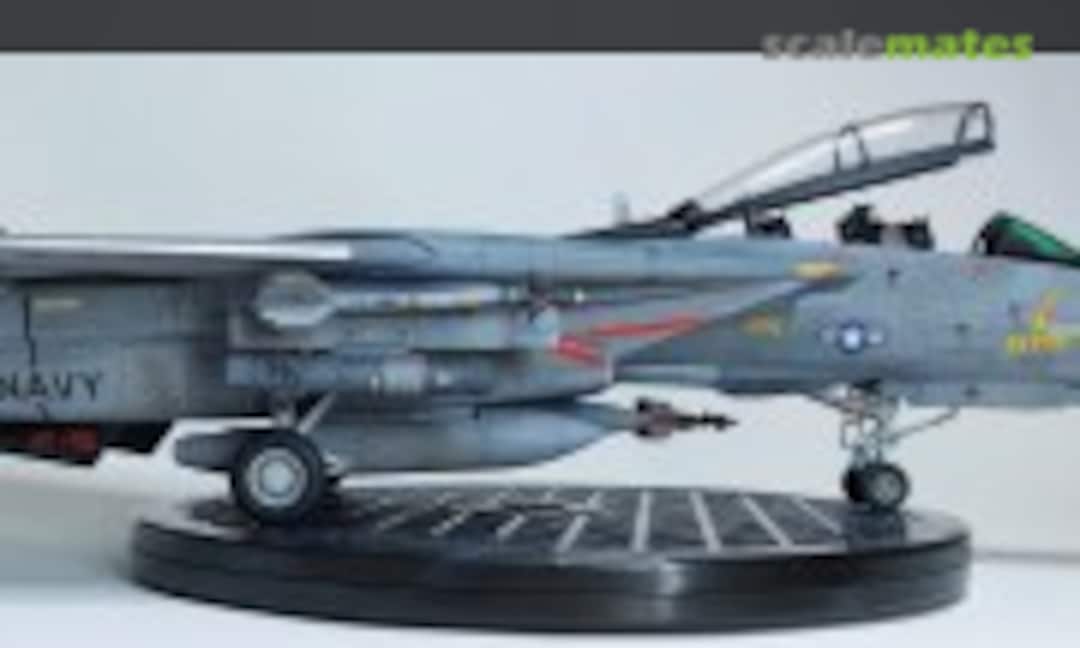 96November 9, 2025
 97November 9, 2025
 98November 9, 2025
 99November 9, 2025
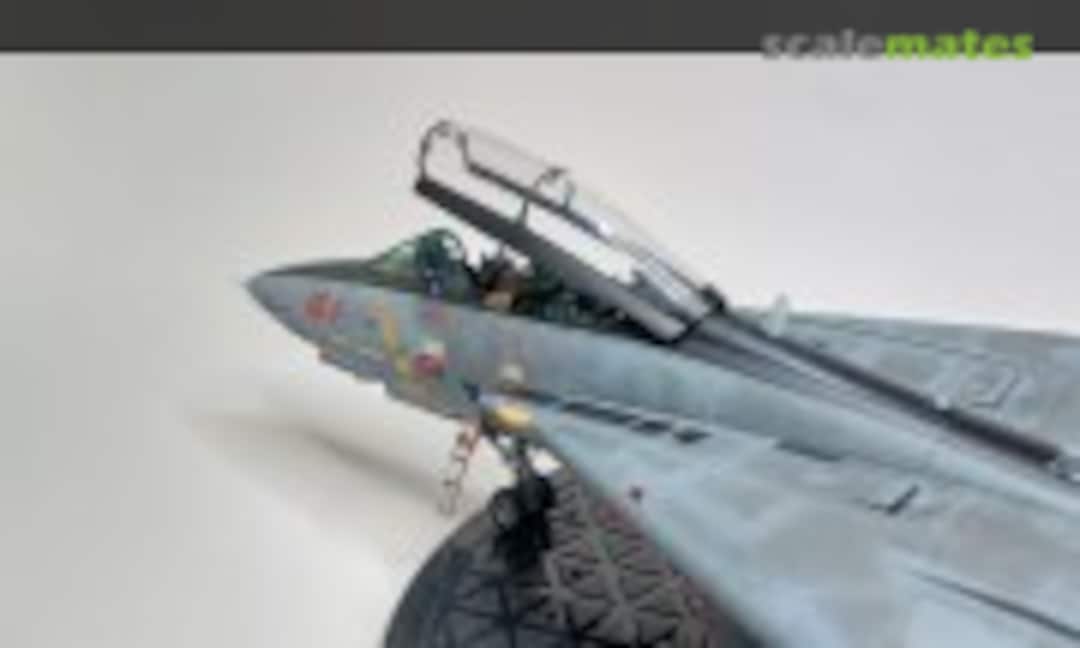 100November 9, 2025
 101November 9, 2025
 102November 9, 2025
 103November 9, 2025
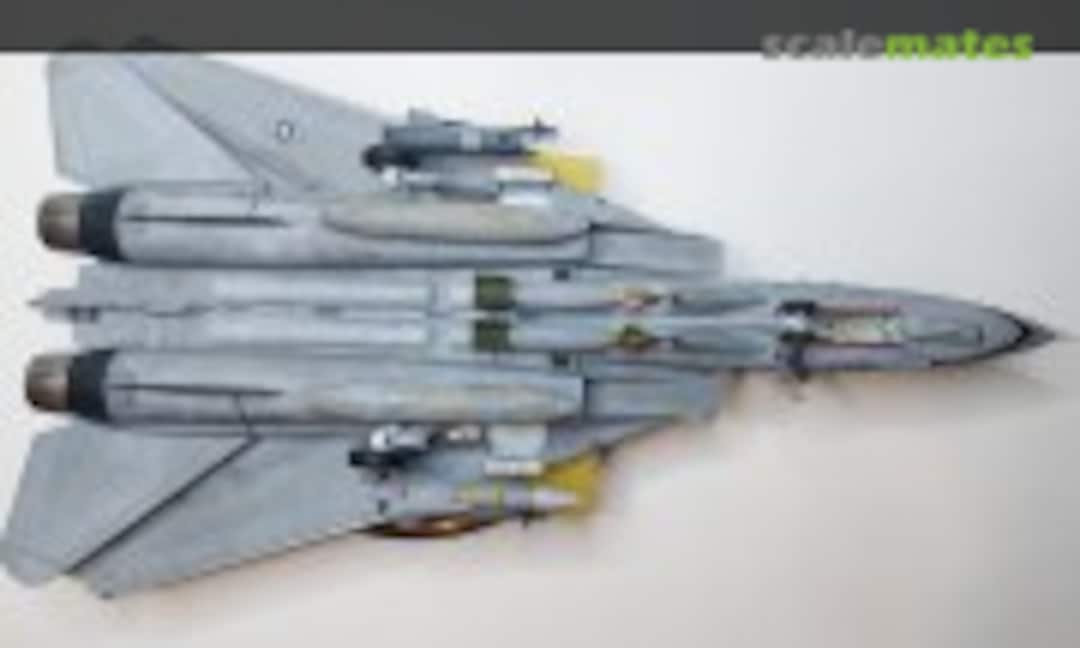 104November 9, 2025
 105November 9, 2025


Comments
39 14 June, 05:04
Project info
105 images
1:48
Completed
