

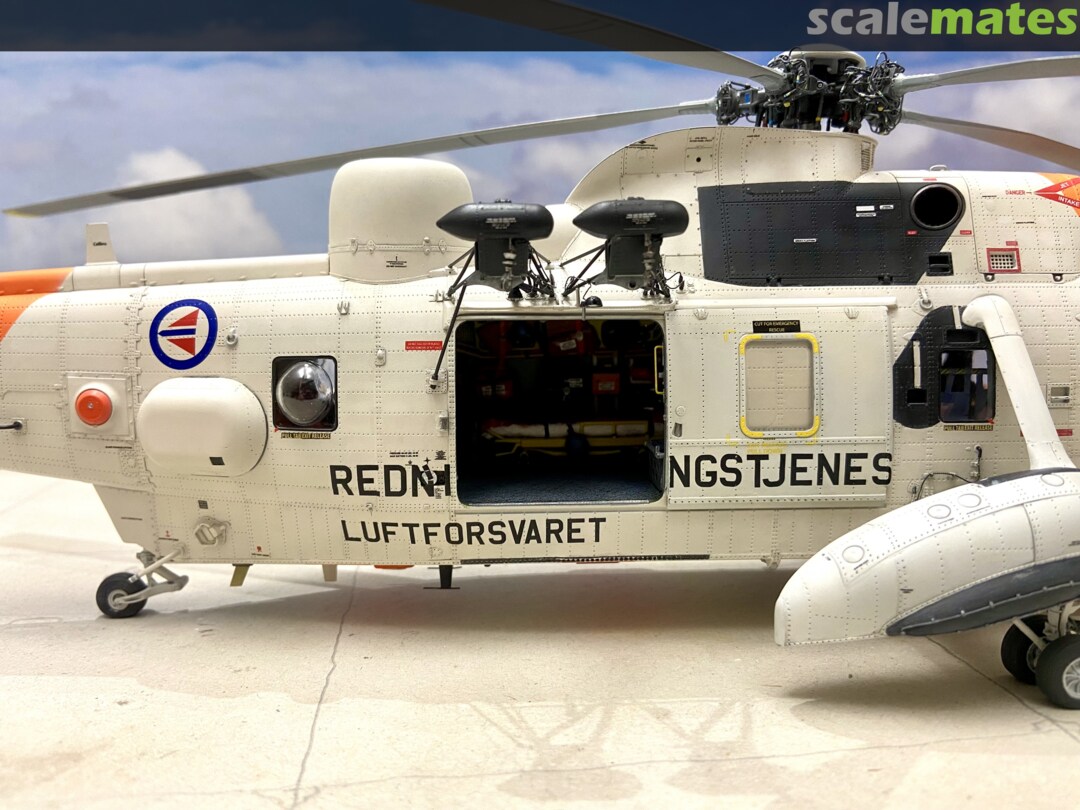
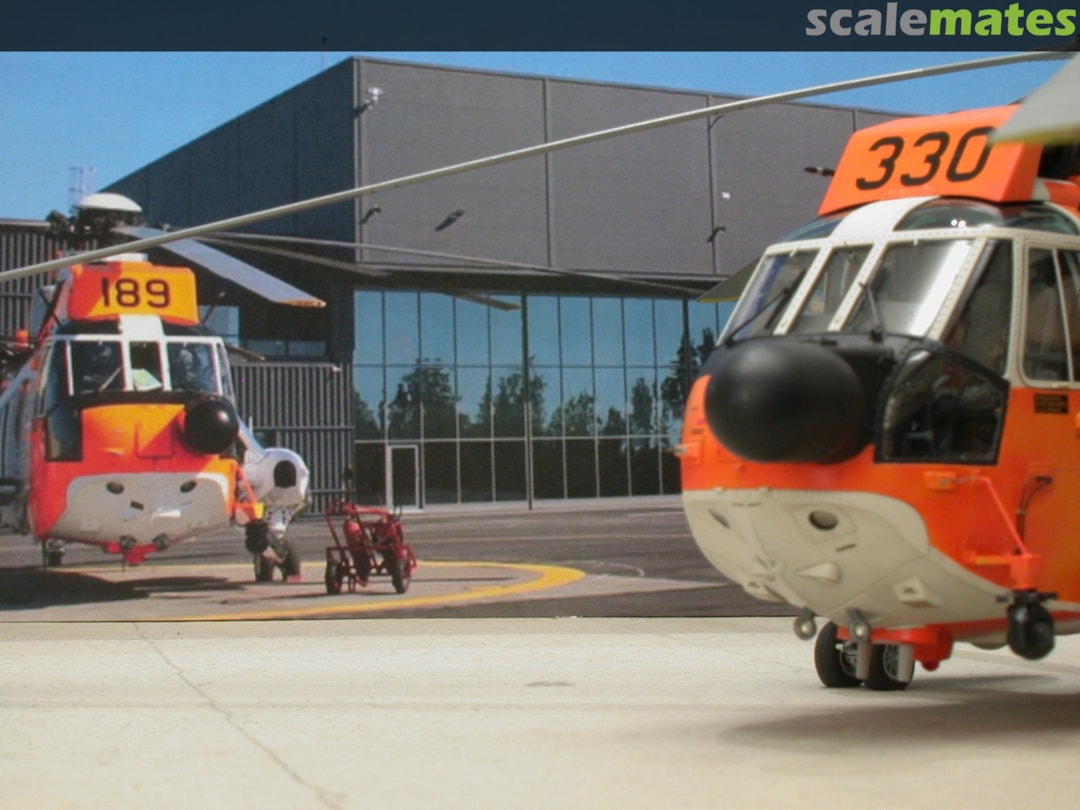
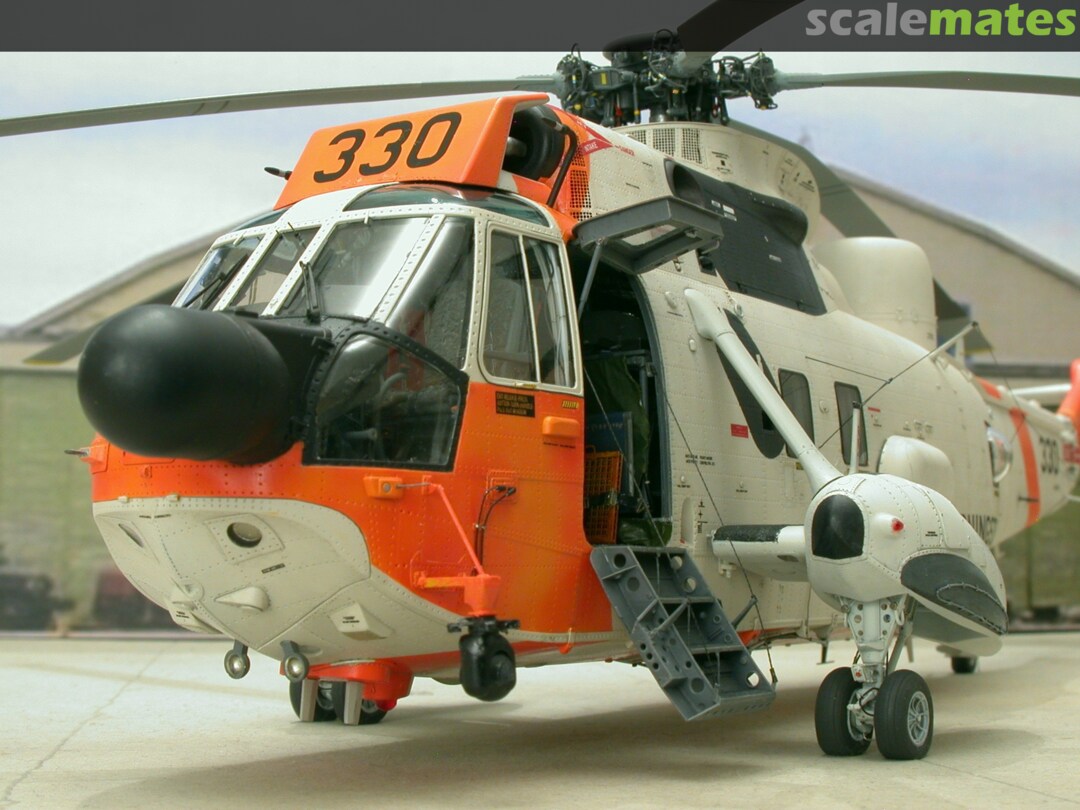
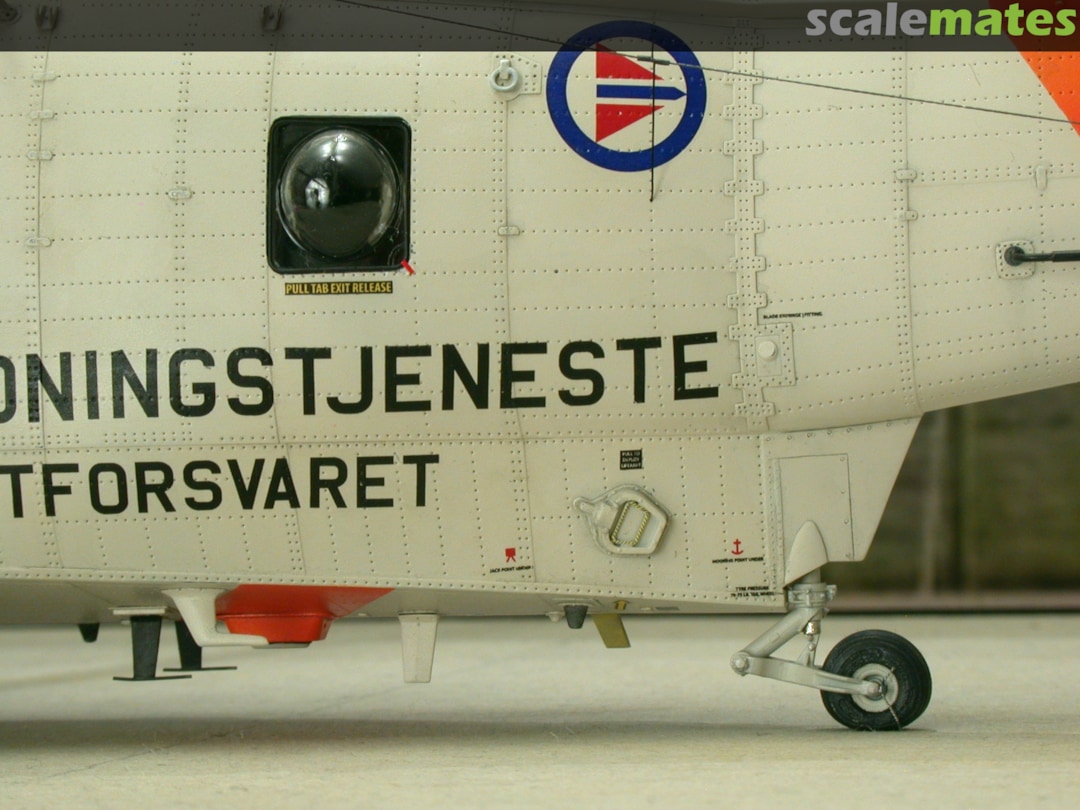
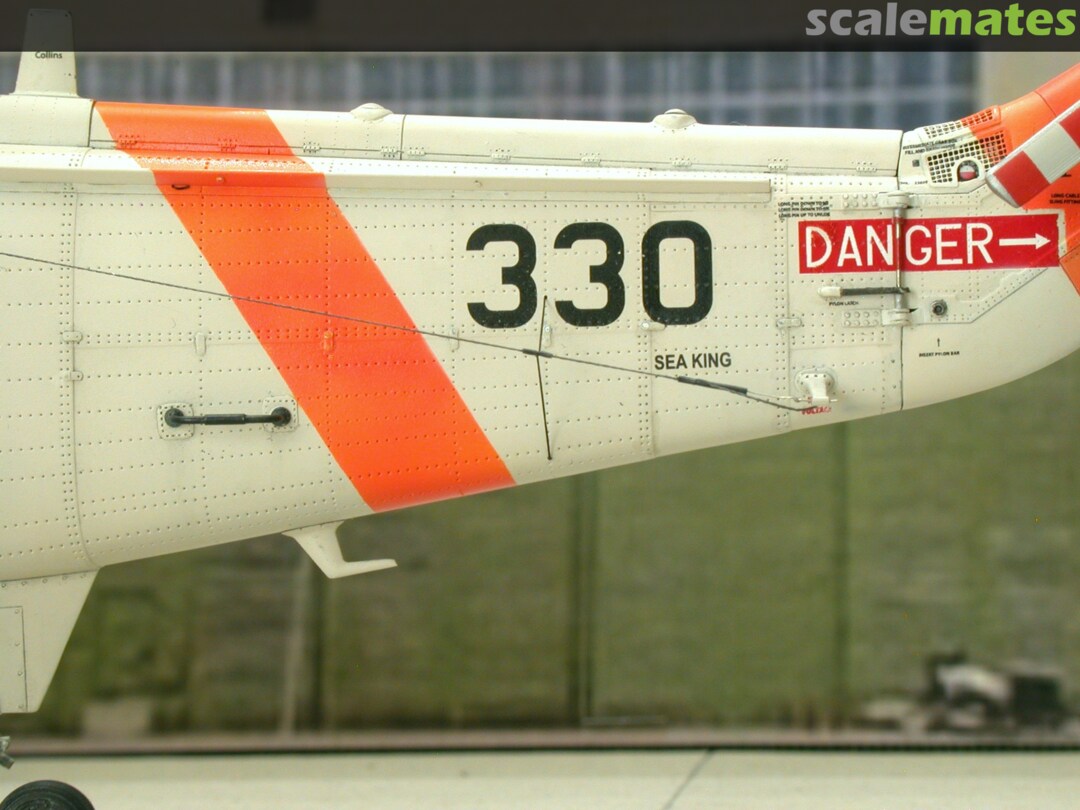
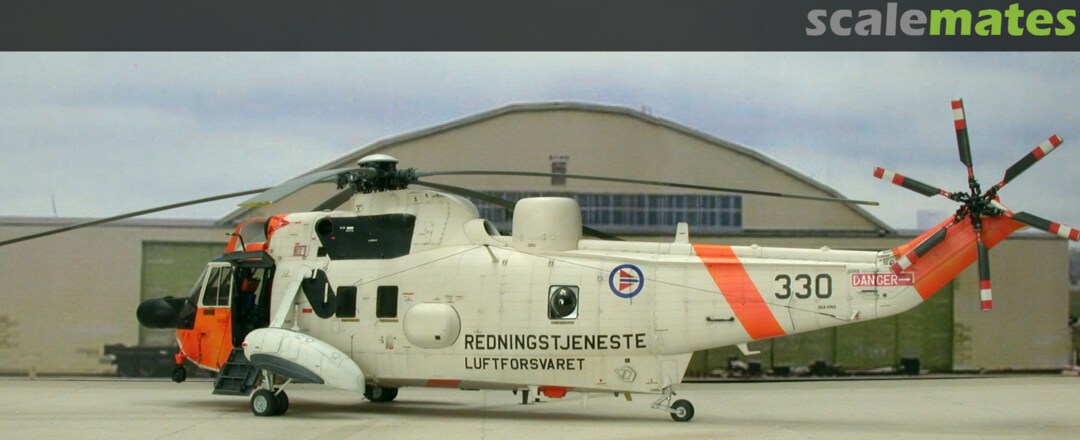
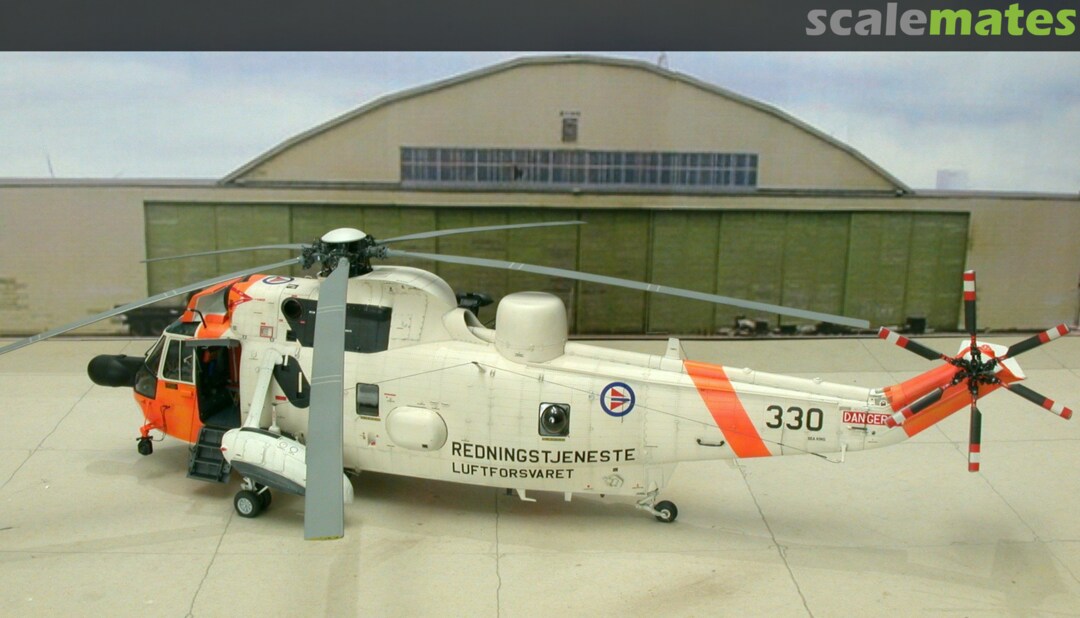
Westland Seaking Mk.43, RNoAF, #330


Comments
110 9 April, 15:52
For some time now, the project has been taking a vague form. It was probably Mirko Krogmeier's model which lit the spark of enthusiasm in lingen.
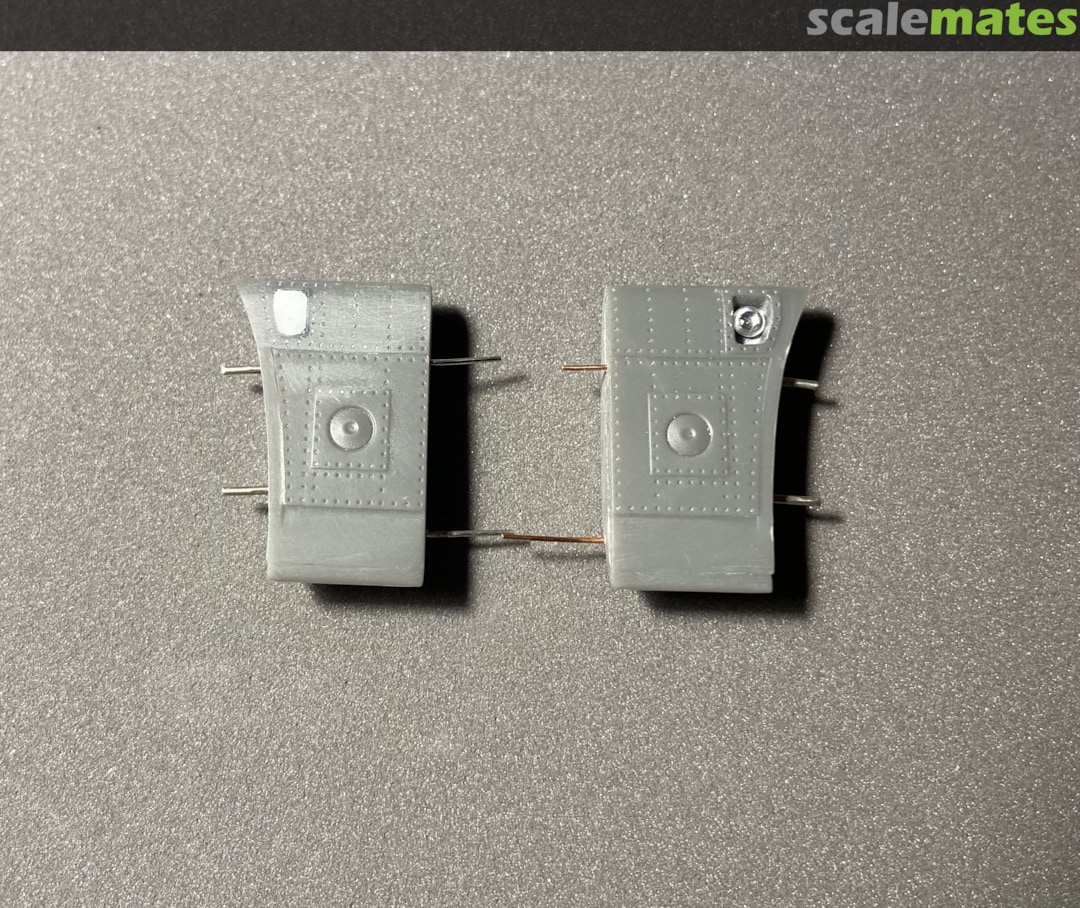
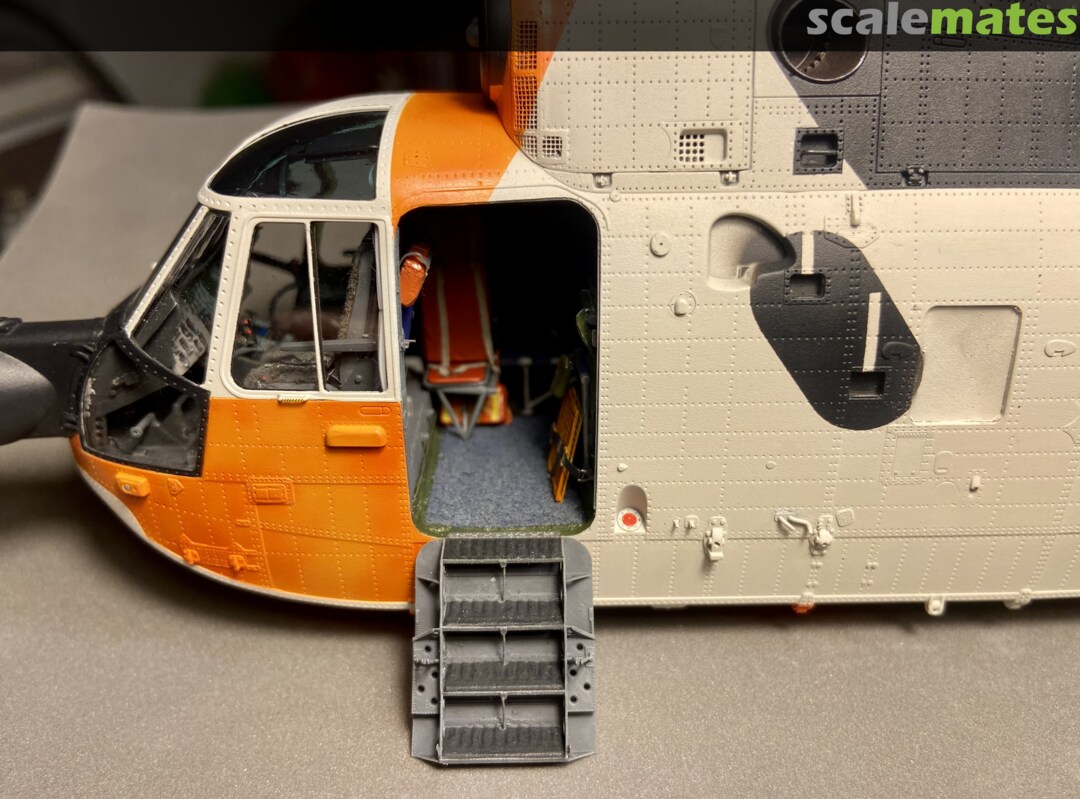
The day before yesterday the kit finally arrived and today to warm up I looked at the door. Although the H-19 is far from completion…🙂
9 April, 16:01

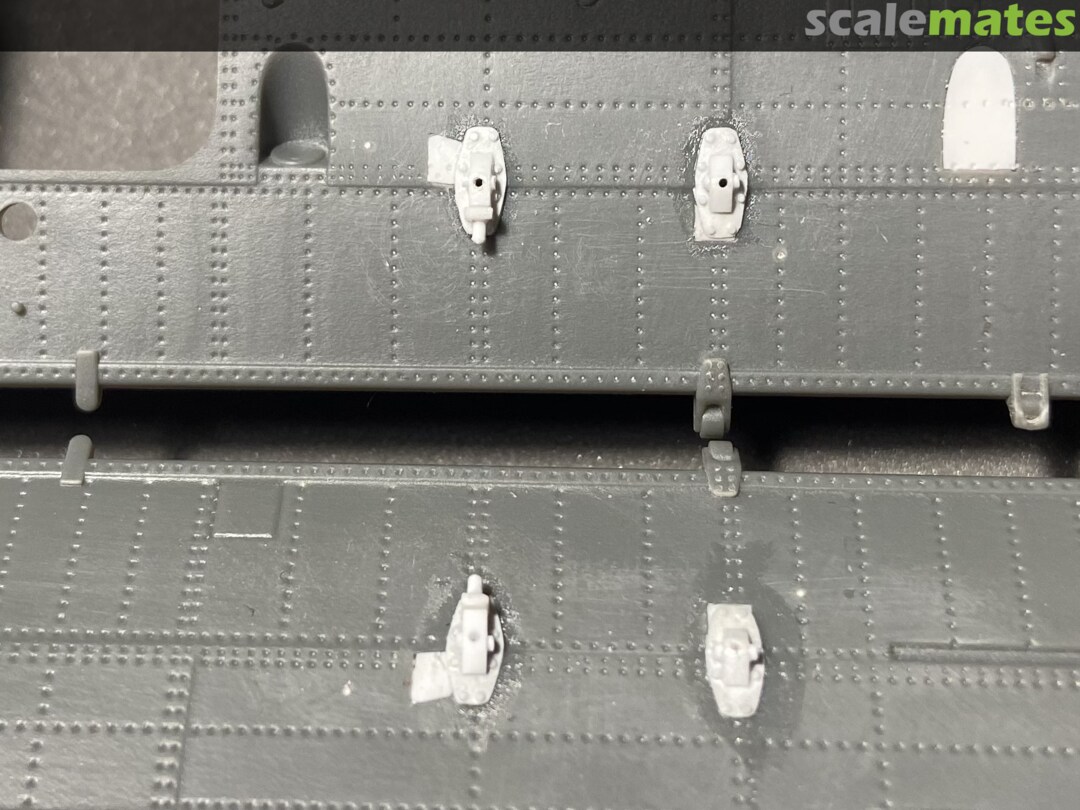
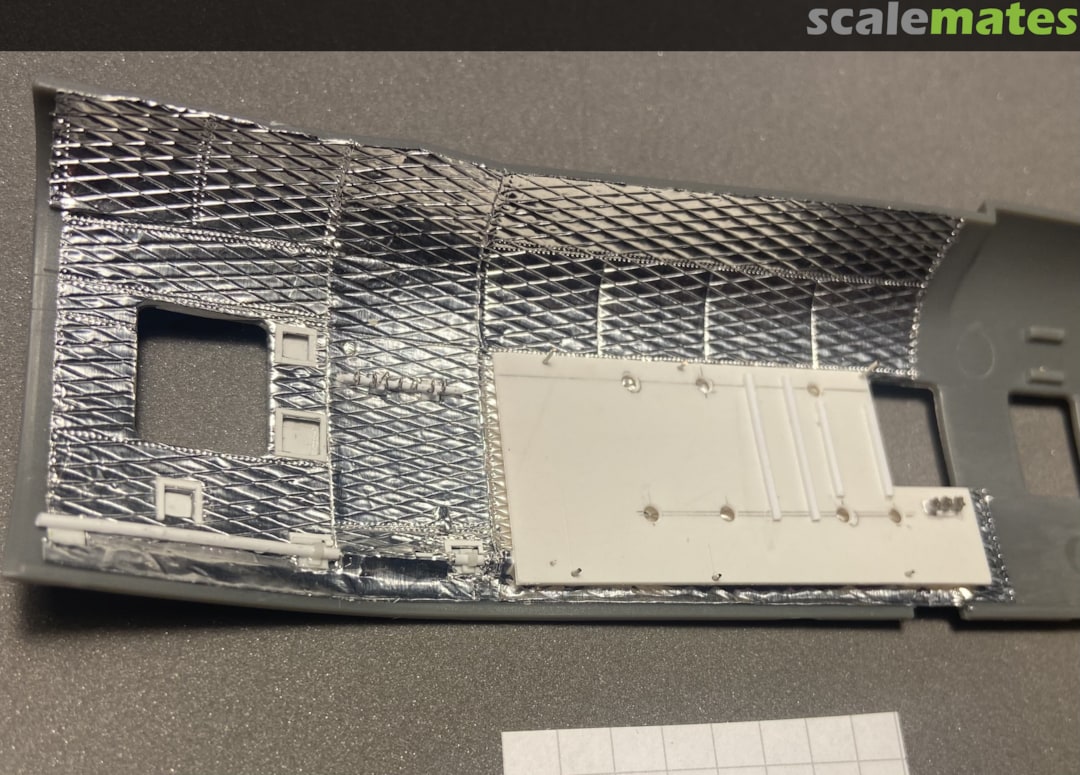
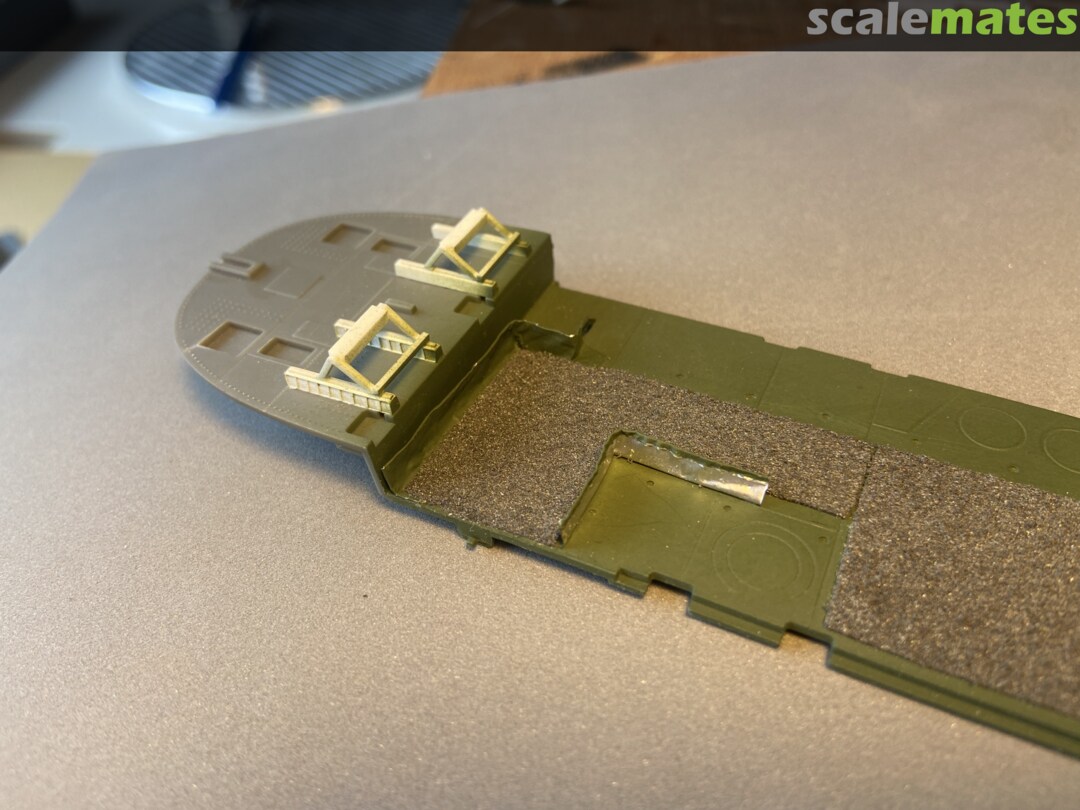
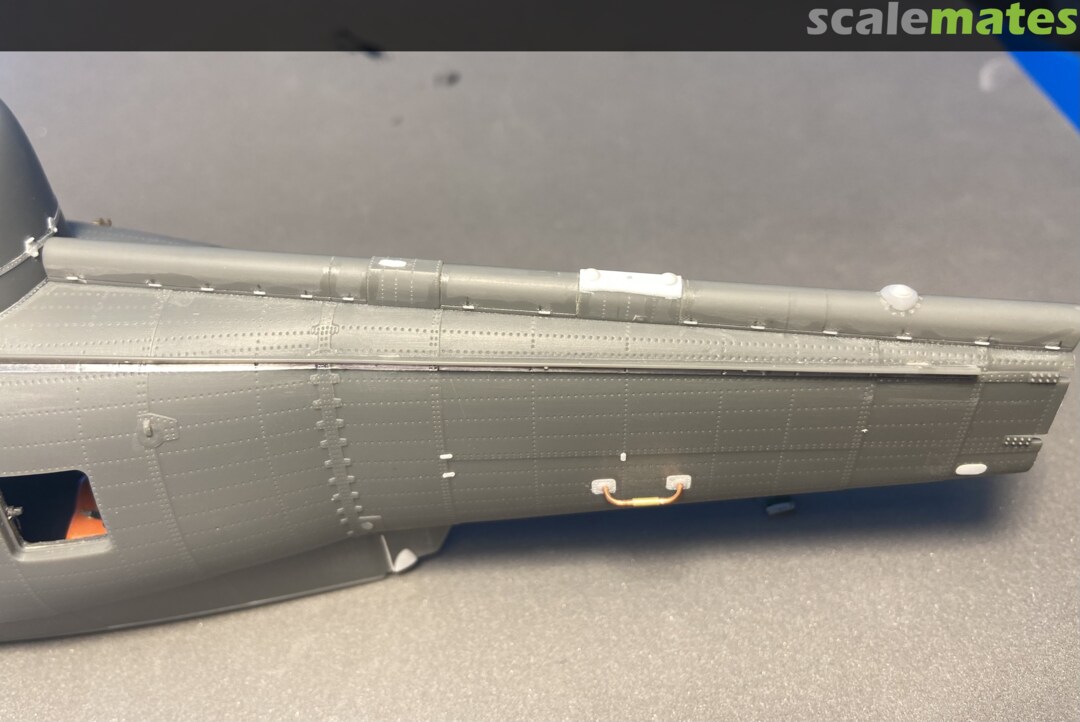
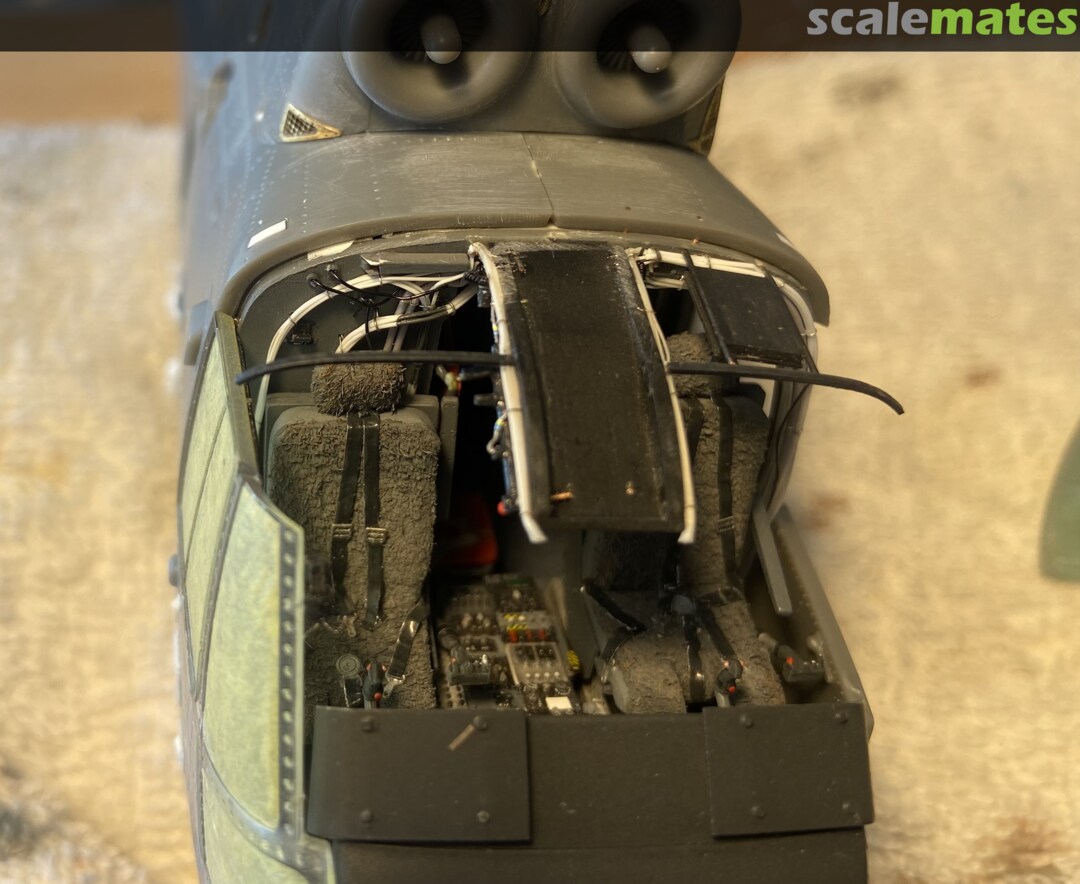
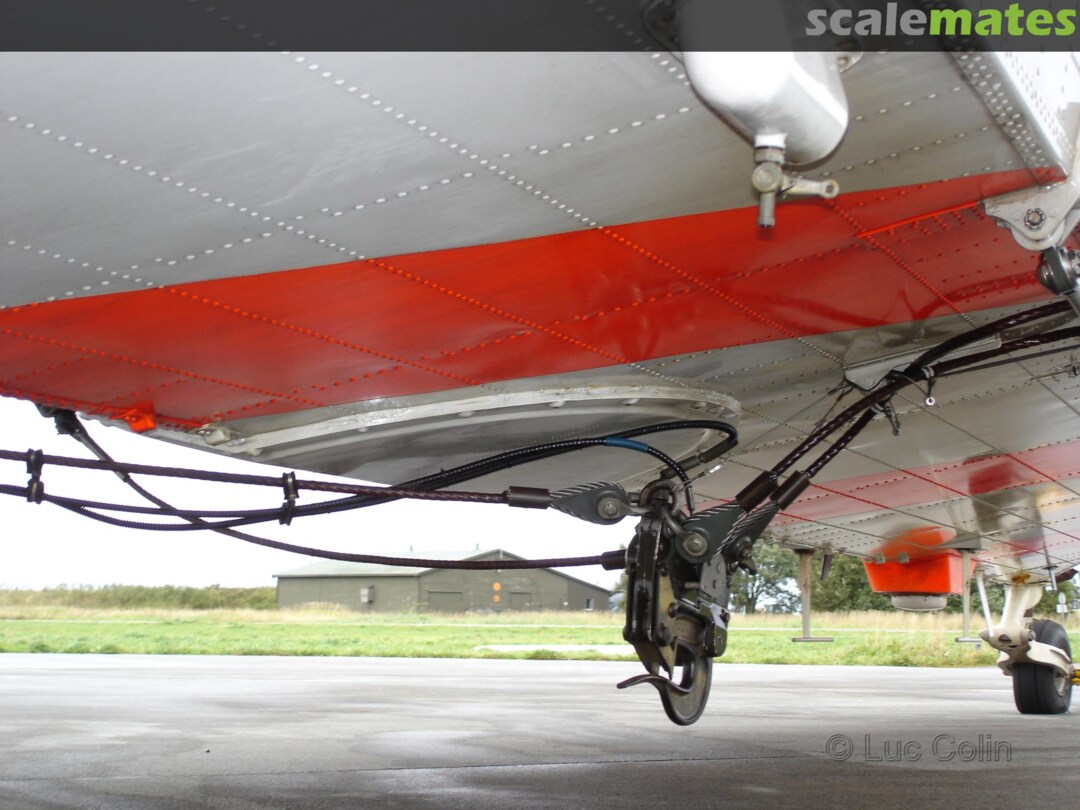
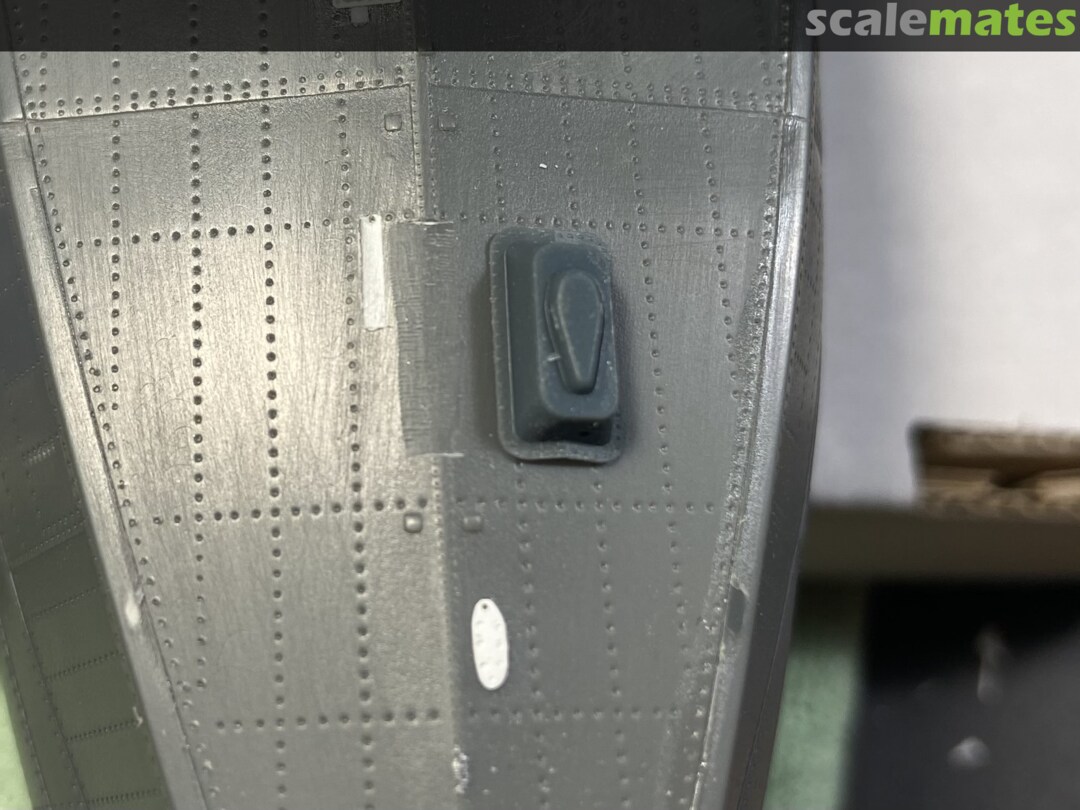
Very practical: the Norwegians have a stable mounting plate opposite the main door, on which any components can be attached as required. On profile rails. About the same principle as with the Mk41, with the difference that the profile rails are attached directly to the frame.
9 May, 17:36
Thank you mates.🙂.
Spanjaard: nice to see you on this project. For you, the seat SP-1 in the 1. row is permanently reserved. 🙂
10 May, 10:35
I know this has been said before, but your attention to detail is amazing. Outstanding progress (y )
10 May, 14:31
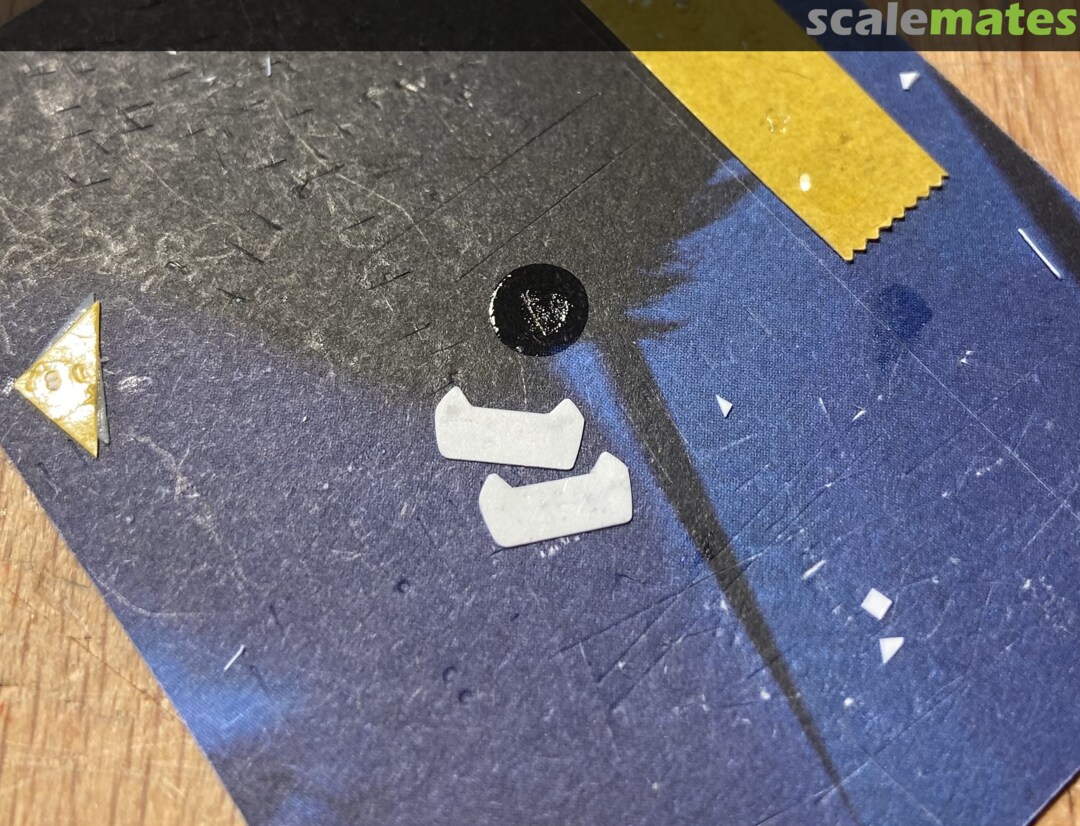
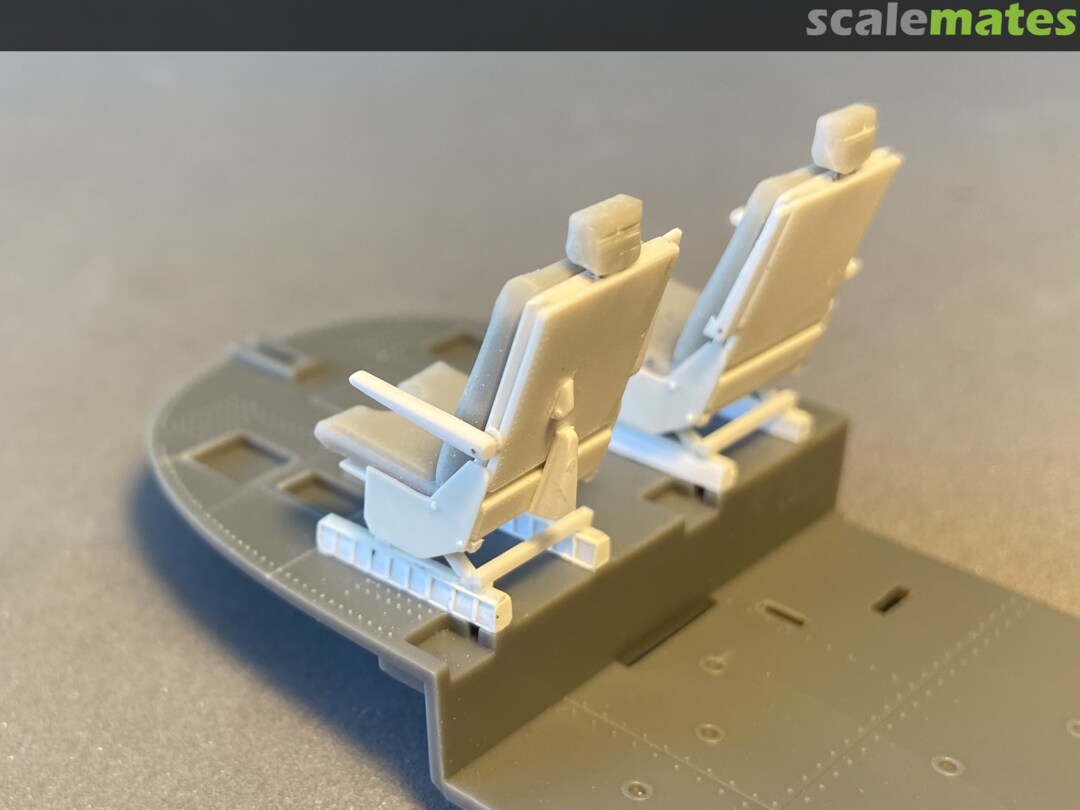
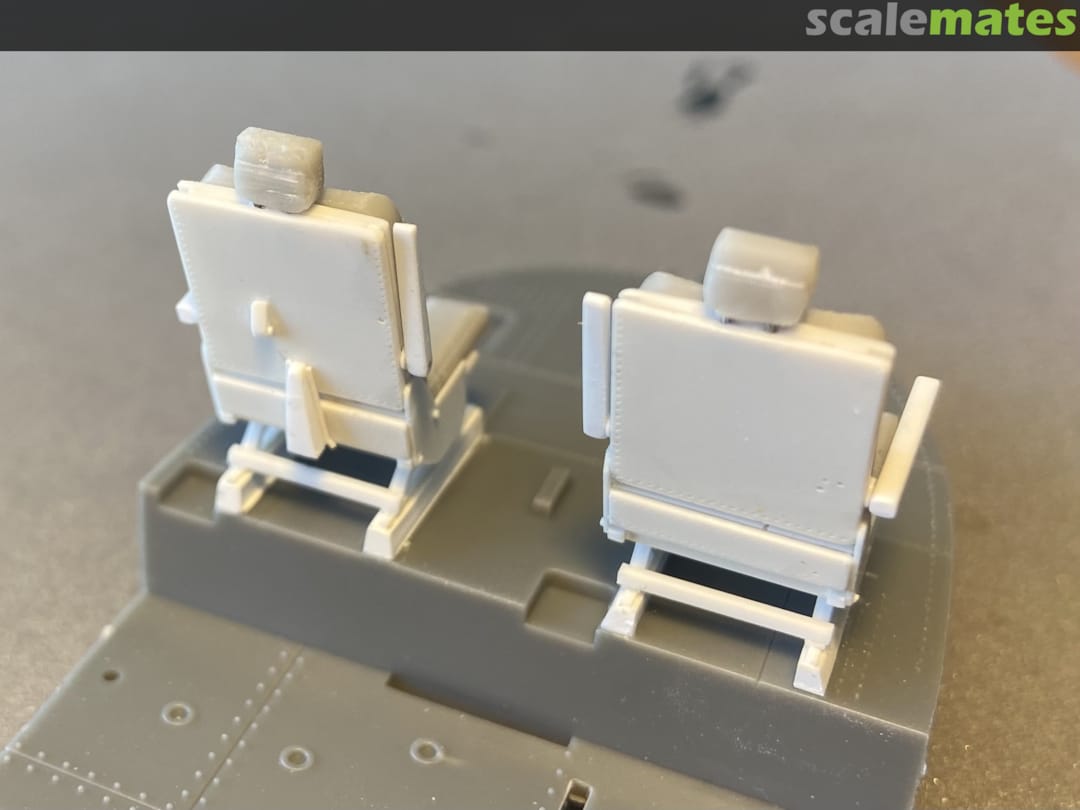
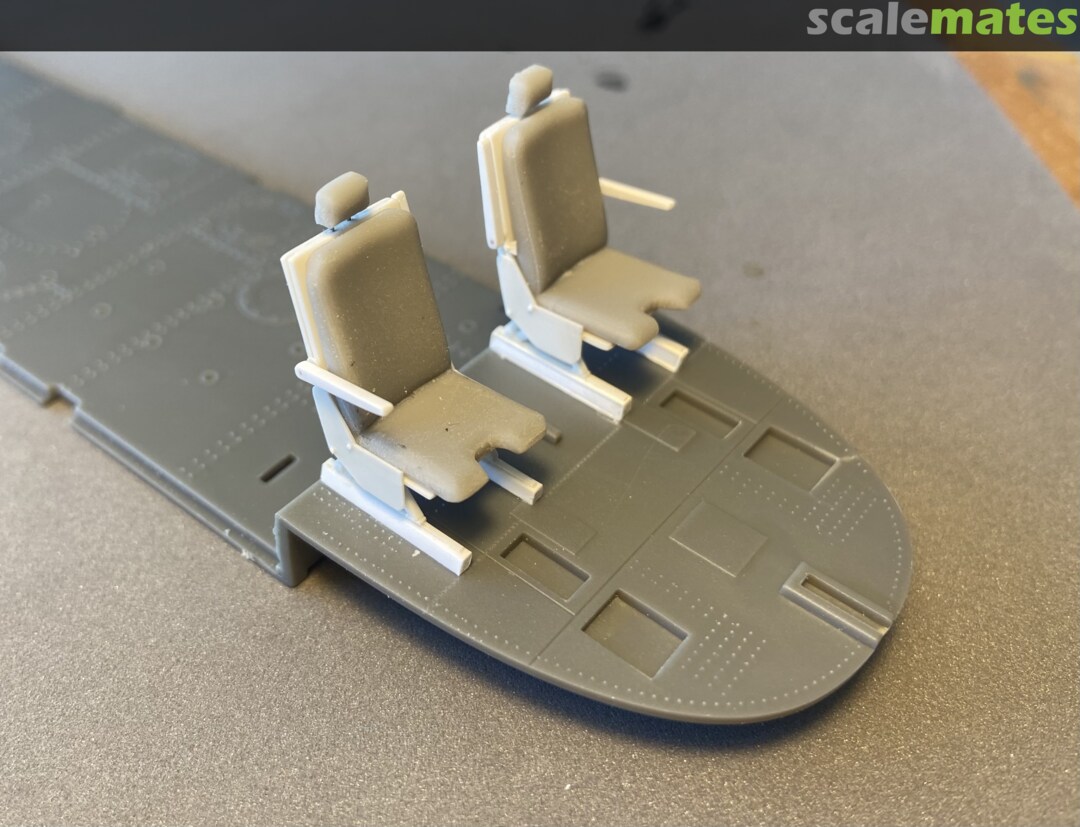
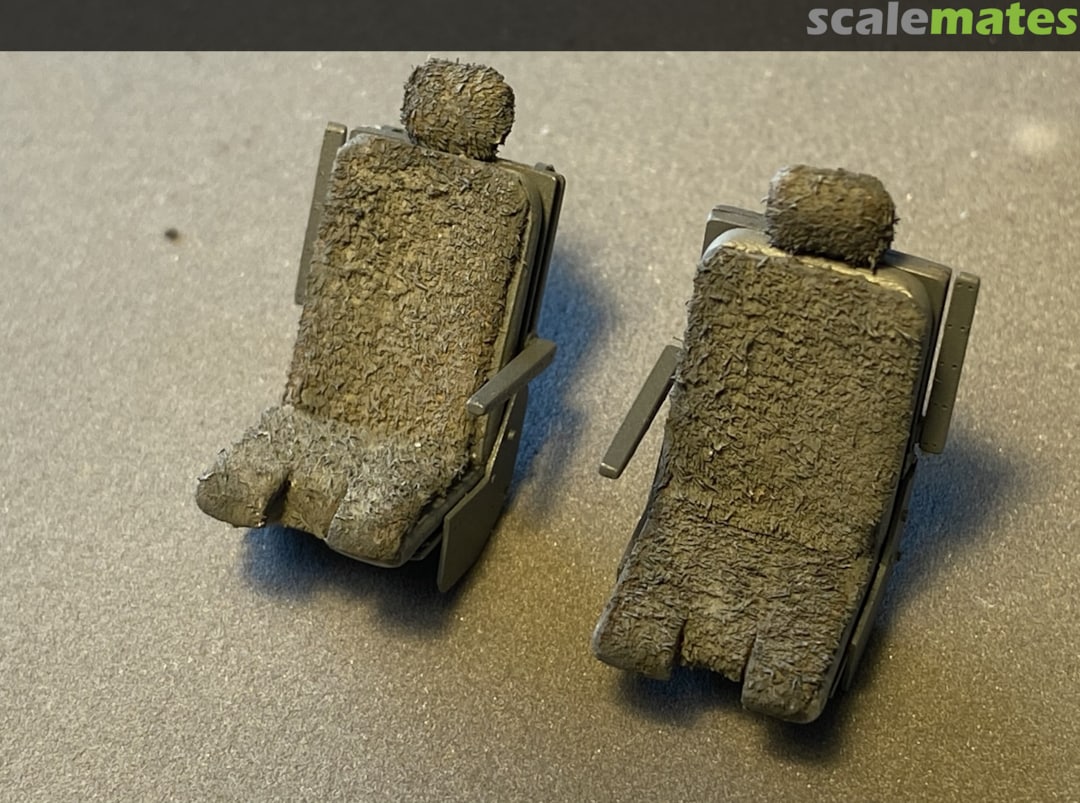
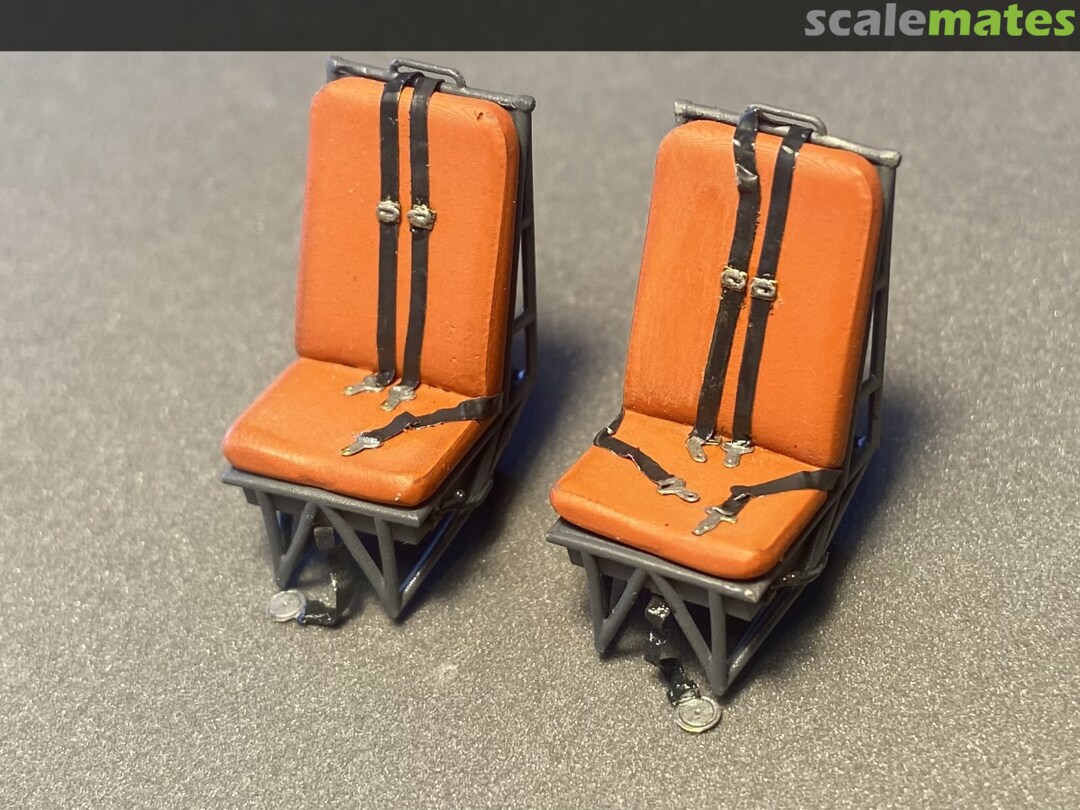
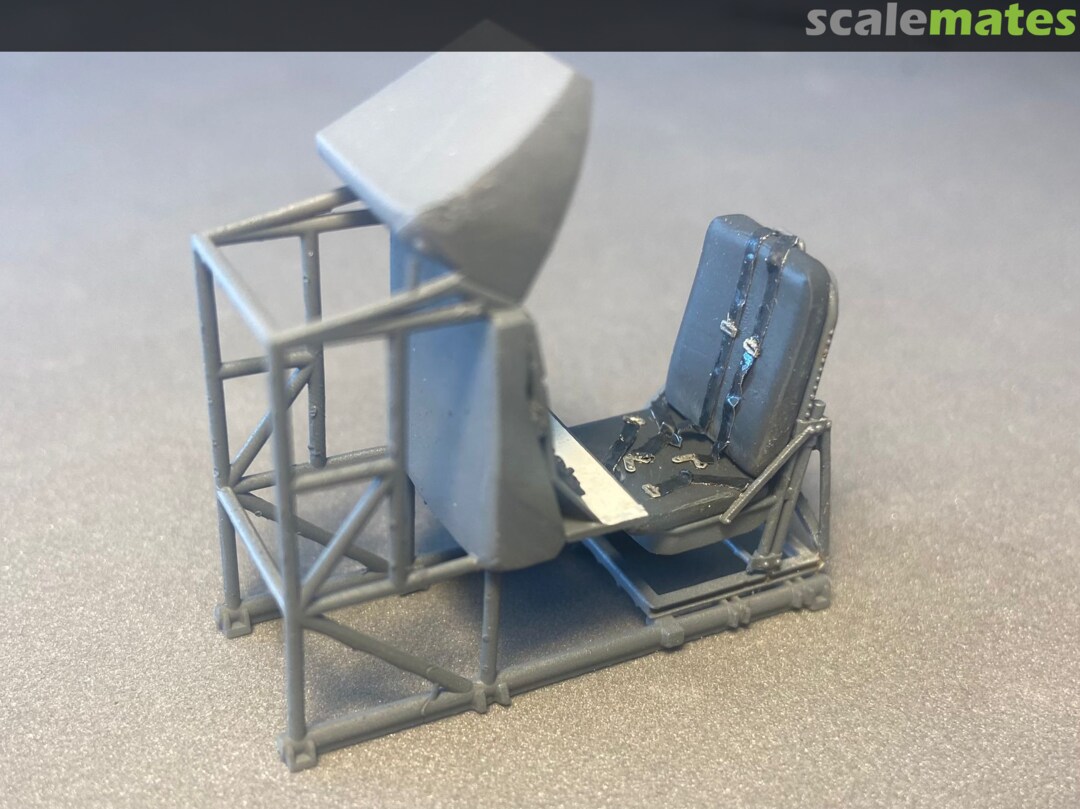
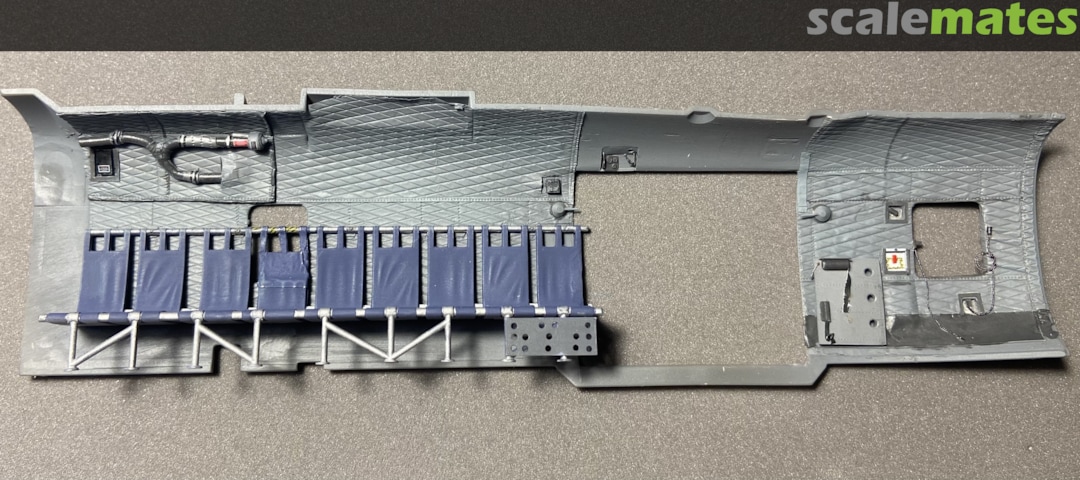
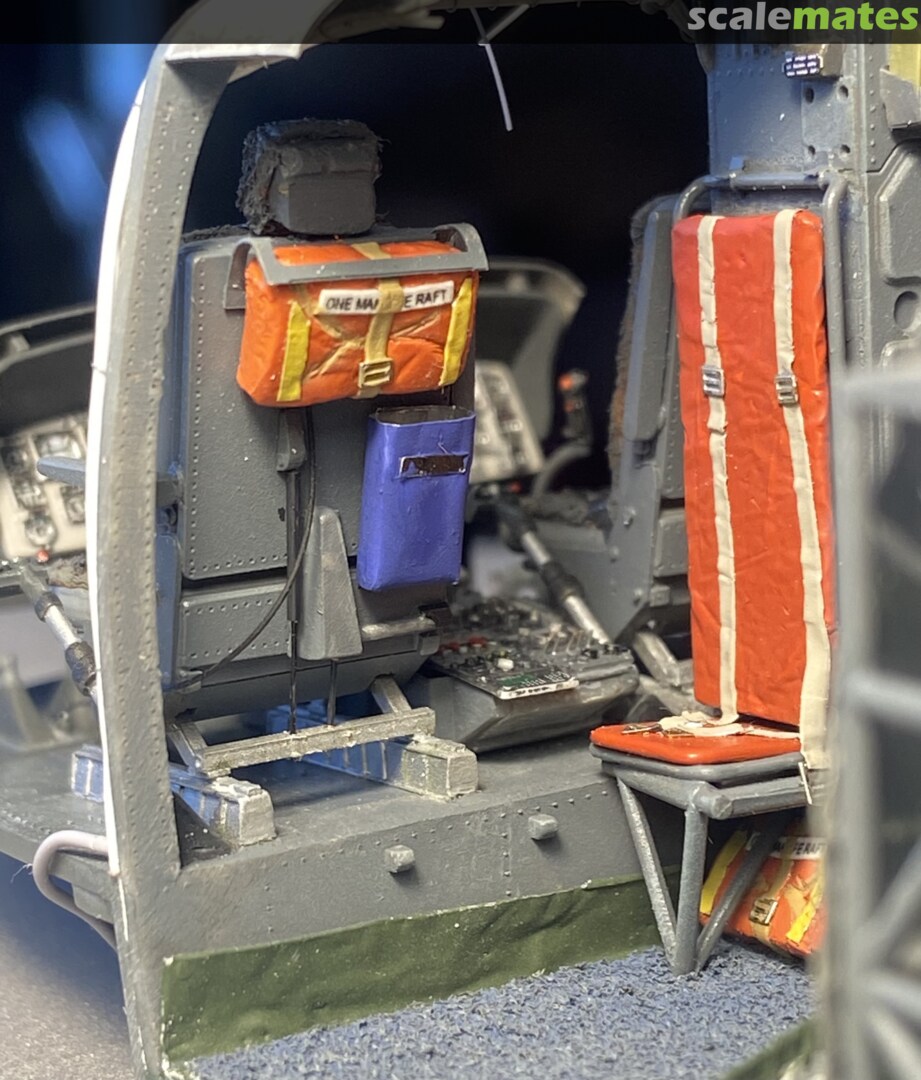
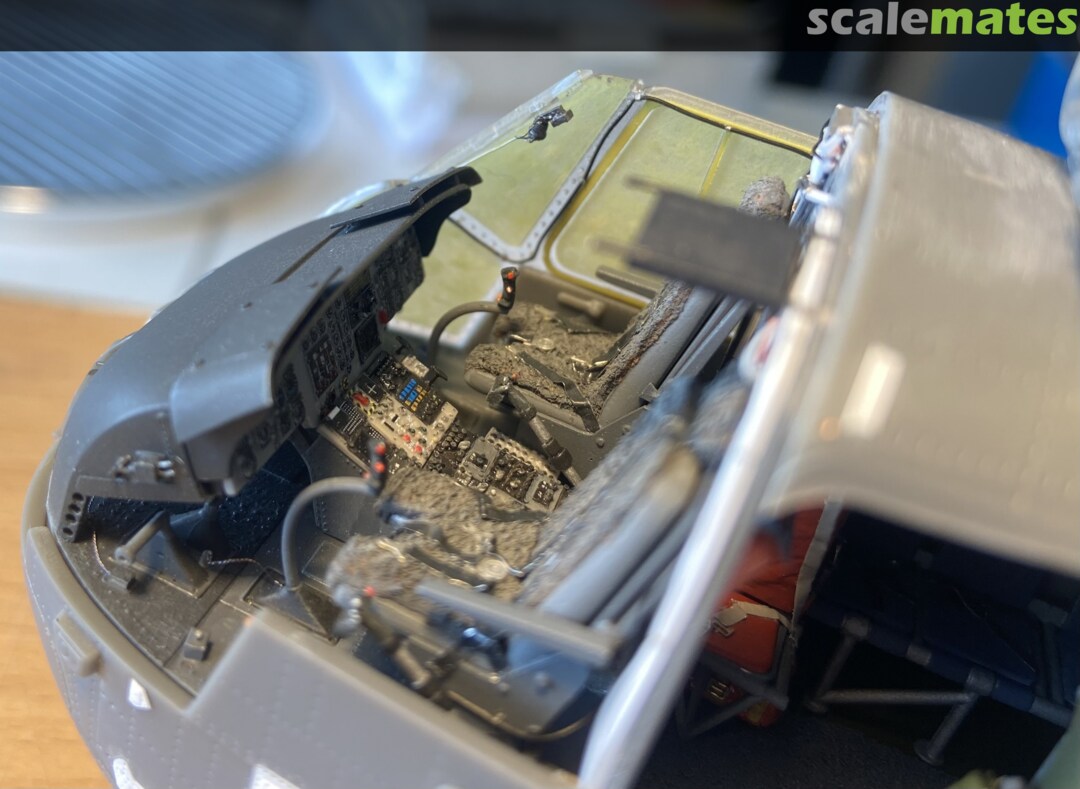
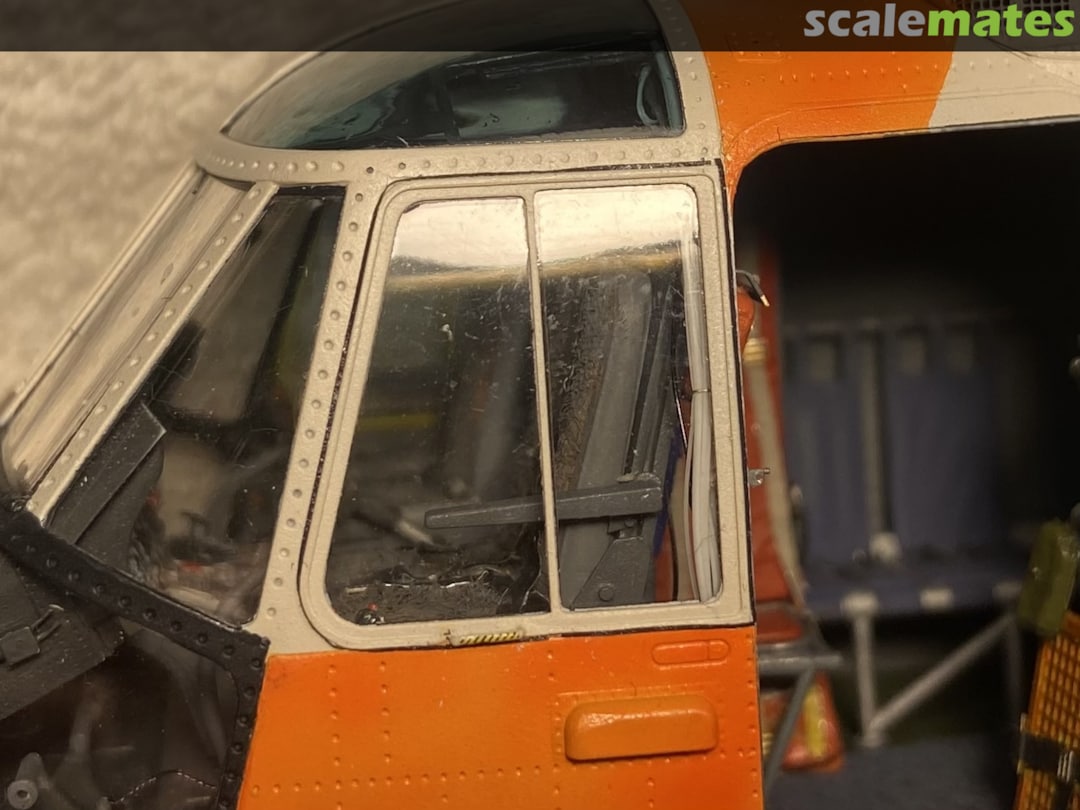
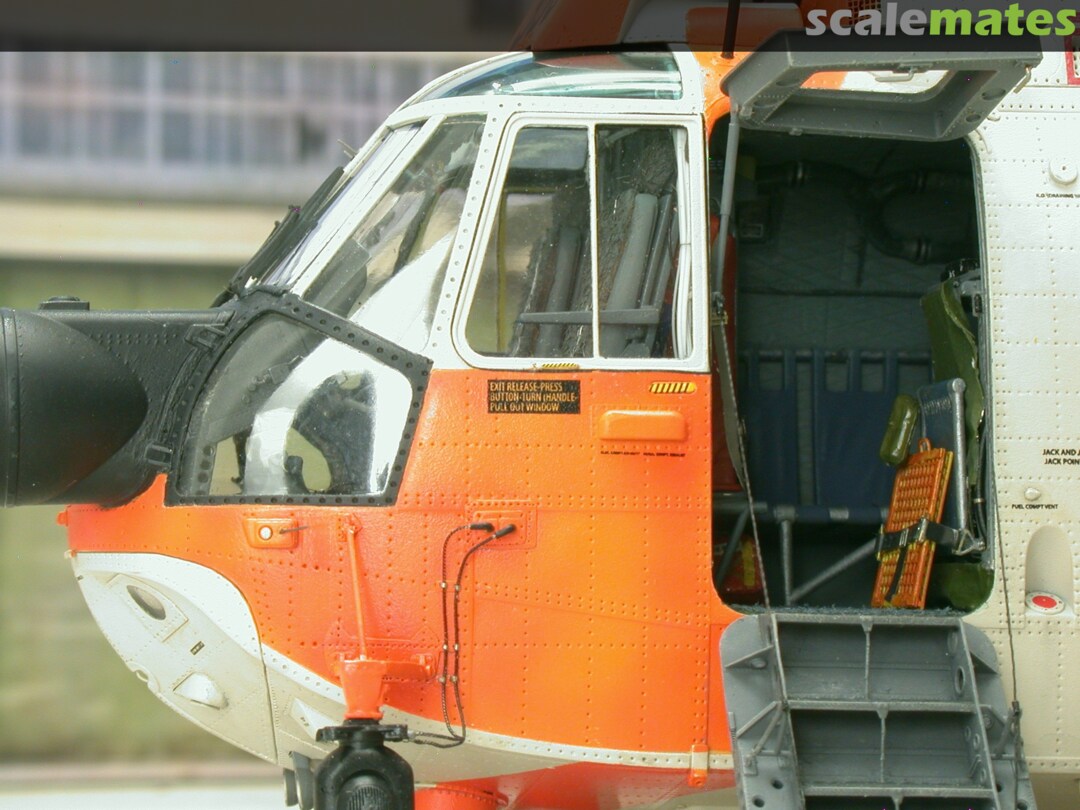
Pictures 38-40: Not only the seats but also upholstery are very specific to the Norwegian SeaKings. I tried different materials and methods and only in the sixth attempt I found a solution / I was satisfied with the result. How about a little guessing game: what does the cushion look like? 🙂
[img1]
19 May, 11:04
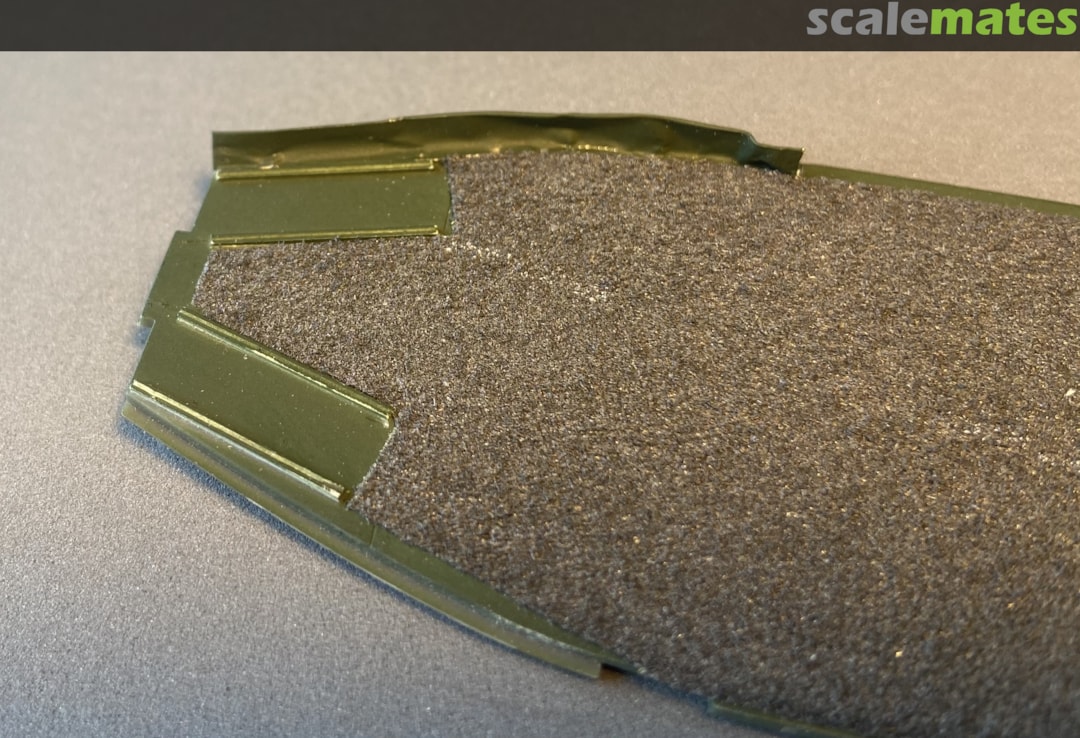
Bernhard, I don't know what you used, but it really does look like a real sheepskin / wool seat cover. Once again, outstanding. My guess for your technique would be white glue and pencil shavings.
19 May, 13:44
Dutch and tyu: thank you for your participation in the quiz. 🙂
Neider nor…
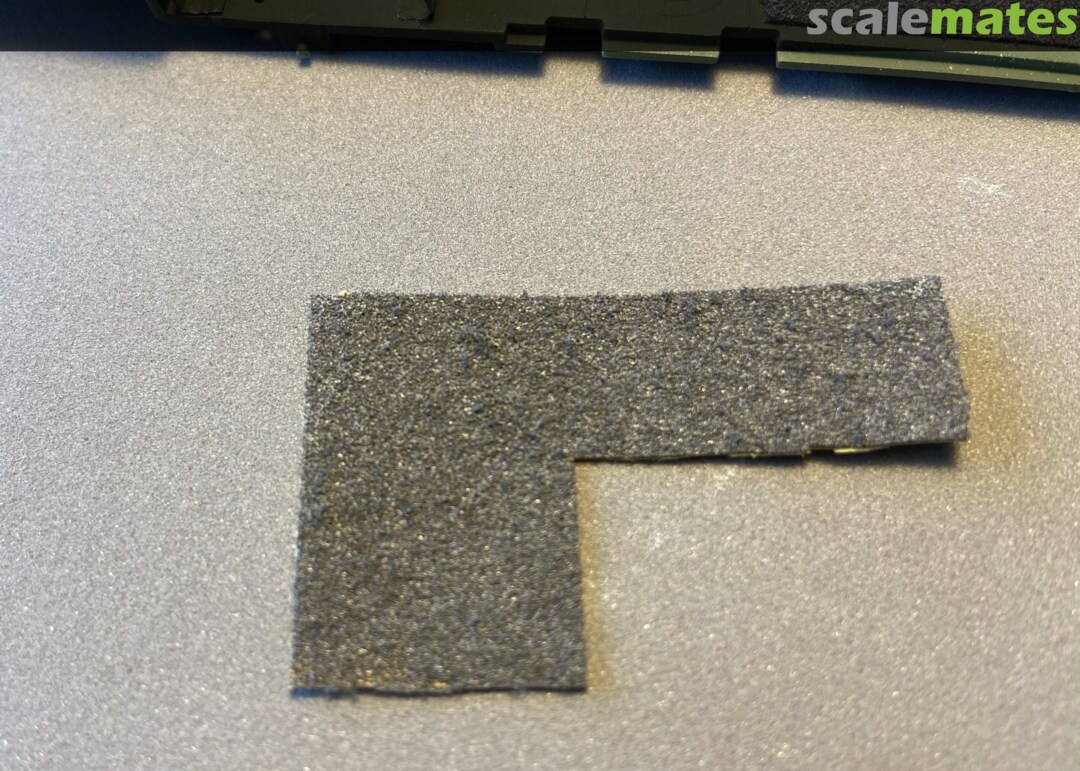
I used a thin (about 1mm) leather inner shoe sole and thinned it with 40 grit sandpaper down (about 0,54 mm). See picture 41.
19 May, 14:45
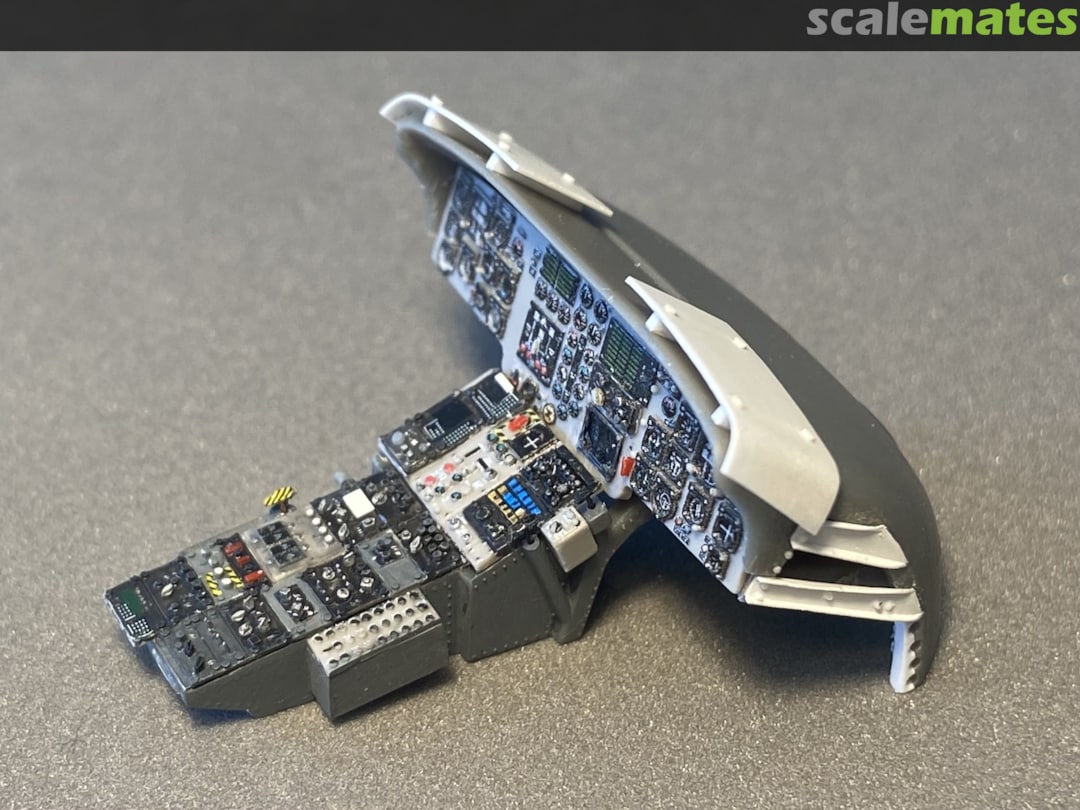
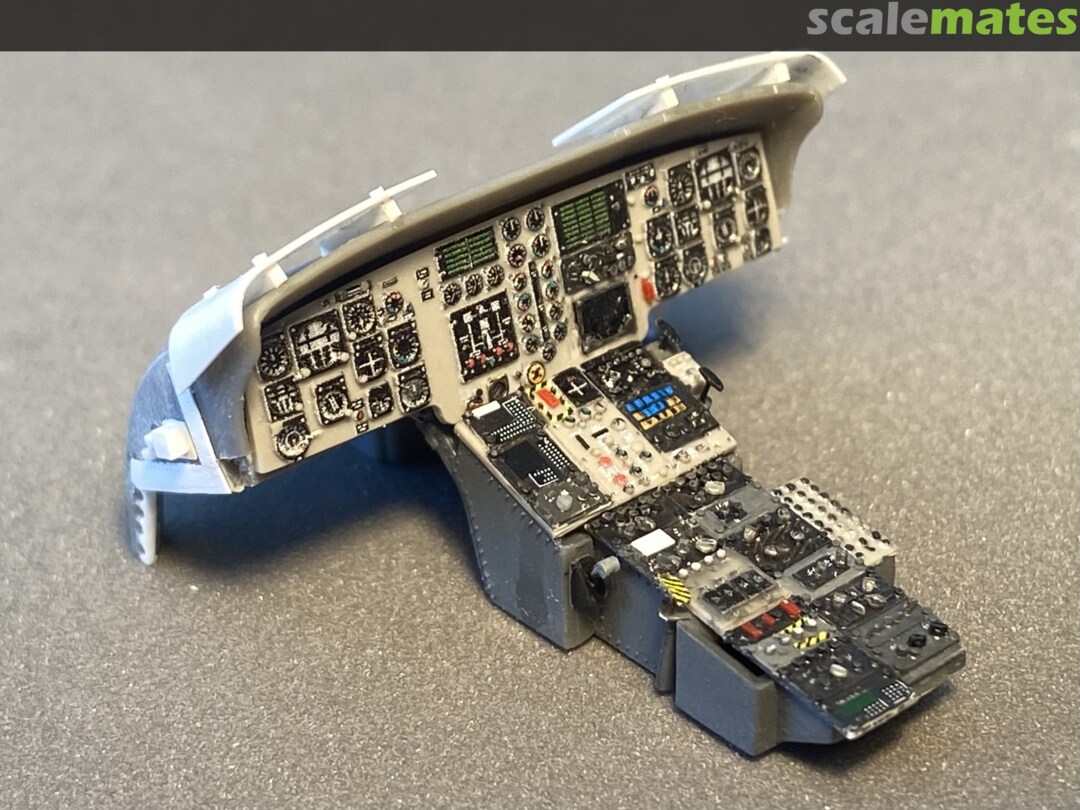
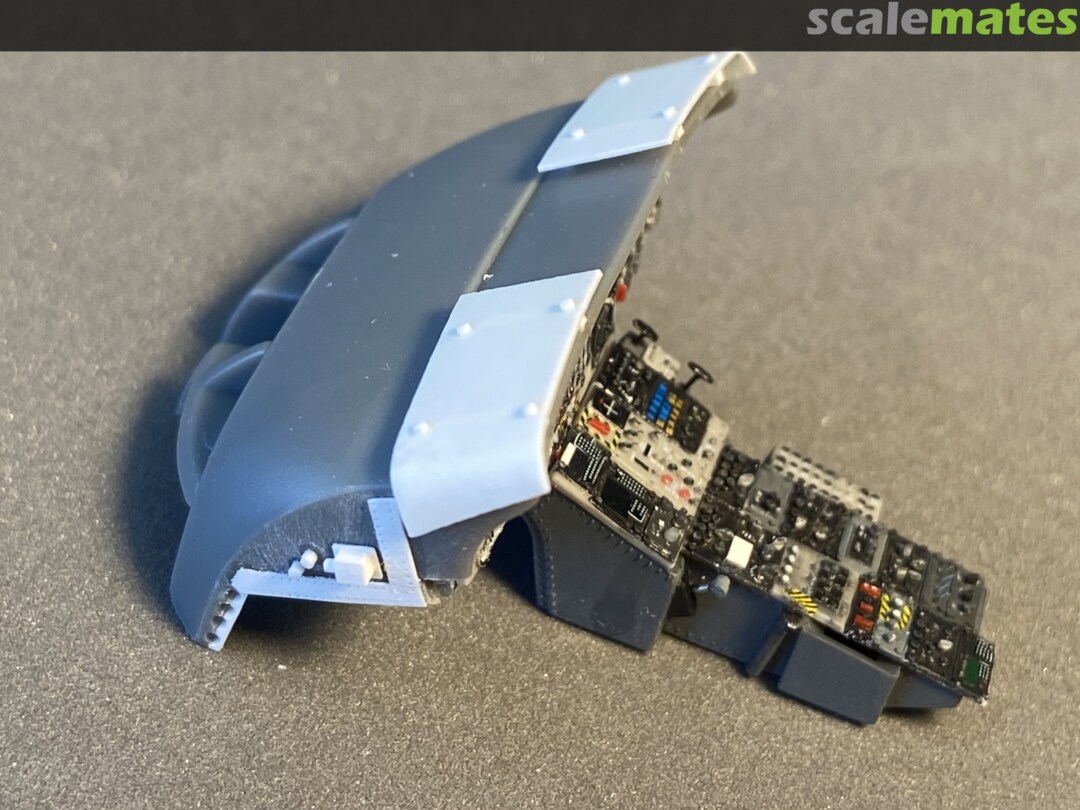
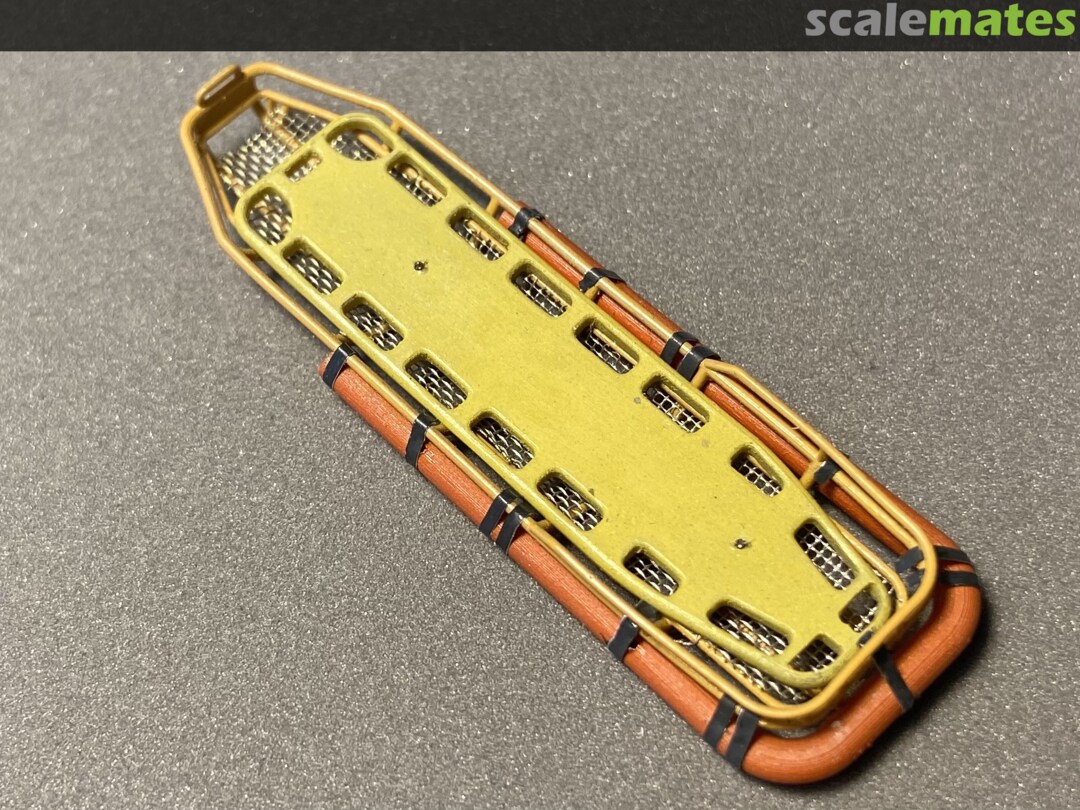
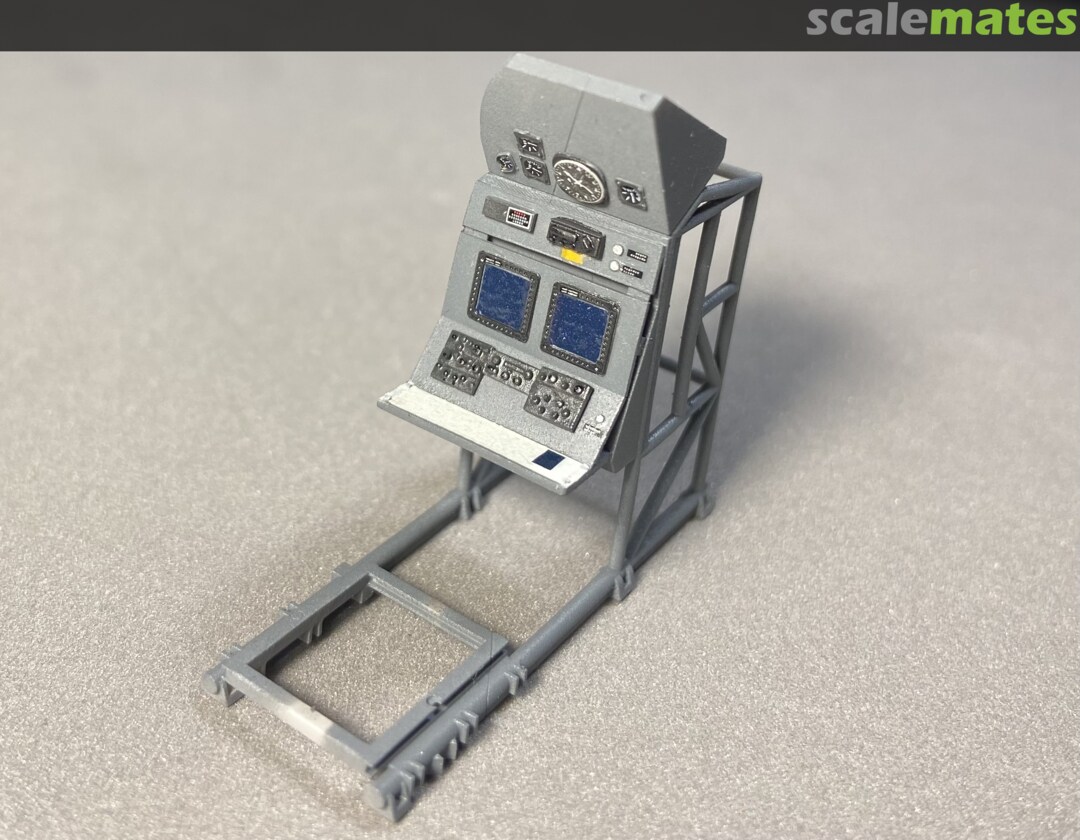
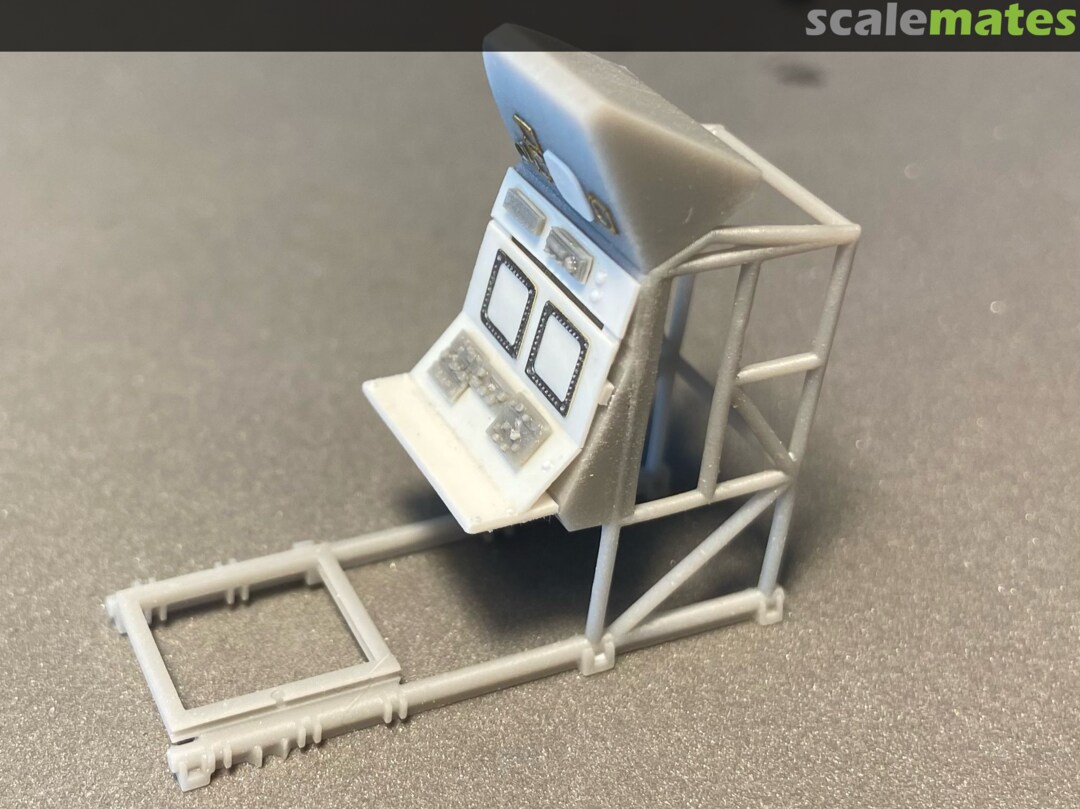
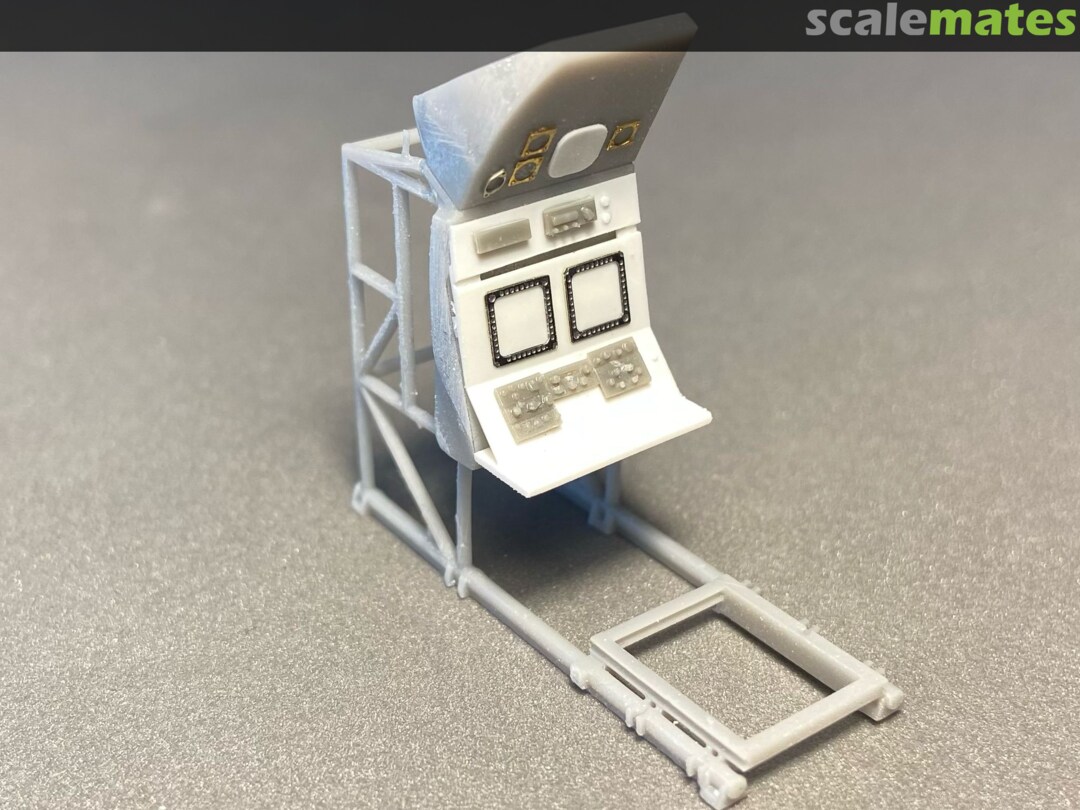
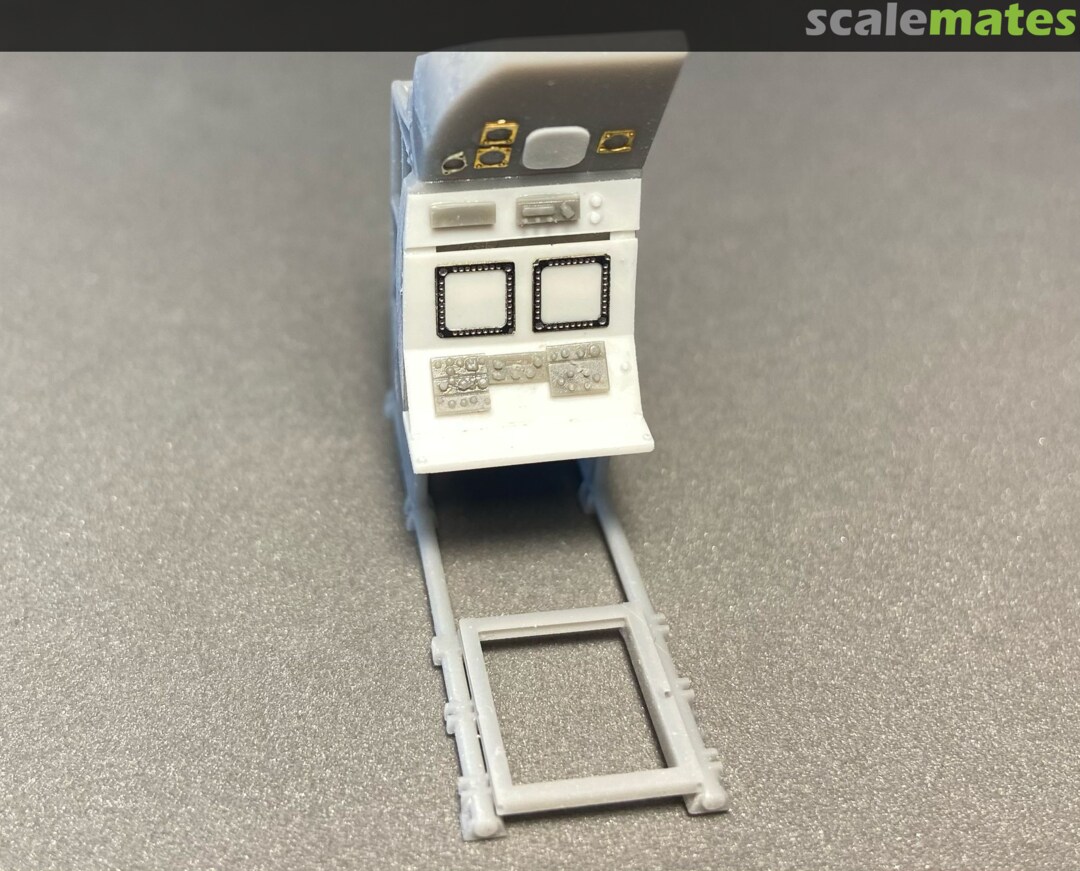
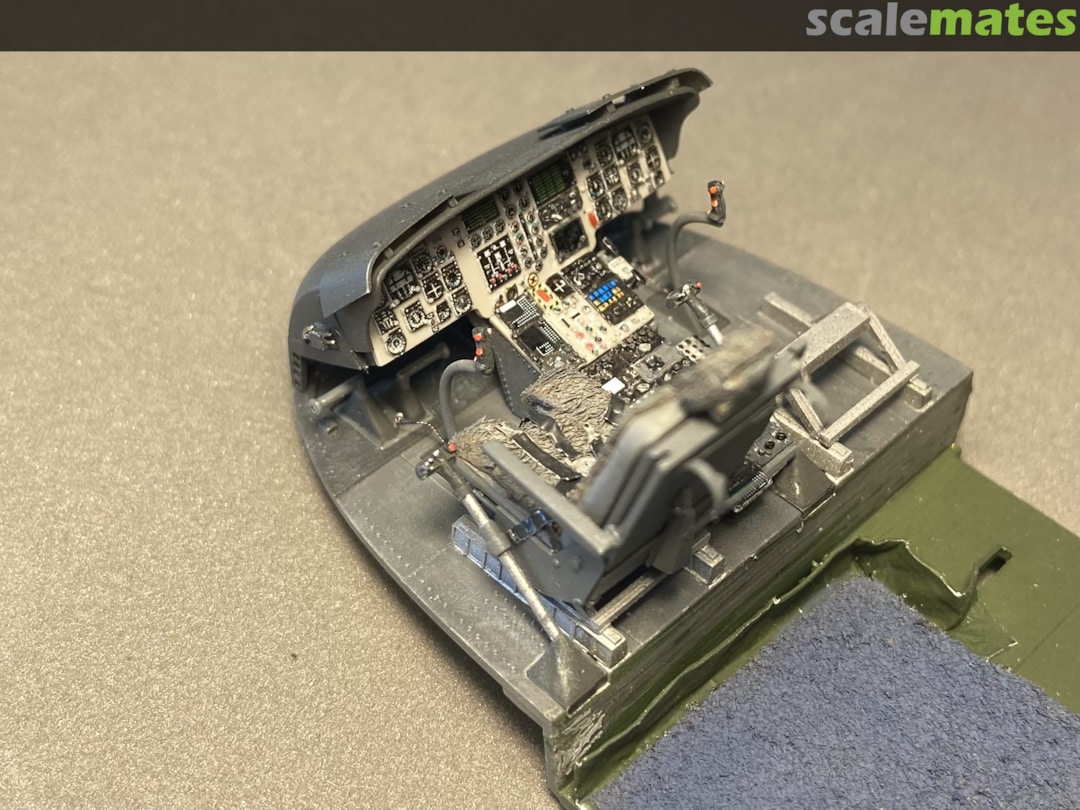
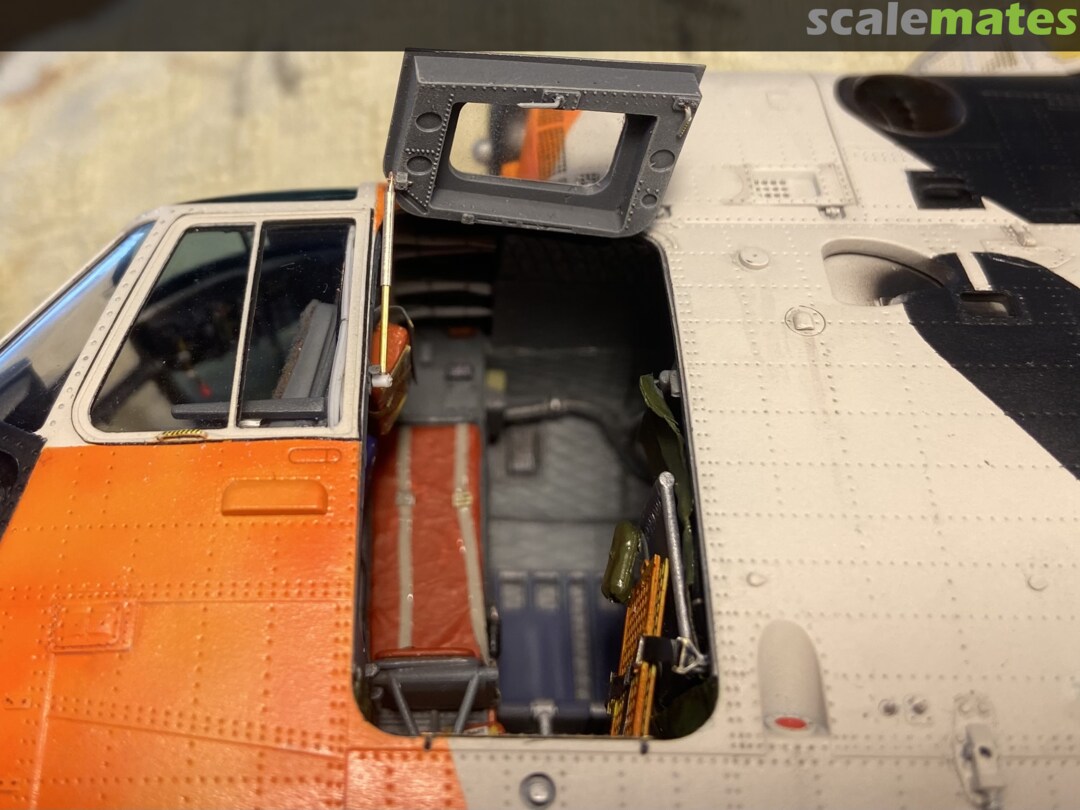
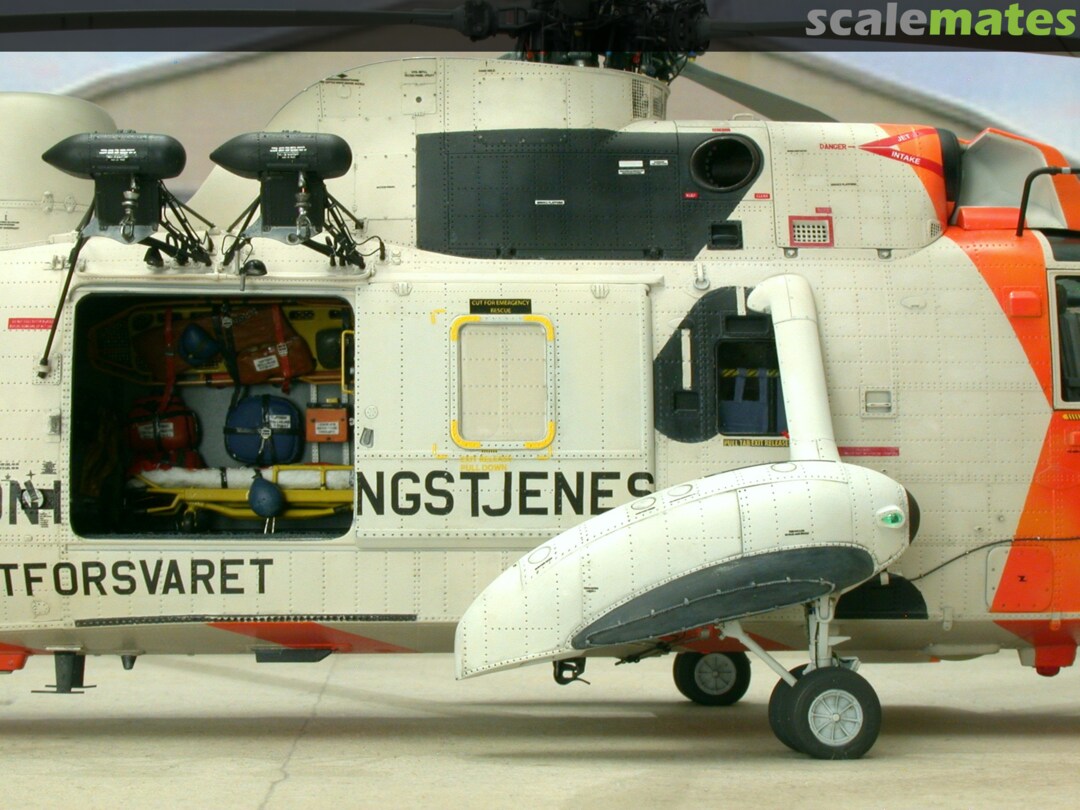
that instrument panel is out of this world, and the emergency stretcher is even better
1 19 May, 22:04
Es ist jedes Mal eine Freude dir zuzuschauen. Wirklich beeindruckend, was du da wieder zauberst! 👍
25 May, 11:25
Thank you Dutch, Jennifer and Johannes. I strive for a good entertainment. 🙂
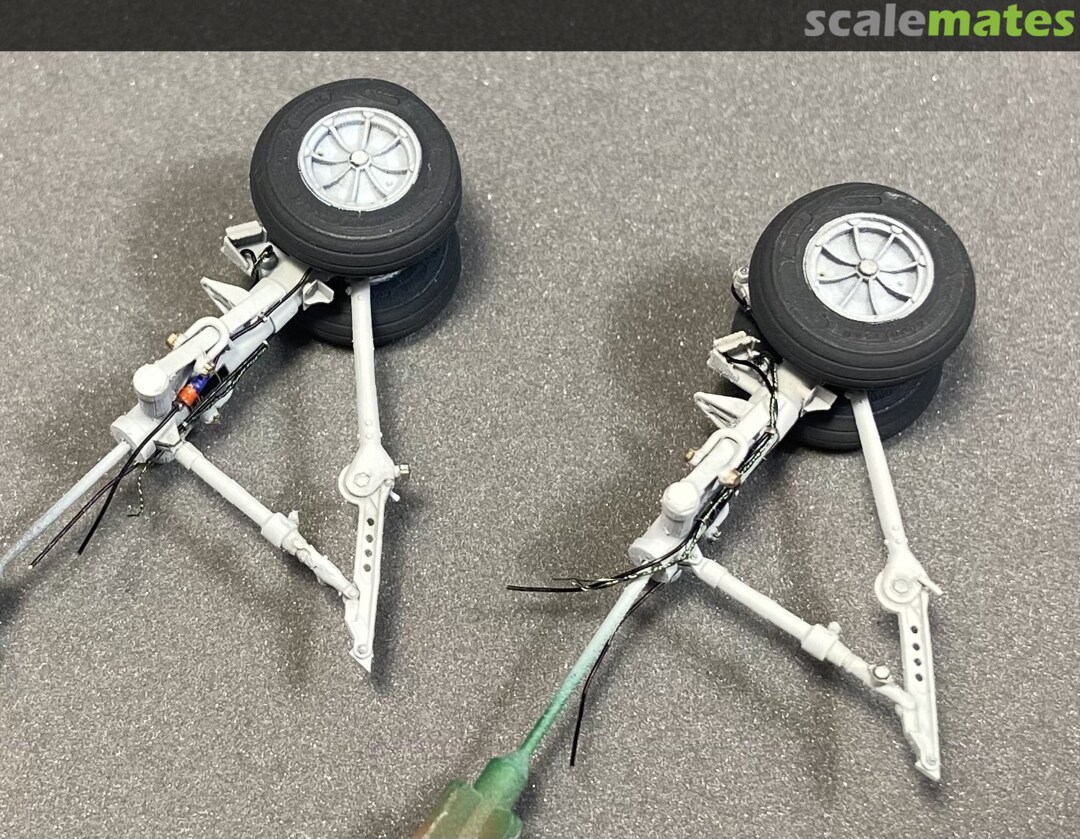
1 25 May, 12:44
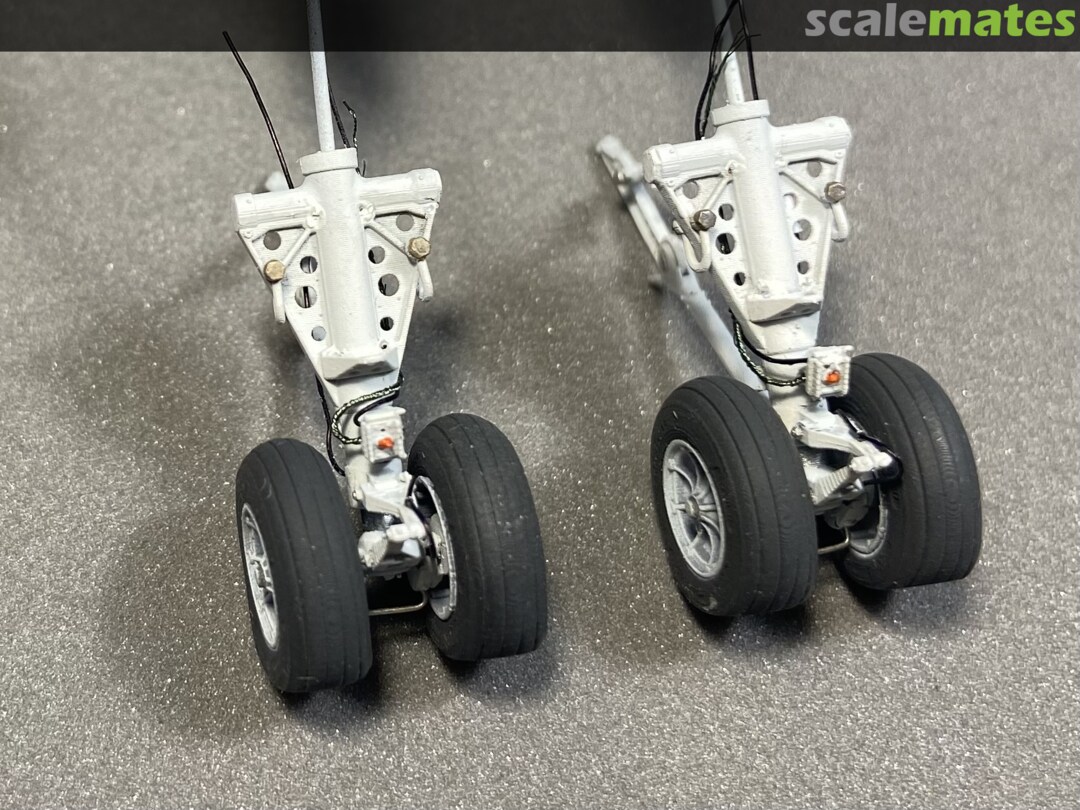
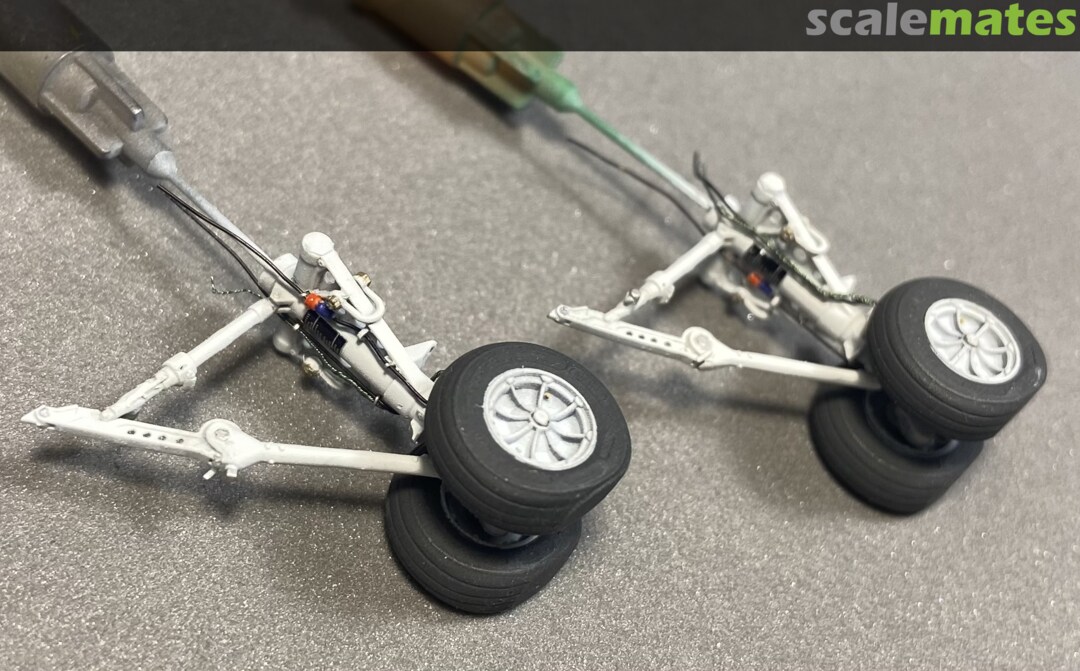
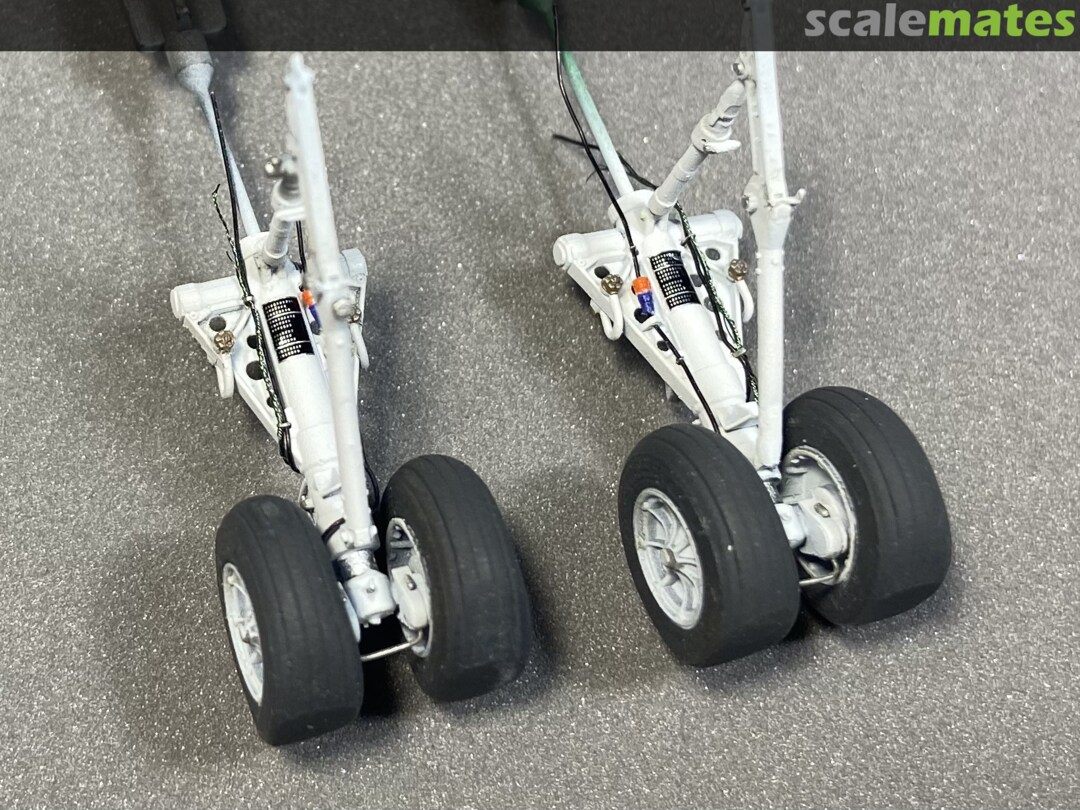
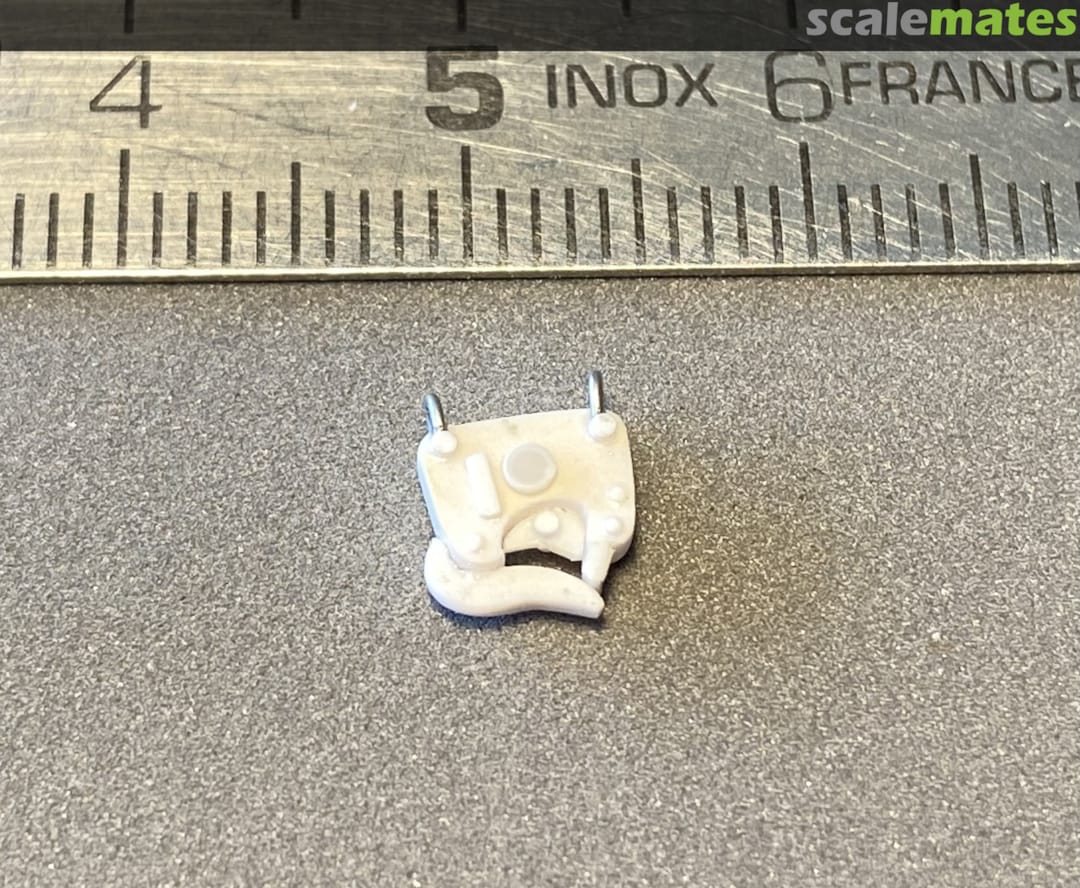
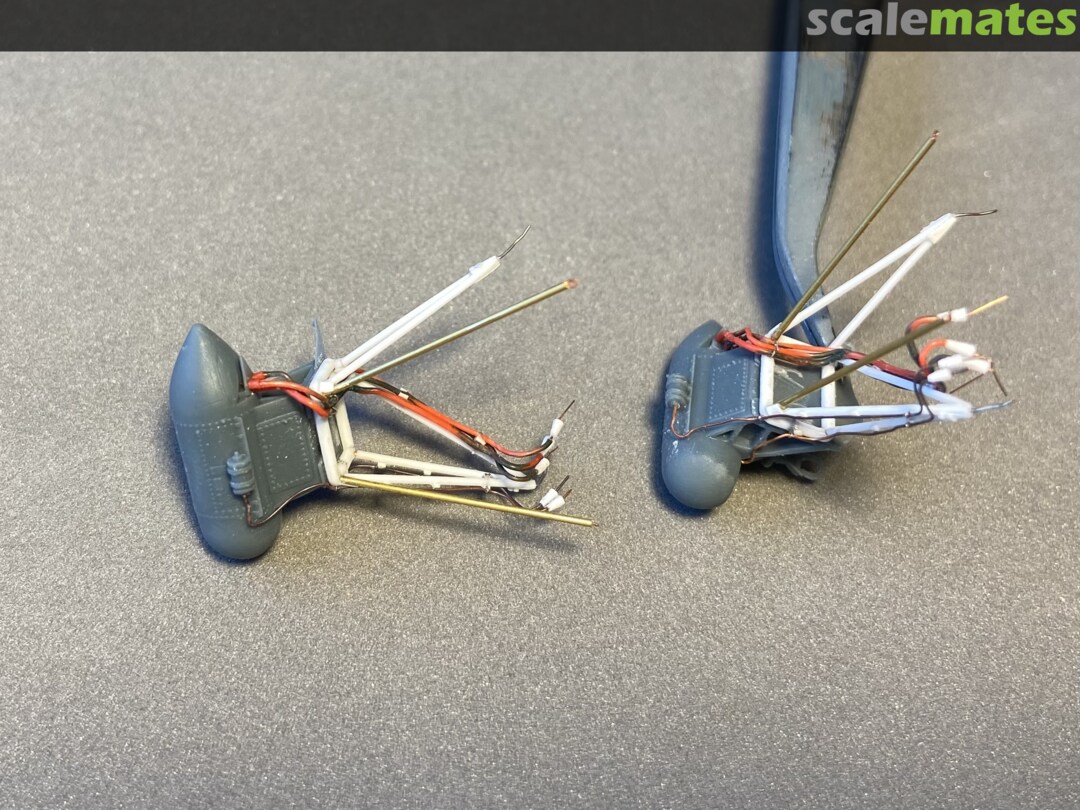
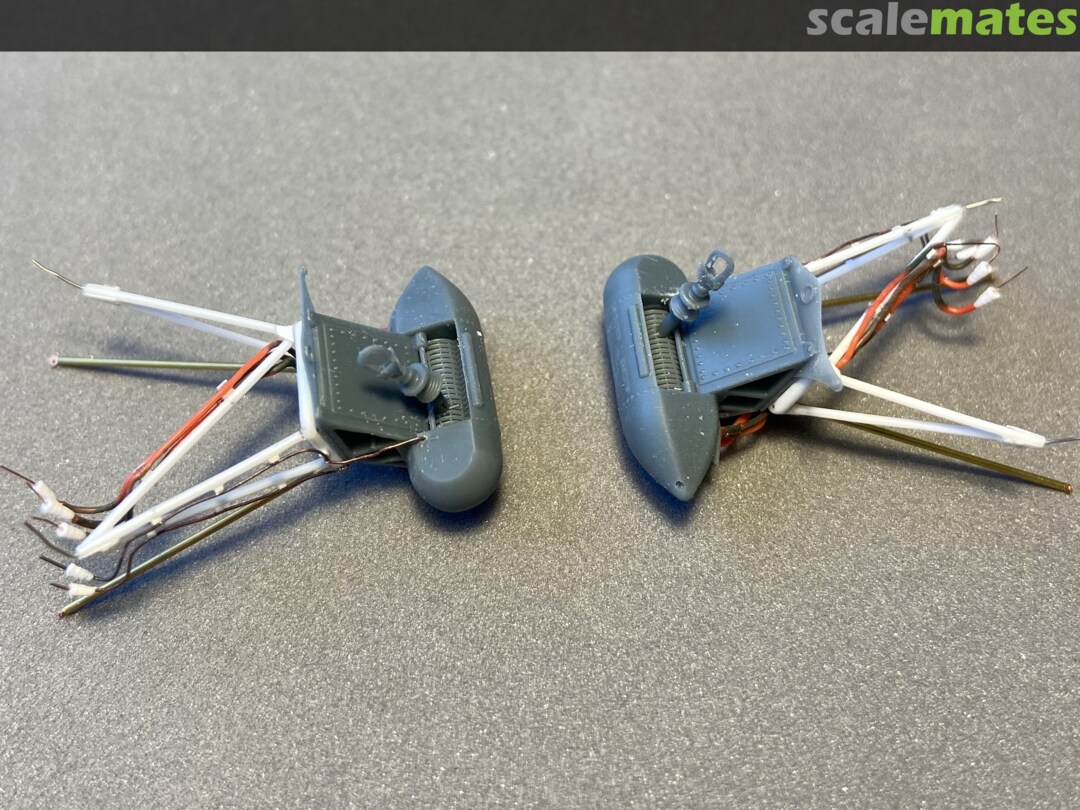
It was once again a great pleasure to use the landing gear of Jam Screw. The detailing is great and I only added the cables. 🙂
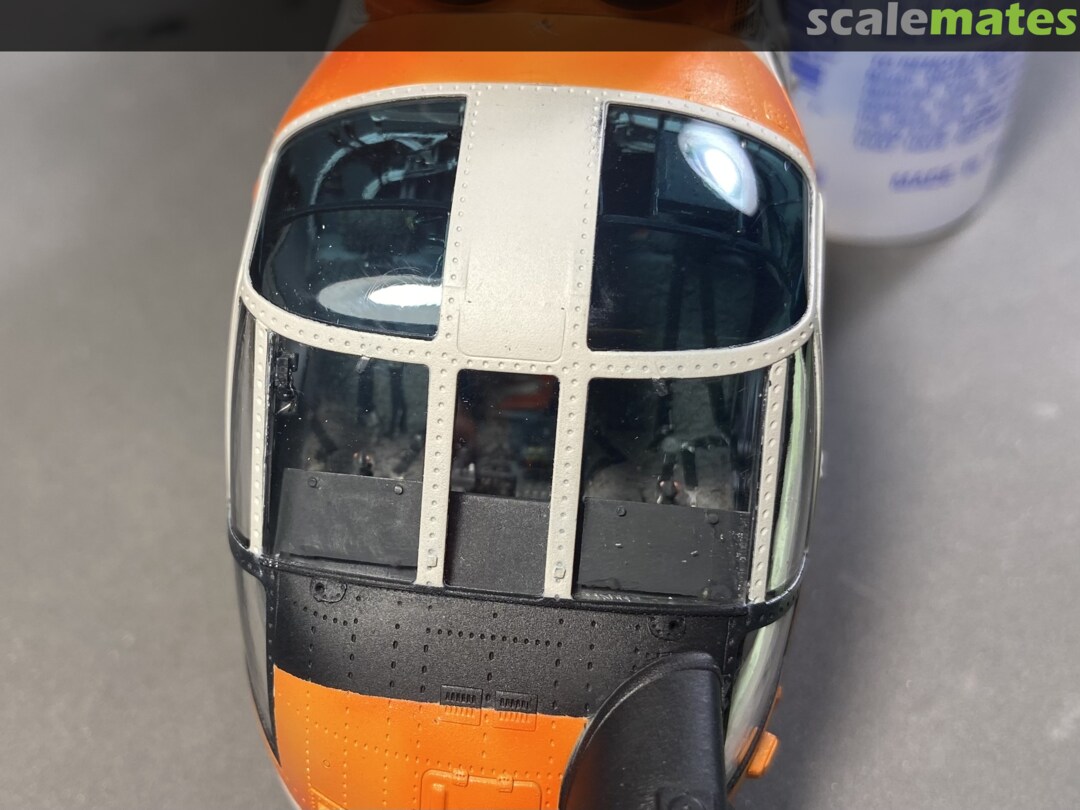
21 June, 03:37
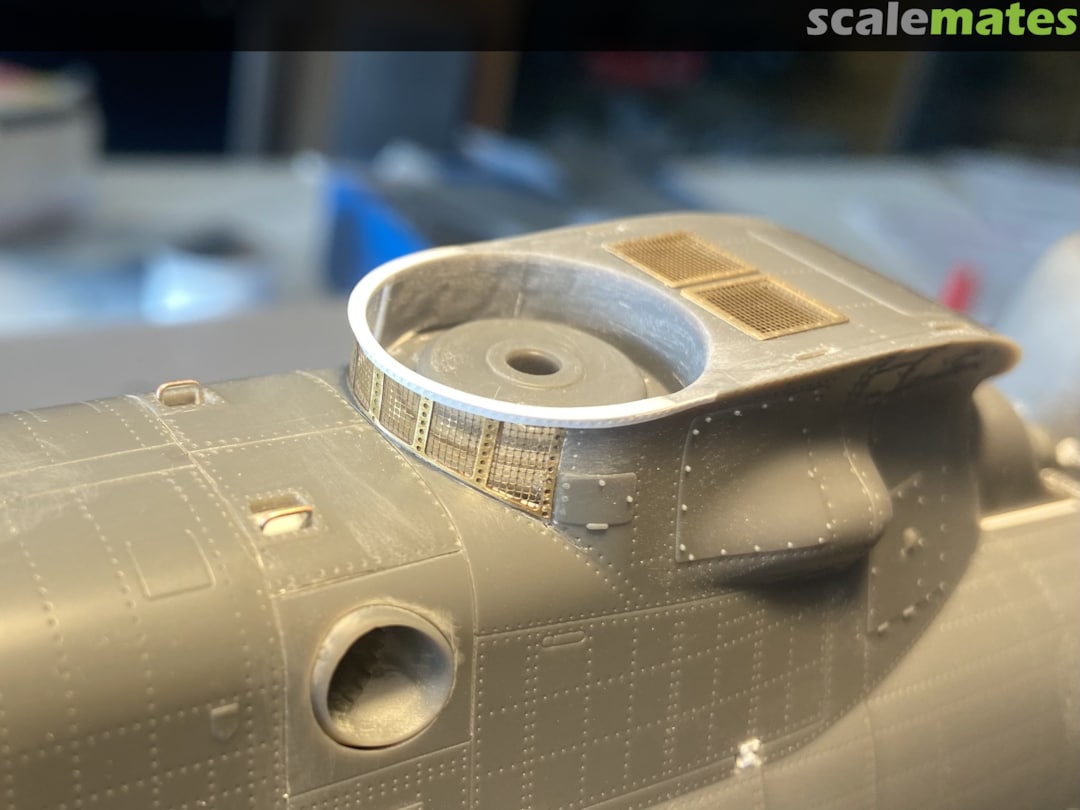
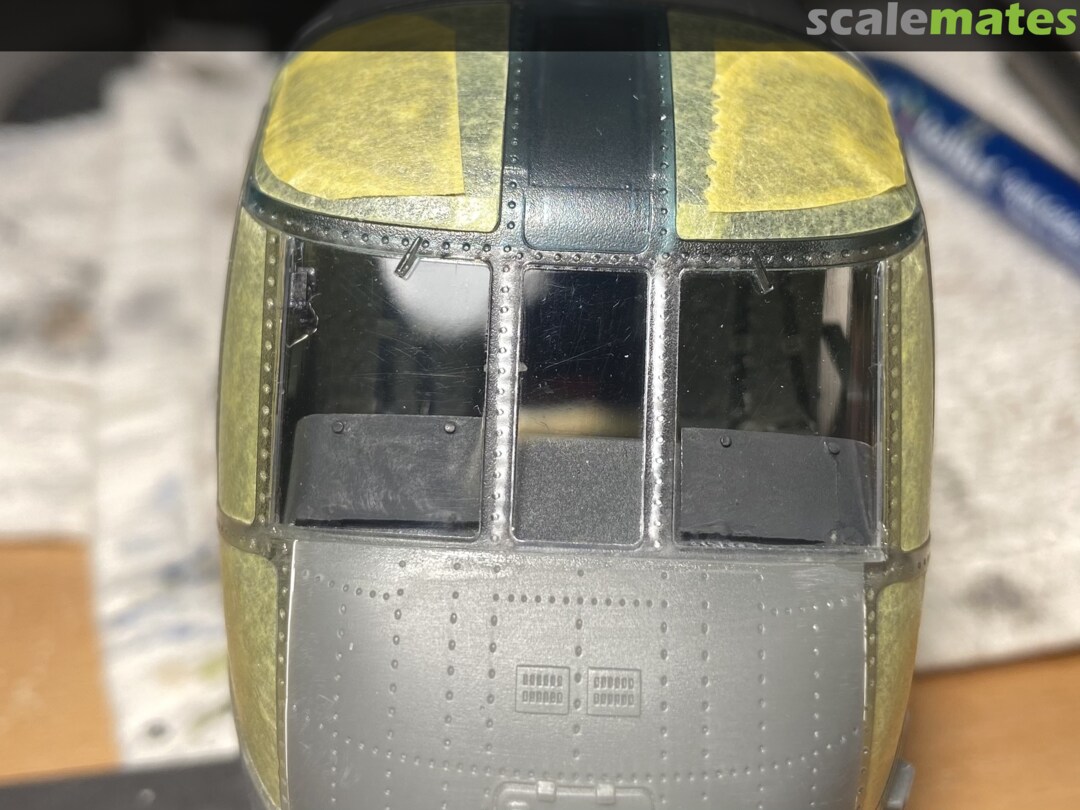
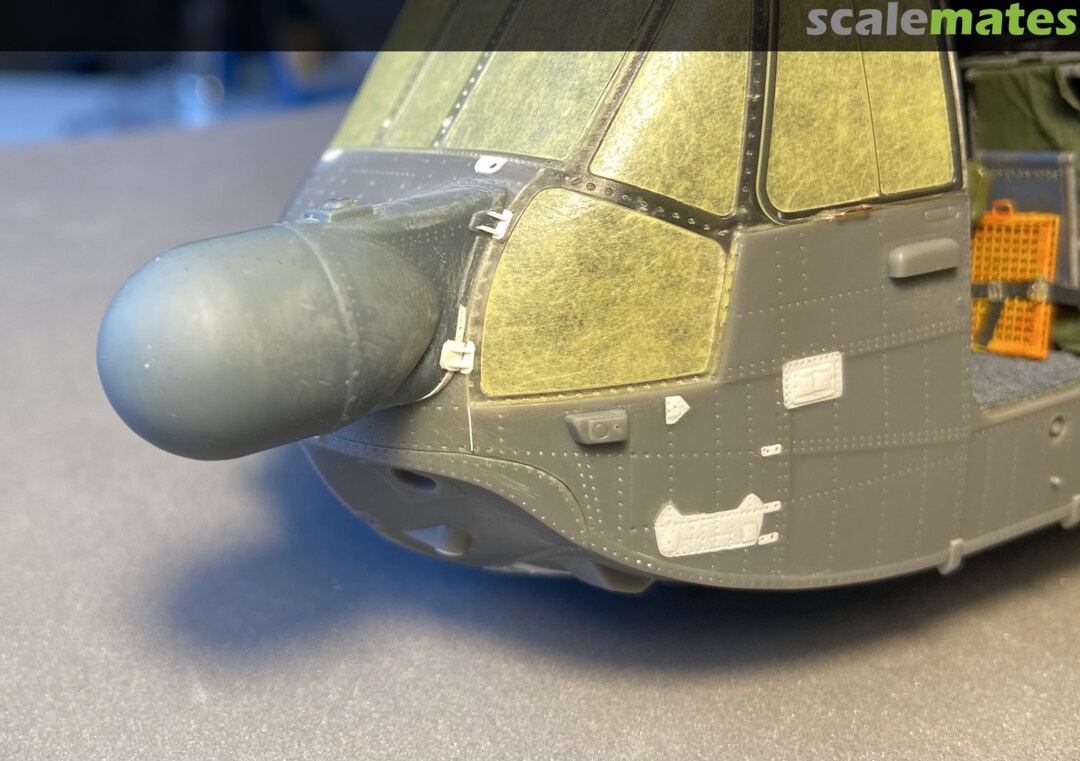
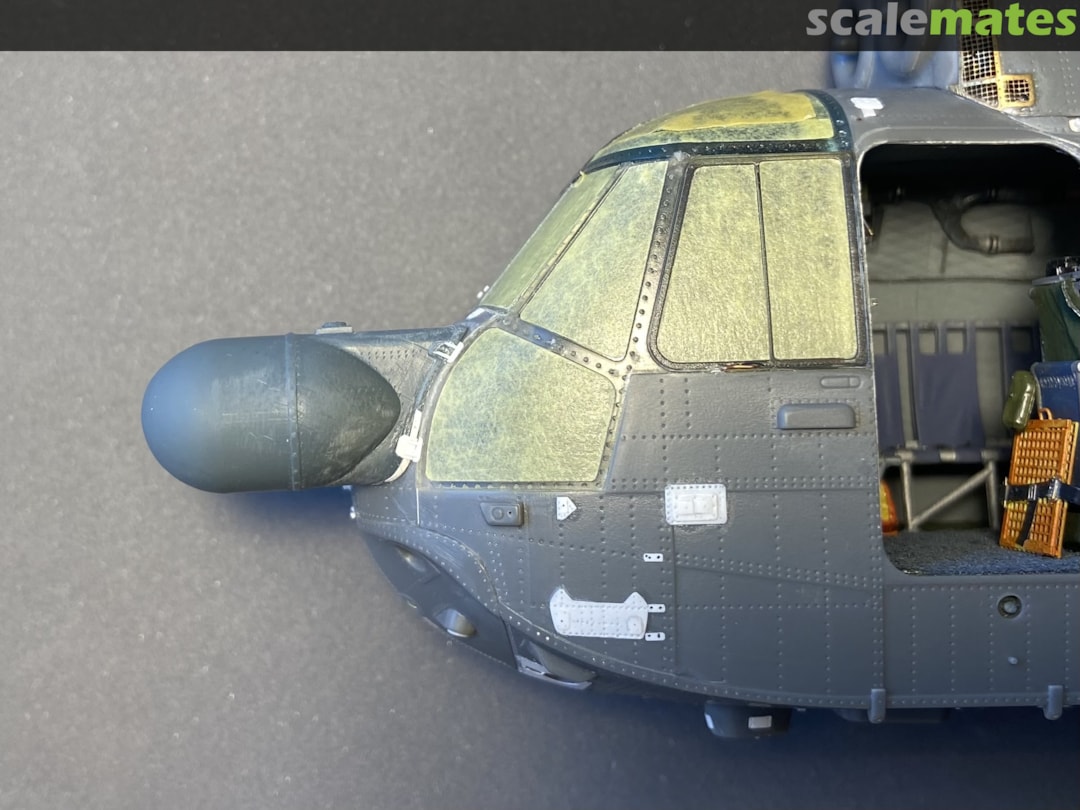
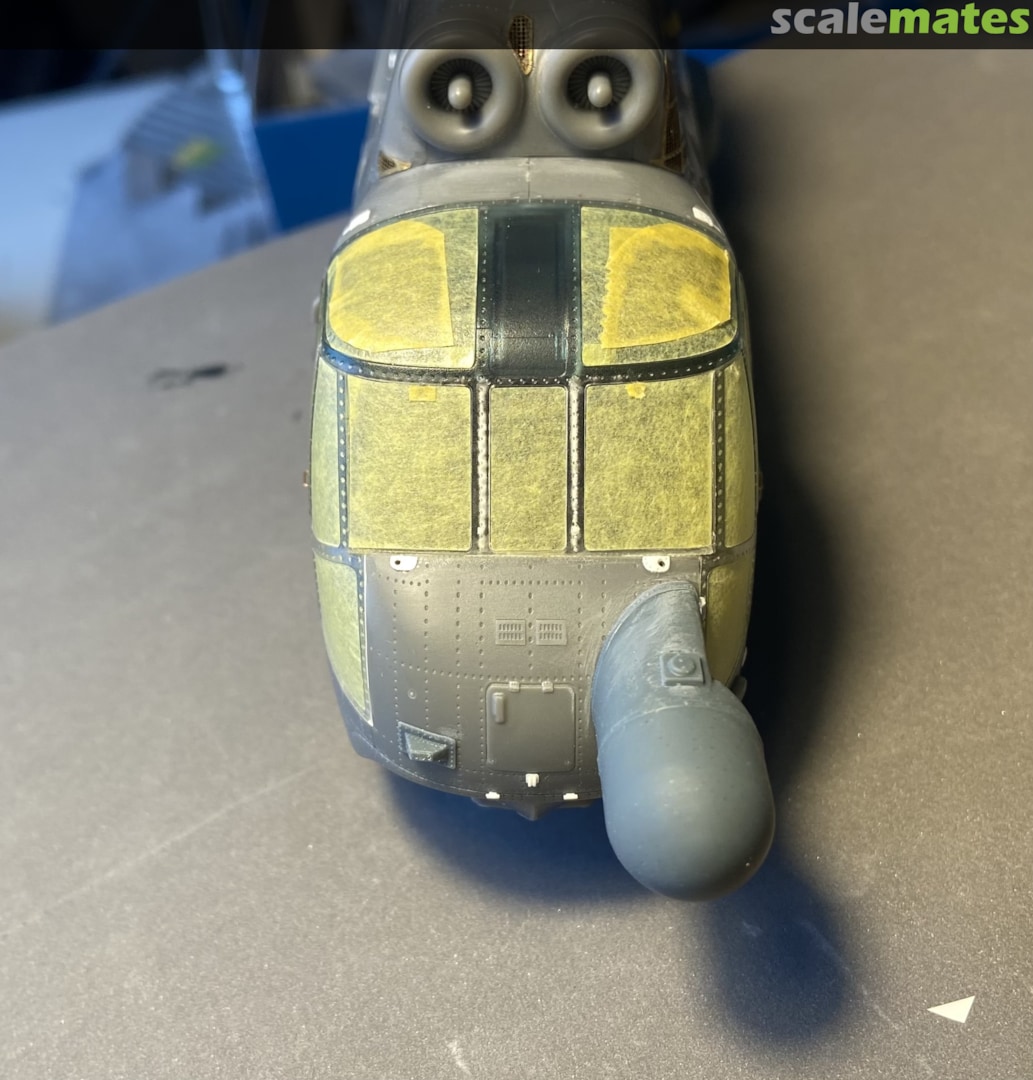
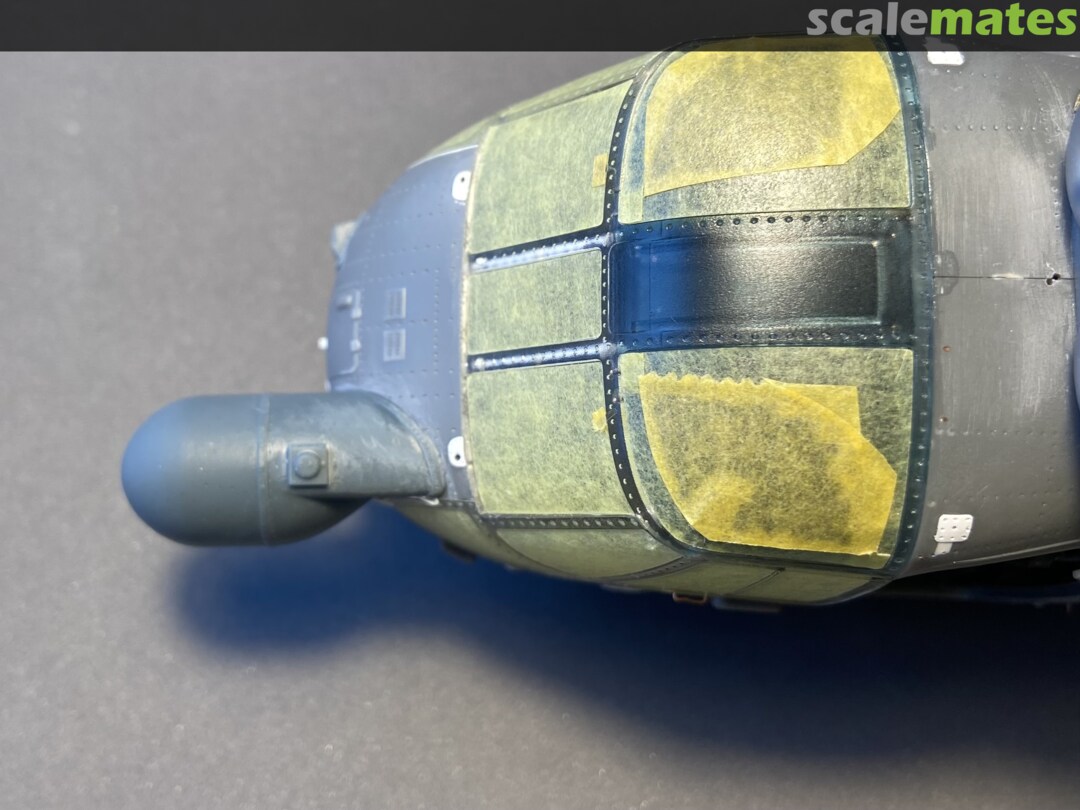
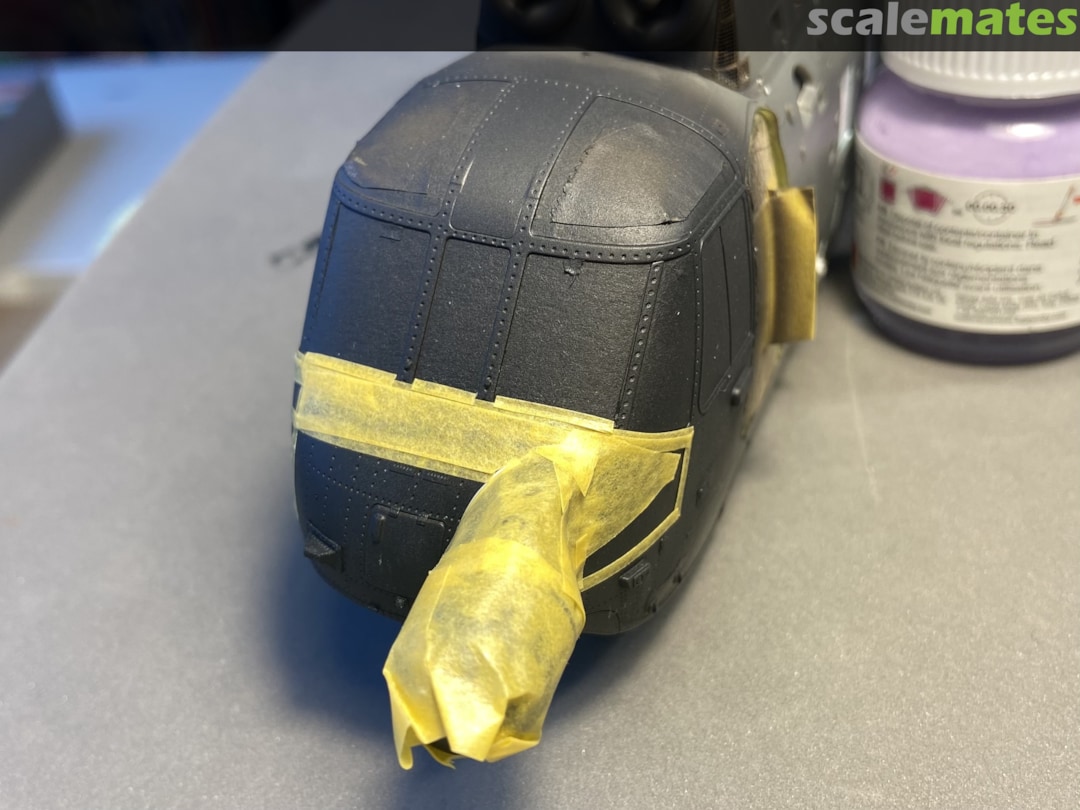
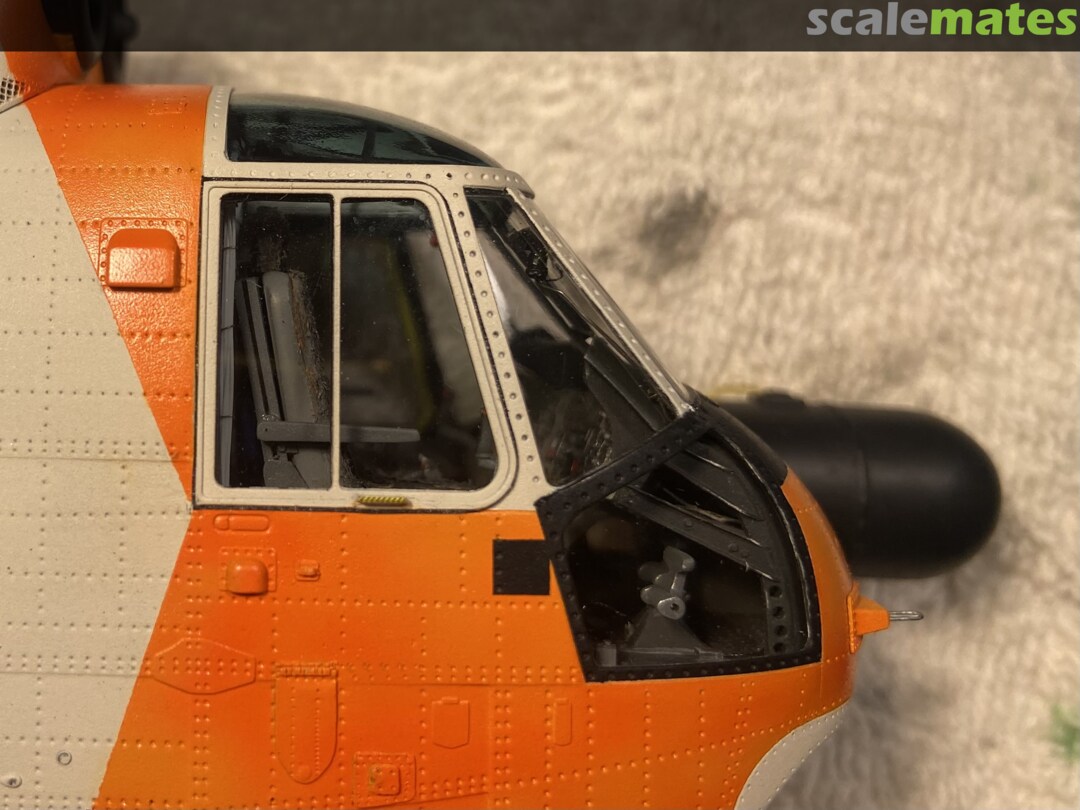
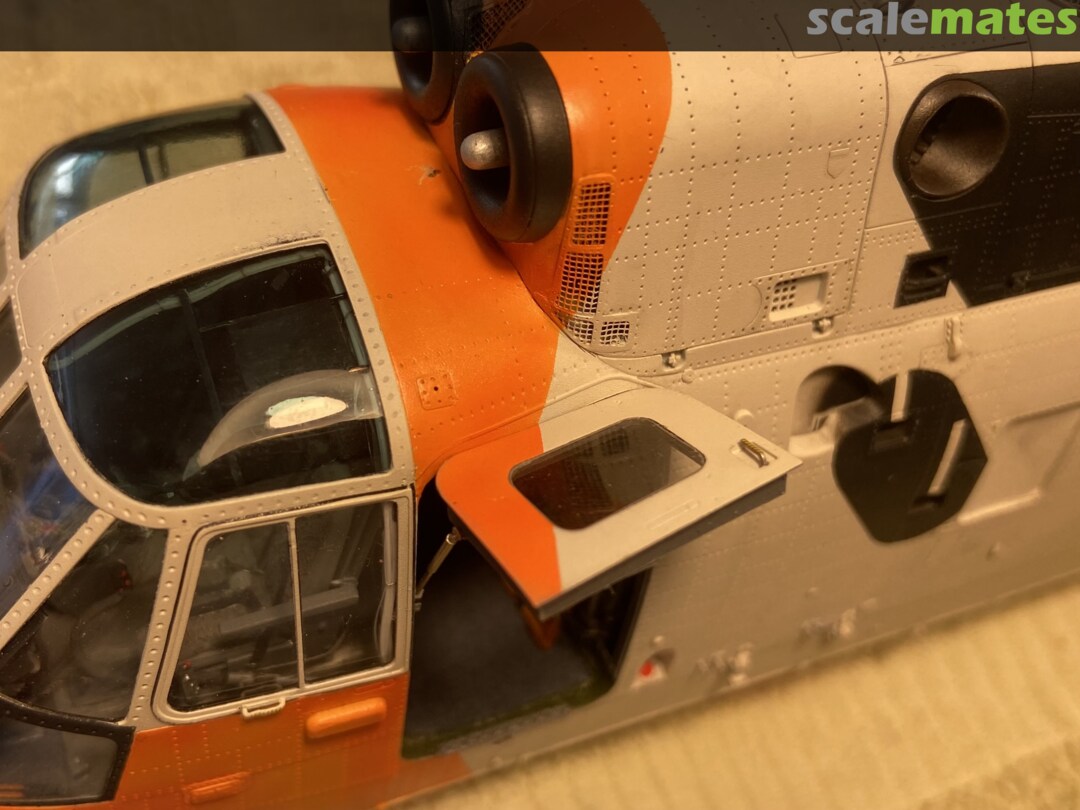
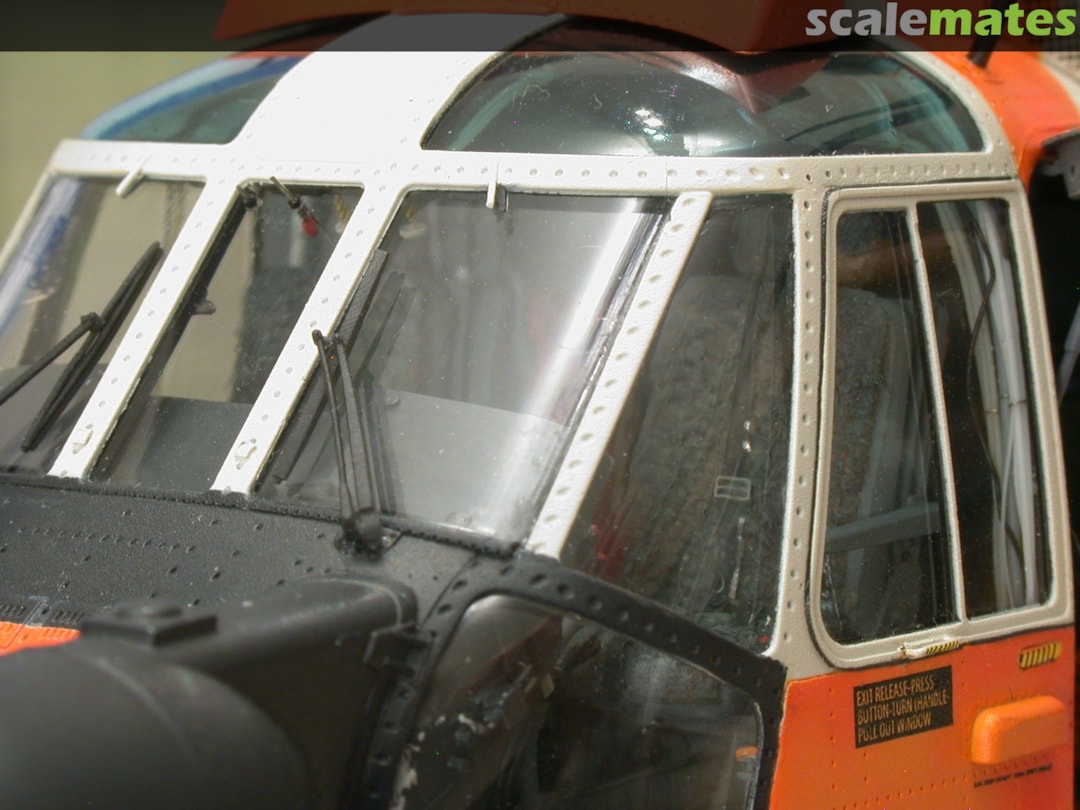
The last big hurdle of the project is now taken: the cockpit clear parts. I really had a lot of respect for that. Unfortunately, it did not run as smoothly as with the Mk.41, because I made a mistake in the dimensioning of the sun visors (too long and too high at the back). In total, the repair took me 2 hours. Fortunately, it worked out well 🙂. Ende gut, alles gut! 🙂
9 July, 14:20
If you already have great respect for clear parts, my respect for this task will be even greater, simply because of my lack of experience. You mentioned Future: have you ever had problems with the masks on windows with Future?
You managed again to get a perfect result at the end 👍
9 July, 14:44
Vielen Dank für das Lob. Grundsätzlich habe ich nie Probleme gehabt bei mit Future behandelten Klarsichtteilen. Das Zeug klebt wie die Pest. In diesem Fall habe ich das ganz vorsichtig nur ganz am Rand gemacht nur um die Spalten zu füllen. Links war der Spalt circa 0,4 mm, rechts kaum zu sehen. Ich habe ihn trotzdem gefüllt um auf Nummer sicher wegen des Sprühnebels zu gehen.
Basically, I have never had any problems with transparent parts treated with Future. The stuff sticks like the „plague". In this case I did it very carefully only at the edge just to fill the gaps. On the left the gap was about 0.4 mm, on the right barely visible. I filled it anyway to be it safe because of the airbrush-mist.
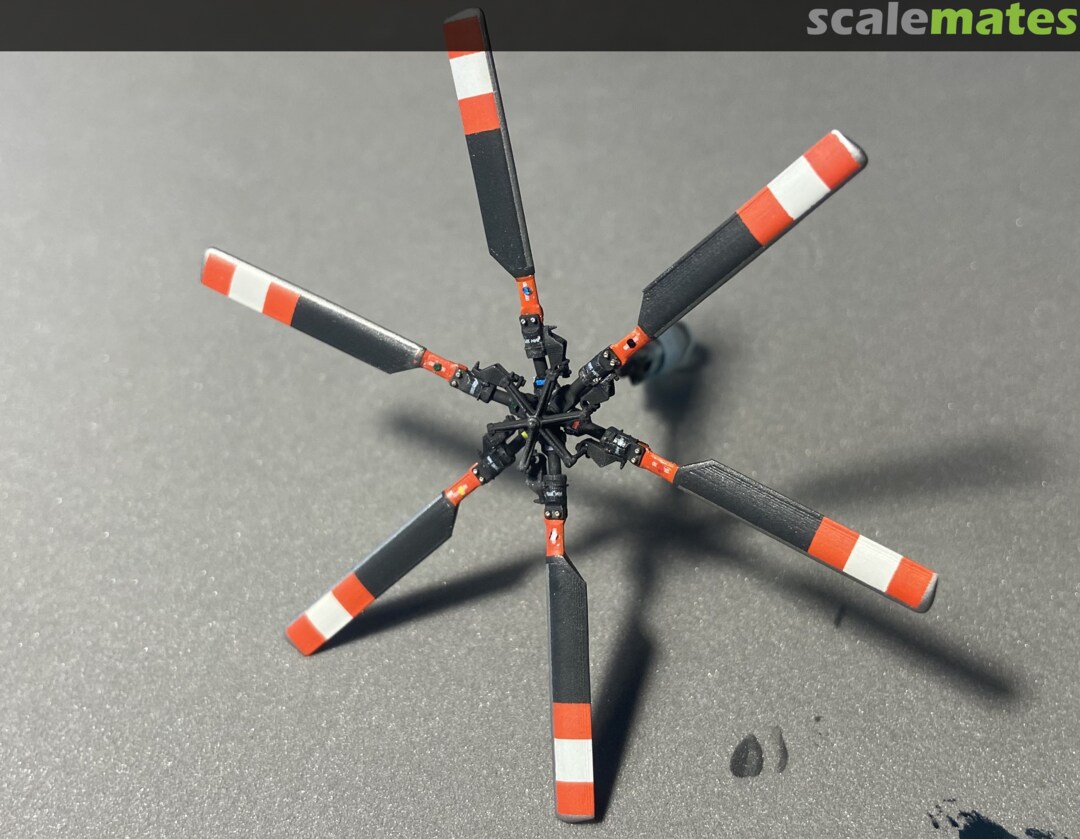
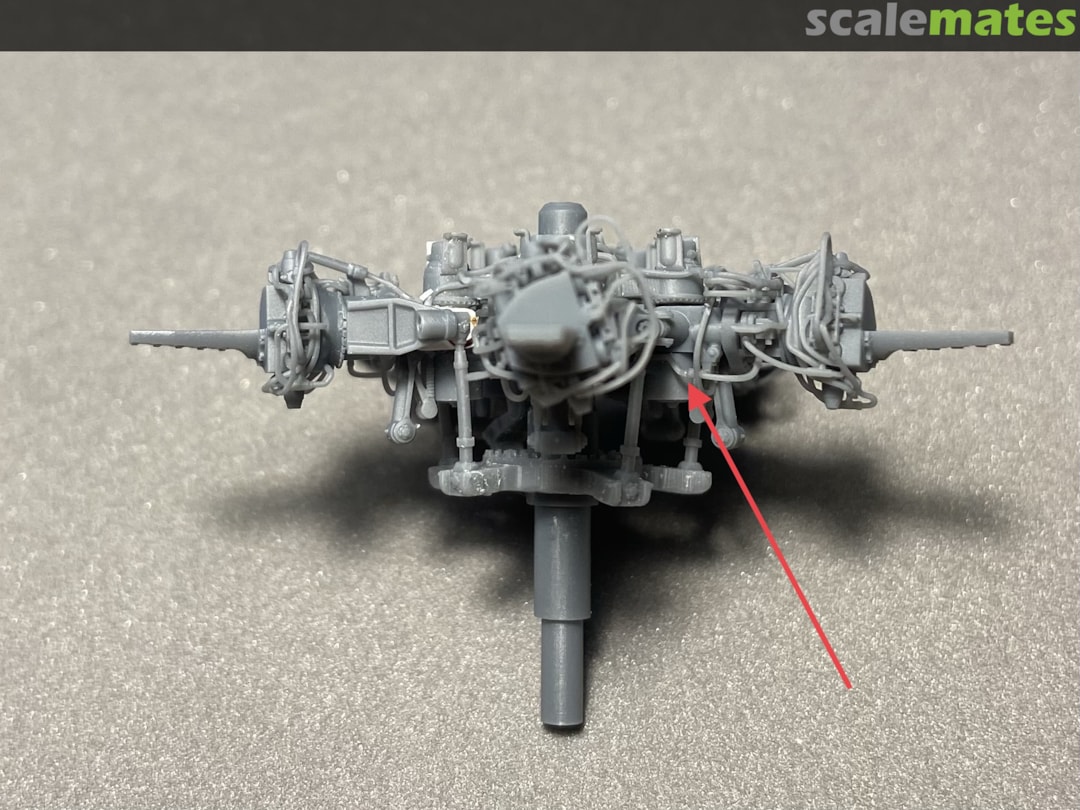
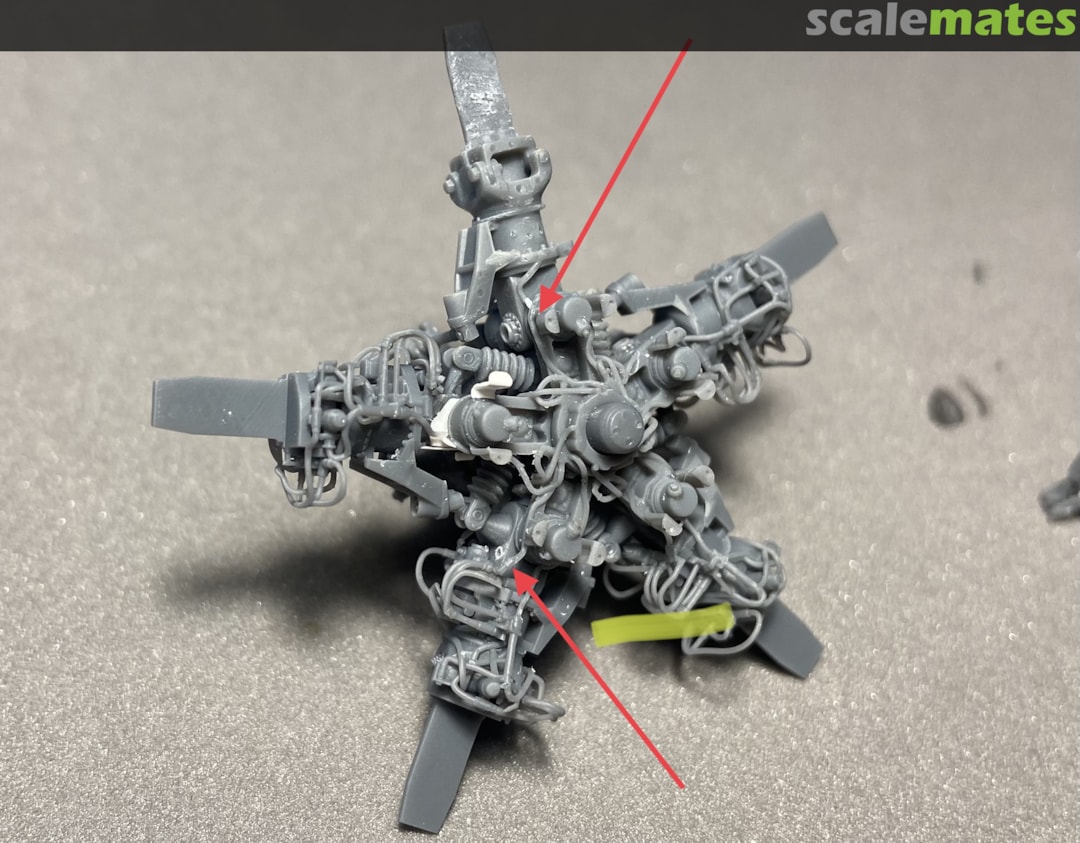
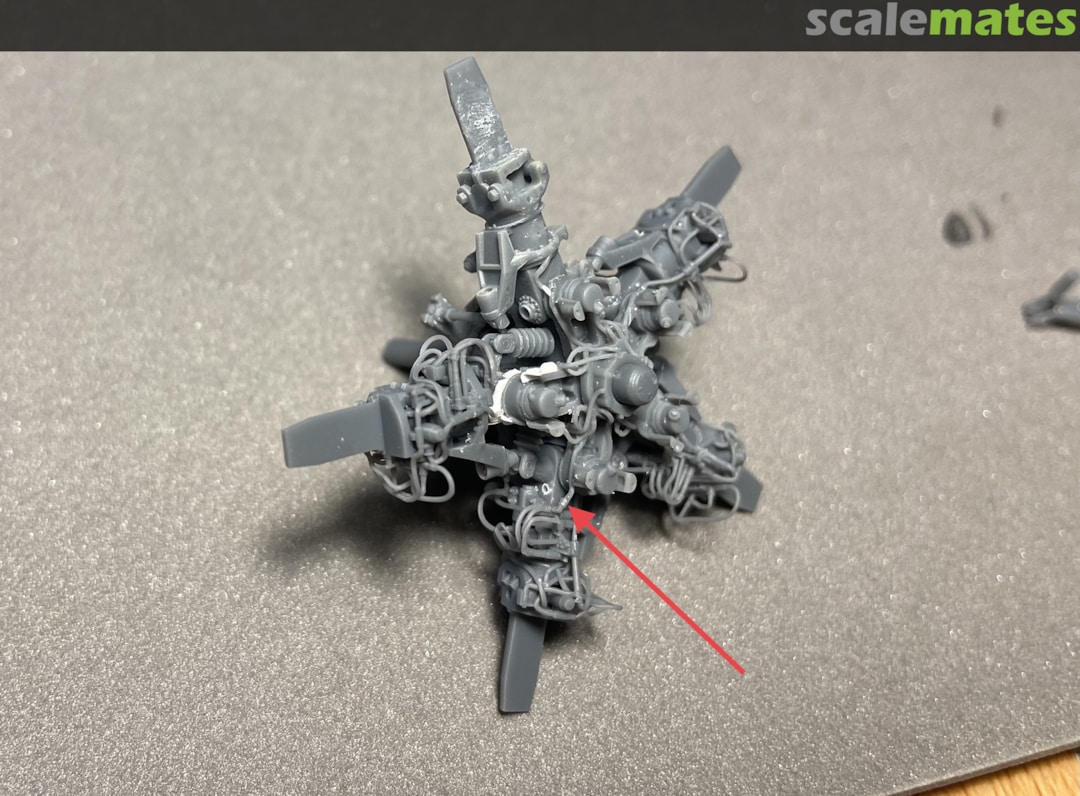
1 9 July, 15:25
that rotor is totally incredible, and with the amazing paint job, it simply looks like the real deal... wow. well, all look like the real deal in your builds, anyway....
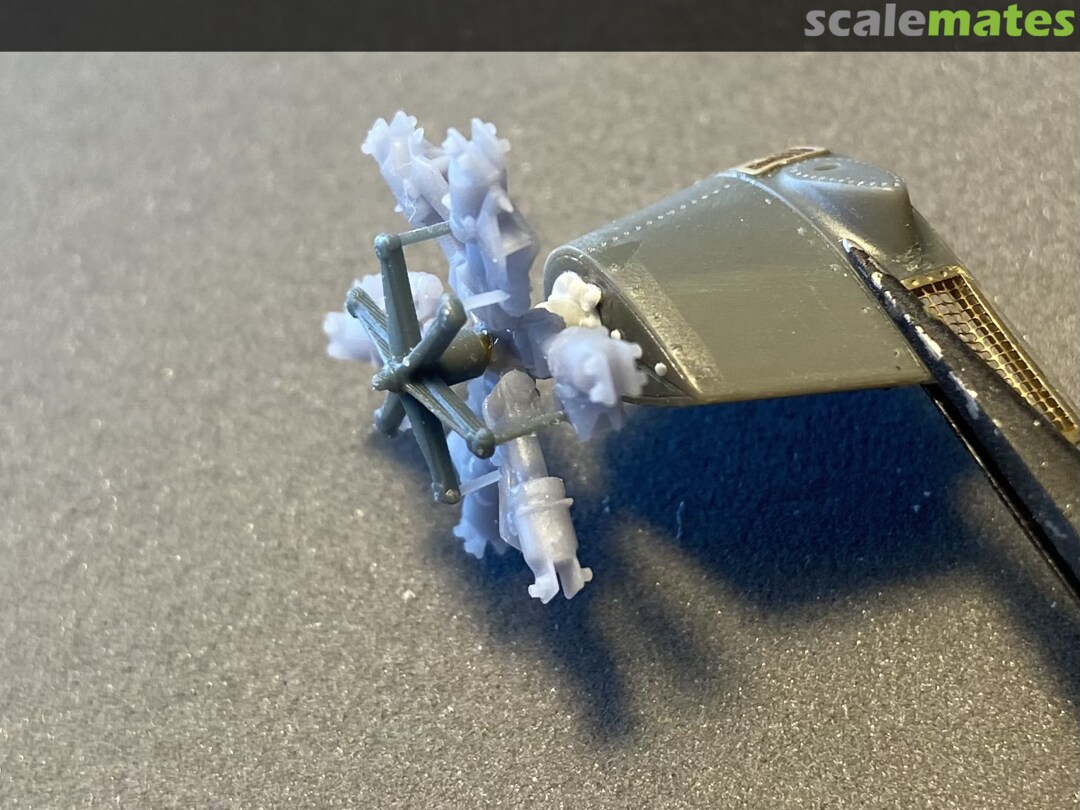
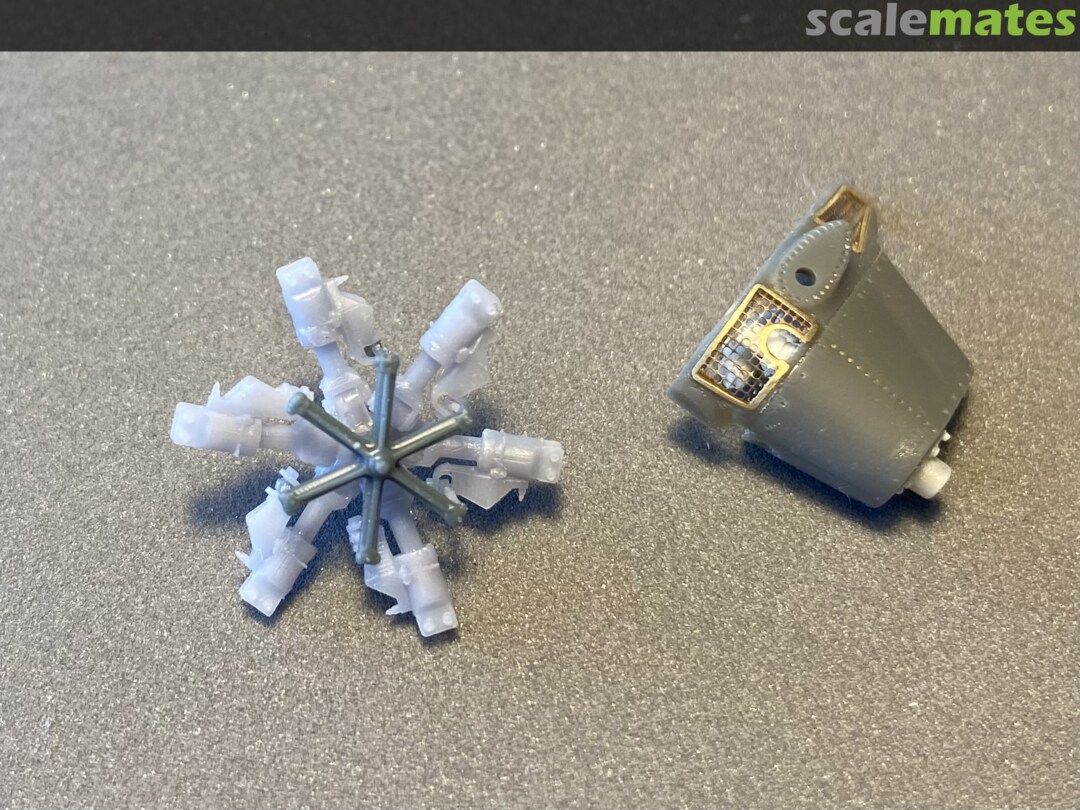
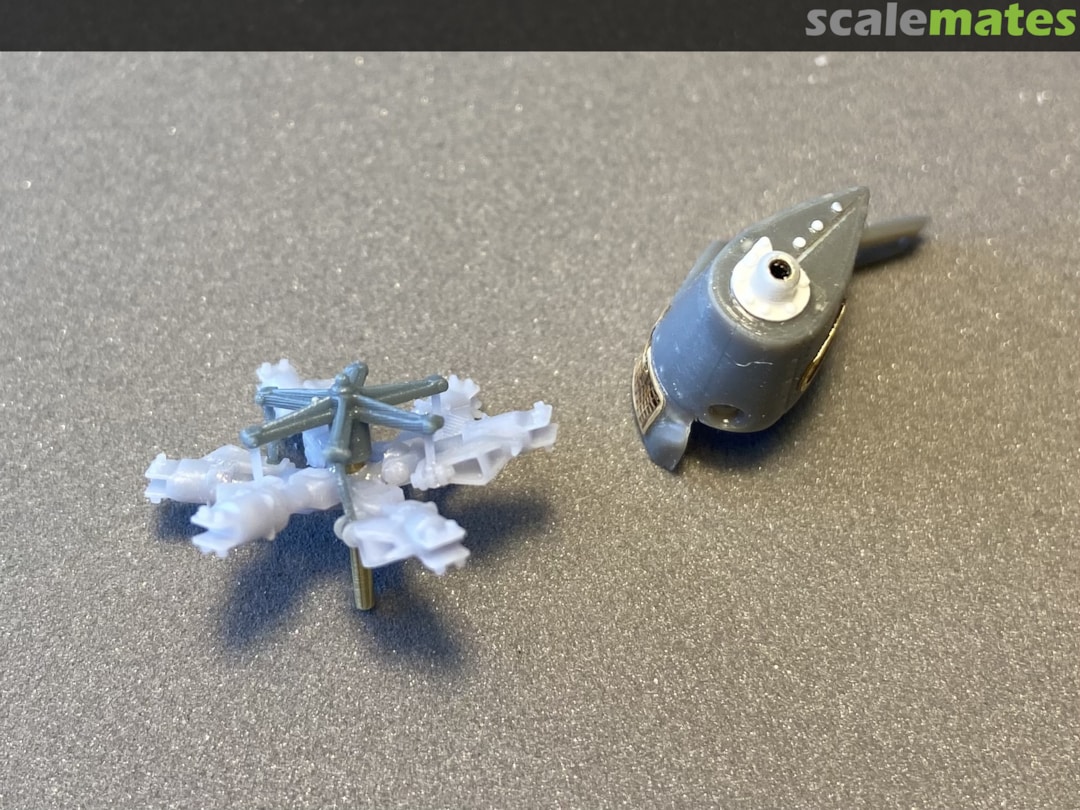
1 9 July, 21:15
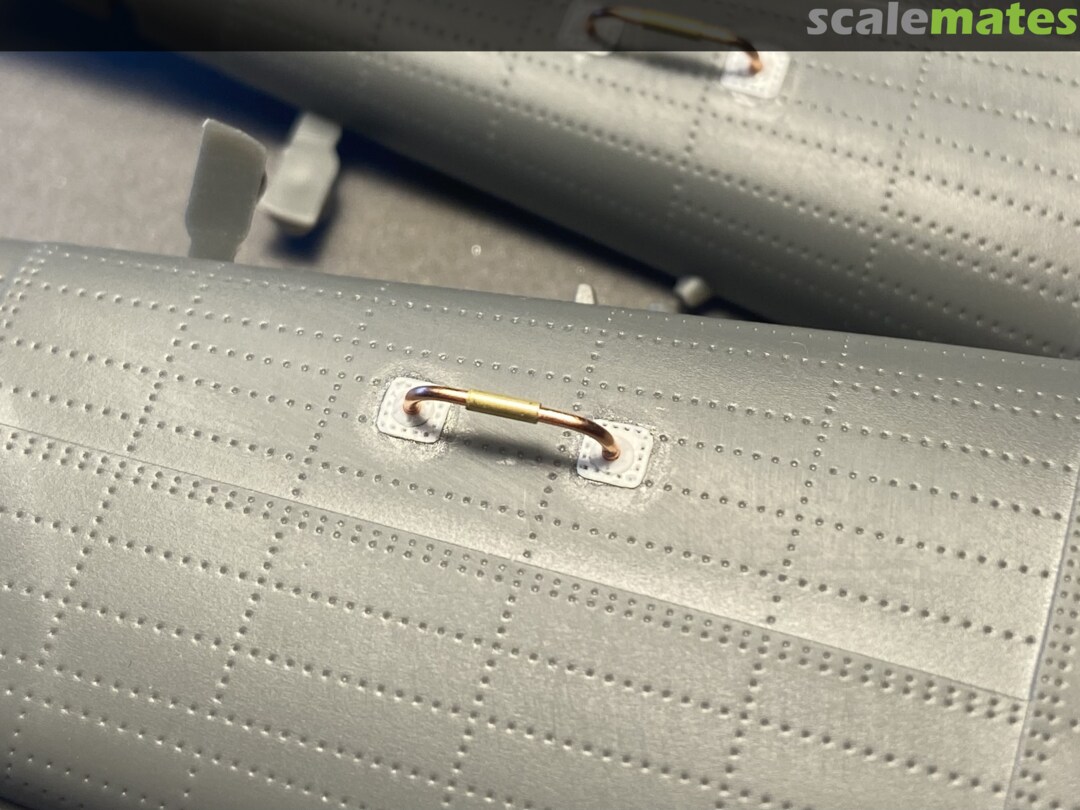
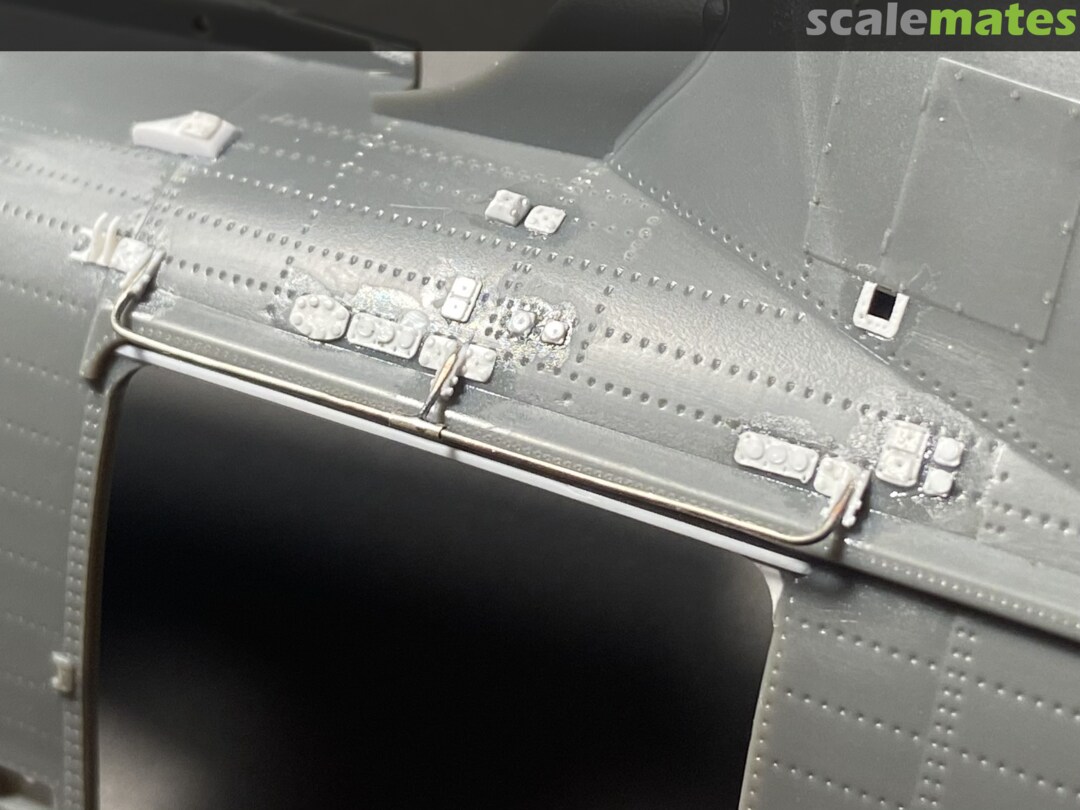
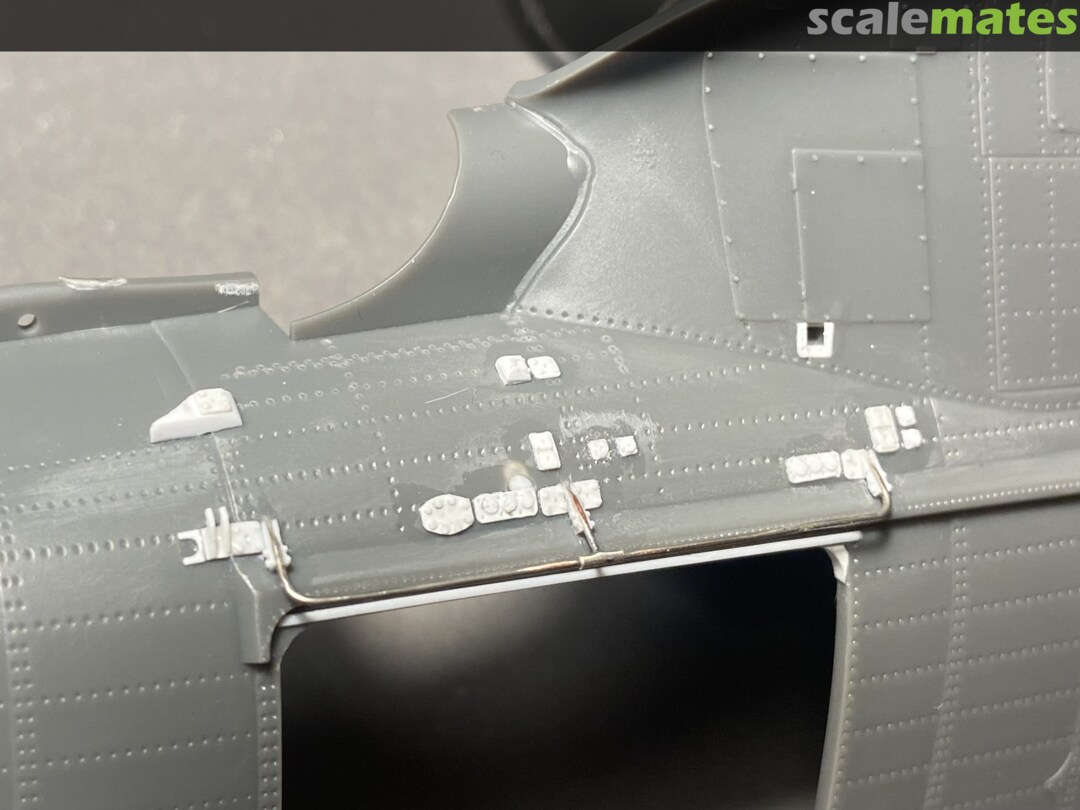
The package arrived from Australia on Wednesday and I could hardly get enough of the parts 🙂🙂. Yesterday I installed a few parts to warm up. Here are the first results.
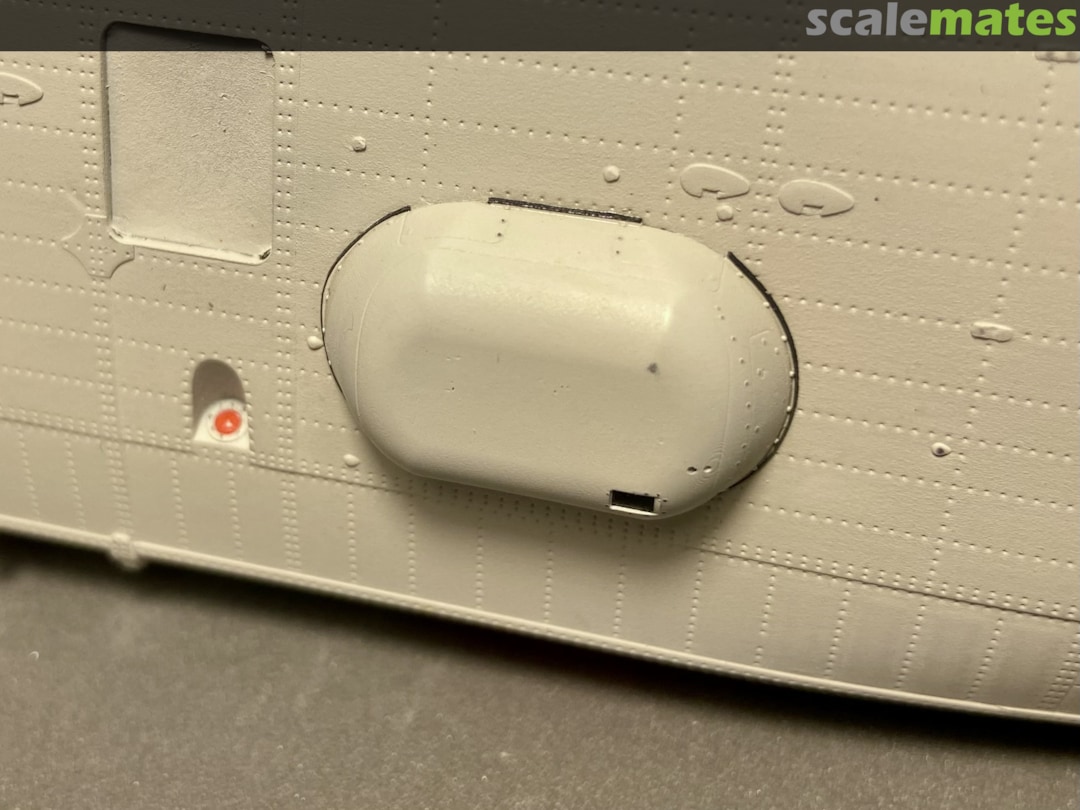
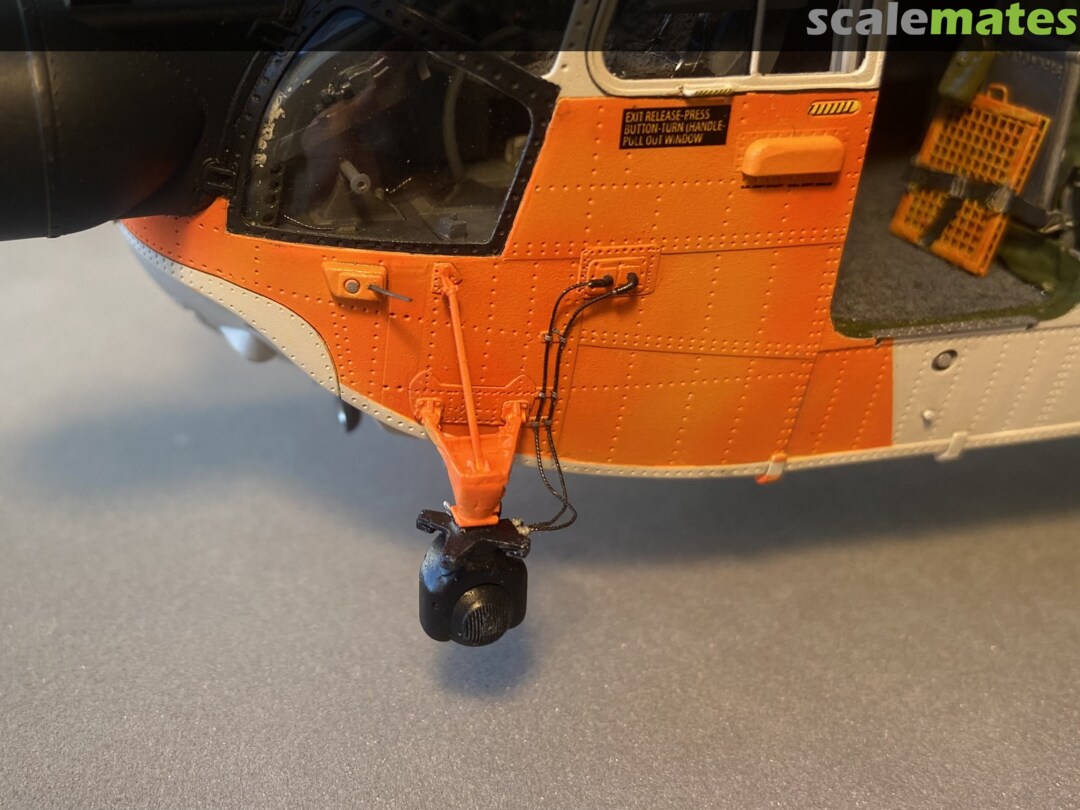
The emergency buoy is printed very thin, the base plate is flexible and fits perfectly against the surface. Correctly, it is not square but resembles a rhombus.
The rescue raft on the left side fits perfectly. On the right side it sits further back where the hull is curved. A little rework is necessary here.
7 November, 05:04
They do look good. The amount of detail and research that is going into this build is mind boggling 👍
8 November, 13:13
Thank you Alec.
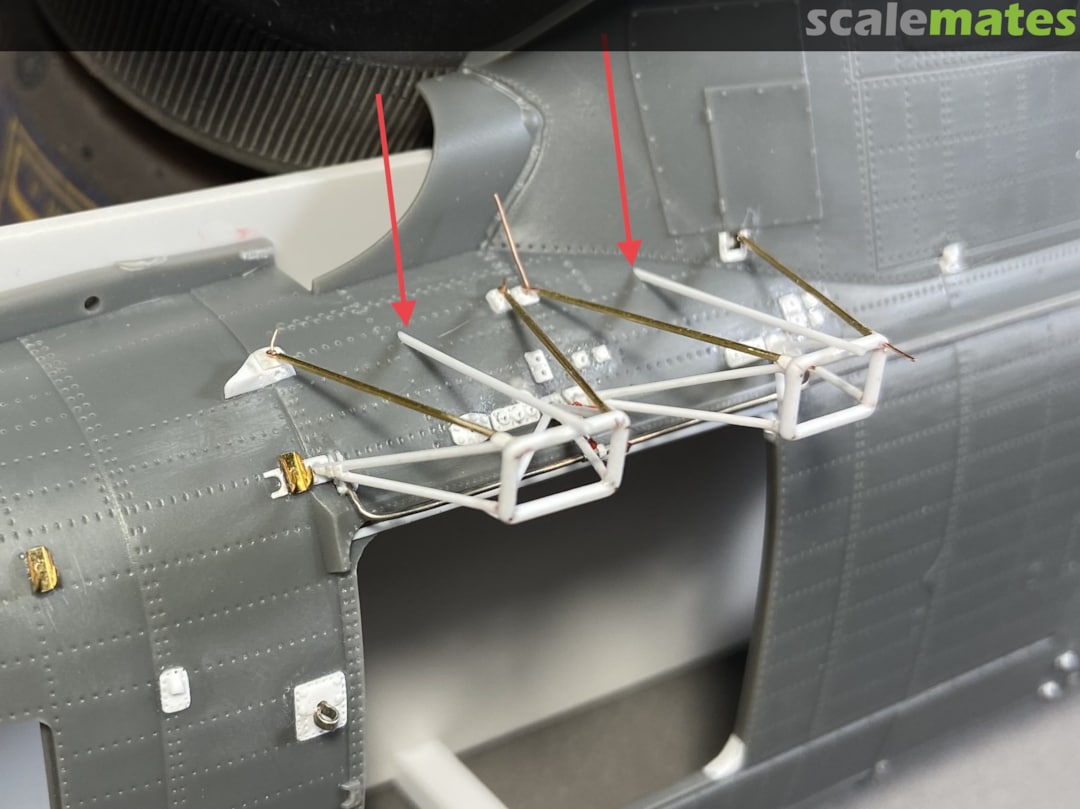
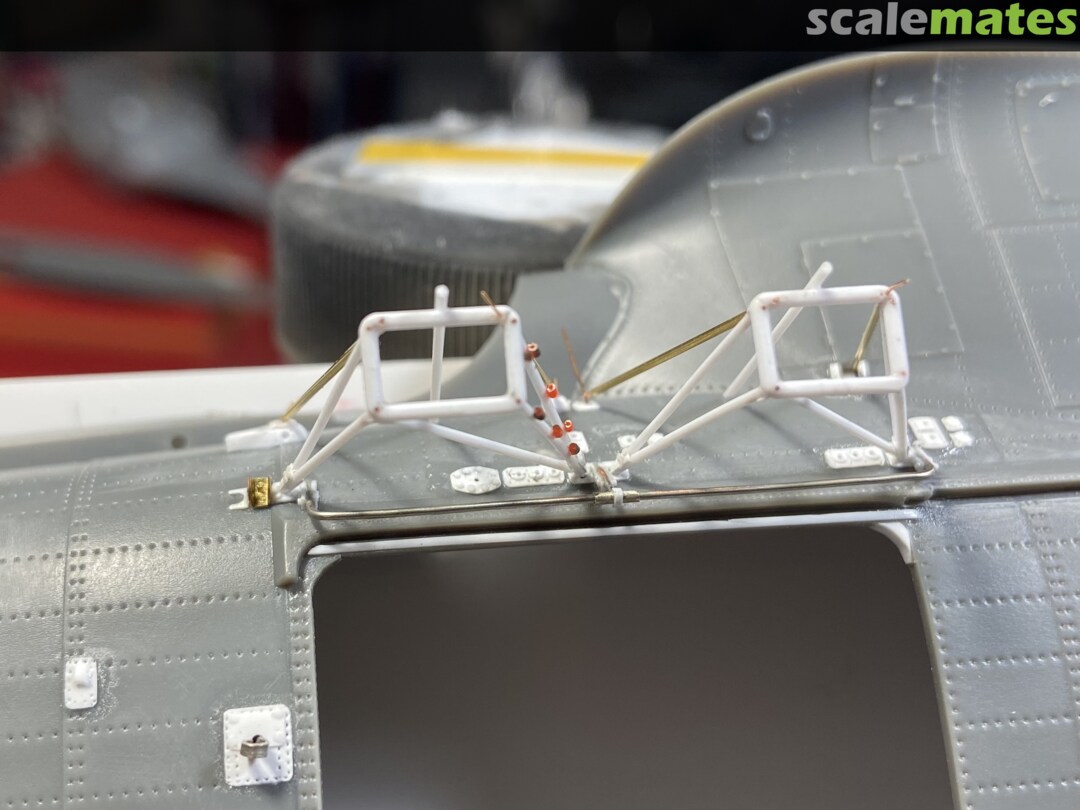
My prayers have been answered! My rectangular frame on the winch support is pretty much the same size as the base plate from JS winch. 😀 One more proof that we both did the right research.🙂
1 9 November, 12:15
Oh wow! You used wires to to guide the scratch built mods into pre-defined holes on the fuselage to ease installation - a simple and very effective trick - THANK YOU for teaching us that trick! You are a genius, sir!
Oh, and my money is on you taking 1st place on any competition for this for aircraft - unless you paint this bright pink with some inappropriate picture on the side if it - then you'll just get 2nd place. 😀
1 9 November, 21:58
CaptGPF: thx😂
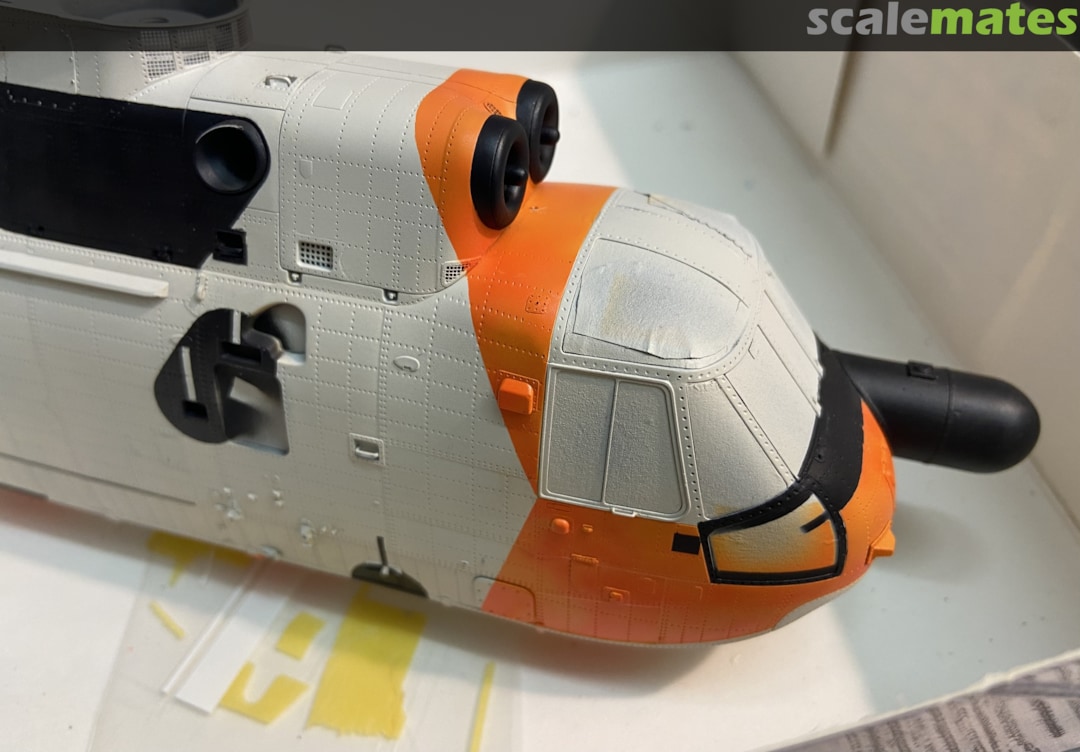
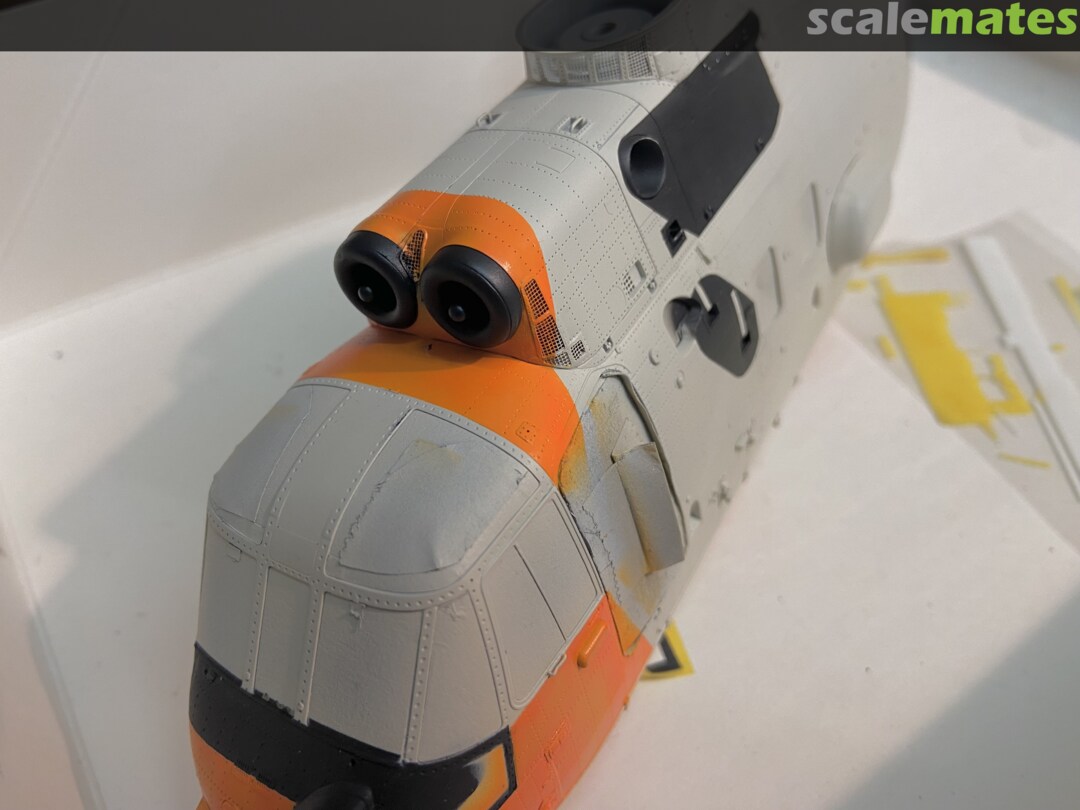
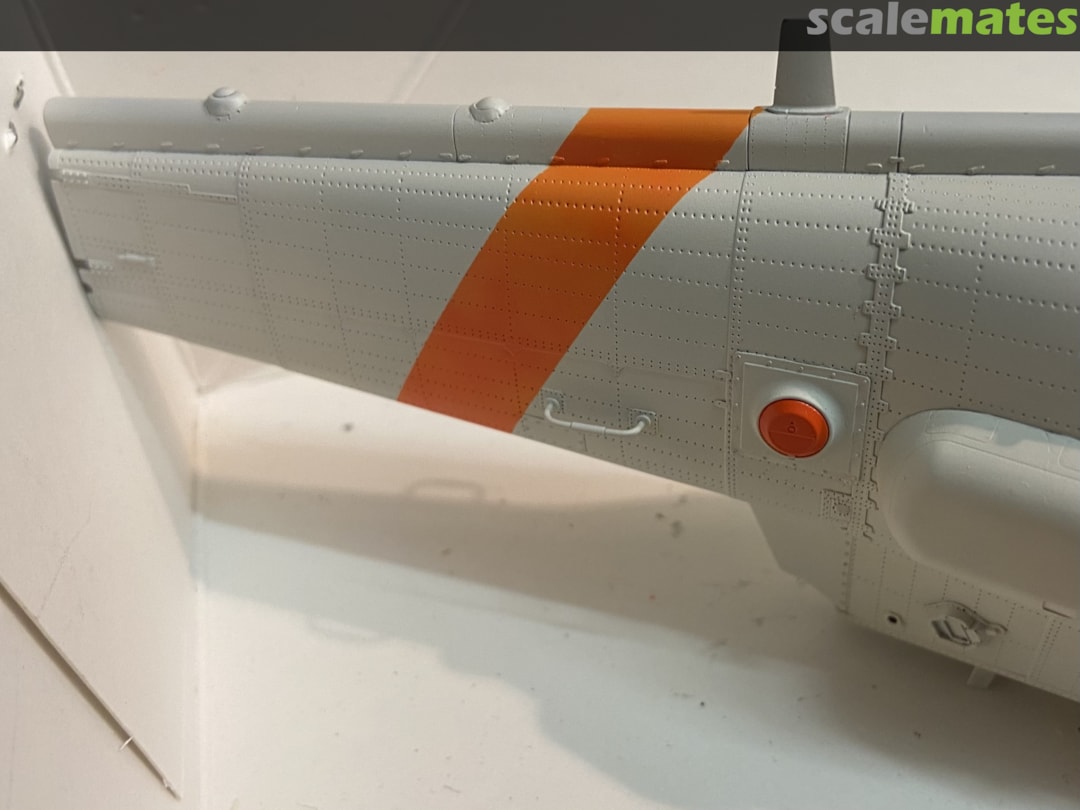
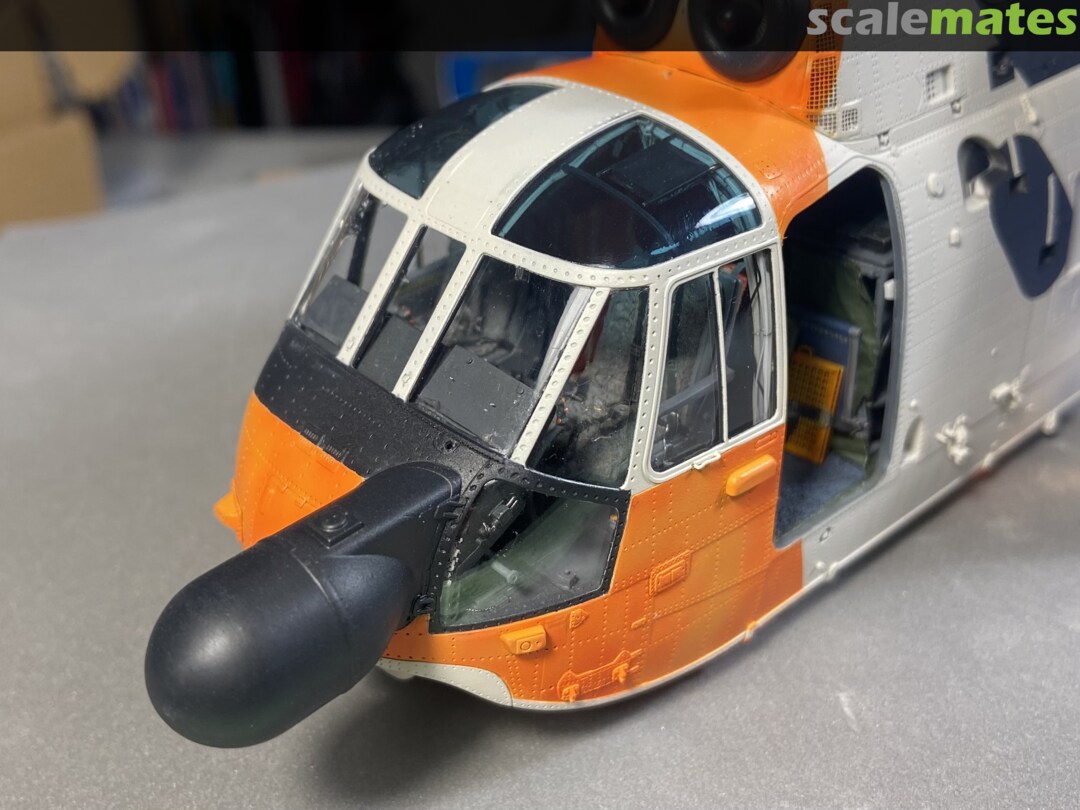
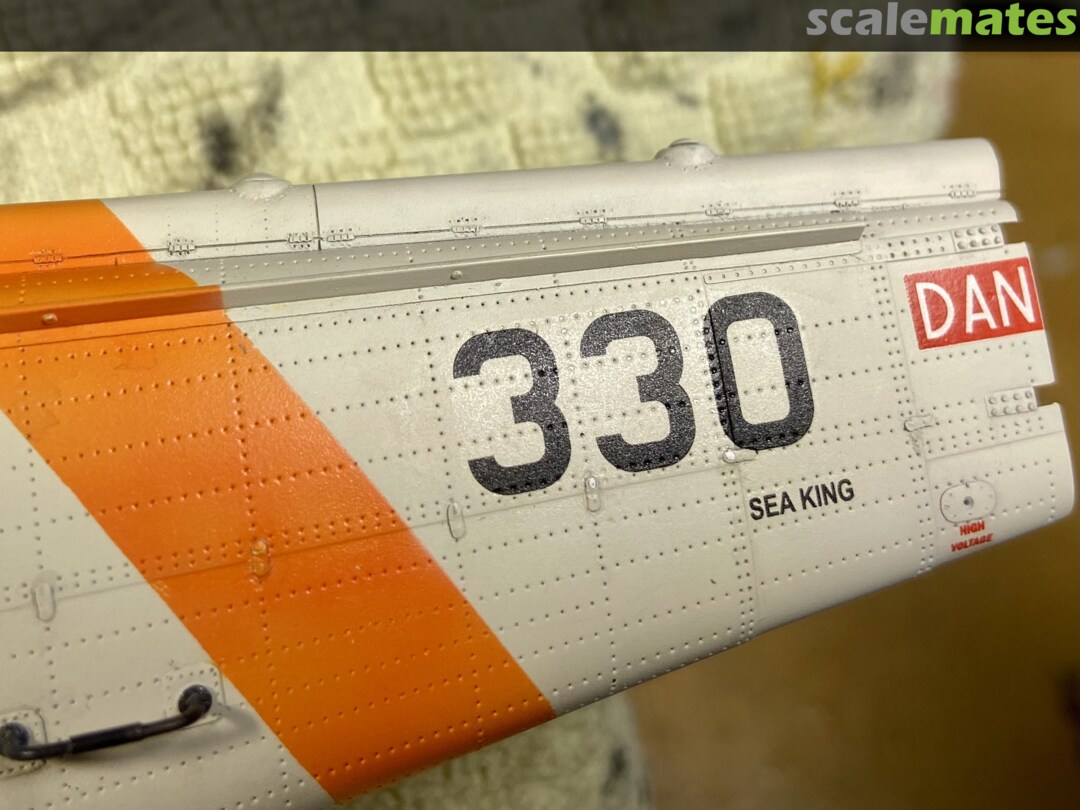
Today I used my „day off" and airbrushed a bit. Slowly the model looks like an MK.43.
10 November, 18:14
This is just incredible. Wow!
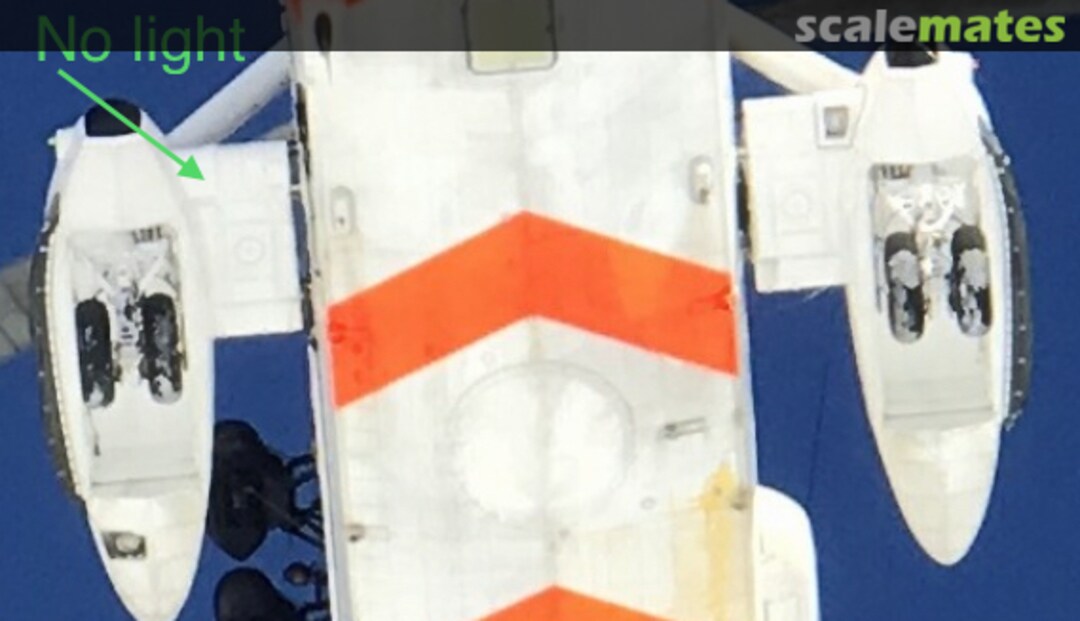
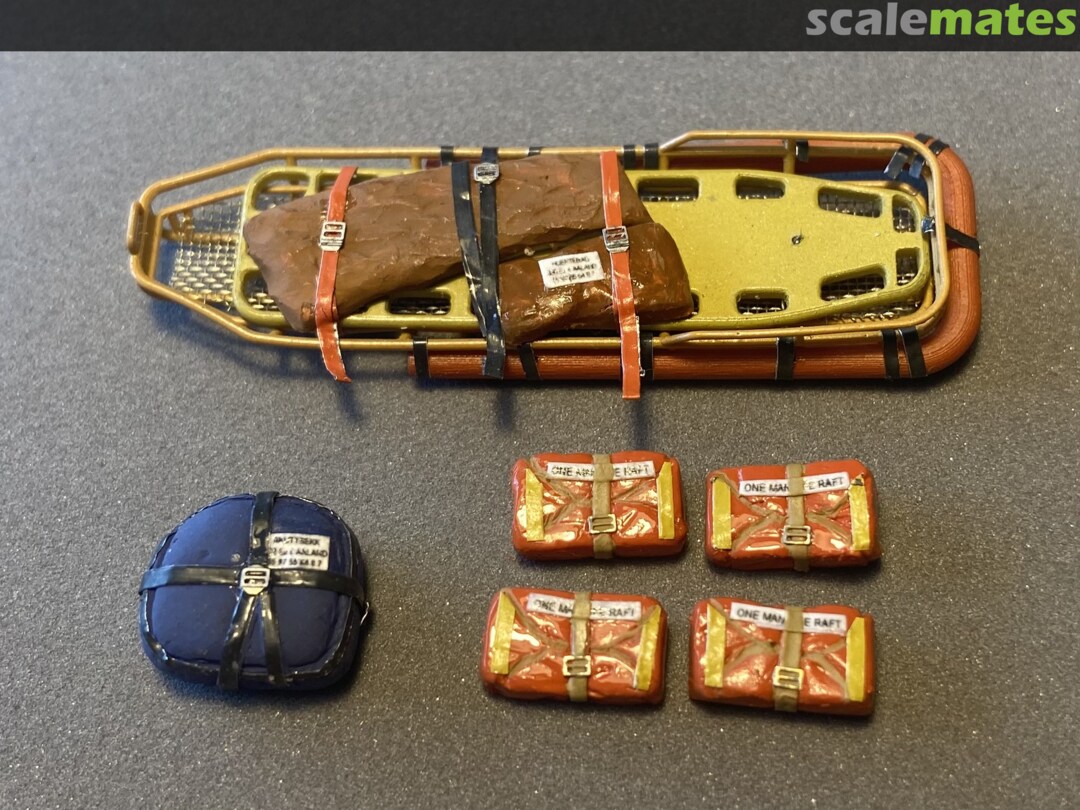
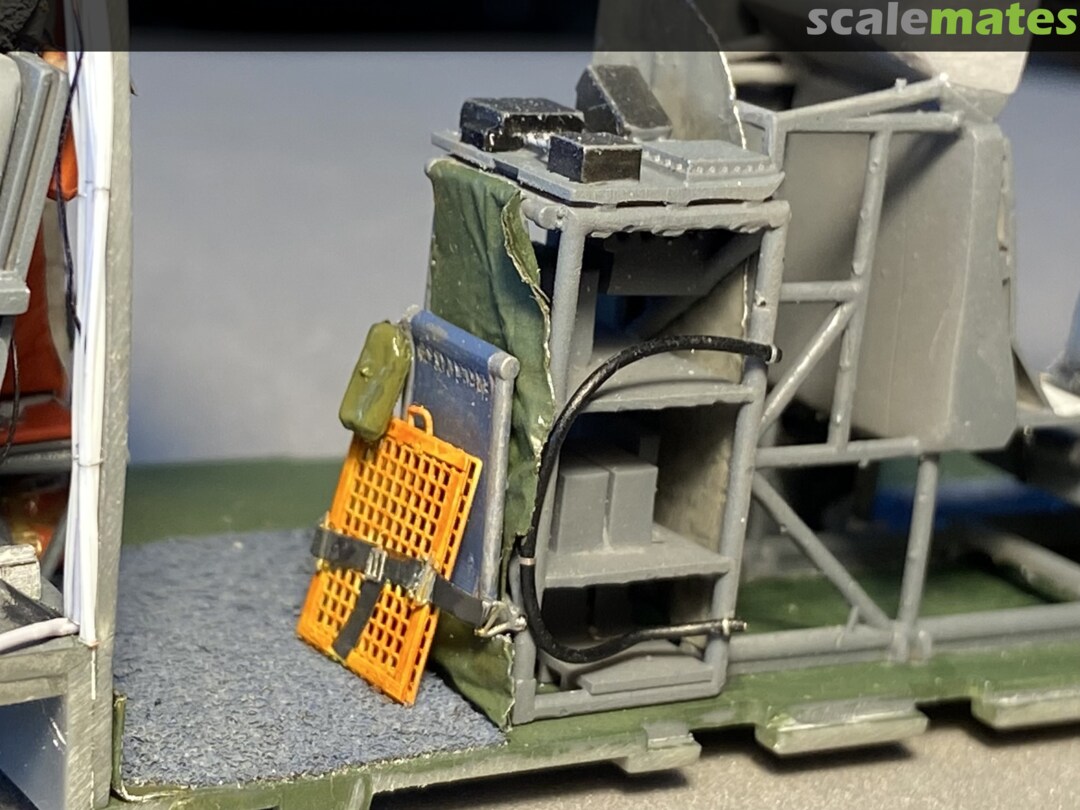
About picture 44, it could be "Akuttsekk", which would translate to "Emergency backpack".
1 14 November, 21:36
Just looked through your album, and again, and again....
Amazing detail, craftmanship, research and painting
1 19 November, 20:37
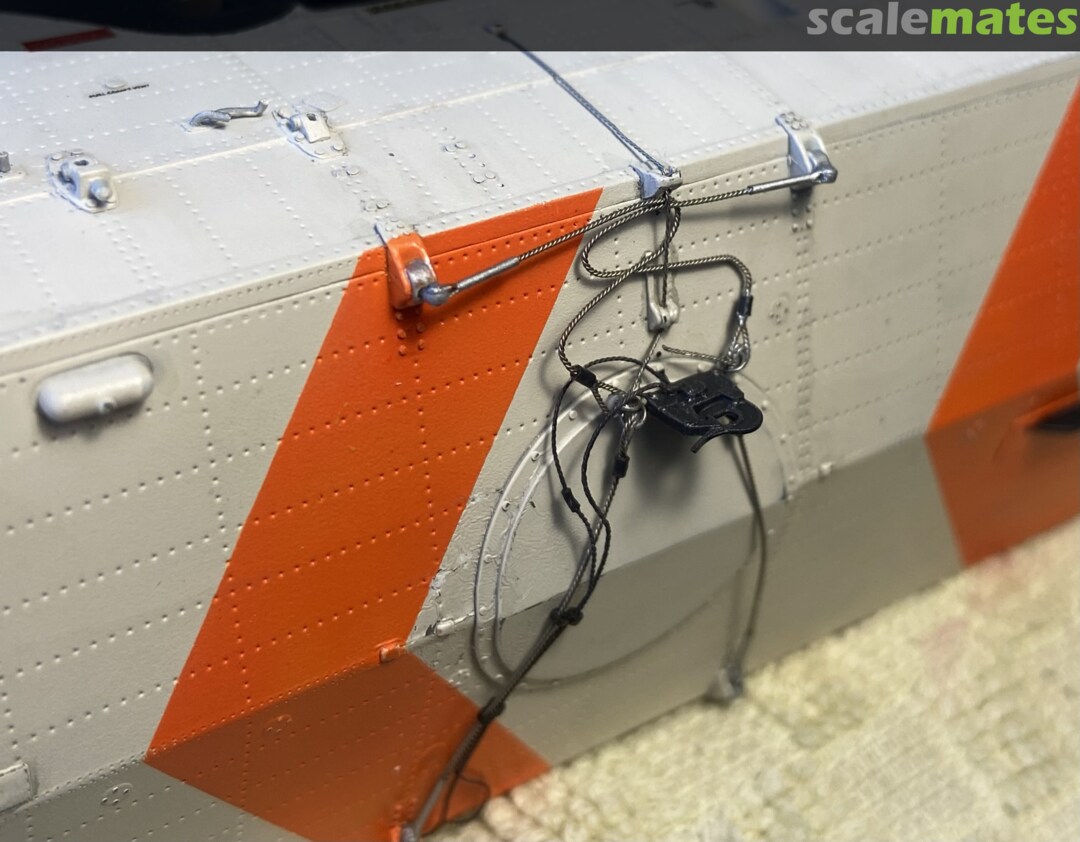
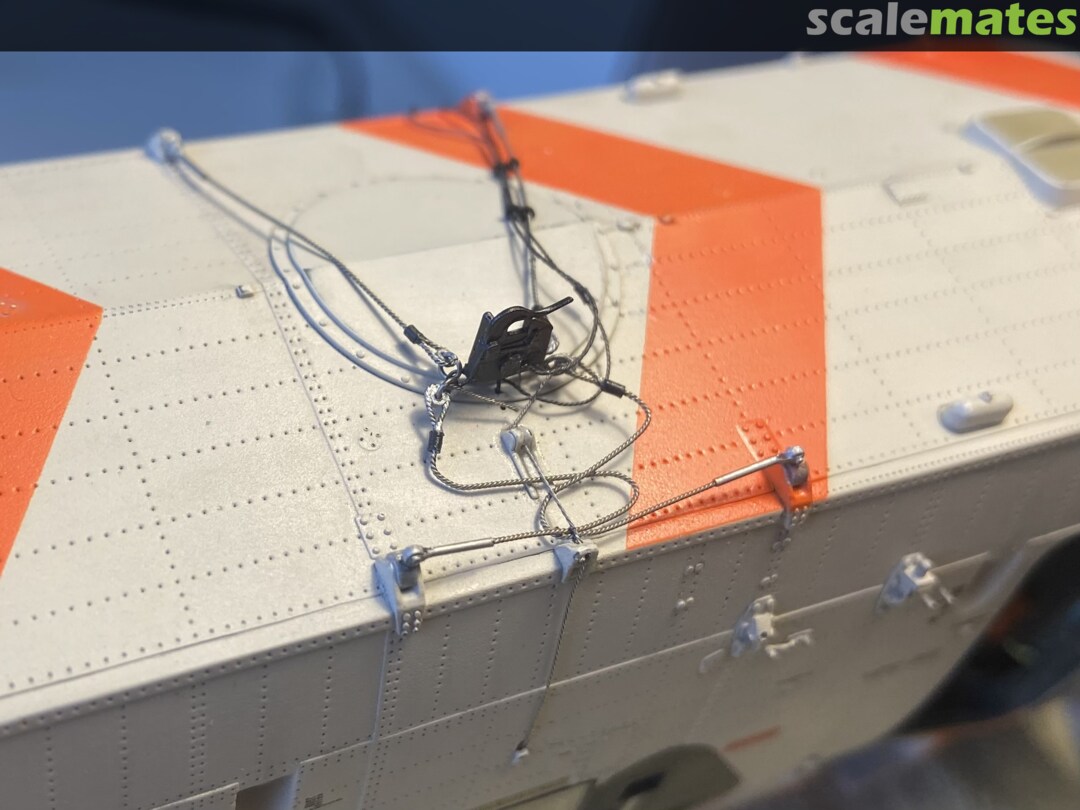
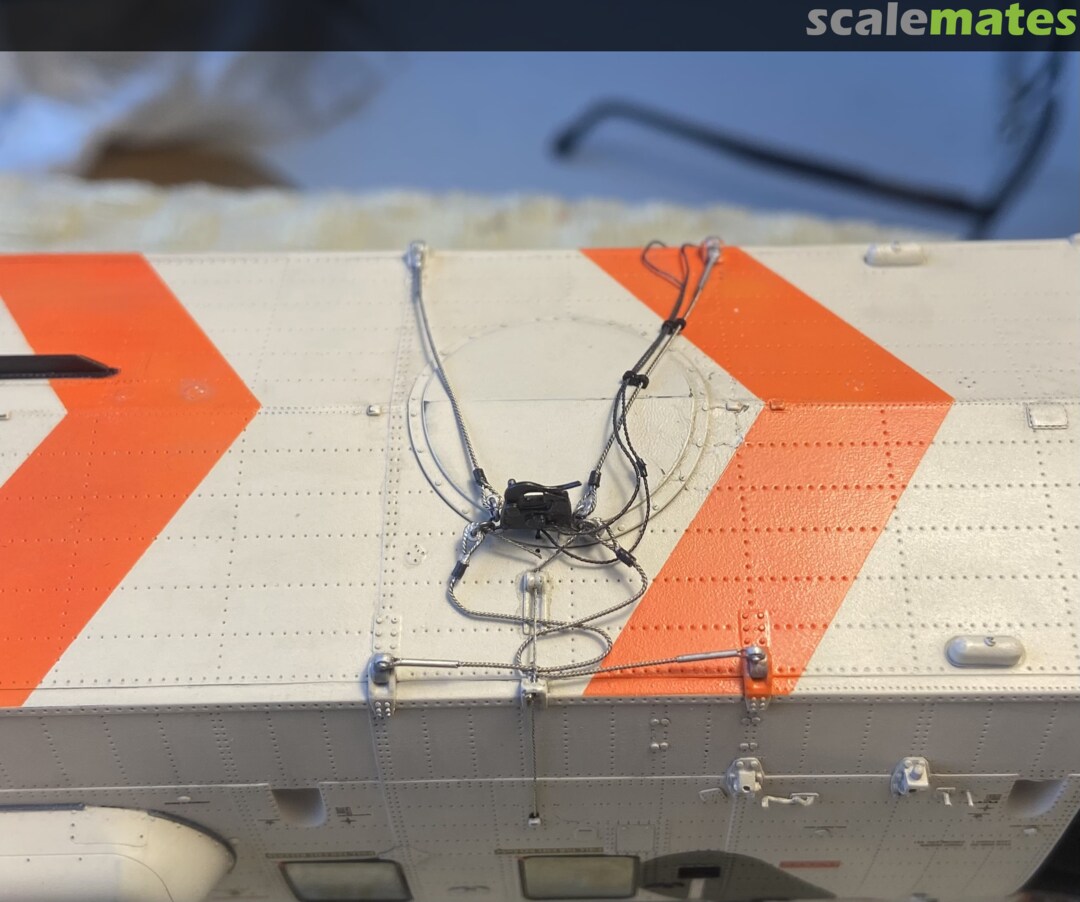
That cargo harness looks superrealistic and usable ! Must have been unspeakably fiddly !
1 30 November, 12:38
Thank you mates. I'm glad you like the last photos. 🙂 Indeed, it was a filigree work, but luckily my eyes are still good and I can see everything without a magnifying glass. By the way, I tried the new precision tweezers from ANYZ Models, highly recommended.
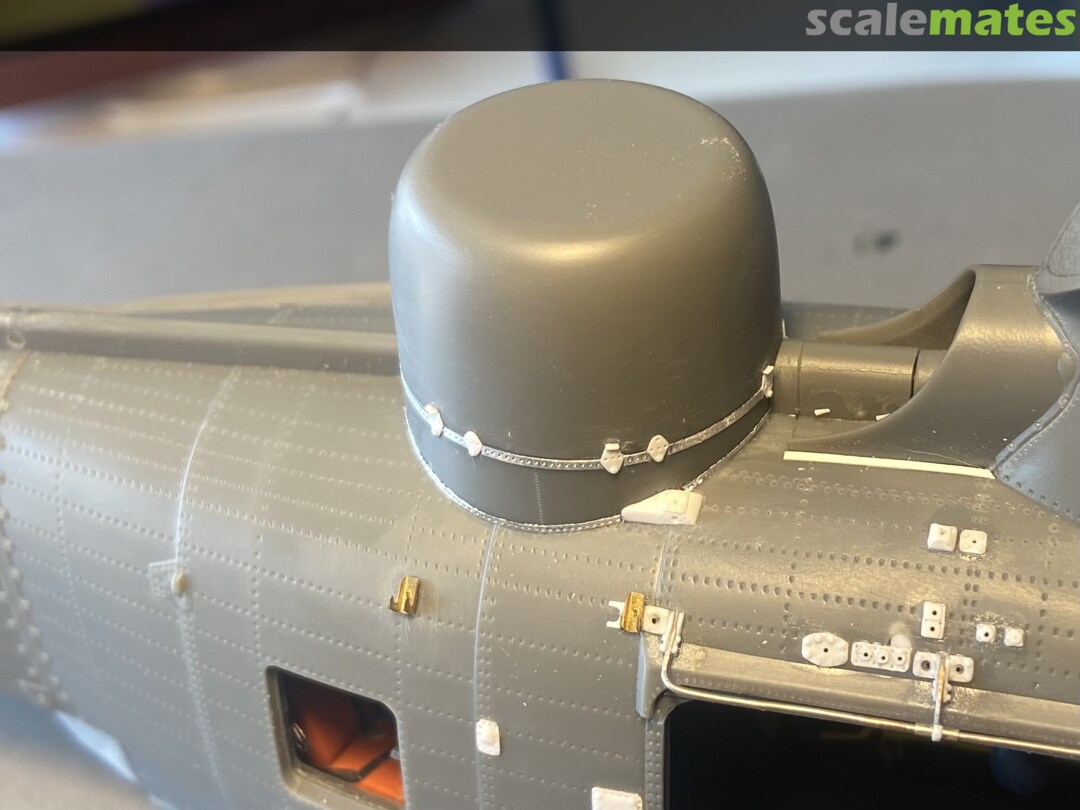
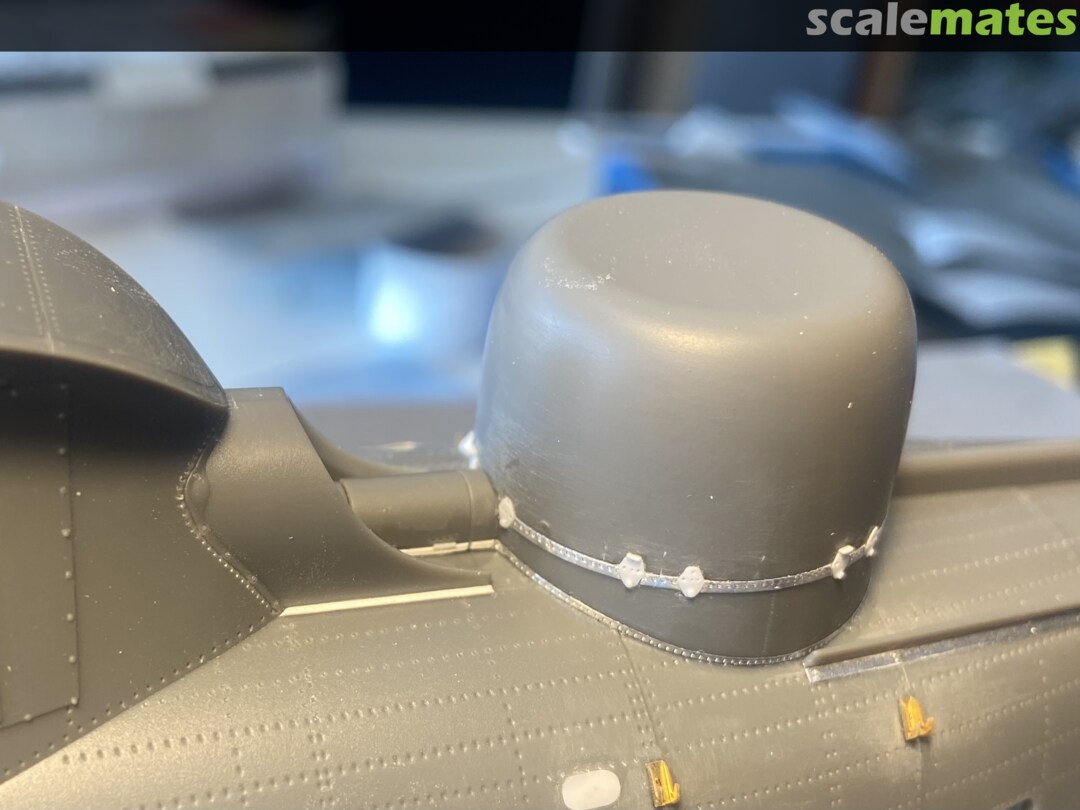
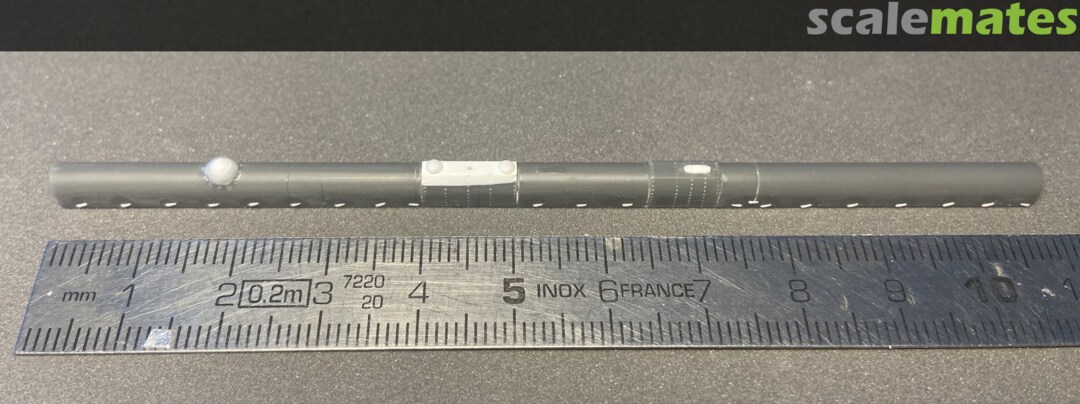
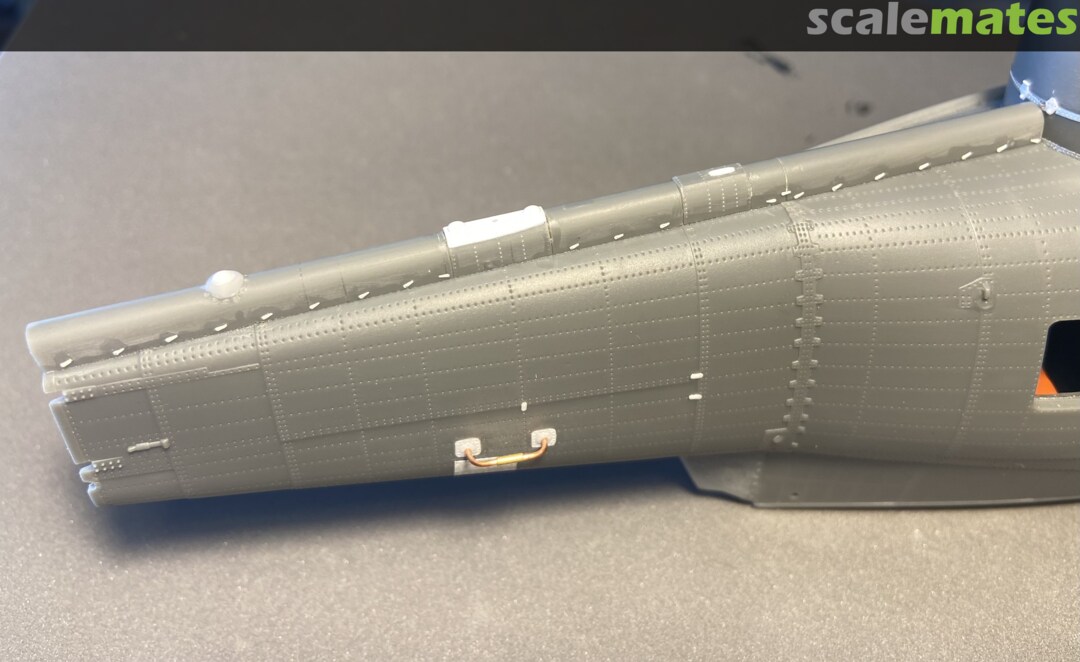
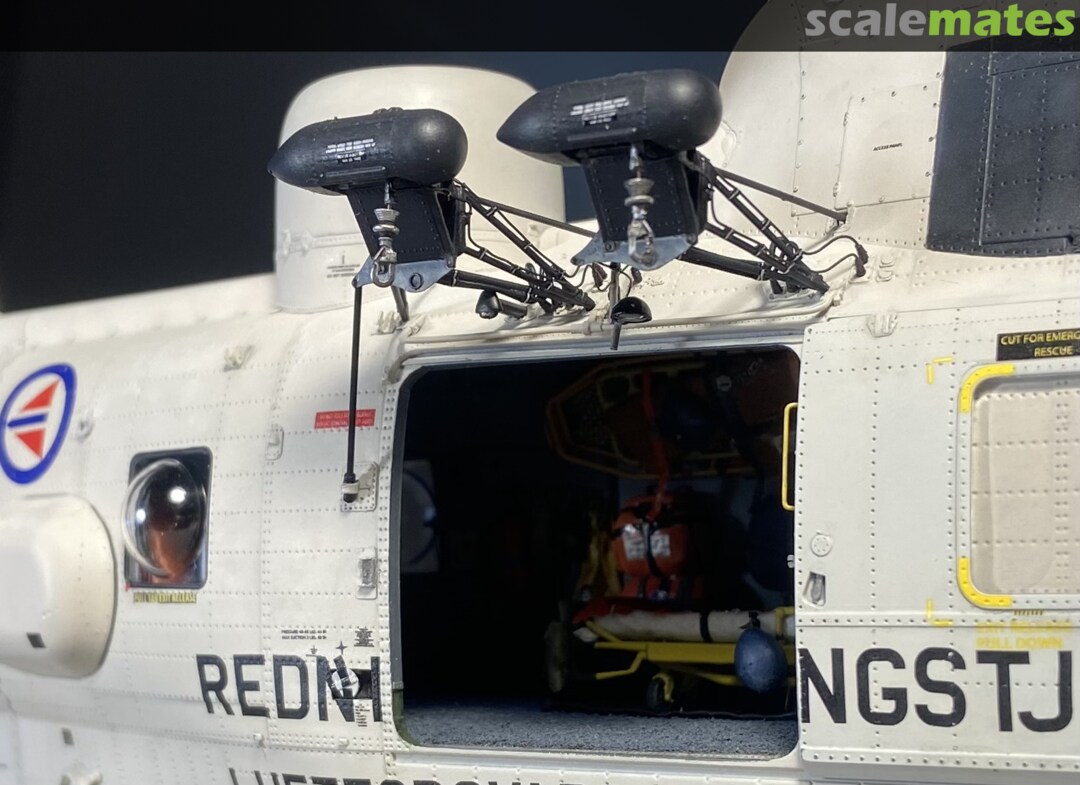
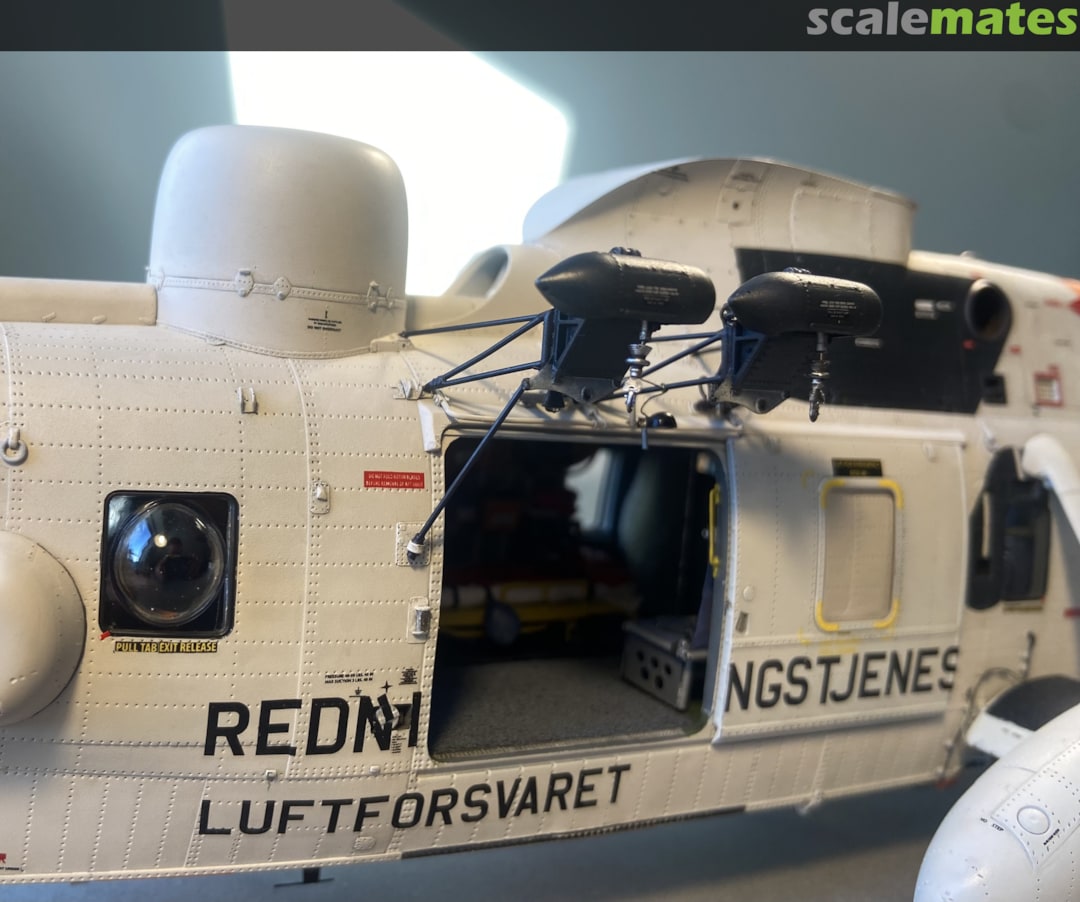
In the meantime I have attached a few more parts, the two winches and the flir turret and have arrived at 42 km and 100 m, so to speak. Still 95 m to run. 😀😀😀
30 November, 13:54
...the master sets such a high bar...and reaches it again and again...
1 30 November, 15:28
I looked at photo 143 and thought 'Is that a model or a real aircraft?'. Stunning work!
1 30 November, 16:57
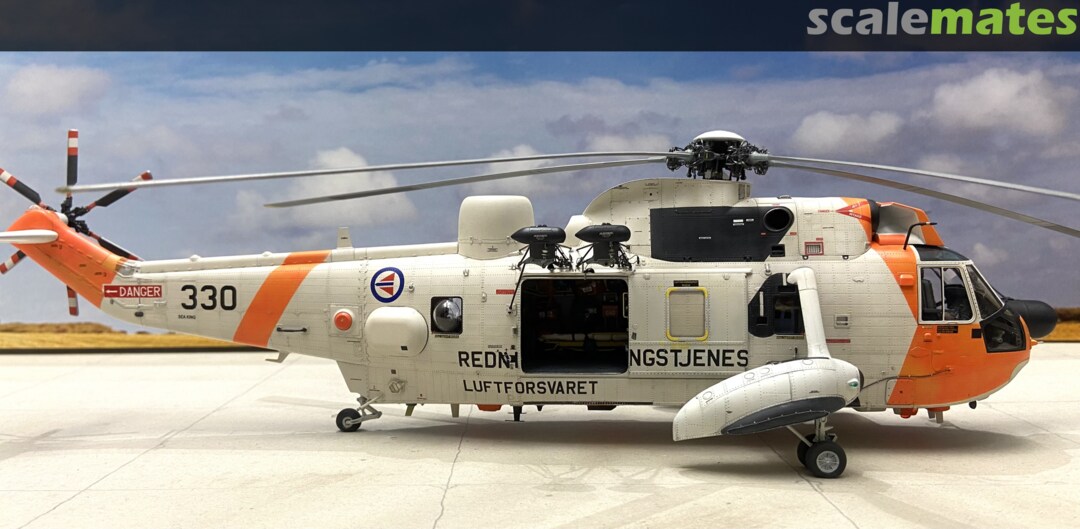
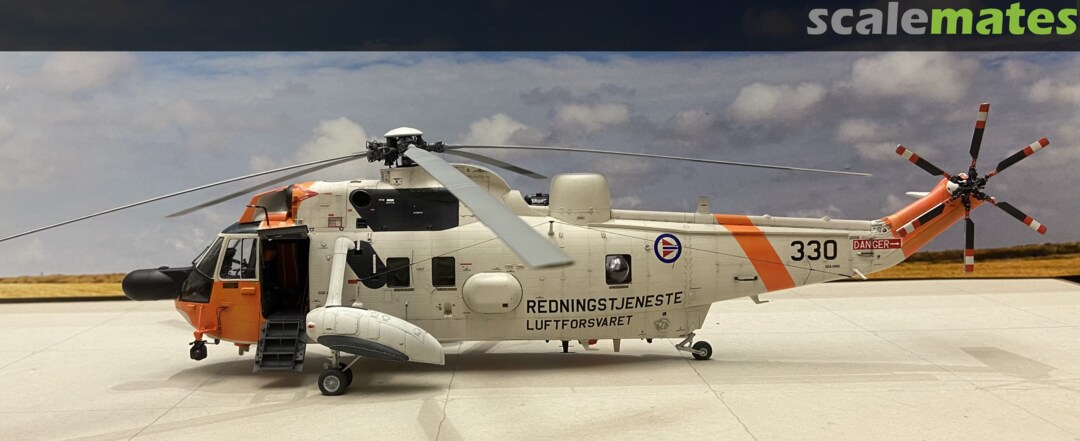
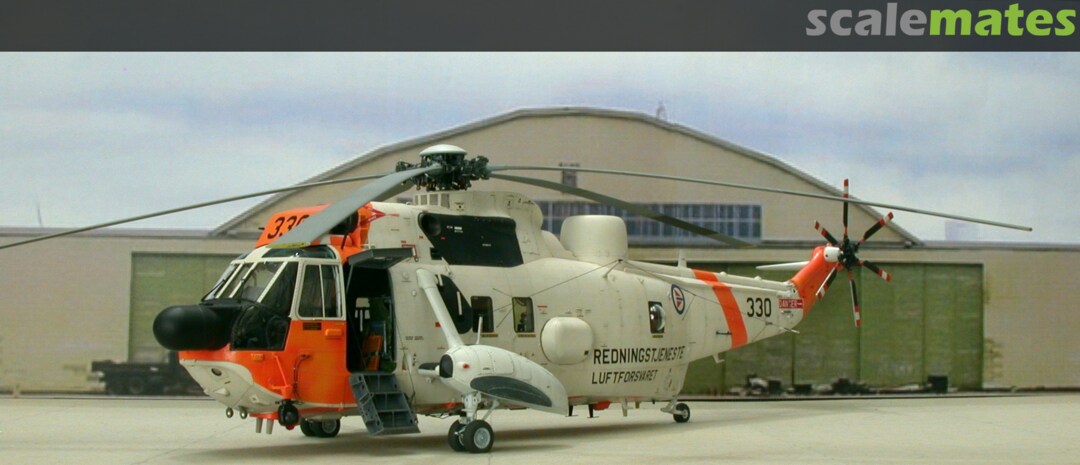
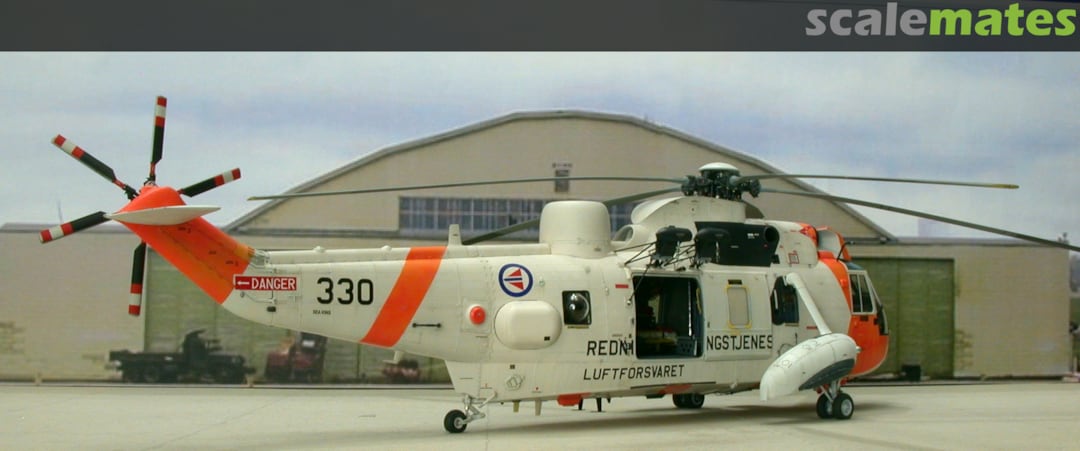
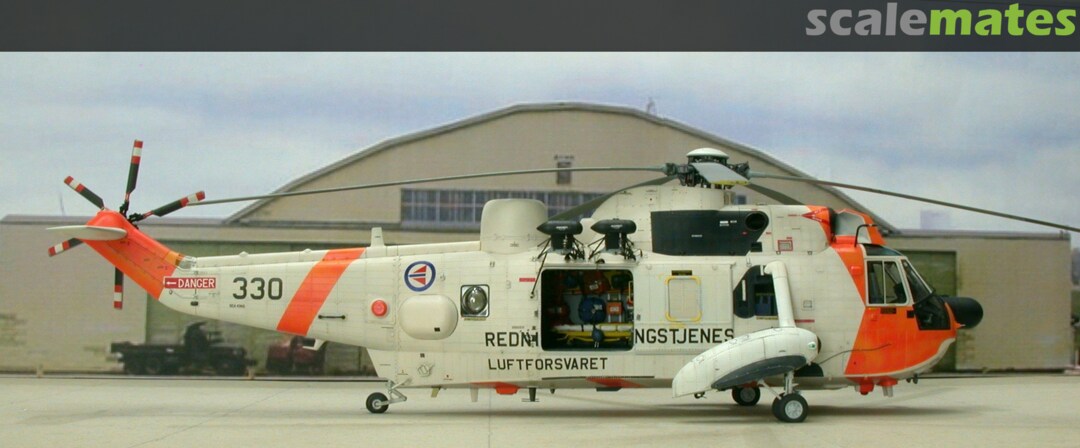
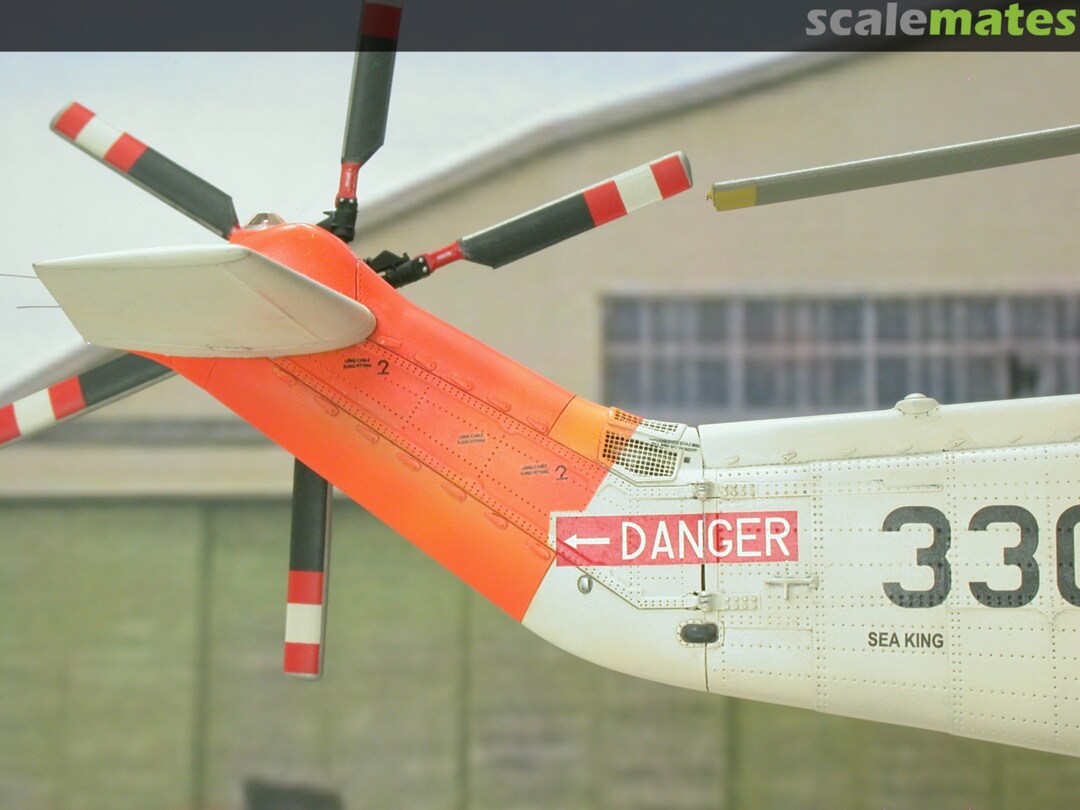
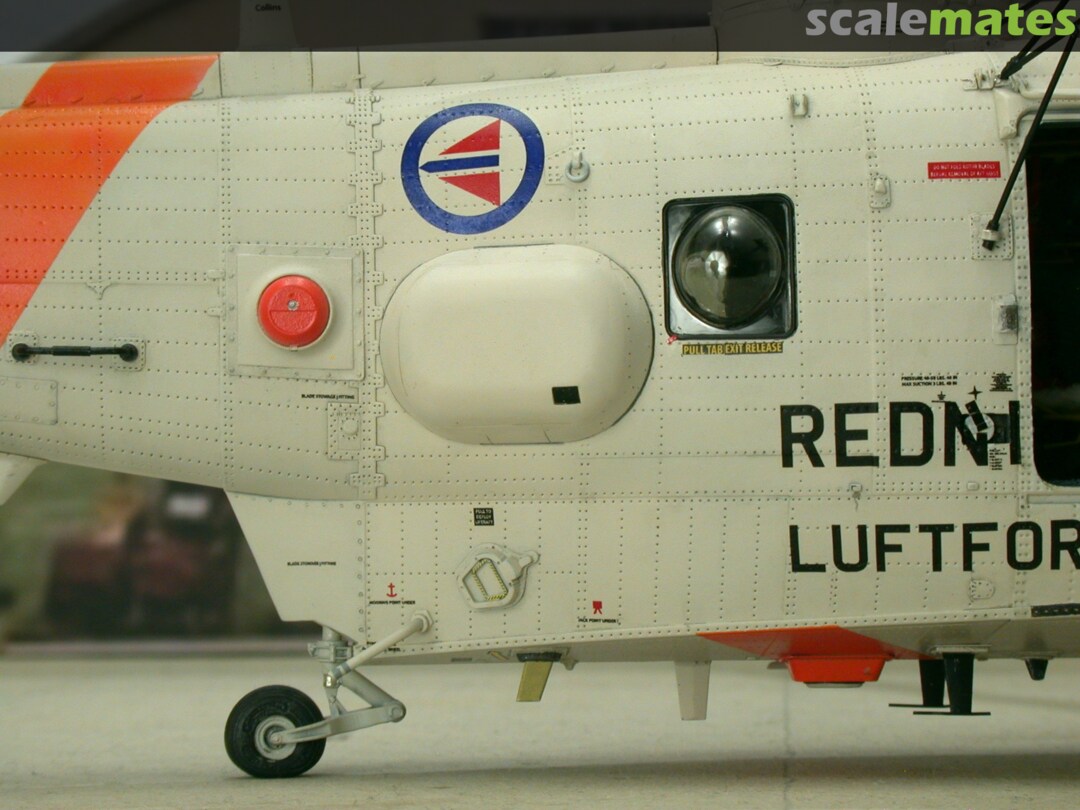
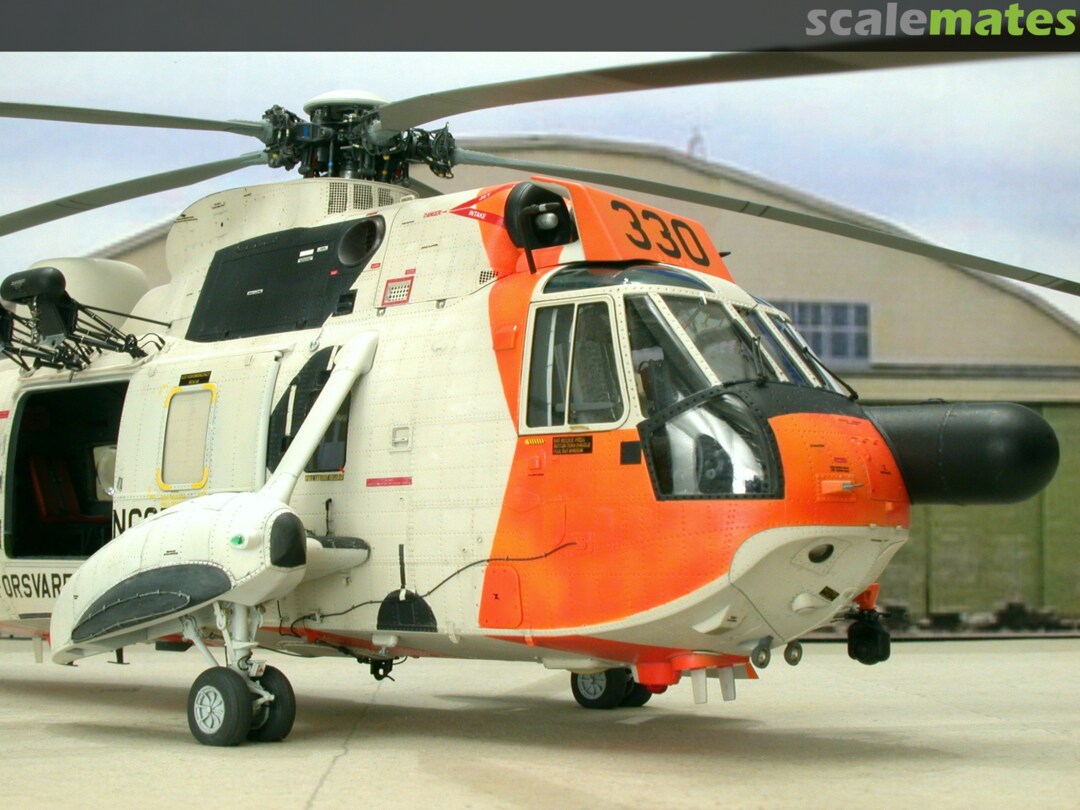
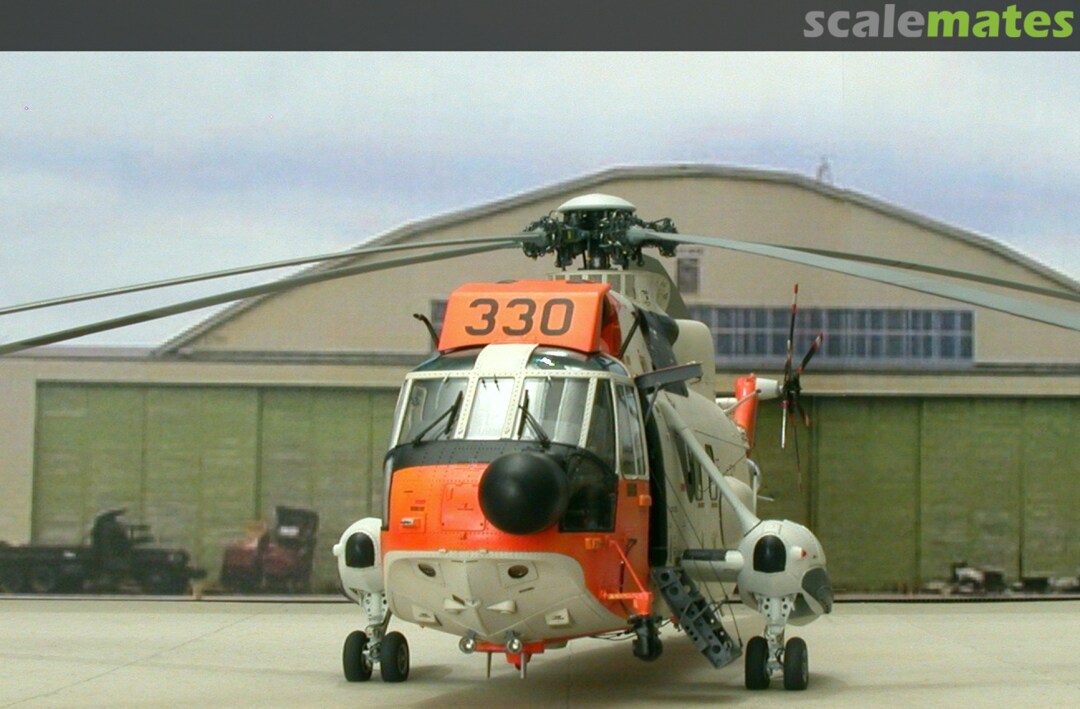
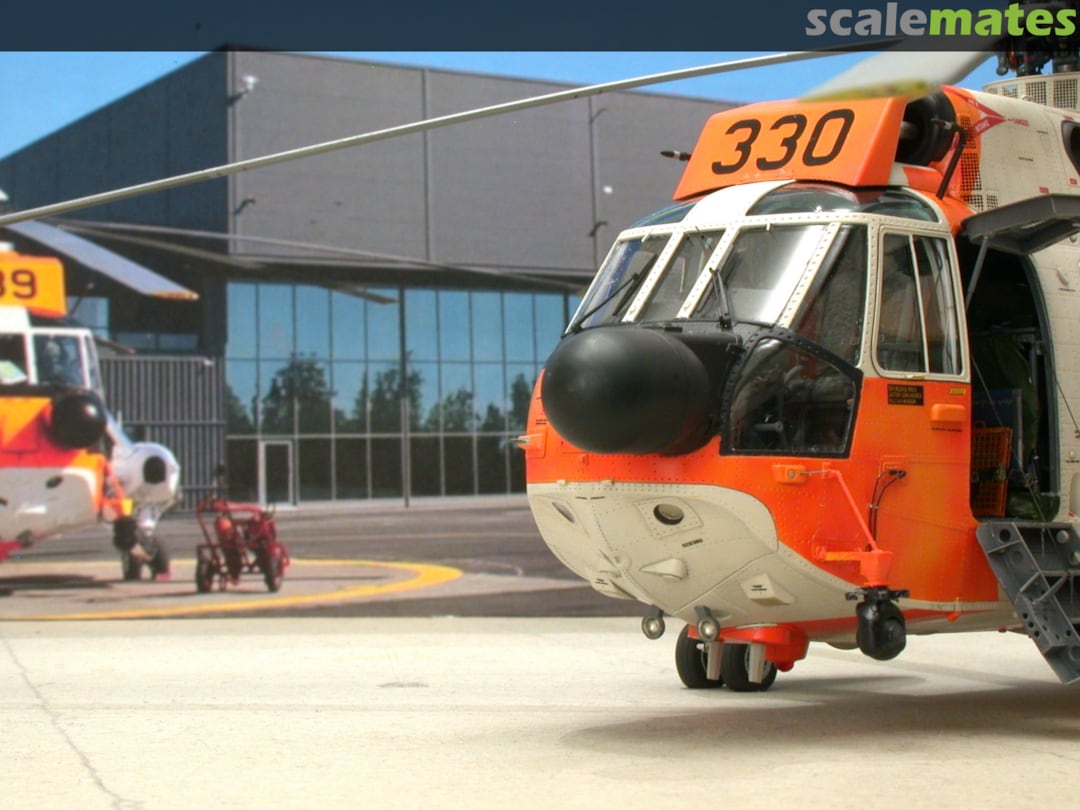
It's done; after more than half a year since the construction began, my Norwegian Seaking is completed . In fact, I managed to install all the parts without breakage, bad luck and breakdowns 😀
Today only a few photos taken "on the fast with the smartphone". "Correct" photos with the appropriate background will follow shortly.
At this point, my special thanks apply to the following mates;
Andy from Jam Scew for his outstanding conversion kit for the Mk.43 as well as his other outstanding details sets.
Thomas for his CAD-support and the informations/support on the differences and equipment at the Norwegian Mk.43, which are very diverse.
Luc Colin, who created an outstanding walkaround with 122 photos and allowed me to see the machine virtually from all sides.
David for his support with CAD parts for the interior design.
Carsten who immortalized the 071 in the museum in Bodo on more than 200 photos with the eyes of a model builder.
And last but not least Nils for his excellent researched decal sheet without which the model would not be possible at all.
1 December, 15:47
Outstanding build Bernhard. The amount of meticulous research, attention to detail and dedication that goes into your builds is just remarkable. As always, it's a joy and privilege to be able follow your builds 👍
3 1 December, 16:04
Sign what the mates said!
But I would like to ask if there are still some Airfix parts involved? 😉
2 1 December, 16:16
Absolut beeindruckende Arbeit, da kommt man aus dem Staunen gar nicht heraus 😊
1 2 December, 08:07
That attention to detail is truly disturbing....patience of a saint
2 2 December, 19:06
Wow! That was quite a journey for this super-detailed build! I agree with the others - looks so good, hard to distinguish from the real thing!
3 December, 21:40
Nothing to add here except praise for the king of scratch-building and detailing! 👍
4 December, 11:34
Die Sea King ist wieder richtig gut geworden! Danke fürs mitnehmen beim Bau. Hat wieder Spaß gemacht zuzuschauen!
4 December, 21:48


